Basics
Avendoo® supports the coordination and management of training sessions in your company. Via the Event wizard you create new Events, define event dates for the event and invite the designated participants. In this case multiple authors can edit different event dates without overwriting the event dates. This means author A can change the communication settings of the event as author B edits the description text.
Furthermore you can use a template via the context menue of the button New event. Further information about the templates you find under Events → Parameters.
The following functions are available via the context menu of the corresponding event title.
Further information of
- managing participant lists
(click the corresponding event date in the column Event date and the Event manager opens with the tab Overview) - managing lists of interested parties
(click the corresponding list of interested parties in the column Event date and the Event manager opens with the tab Lists of interested parties) - managing the communication with the participants (E-mail history and History of community messages) and
- recording the attendance list
you find on page “Event manager“.
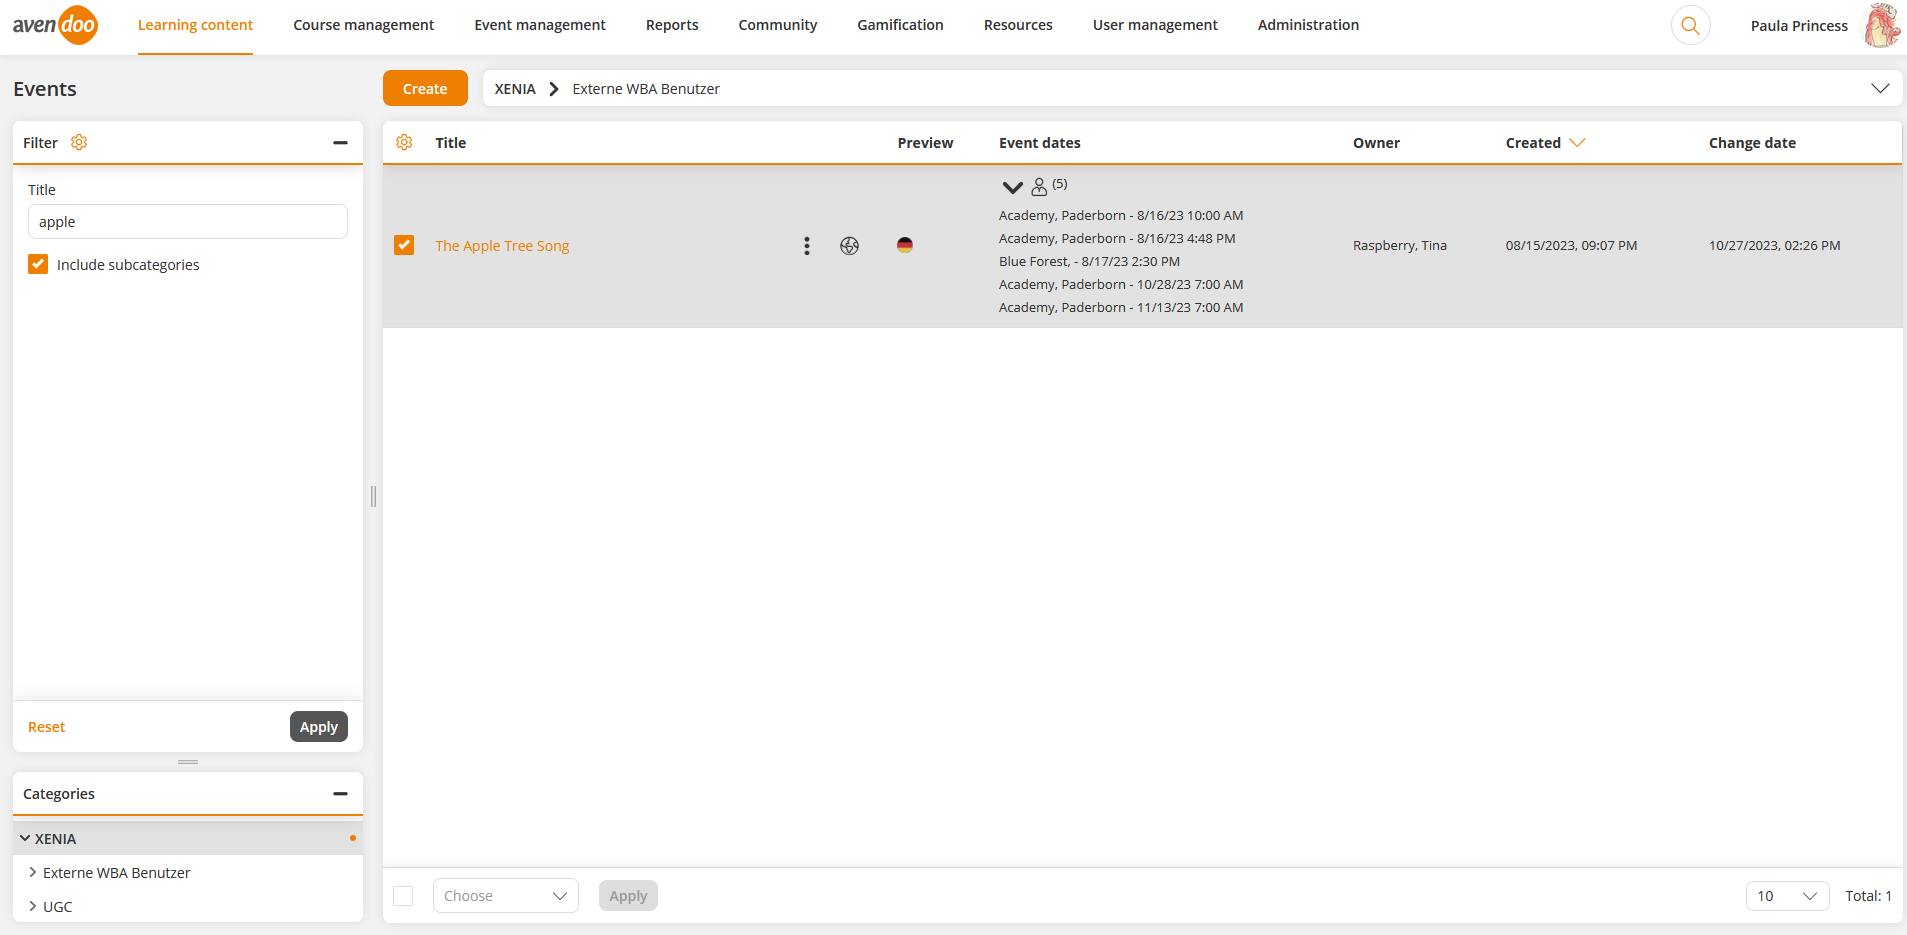
In the overview (Learning content → Event) you see all existing events. If you click on the title, you get to the corresponding Event wizard. Via click on the symbol of the translation area you get into the translation management of the appropriate event. Via the national flag you get to the preview of the user. Furthermore you here, where the event is used for and you can via click on the icon switch to the event management or the list of interested parties.
Via a right click on the table header in the upper left you can edit the display of the columns and the order. You see the columns Title, Preview, Event dates, Owner, Created and Change date. You can add the following columns via the Icon +: Note, Version, Valid until, Valid from, External reference, External reference type, Event type, Teaser and User-defined fields.
There are the mass processing functions Copy, Move, Delete, Change owner, and Export for events. More information about these functions you find under Events: Mass processing functions.
There are the following mass processing functions in the overview of event dates: Overview of event dates: Mass processing functions.
Configure favorites
You can mark favorites on the single tabs by clicking the star besides the criterium, for example External reference and External reference type. Then you see the Star besides the criterium filled out and the corresponding tab is marked as favorite. You can redo that tab favorization by moving with the mouse over the tab text and clicking the favorite star. This field with the Star is then gray again.
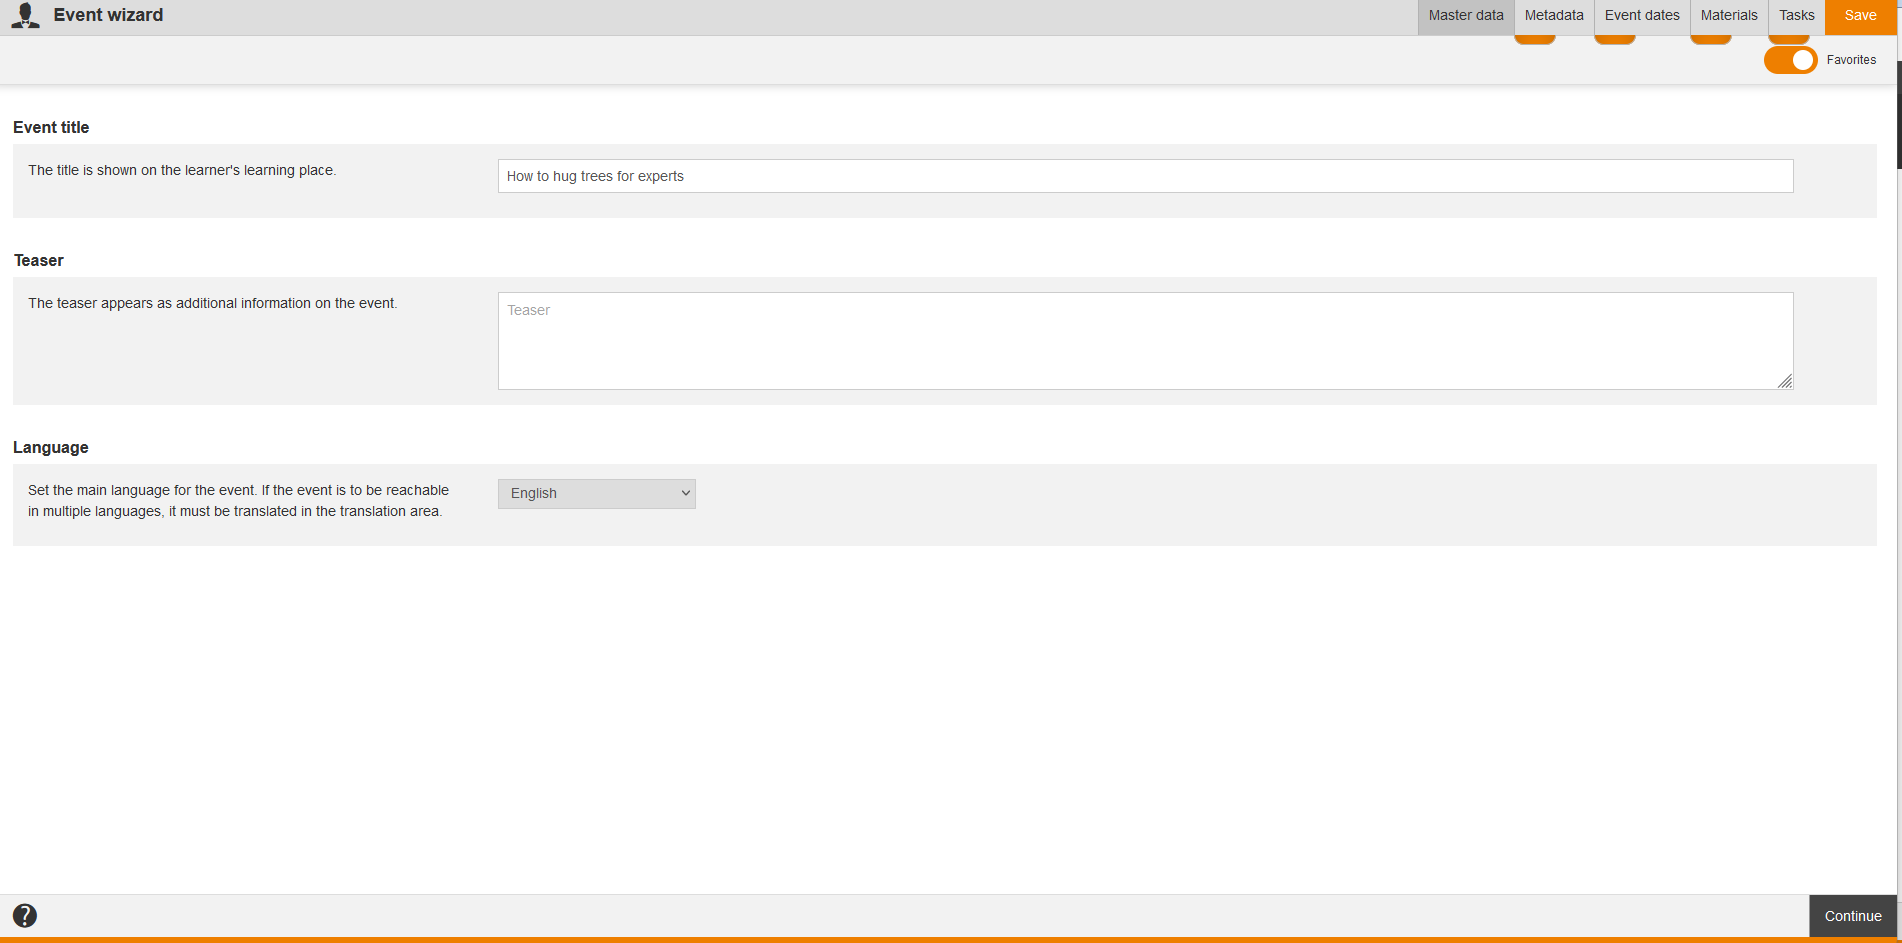
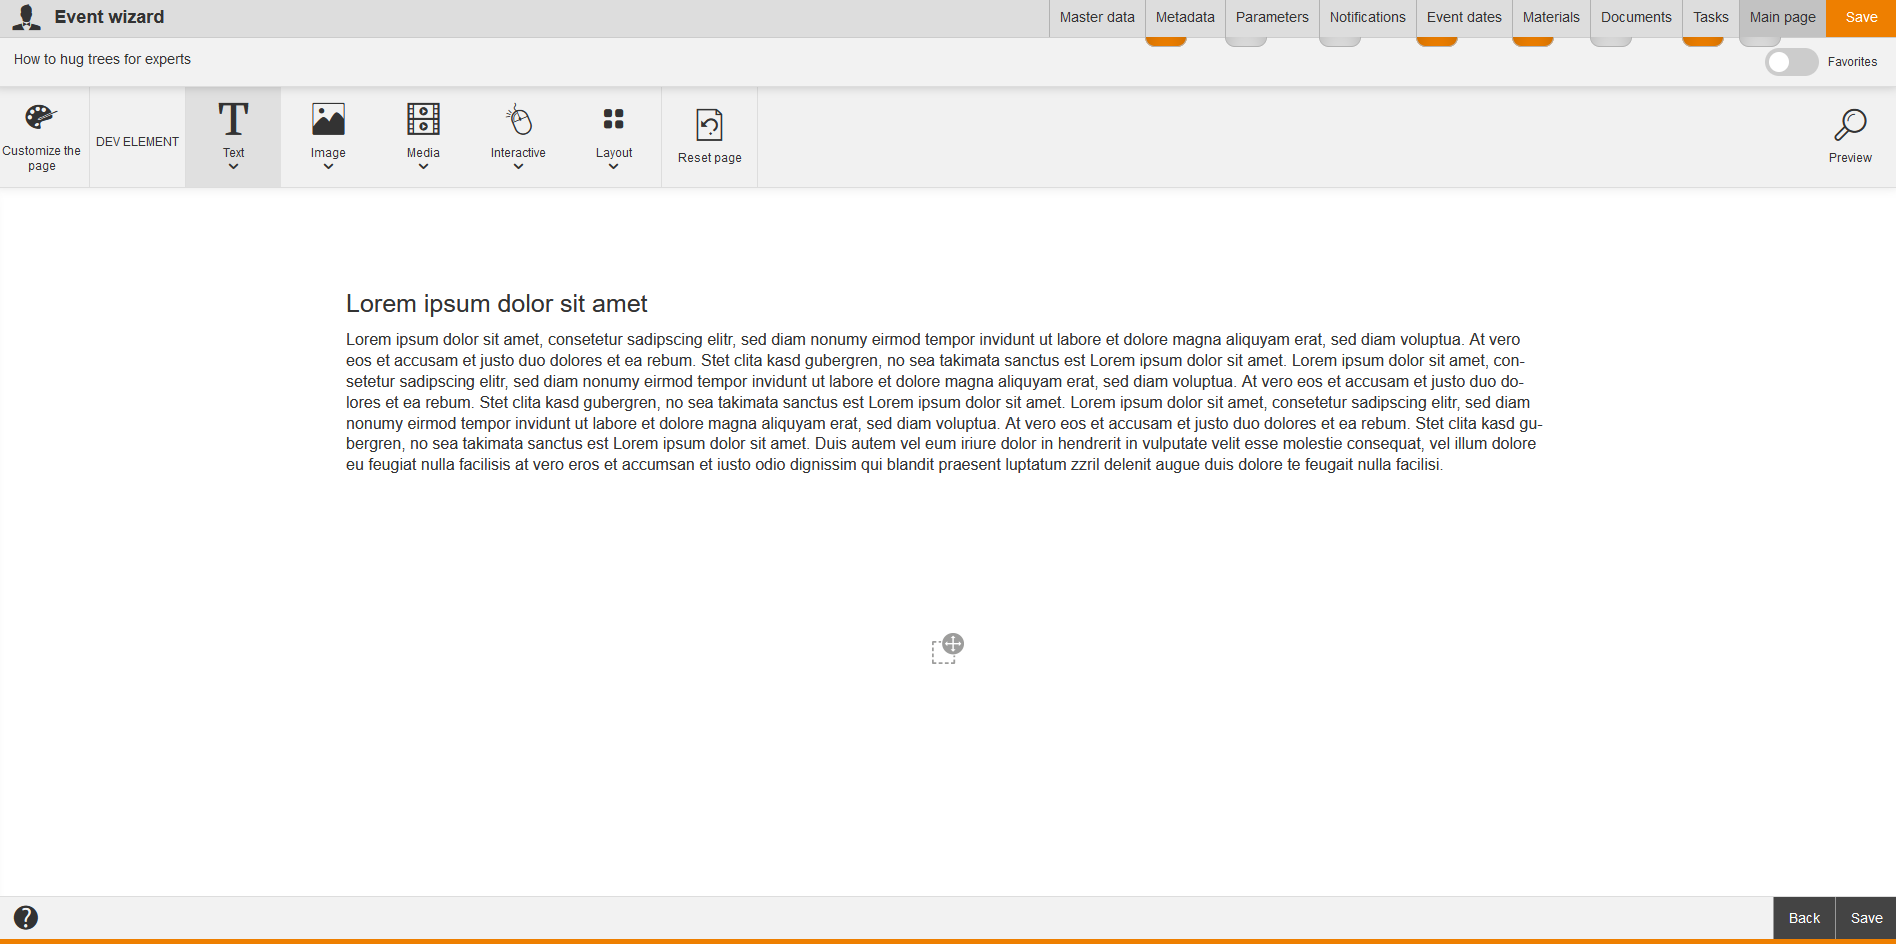
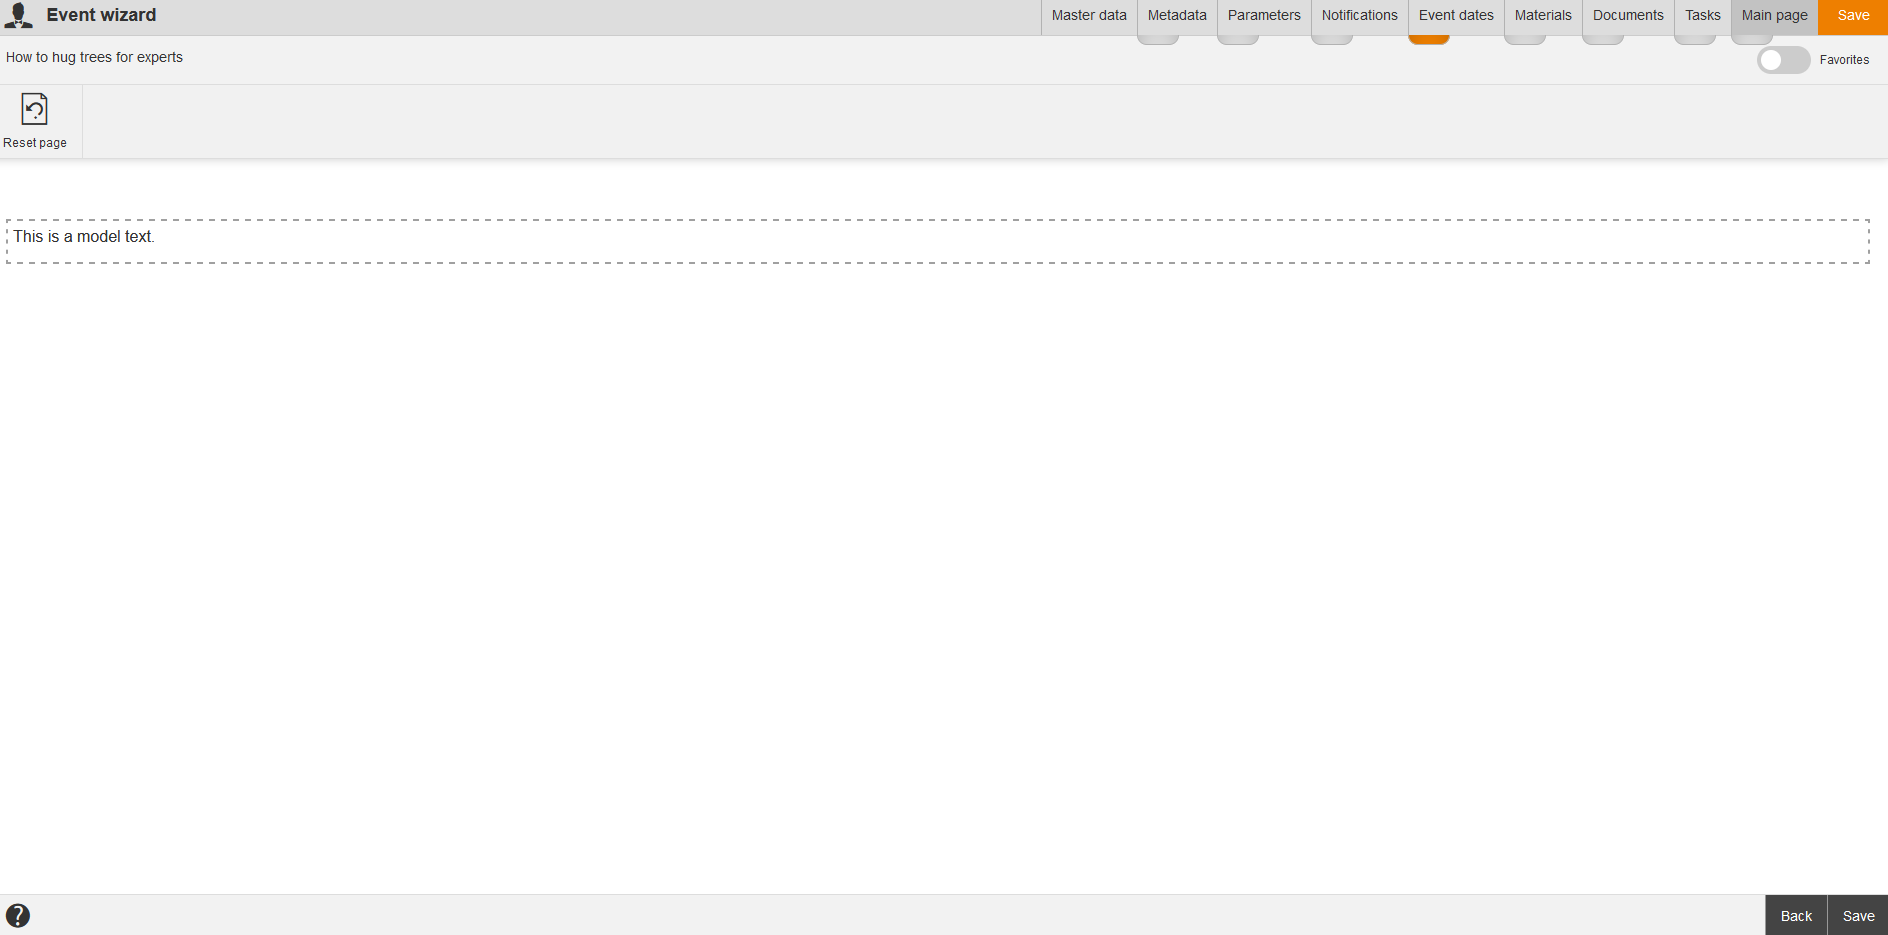
If you’ve selected on all tabs your favorites you can activate the toggle Favorites by clicking on it. Then only the Event wizard with your favorites is shown (see screenshot).
On the tabs Parameters and Notifications you got the search function for single settings.
Create new event
Master data
Define title, teaser, main language and external reference and reference type for the event.
Metadata
Valid from
Enter from which date the event is valid.
Valid until
Enter until which date the event is valid.
Version
Enter which version of the event it is.
Note
Enter notes for the event.
Expected processing time
Enter a value for the expected processing time in the format “hh:mm” regarding the event. How Avendoo® will transfer the expected processing time to the learning path depends on the configuration in the Course wizard on the tab Course content under General characteristics of the event.
Qualifications
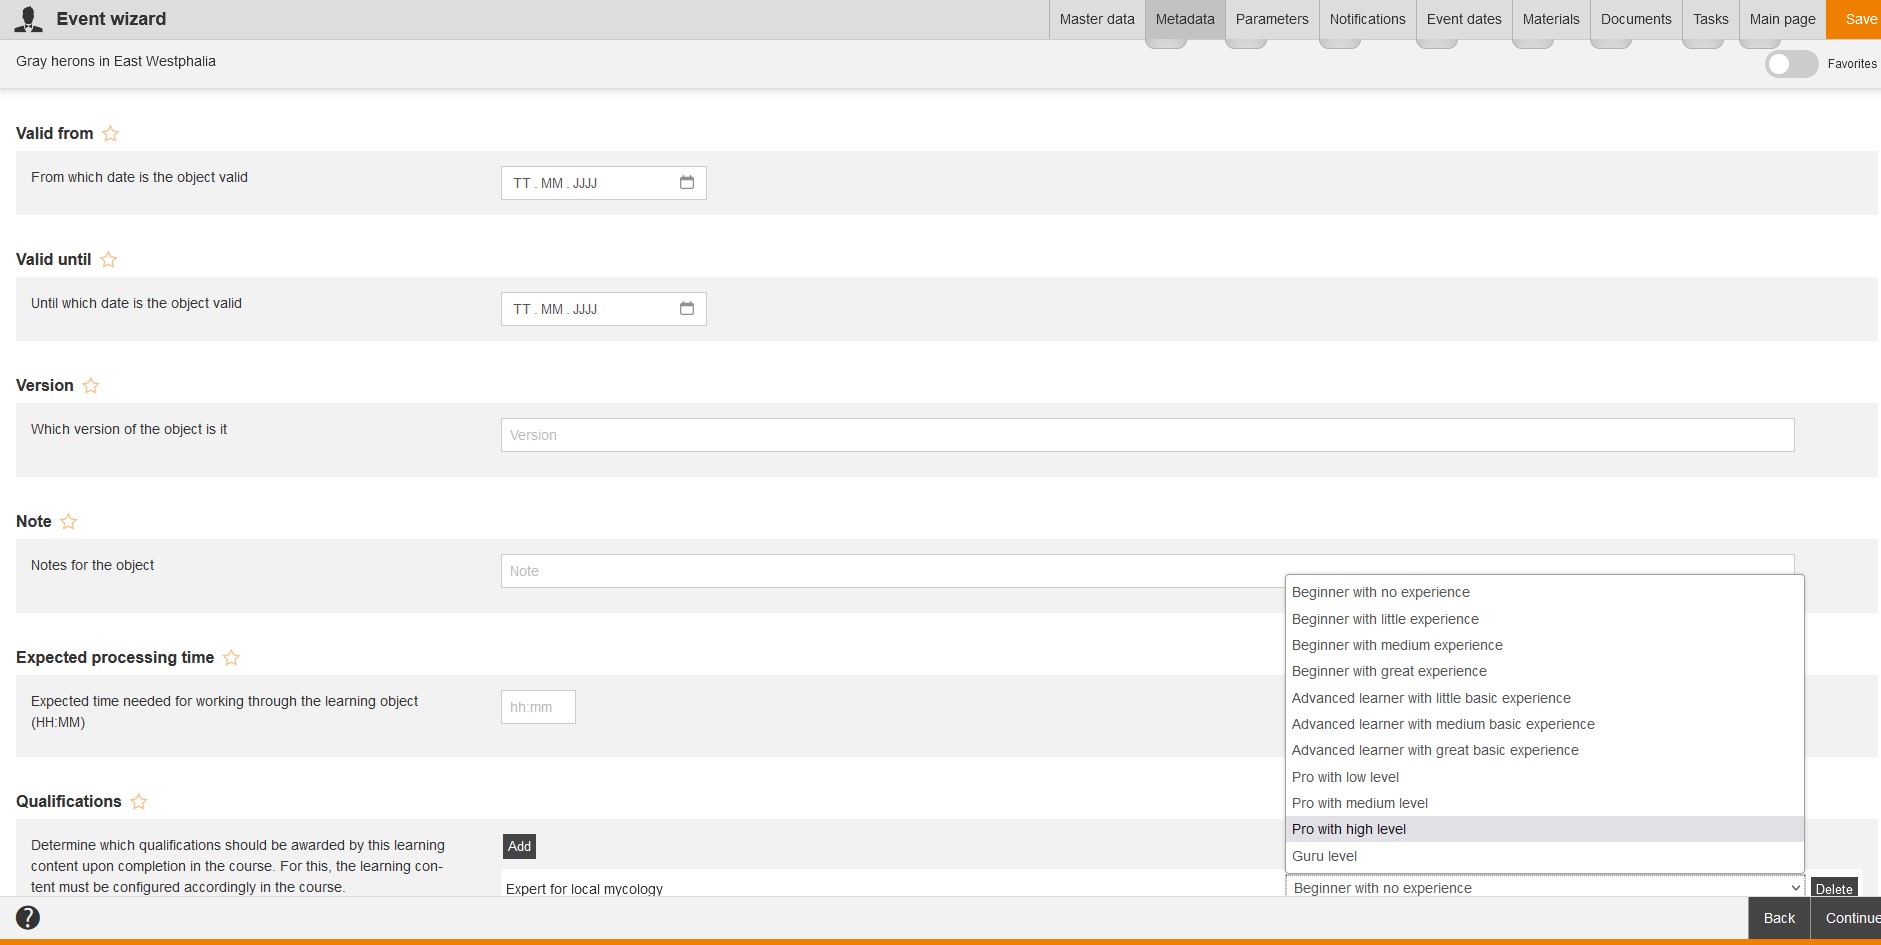
Determine which qualifications should be awarded by this learning content upon completion in the course. For this, the learning content must be configured accordingly in the Advanced characteristics of the event on the tab Course content in the Course wizard.
To assign the qualifications via this event on completing the course to the participant, click the button Add and select the corresponding qualification. If you’ve maintained the qualification group and the qualification scale, you see the corresponding scale values in a drop-down menu (see screenshot).
If required you can remove the qualification via the button Remove. Note that you consider if the course completion is already done by the participant.
Parameters
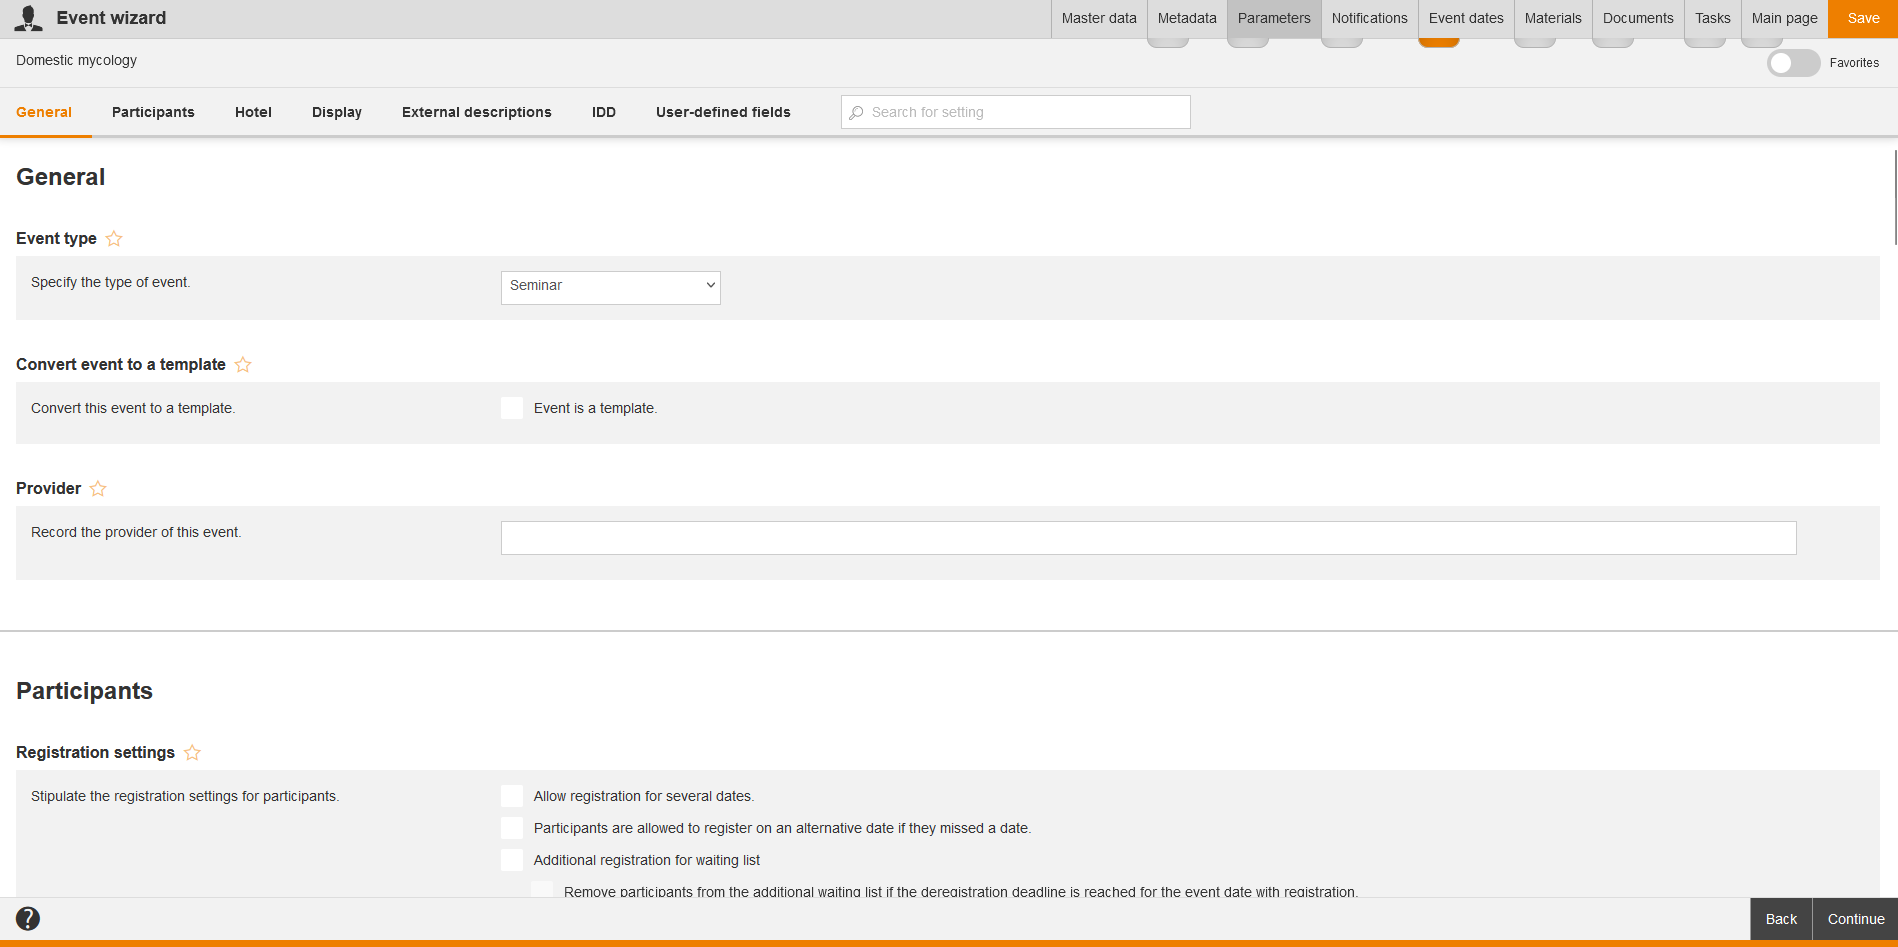
General
Event type
Select one of the following event types:
- Seminar
- Test
- Information event
- Training
- Lecture
- Instructions
- Training
Convert event to a template
Convert this event to a template by setting the check box Event is a template. This template appears then in the context menue of the button New event.
Provider
Enter the name of the provider.
Participants
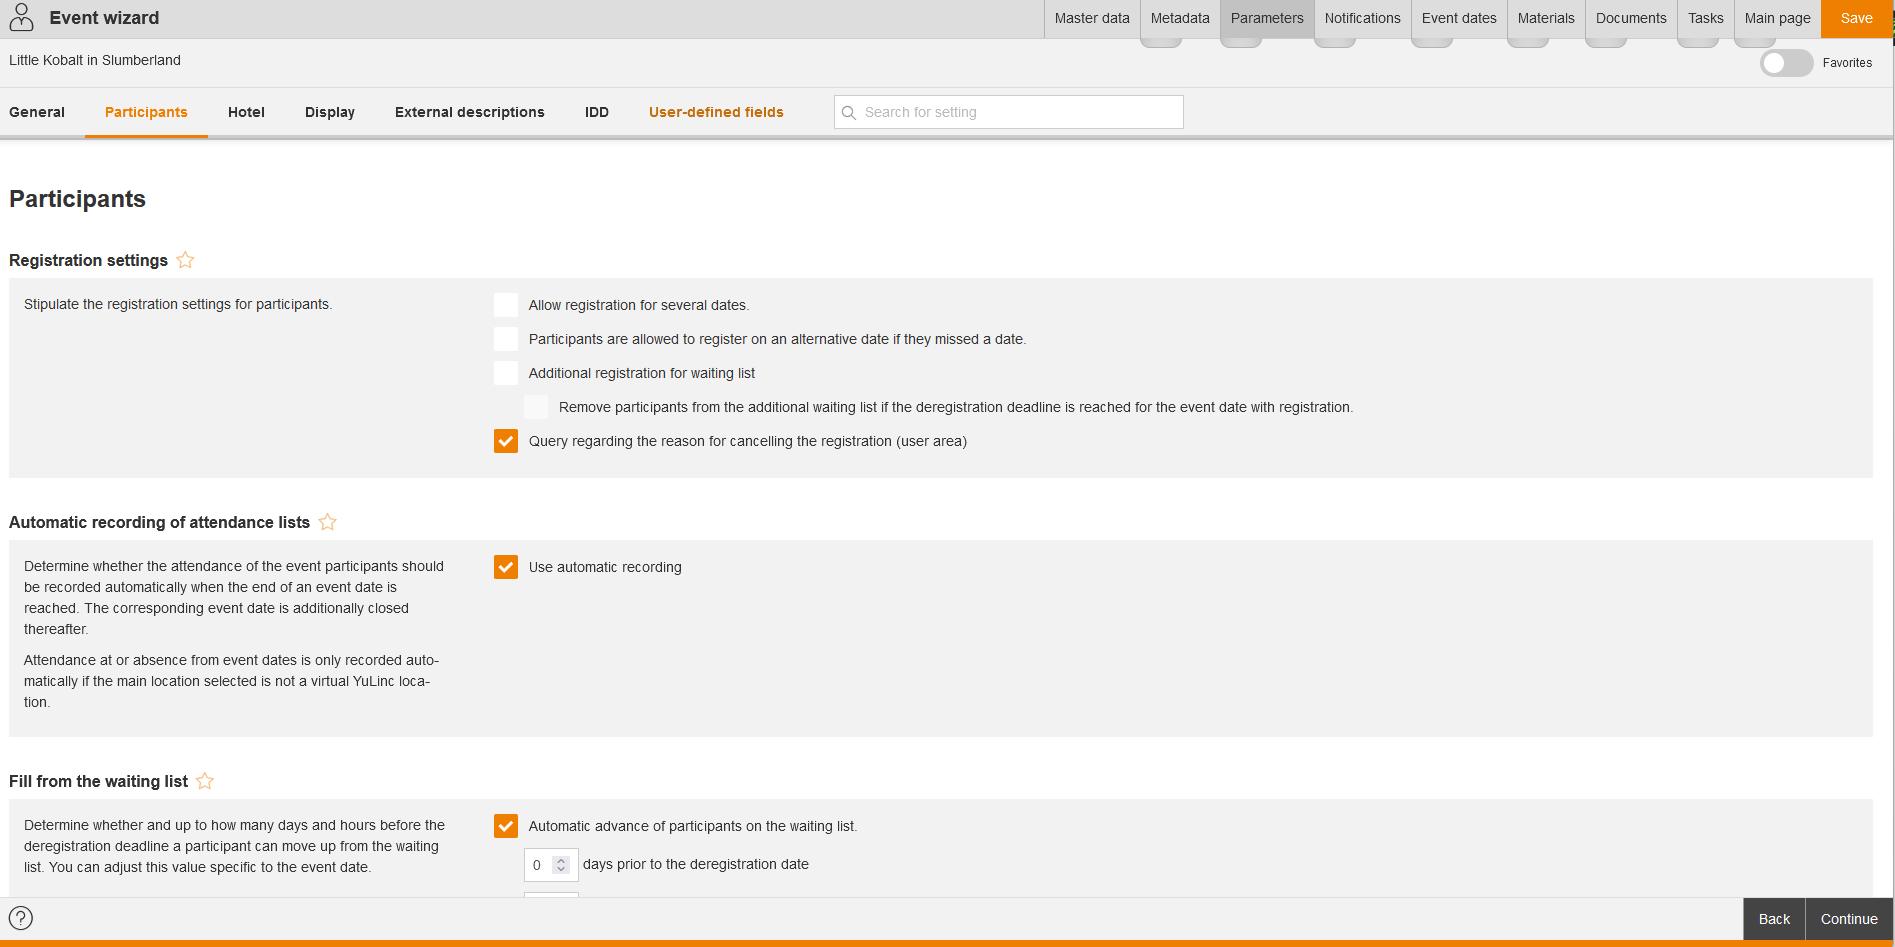
Registration settings
Define if it is allowed for the participants that they
- register to several dates by setting the check box Allow registration for several dates
- register on alternative date if they have missed a date by setting the check box Participants are allowed to register on an alternative date if they missed a date
A date is missed by the participant if the participant isn’t recorded as present on recording the attendance list and the event date is closed. In this case the participant can register to an alternative date. - register for a waiting list, although there is already a registration for another event date by setting the check box Additional registration for waiting list. If there will be a free place on the participants list of the event date with registration for waiting list, the participant succeeds automatically on the free place and will be deregistered from the other event date.
Furthermore, you can define if
- the participant is removed from the waiting list, as the end of registration on the non-desired event date is by setting the check box Remove participants from the additional waiting list if the deregistration deadline is reached for the event date with registration
- participants succeed automatically from the waiting list as a place on participants list is available by setting the check box Automatic advance of participants on the waiting list.
If this option isn’t activated, the participants succeed only by manual registration from the waiting to the participants list. - there is a query regarding the reason for cancelling the registration (user area) by setting the check box Query regarding the reason for cancelling the registration (user area)
- the “Query regarding the reason for cancelling the registration (user area) is activated.
Automatic recording of attendance lists
If you want that the attendance of the participants should be automatically recorded on coming up to the end of an event date, set the check box Use automatic recording. If you have an event with event dates in the past and in the future you can set this function later for being relevant for event dates in future. The attendance is set after the end of each single event date of an event date group.
Note: The automatic recording of attendance lists effects that event dates are set to “Closed” after Performing and all participants of the event are marked as “Present” and “Completed successfully”.
Determine whether and up to how many days and hours before the deregistration deadline a participant can move up from the waiting list. You can adjust this value specific to the event date. If required enter the days and hours before the deregistration deadline. The default value for days and hours is “0”.
Via setting a check box you can define an automatic advance of participants on the waiting list. Enter if applicable the days prior to the deregistration date.
Accompanying persons
Define, if accompanying persons are allowed and how many and if they should receive defined e-mails.
To grant a permit for accompanying persons in an event, set the check mark Accompanying persons. Then you enter the number of allowed accompanying persons or adjust the number of allowed accompanying persion via click on the arrow keys.
That the accompanying persons receive e-mails as CC for invitations, updates and deregistrations, if these were sent after recording the accompanying persons, set the check mark Accompanying persons receive e-mails as CC for invitations, updates and deregistrations, if these were sent after recording the accompanying persons. If this option is activated, users receive an update of the last registration confirmation or invitation, if the author or the user has changed the accompanying person booking on the event date.
You can do configurations regarding the update e-mails for accompanying persons in the system setting “seminar.configuration”.
You can also activate the booking of accompanying persons in the run (tab Parameters) by the user.
Substitute participant registration
Determine whether the user team leader is permitted to exchange one participant for another (substitute) participant. Advantage: The participant already present is deregistered and replaced with a new participant without the slot being occupied by a new registration or by someone from the waiting list. Select between the following options:
- No substitute participant
- Substitute participants can be entered till the close of registration
- Substitute participants can be registered up to the start of the event date or up to:
Therefore enter if required days and hours prior to the start of an event date.
Further information about the selection of the substitute participant you find under User frontend → Cockpit → Employee.
Food requests
If this option is activated, the option Activate food requests will be activated in the Event date wizard on creating further event dates. Otherwise you have to set this option (if applicable) manually on creating event dates.
Hotel
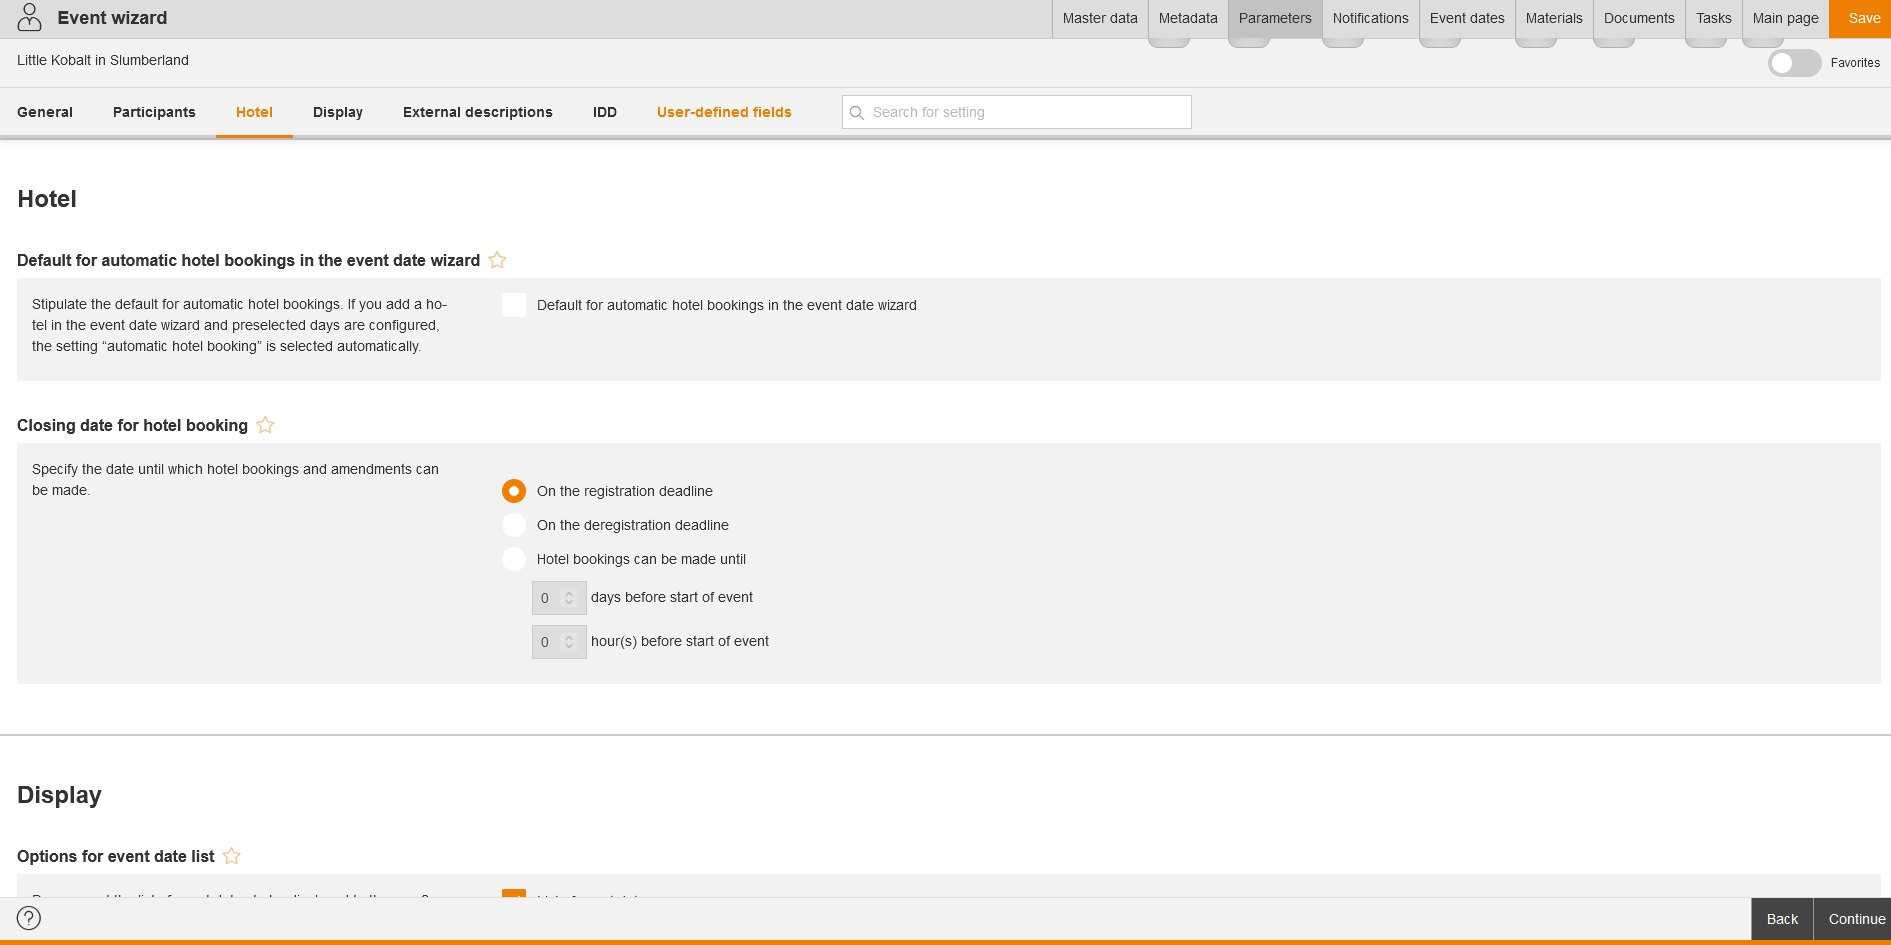
Default for automatic hotel bookings in the event date wizard
If you want to activate the default for automatic hotel bookings in the event date wizard (function Add hotel), set the check mark Default for automatic hotel bookings in the event date wizard. If you add a hotel in the event date wizard and if you configure the selected days in advance, the toggle Automatic hotel booking is automatically selected. Further information about Add hotel you find here.
The check mark is already set, if the configuration parameter defaultAutoHotelBooking is set to true in the system setting seminar.configuration.
Closing date for hotel booking
Specify the date until which hotel bookings and amendments can be made. Select between the following options and enter if required the days and hours before start of event:
Display
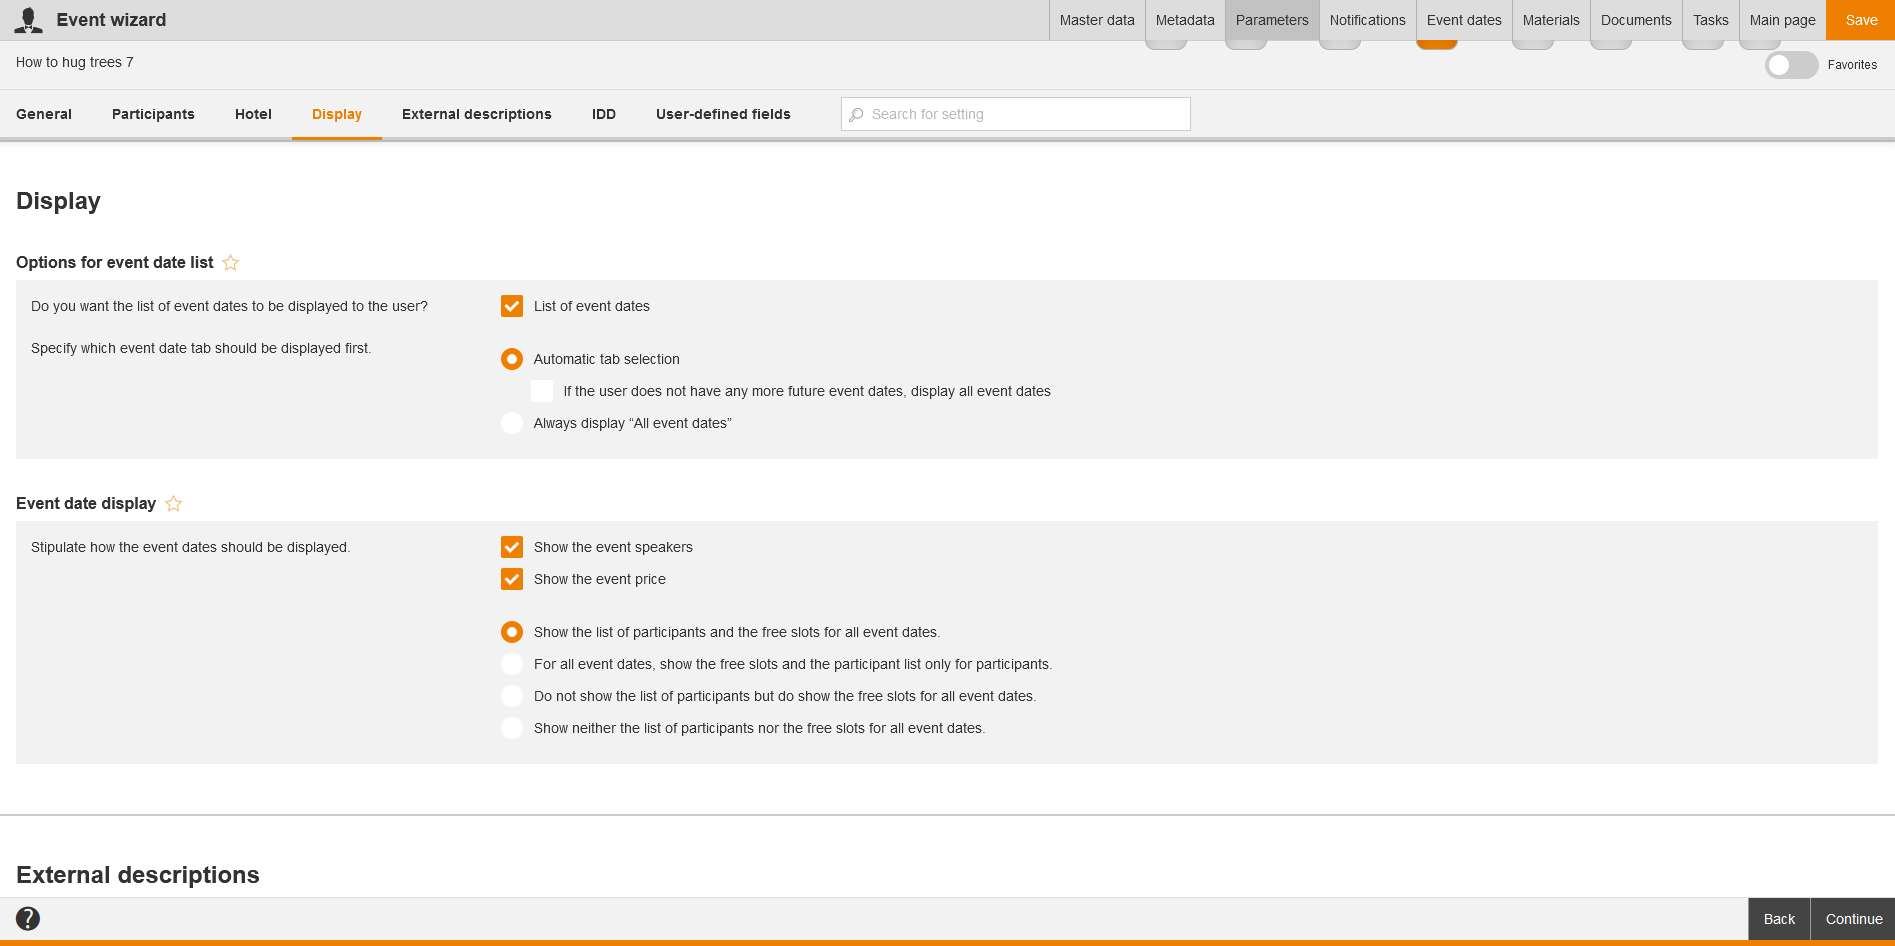
Options for event date list
If the event date list shouldn’t be displayed for the user, remove the check mark List of event dates.
Example for the event date list: The event dates of an event are shown in the description for the user. The display of the event date list can also be inhibited, for example if the users can’t register themselves and shouldn’t see the other possible event dates.
Furthermore you can define, which event date tab should be shown first to the participant. Default is Automatic tab selection (initial My event dates). If required you can set the check mark If the user does not have any more future event dates, display all event dates. But you can also select the option Always display “All event dates”.
Event date display
Stipulate how the event dates should be displayed. Select between the following options:
- Show the event speakers
- Show the event prize
- Show the list of participants and the free slots for all event dates
- For all event dates, show the free slots and the participant list only for participants
- Do not show the list of participants but do show the free slots for all event dates
- Show neither the list of participants nor the free slots for all event dates
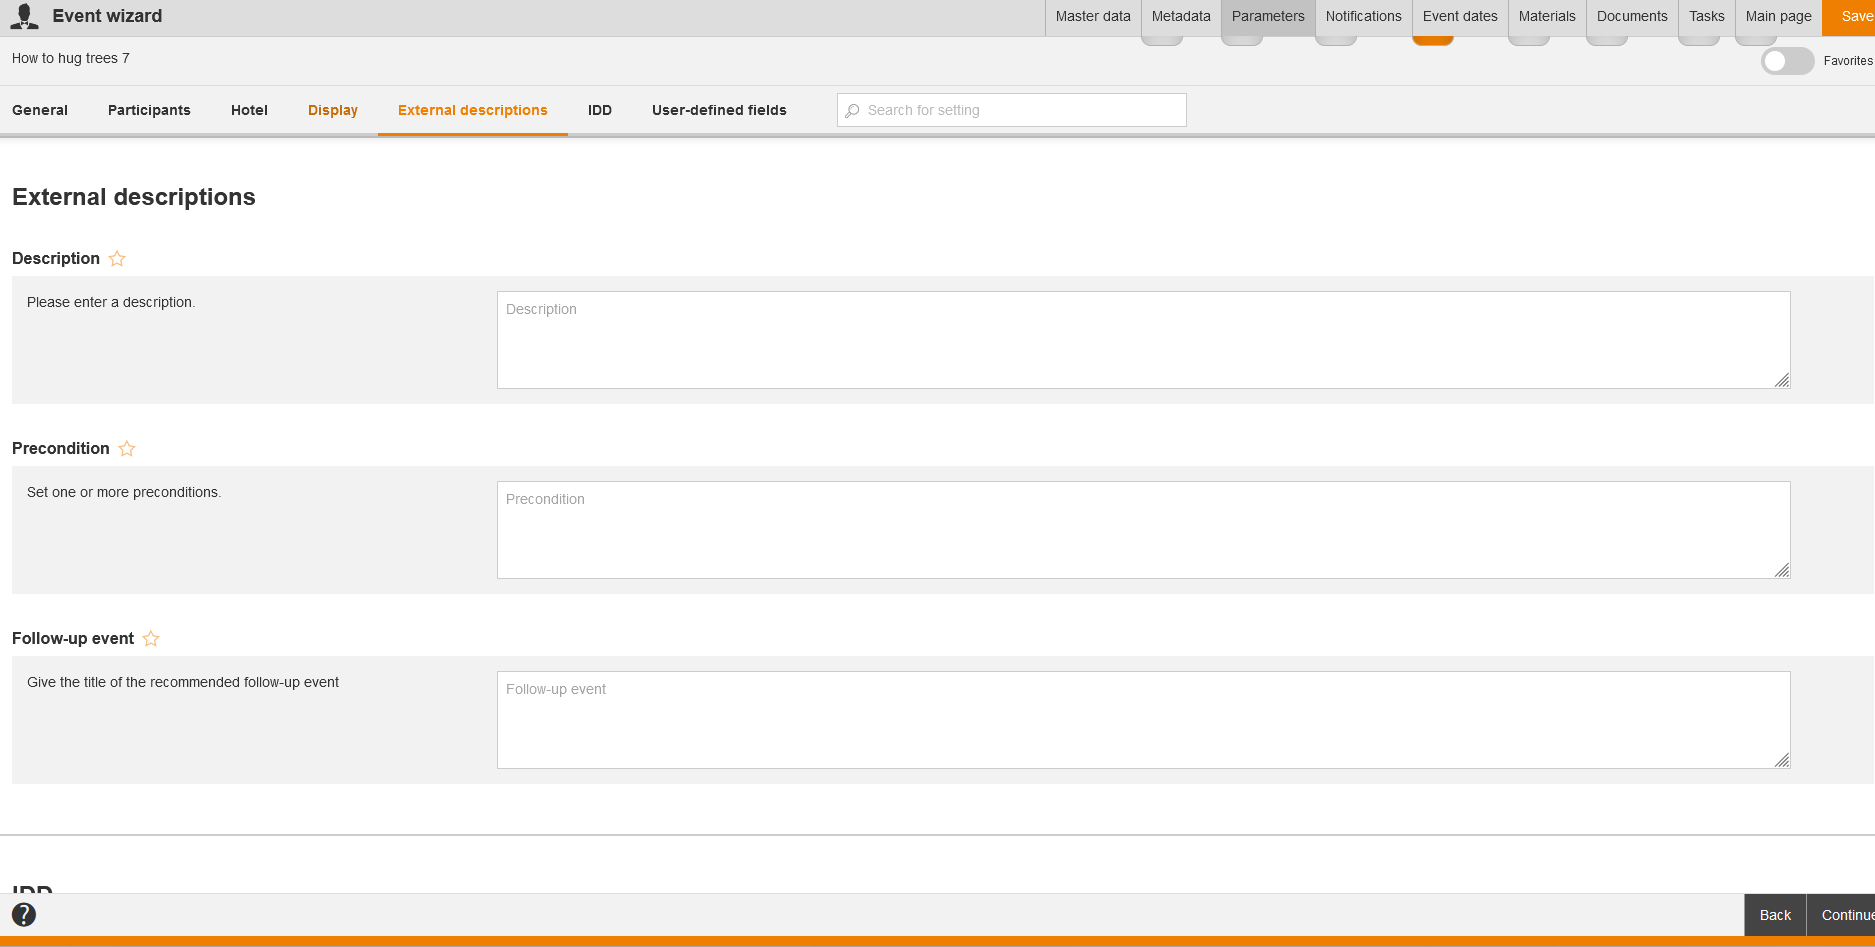
External descriptions
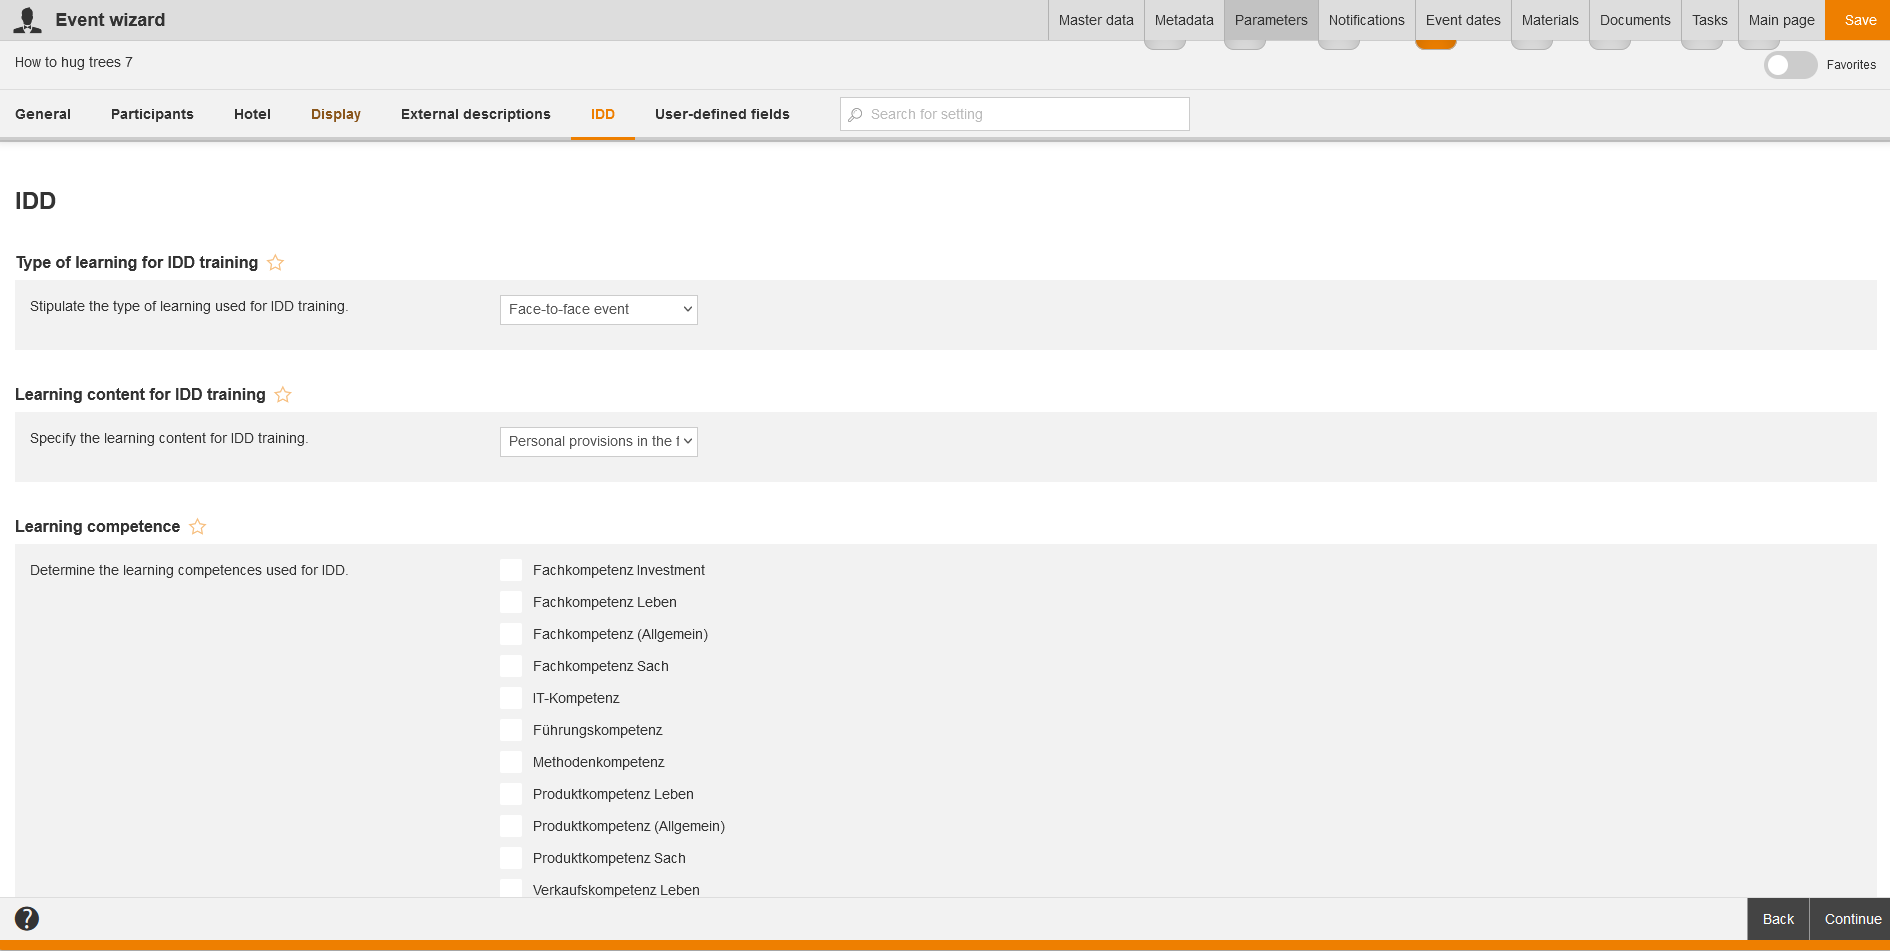
IDD
If you’ve maintained on this sub tab the IDD learning type like single training, the IDD learning content like Multi-sector and the learning competences like IT competence (as several learning competences like IT competence and social competence are possible) the user and/or the user team leader see these date for the corresponding event on the sub tab Training history of the tab Achievements since version 17.35.
Type of learning for IDD training
Select the type of learning (basic type), which is used for IDD.
You can activate the function IDD in the appropriate course activation under registration management or the participant management of the appropriate course activation under the registration options of the rules on participants.
Learning content for IDD training
Select the learning content, which is used for IDD.
Learning competence
This option is only shown if the system setting „insuranceDistributionDirective“ is configured.
Determine the learning competences used for IDD by setting a check mark.
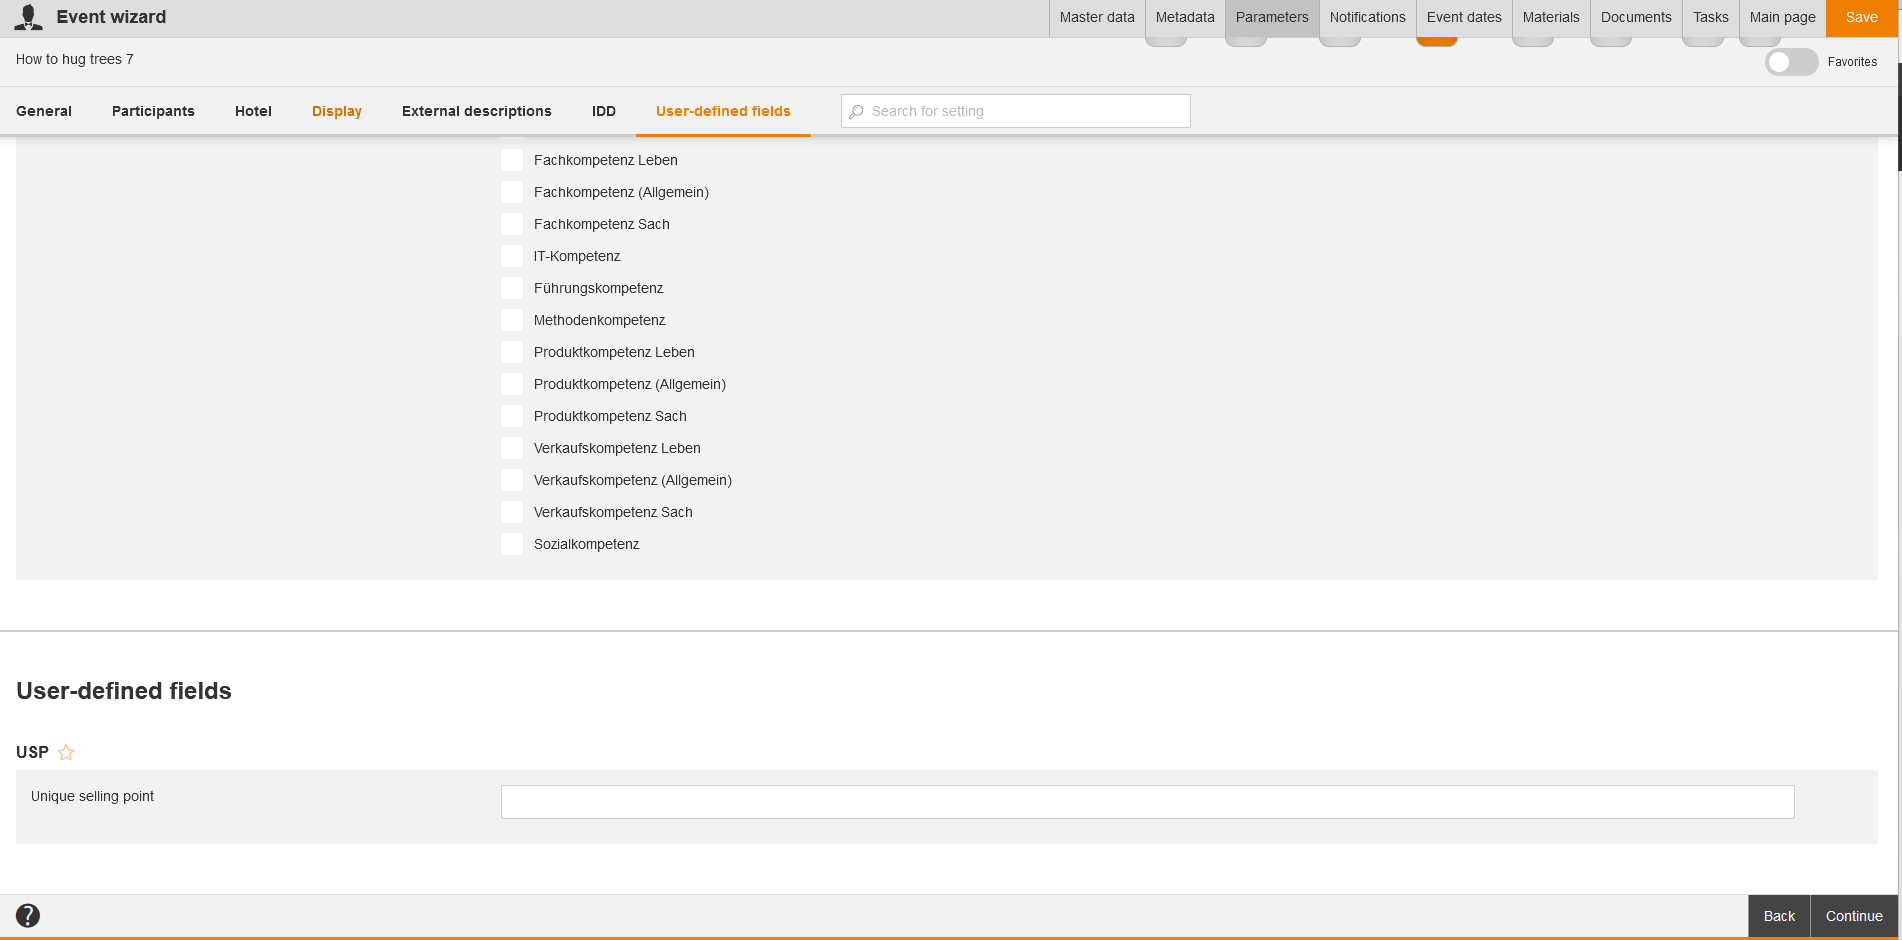
User-defined fields
Which fields are shown on this tab, depends on what the author the administration (objects) rights Read, select and Change, create under User-defined fields has created. This author also selects the field type (text field, object selection, dropdown or multiselect) and in which wizard the user-defined field shall be shown, this means if in the Event wizard, Event date wizard, Course activation wizard, Course wizard, Remote content wizard (LTI and Offline with xAPI feedback channel), UGC wizard for learning units and/or Training suggestions.
You find further information on the page “User-defined fields“.
Notifications
How the event will proceed
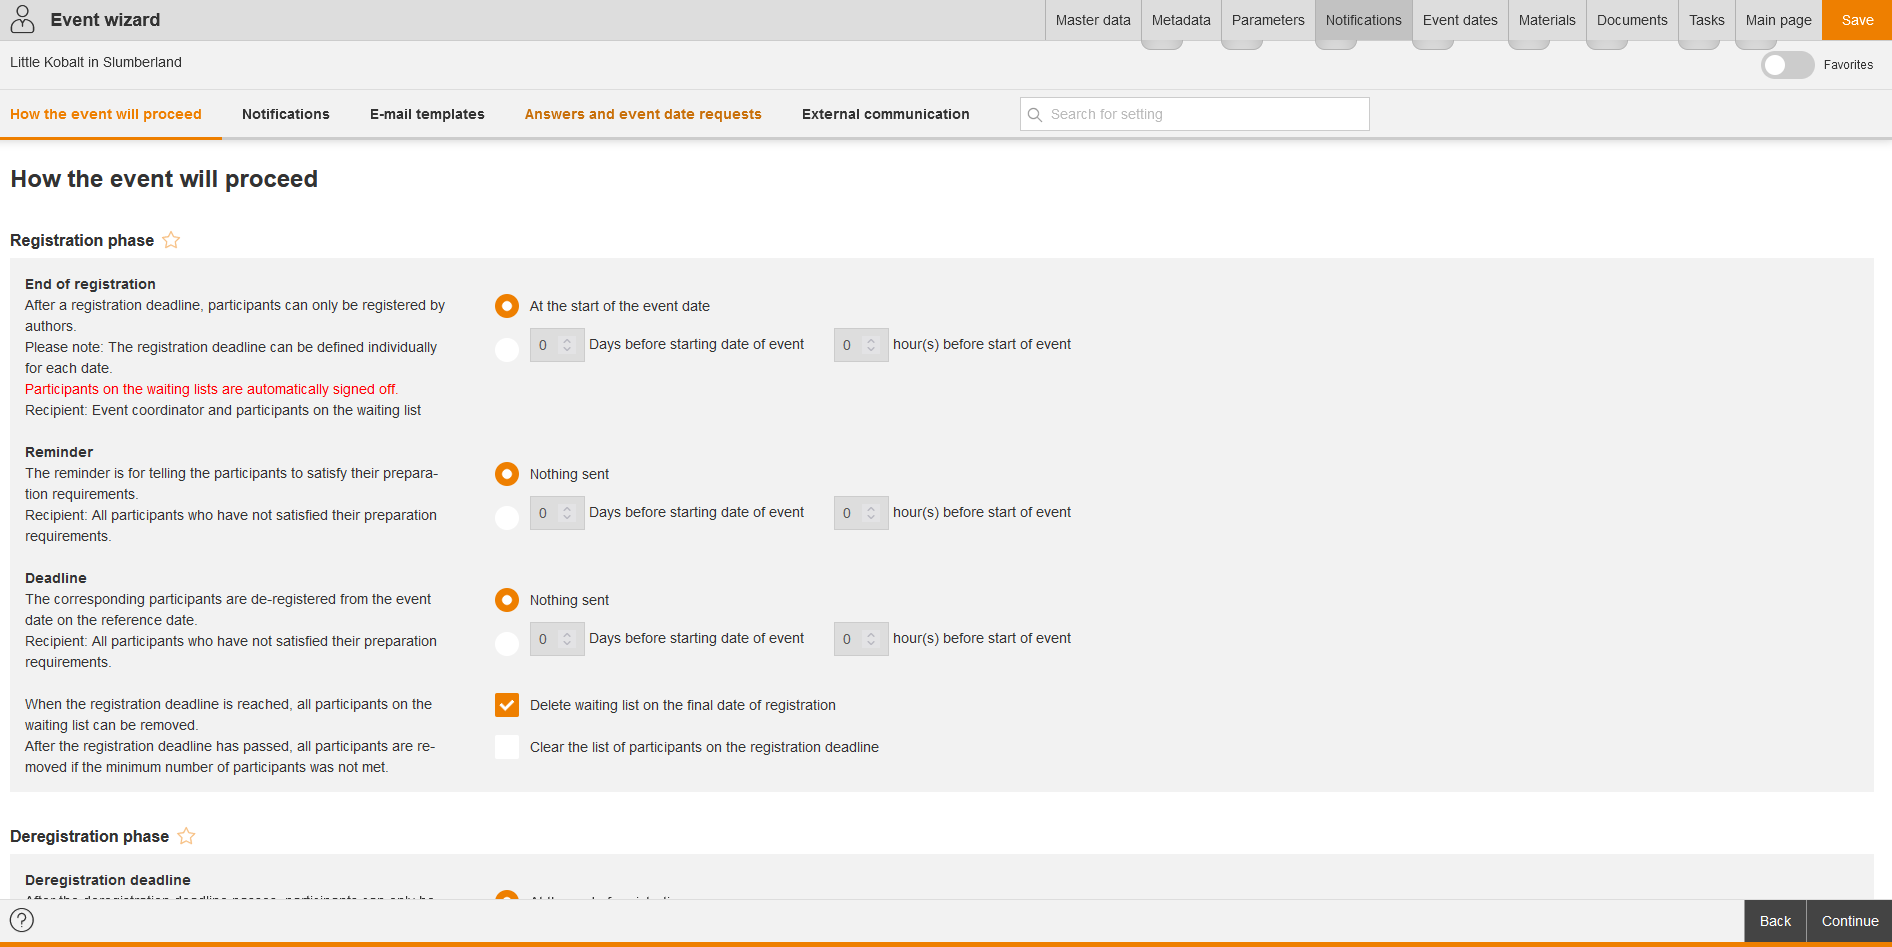
Registration phase
Decide, when and how Avendoo® communicates in the registration phase with the participants.
- End of registration
The end of registration can be set on the starting date of the event or if required on any number of days and hours before the starting date of the event. After the end of registration participants can only be registered and deregistered by authors. All participants on waiting list and the event coordinator receive an information on the end of registration. Optional the waiting list can also be emptied on the end of registration for allowing no participants on waiting list, even if a person is registered by an author. - Reminder
You can activate the reminder on event or event date level.
The reminder informs the participant in configurable time (days and hours) before the event that he/she has to fulfill pre-tasks for participating the event. Pre-tasks are previous objects on the learning path, for example: hurdles, check points. The mail template reminder is used.
Therefore set a check box in the column Active. Afterwards you enter in the status column how many days and hours before the starting date of event the participants should be reminded. If the reminder is activated, the sending is at 8:30 p.m. on the day, on which the reminder date is achieved. If the date is after 8 or 8:30 p.m. the corresponding e-mails are sent on the next day. - Deadline
If the participant hasn’t fulfiled his/her corresponding pre-tasks to a certain deadline, he/she can be deregistered from the event. The pre-tasks are all mandatory content, which are before a hurdle on a learning path.
This deadline can be activated by setting a check box in the column Active and is defined by a selectable number of days and hours, which are before the event. If the deadline is activated, the sending and deregistration is at 8 p.m. on the day, on which the deadline is. If the date is after 8 or 8:30 p.m. the corresponding e-mails are sent on the next day.
All waiting list participants and the event co-ordinator receive at the registration deadline an information. You can select if the waiting list (by setting the check mark Delete waiting list on the final date of registration) should be deleted on the final date of registration for not allowing any waiting list participants, even if a person is registered by an author. After achieving the registration deadline all participants remained on the waiting list can be deleted.
If you set the check mark Clear the list of participants on the registration deadline, all participants will be removed as participants after reaching the registration deadline if the minimum number of participants hasn’t been reached. Therefore you can send the individual notification “Automatic event date deregistration”. Furthermore you can manage the minimum number of participants via the system setting “seminar.configuration“.
Deregistration phase
- Deregistration deadline
After a deregistration deadline only authors can deregister the participants. Note that you can define the deregistration deadline separately on each event date.
You can define, if the deregistration deadline is on the end of registration (default), if the deregistration deadline is on the start of the event date or if it is a defined time before the start of the event date (in days and hours). You can empty optionally the waiting list on the deregistration deadline for allowing no participants on waiting list.
You can define if the deregistration deadline is on the registration deadline (default), or if it’s on the event date start or if it’s a defined time period before the event date start (in days and hours).
Also you can delete the waiting list at the deregistration deadline for not allowing waiting list participants. After reaching the deregistration deadline all participants remained on the waiting list can be removed.
Additionally, you can set the check mark Clear the list of participants on the registration deadline, if you want that on non-reaching the minimum number of participants all participants should be removed after reaching the deregistration deadline.
Therefore you can send the individual notification “Automatic event date deregistration”. Furthermore, you can manage the minimum number of participants via the system setting “seminar.configuration“.
Sending the attendance list
- Time
Enter a number of days and hours for the sending of the attendance list in relationship before the start of the event date. Then the attendance list will be sent independent of the end of registration or of the deregistration deadline.
Otherwise, you can select an appropriate report template, as selecting additionally between PDF, Excel and CSV as file type for the automatic attendance list. Default is the report template Attendance checklist. If applicable you can remove the selected report template.
Hotel booking list
Select one of the suggested report templates. If applicable you can remove the report template.
Follow-up phase
The event can be closed with the follow-up e-mail.
Recipient: All event participants marked as present.
Select between the following options:
- Nothing sent
- x days and x hours.
Notifications
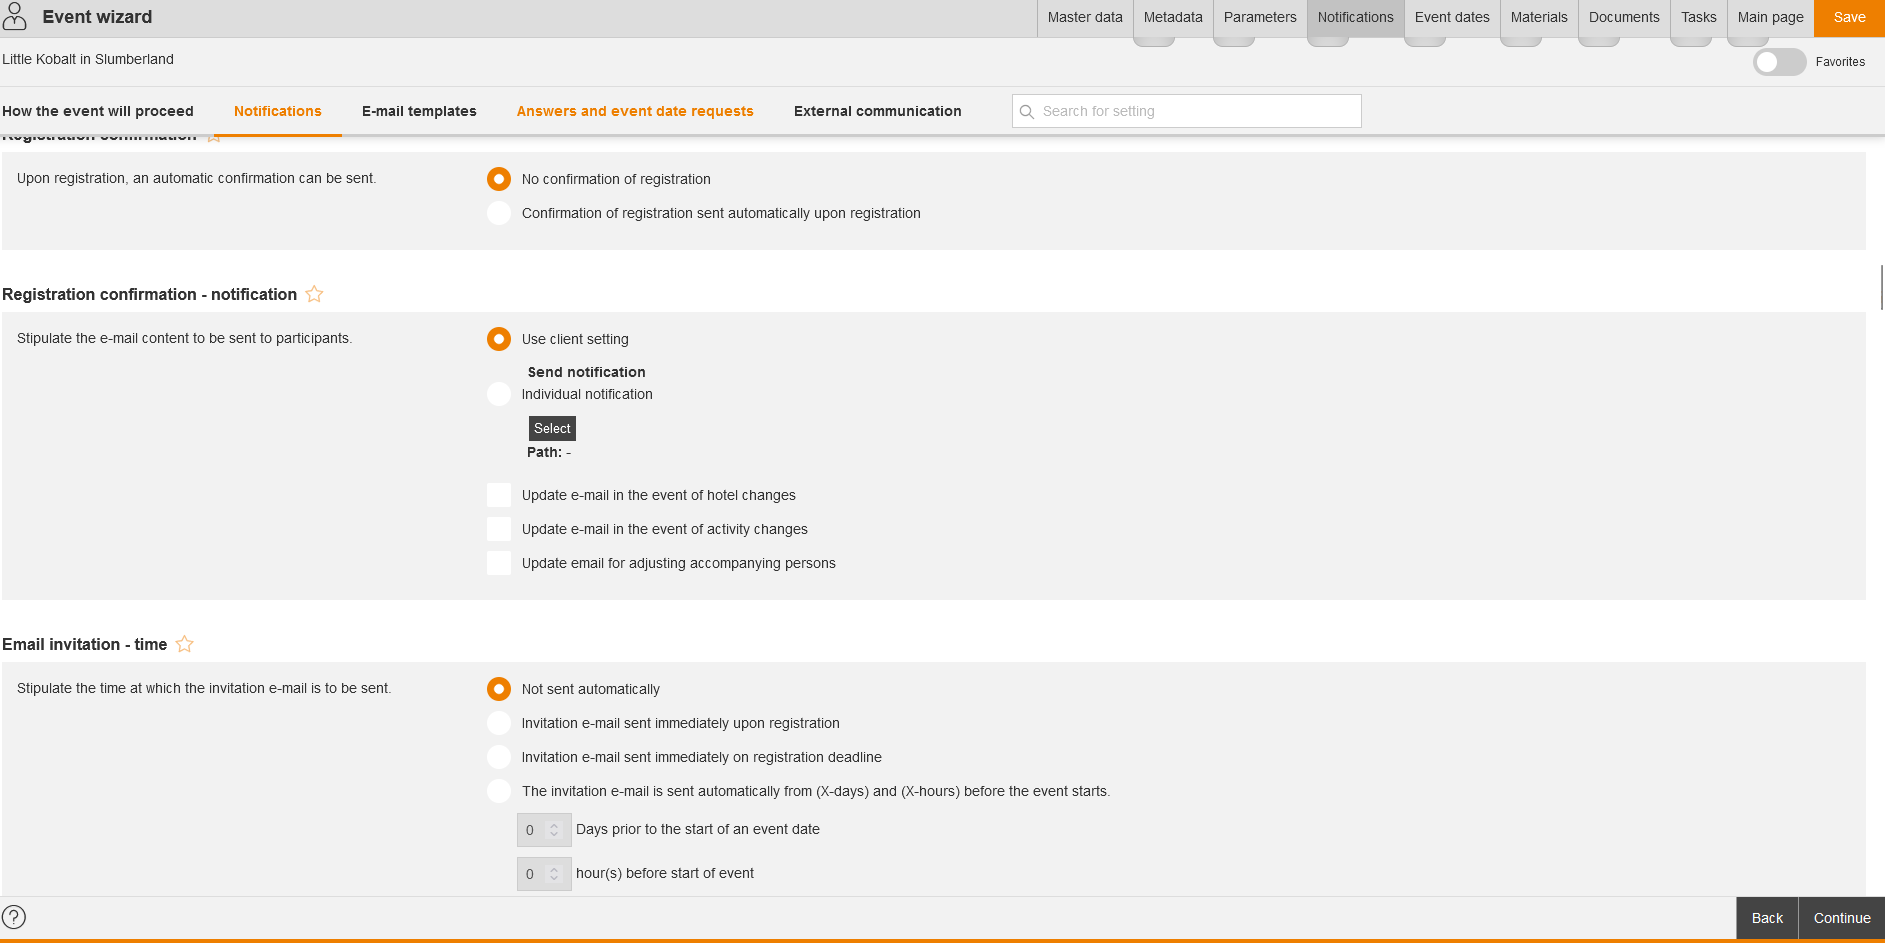
Registration confirmation
Upon registration, an automatic confirmation can be sent.
Registration confirmations will be sent if you’ve activated the option Confirmation of registration sent automatically upon registration and the date of sending the invitation wasn’t reached or you’ve activated the sending of the invitation notification.
Select between:
- No confirmation of registration or
- Confirmation of registration sent automatically upon registration
If you have selected this option, you cannot select Invitation e-mail sent immediately upon registration.
Registration confirmation – notification
Stipulate the e-mail content to be sent to participants:
- Use client setting
- Individual notification (therefore select the appropriate individual notification via the button Select)
Then the source path of the individual notification will be shown. Information about creating an individual notification you find here.
Furthermore, define if the particpants should receive update e-mails in the following cases:
- Update e-mail in the event of hotel changes
- Update e-mail in the event of activity changes
- Update e-mail for adjusting accompanying persons
E-mail invitation – time
Stipulate the time at which the invitation e-mail is to be sent:
- Not sent automatically
- Invitation e-mail sent immediately upon registration
If you have selected this option, you cannot select Automatic confirmation of registration. - Invitation e-mail sent immediately on registration deadline
- Invitation e-mail sent automatically at the start of an event date or sent on the event date
Therefore enter days and hours prior to the start of an event date.
The check mark Invitation e-mail is not sent if the minimum number of participants is not reached is set by default.
If you have selected the option The invitation e-mail is sent automatically from (X days) onward before the event date start and the check mark Invitation e-mail is not sent if the minimum number of participants is not reached is set, the registration confirmation will be sent if reaching not the minimum number of participants. Example: The invitation e-mail was sent 5 days before starting the event date and the minimum number of participants is already not reached 4 days before starting the event date.
Avendoo® doesn’t send invitation e-mails by standard. But you can trigger the invitation e-mails manually in the event management. Date and time in the invitation are identical with the time zone of the main venue. Further information about configuring the time zone you find here.
E-mail invitation – notification
Stipulate the e-mail content to be sent to participants.
Therefore select between:
- Use client setting
- Individual notification (therefore select the corresponding individual notification via the button Select; then the source path of the individual notification will be shown. Information about creating an individual notification you find here)
Furthermore define, if the particpants should receive update e-mails in the following cases:
- Update e-mail in the event of hotel changes
- Update e-mail in the event of activity changes
- Update e-mail for adjusting accompanying persons
Preview of e-mail invitation for speakers
Stipulate the point in time at which you want a preview of the invitation to participants to be sent automatically to the corresponding individuals (Main speaker, Speakers and/or Coordinator):
- Not sent automatically
- Send automatically from (x days and x hours) prior to the start of the event date (You can also adjust the sending time for specific event dates.)
Default setting is Not sent automatically.
Avendoo® sends neither invitation e-mails nor confirmations of registration. You can trigger invitation e-mails manually in the event management. Date and time in the invitation e-mail represents the time zone of the main location. You find further information about configuring the time zone here.
Send registration confirmation – waiting list
The registration confirmation (waiting list) will be sent independent from the invitation and the automatic registration confirmation.
Stipulate the e-mail content to be sent to participants:
- Do not send a notification
- Use client setting
- Individual notification (therefore select the appropriate individual notification via the button Select)
Then the source path of the individual notification will be shown. Information about creating an individual notification you find here.
Set a check mark, if you want update mails when accompanying persons have been adjusted.
Copy of notification of move from waiting list
Define who receives a copy of the notification when a user moves from the waiting list to an event place by setting the following check marks:
- Superior
- Coordinator
- Owner (of the course activation)
- Training coach and/or
- Speakers
Event – move from waiting list to event place
This a notification is sent when a user moves up from the waiting list to the event place.
Select between:
- Use client setting
- Individual notification (therefore select the appropriate individual notification via the button Select).
Then the source path of the individual notification will be shown. Information about creating an individual notification you find here.
Event – move from waiting list to event place (invitation)
This a notification is sent when a user moves up from the waiting list to the event place and receives an invitation.
Select between:
- Use client setting
- Individual notification (therefore select the appropriate individual notification via the button Select).
Then the source path of the individual notification will be shown. Information about creating an individual notification you find here.
Event – date request answered (speaker)
This a notification informing selected persons when the speaker responds to a speaker invitation.
Select between:
- Do not send a notification
- Use client setting
- Individual notification (therefore select the appropriate individual notification via the button Select).
Then the source path of the individual notification will be shown. Information about creating an individual notification you find here.
Event – approval request for event date deregistration
This is a notification informing team leaders that there is a new event date deregistration to-do in the cockpit.
Select between:
- Do not send a notification
- Use client setting
- Individual notification (therefore select the appropriate individual notification via the button Select).
Then the source path of the individual notification will be shown. Information about creating an individual notification you find here.
Event – approval request for event date deregistration declined
This is a notification informing event date participants that their event date deregistration has been declined.
Select between:
- Do not send a notification
- Use client setting
- Individual notification (therefore select the appropriate individual notification via the button Select).
Then the source path of the individual notification will be shown. Information about creating an individual notification you find here.
Event – date request accepted (speaker)
This is a notification informing selected persons when the speaker accepts a speaker invitation.
Select between:
- Do not send a notification
- Use client setting
- Individual notification (therefore select the appropriate individual notification via the button Select).
Then the source path of the individual notification will be shown. Information about creating an individual notification you find here.
Event – date request declined (speaker)
This a notification informing selected persons when the speaker declines a speaker invitation.
Select between:
- Do not send a notification
- Use client setting
- Individual notification (therefore select the appropriate individual notification via the button Select).
Then the source path of the individual notification will be shown. Information about creating an individual notification you find here.
Automatic event date deregistration
This notification is sent to users when they are automatically deregistered from an event date.
Select between:
- Do not send a notification
- Use client setting
- Individual notification (therefore select the appropriate individual notification via the button Select).
Then the source path of the individual notification will be shown. Information about creating an individual notification you find here.
Event – unauthorized event date deregistration
This is a notification informing selected persons when an event date participant wants to deregister from an event date via calendar/iCAL but is not permitted to do so. Examples: deregistration deadline, run date, approval procedure, system setting.
Select between:
- Do not send a notification
- Use client setting
- Individual notification (therefore select the appropriate individual notification via the button Select).
Then the source path of the individual notification will be shown. Information about creating an individual notification you find here.
Event – manual deregistration
This is a notification which is sent to users when they are removed from an event date by an author. Select between:
- Do not send a notification
- Use client setting
- Individual notification (therefore select the appropriate individual notification via the button Select).
Then the source path of the individual notification will be shown. Information about creating an individual notification you find here.
Event – feedback
This is a notification informing participants that a feedback form relating to an event should be completed. Select between:
- Do not send a notification
- Use client setting
- Individual notification (therefore select the appropriate individual notification via the button Select).
Then the source path of the individual notification will be shown. Information about creating an individual notification you find here.
Follow up with event invitation
This notification is suggested as standard to other authors if they want to follow up with another message (usually the invitation).
Select between:
- Use client setting
- Individual notification (therefore select the appropriate individual notification via the button Select).
Then the source path of the individual notification will be shown. Information about creating an individual notification you find here.
Hotel notifications regarding booking request
This is a notification that the hotel was informed about a booking request. This notification is sent prior to each change in the booking. Select between:
- Do not send a notification
- Use client setting
- Individual notification (therefore select the appropriate individual notification via the button Select).
Then the source path of the individual notification will be shown. Information about creating an individual notification you find here.
Stipulate the recipients:
- E-mail address of venue/hotel
- Contact partner at venue/hotel
- Coordinator of the event date
- Further recipient (click on the button Select and select a further recipient)
Event – New document
Stipulate which notification the user should receive if there is a new document for the event date.
Select between:
- Do not send a notification
- Use client setting
- Individual notification (therefore select the appropriate individual notification via the button Select).
Then the source path of the individual notification will be shown. Information about creating an individual notification you find here.
Event – Did not participate in event
Stipulate which notification should be sent to the team leader if the user did not participate in an event.
Select between:
- Do not send a notification
- Use client setting
- Individual notification (therefore select the appropriate individual notification via the button Select).
Then the source path of the individual notification will be shown. Information about creating an individual notification you find here.
Additional notifications
Determine additional notifications for the event, e.g. selected overnight stays per hotel, catering details for event venues.
To add a new notification , click on the button Add message. You get a list of message templates of the message type Selected overnight stays per hotel and Catering details for event venues. You find these message types under Community → Message templates.
If applicable you can change the notification under Title via the button Change. In the column Recipient the recipient (hotels or locations) is strictly defined. Furthermore you can assign a report or change via the button Change (only for selected overnight stays per hotel). In the column Send you can define, if the notification should be sent manually by setting a check box or if there should be automatic notifications (this means the check box Send manually isn’t set).
If you have decided for automatic notifications (this means the check box Send manually isn’t set), you can define how many hours and/or days before or after start of the event date, registration deadline, deregistration deadline or starting date for block of event dates it should be. Note that, the option starting date for block of event dates is only available for the notification type Selected overnight stays per hotel.
If applicable, you can delete the notification via the button Delete.
Sending of invitation e-mail
Stipulate the e-mail content to be sent to participants:
- Use client setting
- Individual notification (therefore select the appropriate individual notification via the button Select)
Then the source path of the individual notification will be shown. Information about creating an individual notification you find here.
Furthermore define, if the particpants should receive update e-mails in the following cases:
Event – Did not pass knowledge test
Stipulate which notification should be sent to the team leader if the user did not participate in an event:
- Do not send a notification
- Use client setting
- Individual notification (therefore select the appropriate individual notification via the button Select).
Then the source path of the individual notification will be shown. Information about creating an individual notification you find here.
E-mail templates
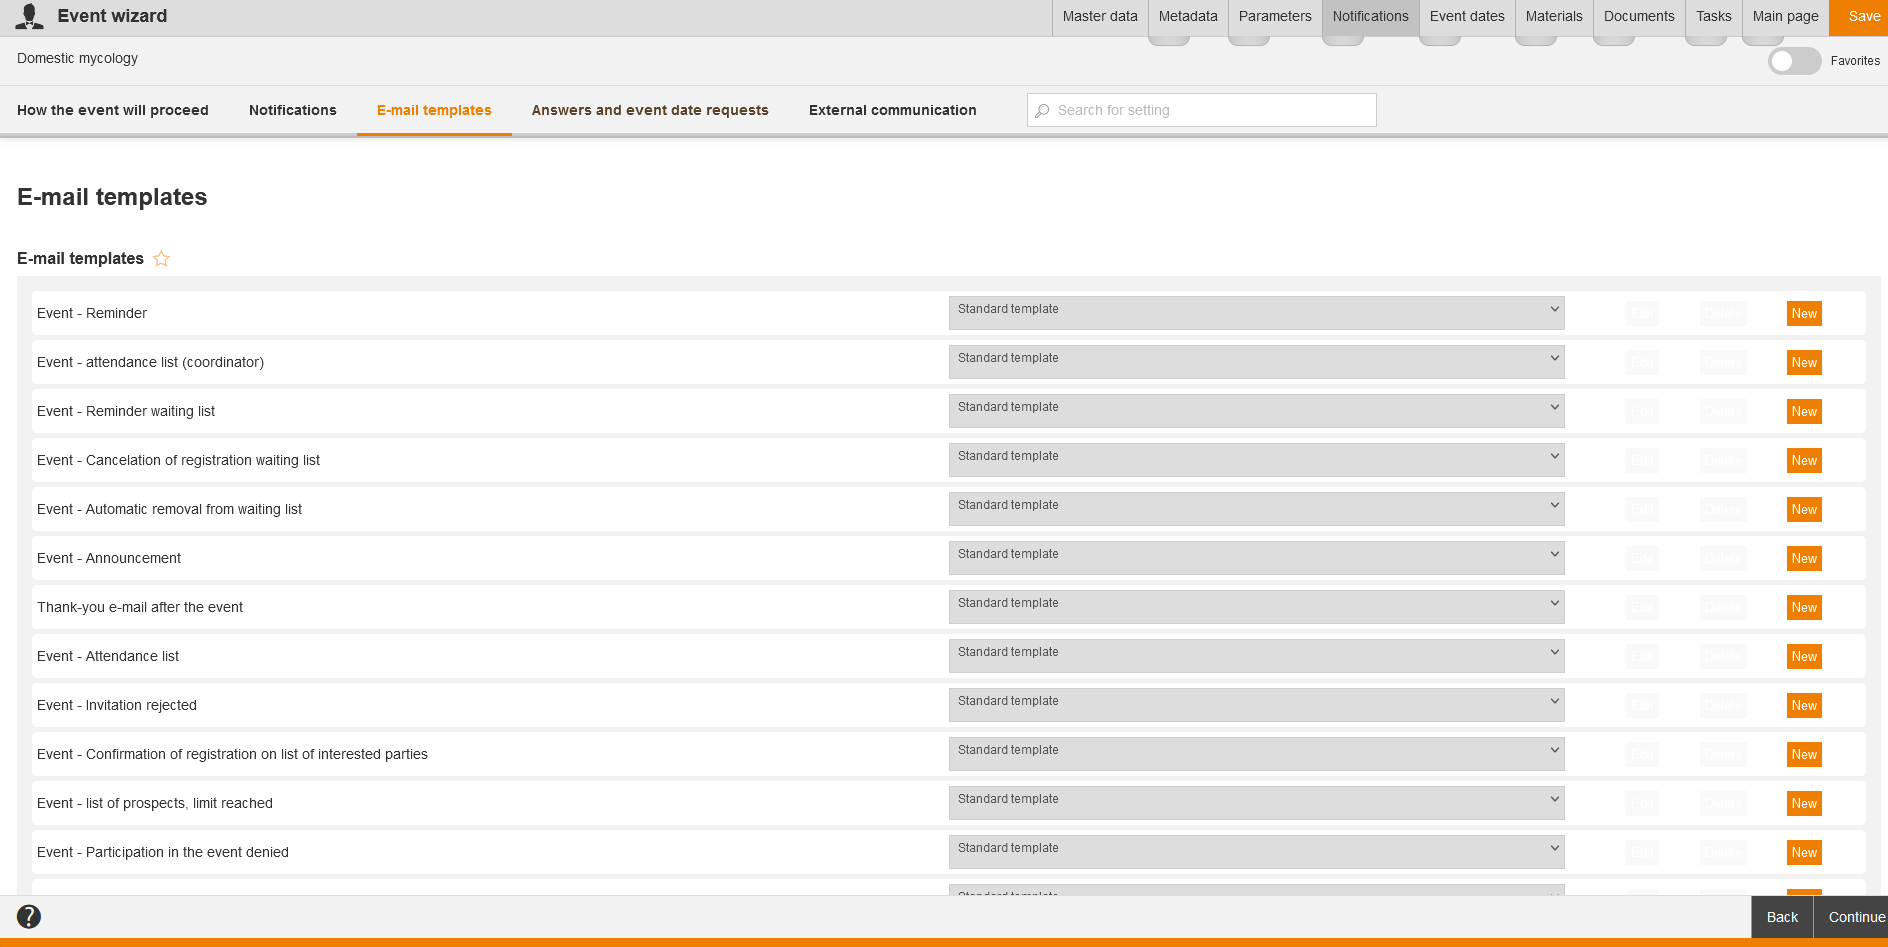
Here you see a list of all event e-mail templates. Either you use the standard (e-mail) templates or you write an own e-mail template. If you want to write an own e-mail template, click on the button New and the editor for the e-mail template opens.
Answers and event date requests
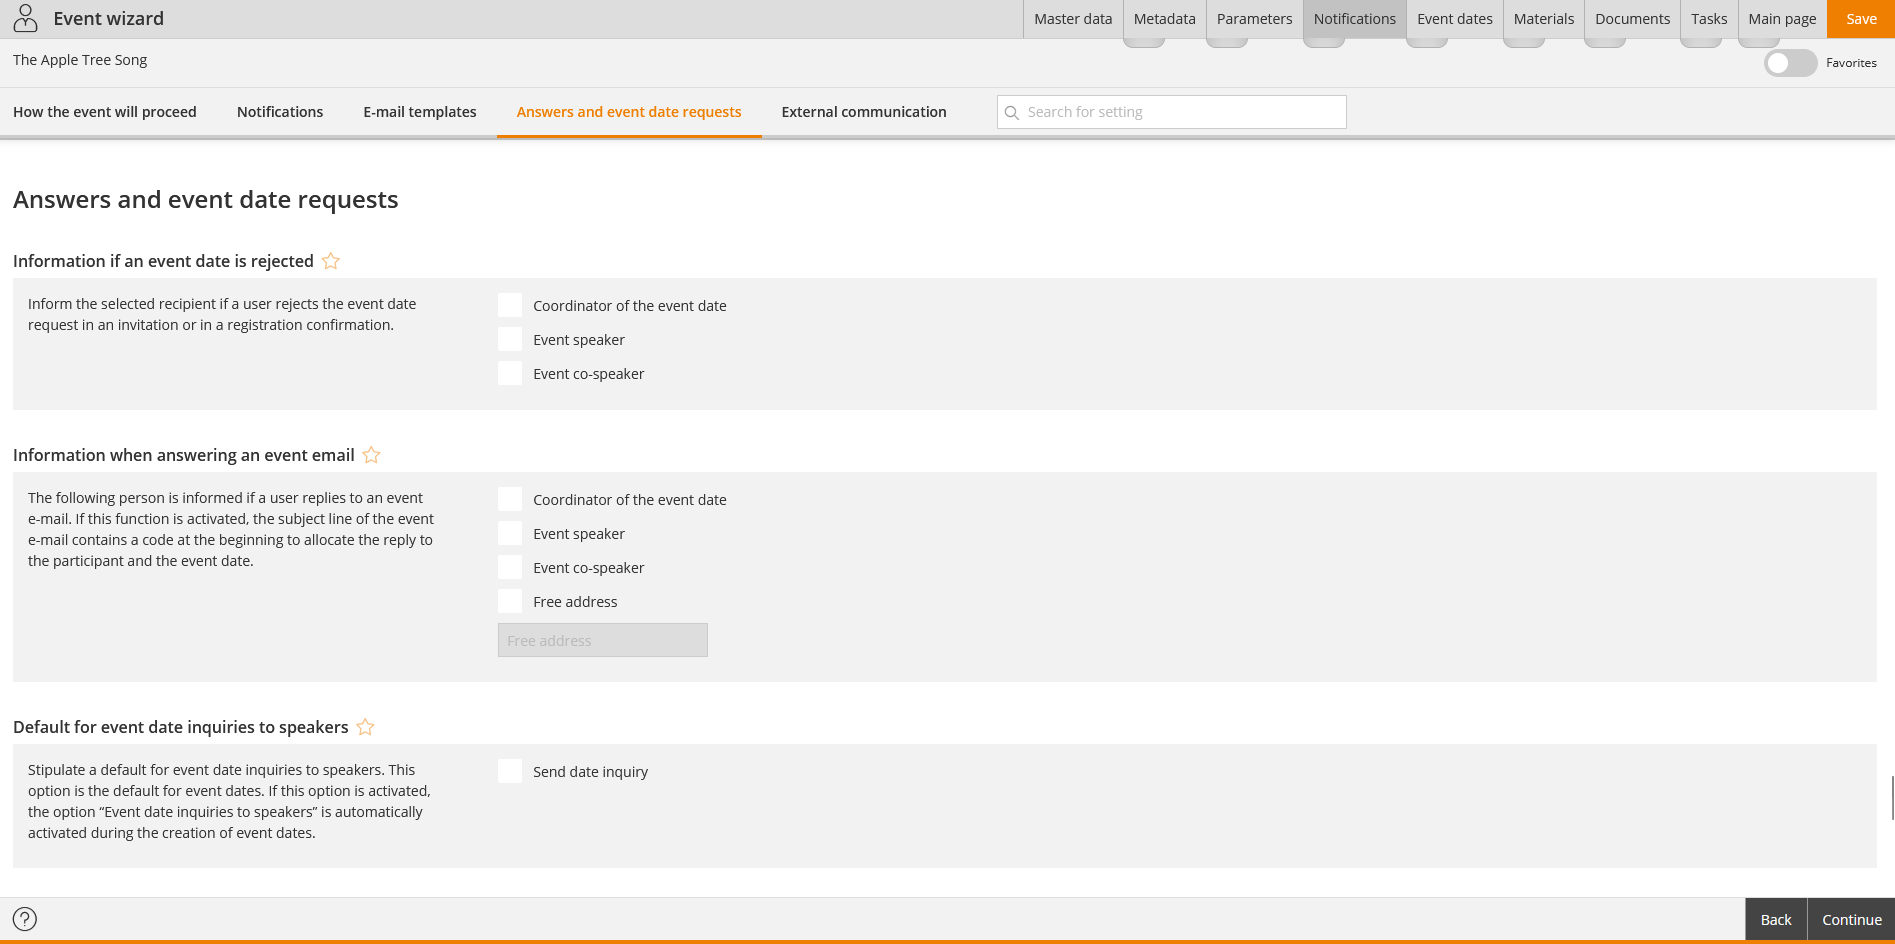
Information if an event date is rejected
Define that the coordinator of the event date, the event speaker and/or the event co-speaker should be informed when a user has rejected the date inquiry of an invitation or the date inquiry of a confirmation of registration.
Notifications regarding the event date deregistration if an event date was rejected will be sent if the system setting „seminar.allowDeregistrationViaical“ is set to „true“, because this activated system setting triggers the deregistration of the participant from the event date group if he/she has rejected an iCal in a confirmation of registration or an invitation e-mail.
Information when answering an event e-mail
The following person is informed if a user replies to an event e-mail. If this function is activated, the subject line of the event e-mail contains a code at the beginning to allocate the reply to the participant and the event date. Set a check mark for:
- Coordinator of the event date
- Event speaker
- Event co-speaker
- Free e-mail address
Default for event date inquiries to speakers
Stipulate a default for event date inquiries to speakers. This option is the default for event dates. If this option is activated, the option “Event date inquiries to speakers” is automatically activated during the creation of event dates. If required set the check mark Send date inquiry.
Recipients of event date inquiries
Select the recipient/recipients of the event date inquiries. Event date inquiries are sent to the selected speakers if the option “Event date inquiries to speakers” is activated in the event date wizard. If important changes are subsequently made in the event date (e.g. adjustments to the starting or end time and/or selection of a different venue), updates are sent to the selected speakers.
If required set the check mark:
Notification of speaker’s response
Determine who is to be informed about a speaker’s response to an event date invitation. If required set the check mark for:
- Owner of the event and/or
- Coordinator of the event date
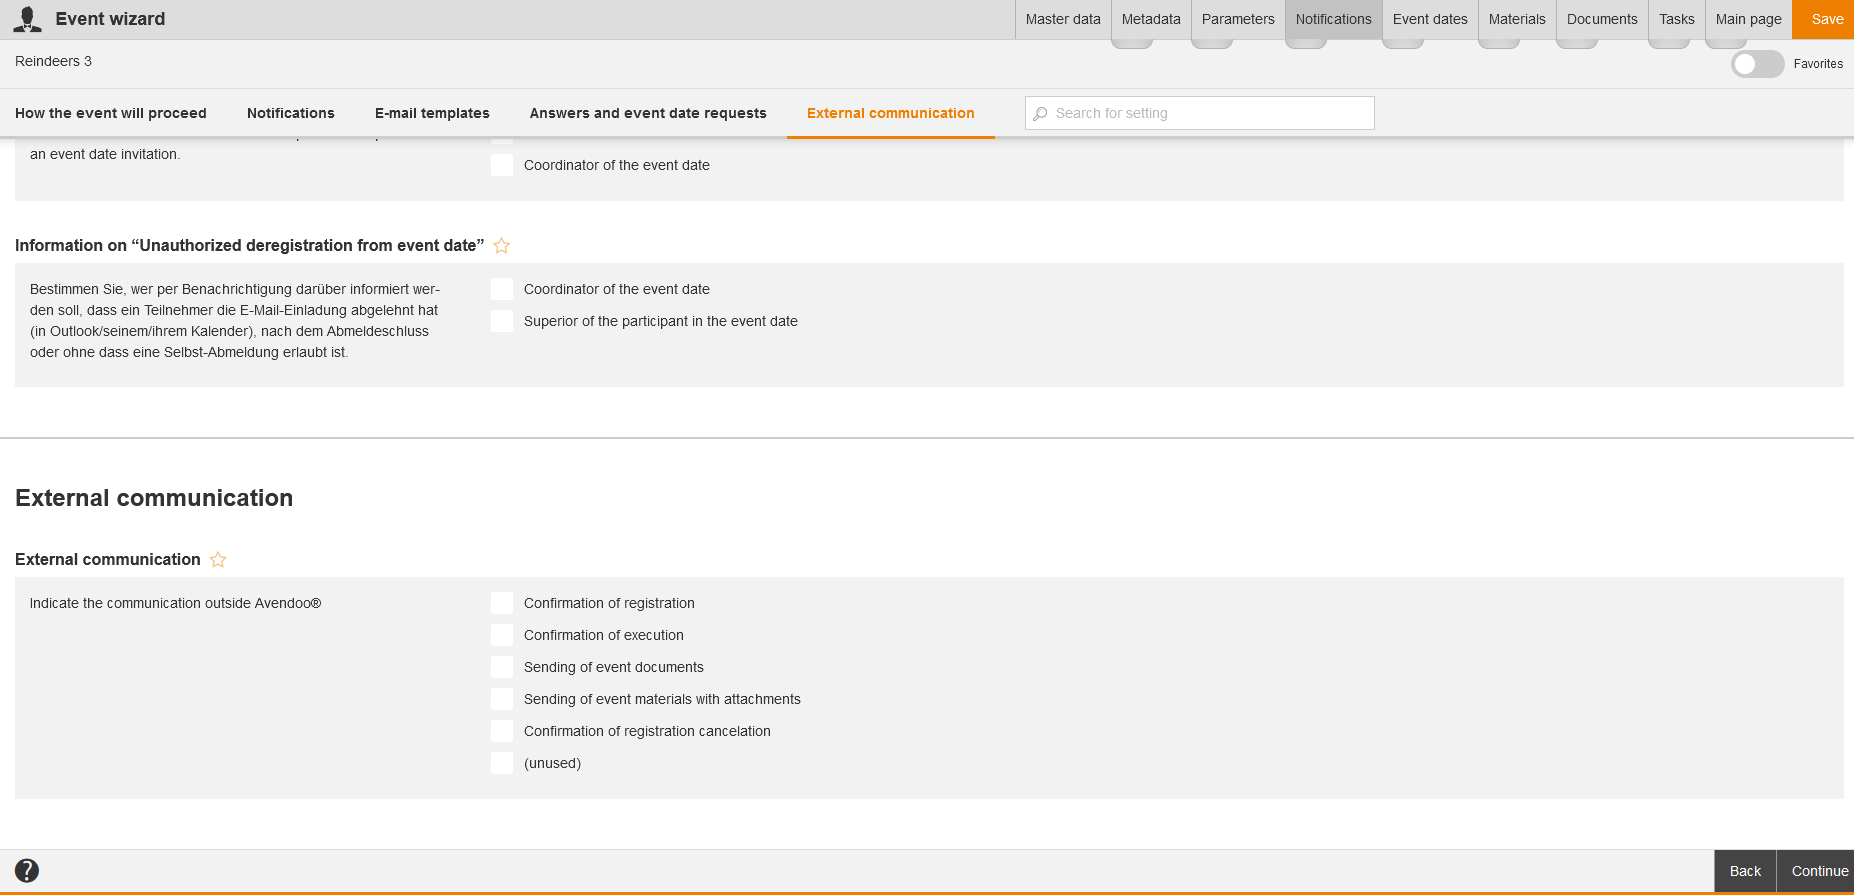
Information on “Unauthorized deregistration from event date”
Determine who is to be informed by a message that a participant turned down the e-mail invitation (in Outlook/in his/her calendar) after the deregistration deadline or without a self-deregistration being allowed. Set a check mark if required:
- Coordinator of the event date and/or
- Superior of the participant in the event date.
External communication
Indicate the communication outside Avendoo® . If required set the following check marks:
- Confirmation of registration
- Confirmation of execution
- Sending of event documents
- Sending of event materials with attachments
- Confirmation of registration cancelation
- (unused)
If you got questions just contact our Avendoo® support team.
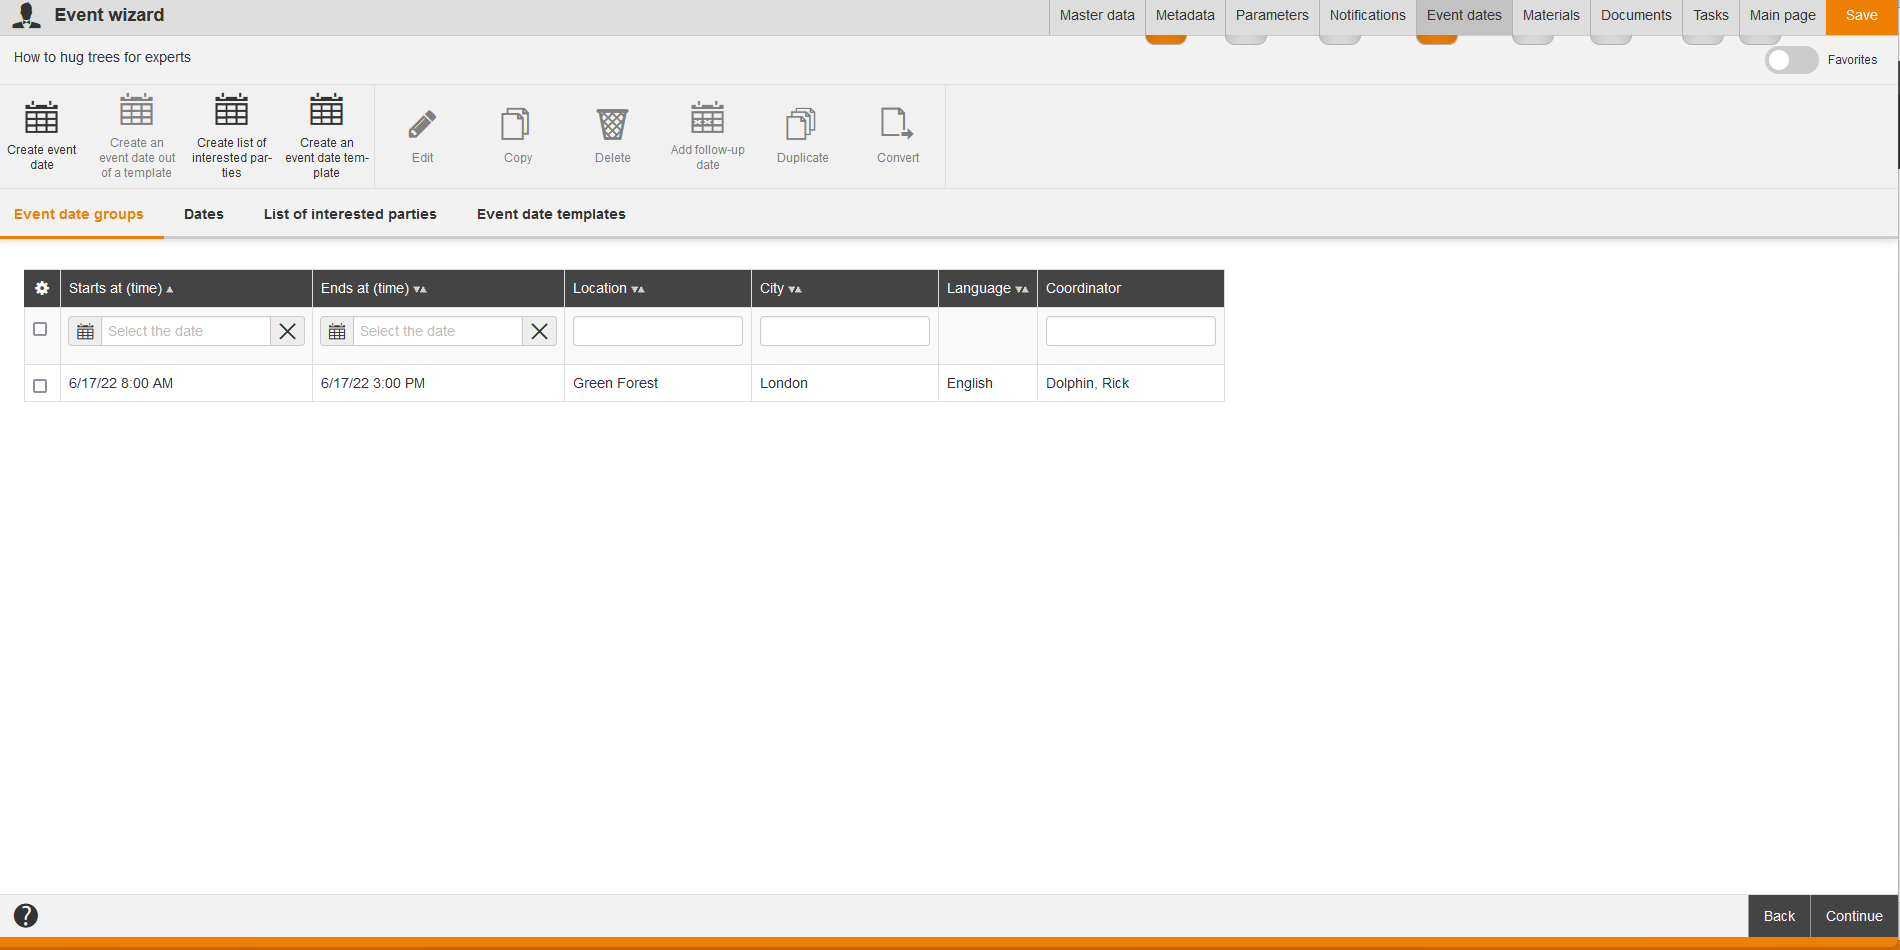
Event dates
The tab Dates is subdivided into two areas. In the upper area you can select diverse functions for an event. In the lower area you see the sub tabs Event date groups, Dates, Lists of prospectives and Event date templates with the corresponding tables.
Via the entry fields you can search in the single table lines for event details or you can sort the view via the buttons. You see follow-up events via the icon. If there is a date conflict you see also the event date participations.
For further information about the API for creating and editing event dates and lists of interested parties contact our support team.
Via click on the icon in the first column of the table you can configure the columns of the table. You can add or remove the following columns (the available columns on the appropriate sub tabs are shown in brackets in the list of the dialog window Configure column view):
- Title (only on sub tab Event date templates)
- Event ID
- Starts at (time) (sub tabs Event date groups and Dates)
- Time zone for starting date (not shown on the sub tab List of interested parties)
- Ends at (time) (sub tabs Event date groups and Dates)
- End date (location) (sub tabs Event date groups and Dates)
- Time zone for end date (not shown on sub tab List of interested parties)
- Location
- City
- Language
- Coordinator
- Event speakers
- Price (not shown on sub tab List of interested parties)
- Participant (sub tabs Event date groups and Dates)
- Waiting list (sub tabs Event date groups and Dates)
- Min (Minimum number of participants)
- Max (Maximum number of participants)
- Functions
- Room
- Status (not shown on sub tab List of interested parties)
- Documents (not shown on sub tab List of interested parties)
- Pre-event task date (sub tabs Event date groups and Dates)
- Post-event task date (sub tabs Event date groups and Dates)
- Creation date (sub tab Event date templates)
- Learning time (sub tabs Event date groups and Dates)
- IDD time (not shown on the sub tab List of interested parties)
- Event date description (not shown on the sub tab List of interested parties)
- Description of event date groups (not shown on the sub tab List of interested parties)
- External reference (not shown on the sub tab List of interested parties)
- External reference type (not shown on the sub tab List of interested parties)
You get the event date groups displayed with Event ID, Starts at and Ends at (time), Starting date (location), Time zone for starting date and end date, City, Language and Coordinator.
Further information about mass processing of event date groups you find under Create event date.
Create event date
Click on this icon for creating a new event date via the Event date wizard. The dialog window Event date wizard opens for defining details of the event date. There is no more the Event wizard opened in the background.
Create an event date template
Click on this icon for creating a new event date template via the Assistant for event date templates. The dialog window Assistant for event date templates opens for defining details for the event date template.
Create an event date out of a template
Click on this icon for creating one or more new event dates out of a template.
Create list of interested parties (formerly: Preliminary event date)
Click on this icon if you want to create a list of interested parties. This function is for planning already events without defining the final date.
Edit
If you select one or more event dates in the table, you can edit this/them by clicking the button Edit. The Event date wizard opens.
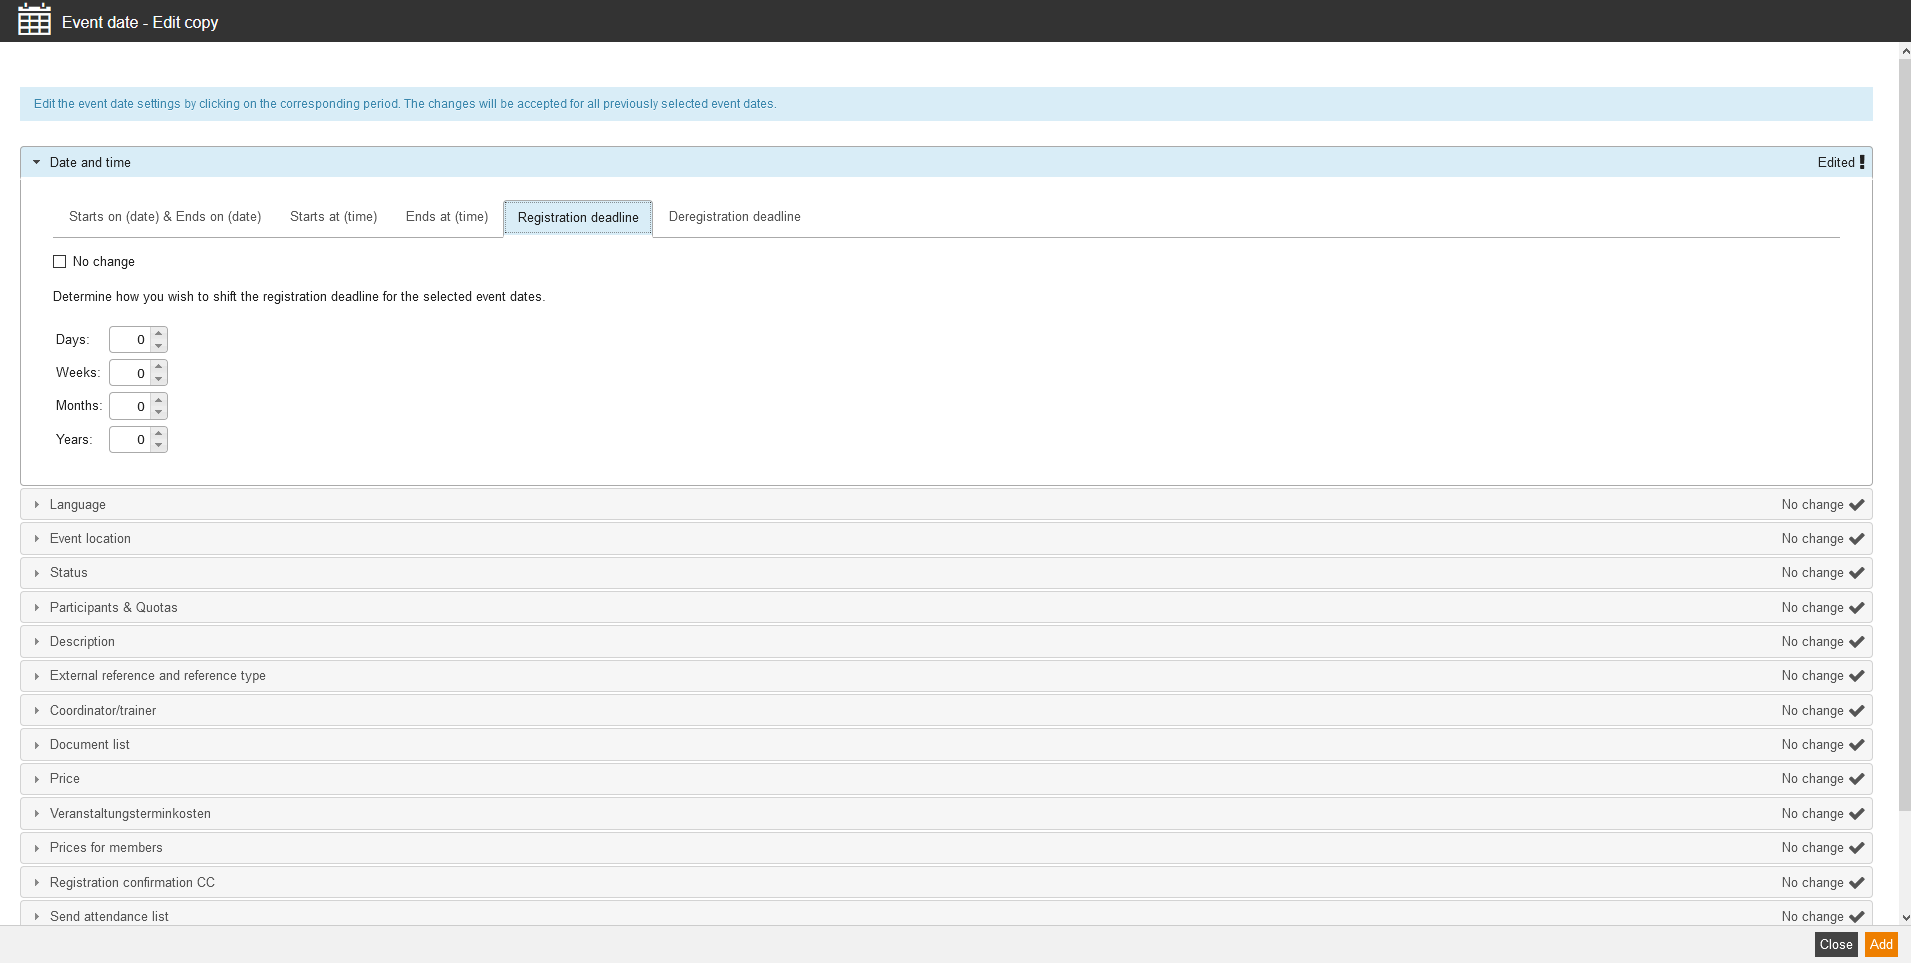
If you want to edit multiple event dates simultanously, set the check boxes before the favored event dates and then click on the button Edit. The dialog window Event date opens.
Copy
Select an event date in the table and then click on the button Copy. The Event date wizard opens.
If you want to have alternative event dates of an event, you can simply copy the appropriate event date via this icon. Afterward you adjust date, time, event speaker, room etc. directly in the copy of the event date and save the new event date. This is in contrary to the follow-up date independent of other event dates.
Delete
If want to delete an event date, select the appropriate event date in the table and then click on the button Delete. To confirm finally the deleting of this event date, click on the button Delete in the dialog window Delete.
Add follow-up date
Follow-up dates are parts of events series. You can offer event dates with nearly same content as events series. Therefore create a first event date and add for example three further event dates as follow-up dates. The participants, who are registered to main event date (first event date), are automatically participants of the follow-up dates. Thus follow-up dates can only be added to an already created event date. In the overview on the tab Dates are the main event dates bold marked, follow-up dates are not bold.
Select the favored event date in the table and then click on this icon. The Event date wizard opens.
Duplicate
The function Duplicate is only available if you have selected an event date. Via click on this icon the Date duplication wizard opens for creating an event date with regular pattern out of the selected event date.
Convert
The function Convert is only available if you have selected a list of interested parties. You can convert it via click on this icon to a real event date inclusive date.
Hide list of interested parties
If appplicable you can hide the list of interested parties to get a better overview. Therefore click on this button.
Options
Under Options you can define the information, which should be displayed for the learner at his/her learning place:
- Show the event speakers
- Show the event price
- Show the list of participants and the free slots for all event dates
- Show the list of participants only for participants and the free slots for all event dates
- Do not show the list of participants but do show the free slots for all event dates
- Show neither the list of participants nor the free slots for all event dates
Materials
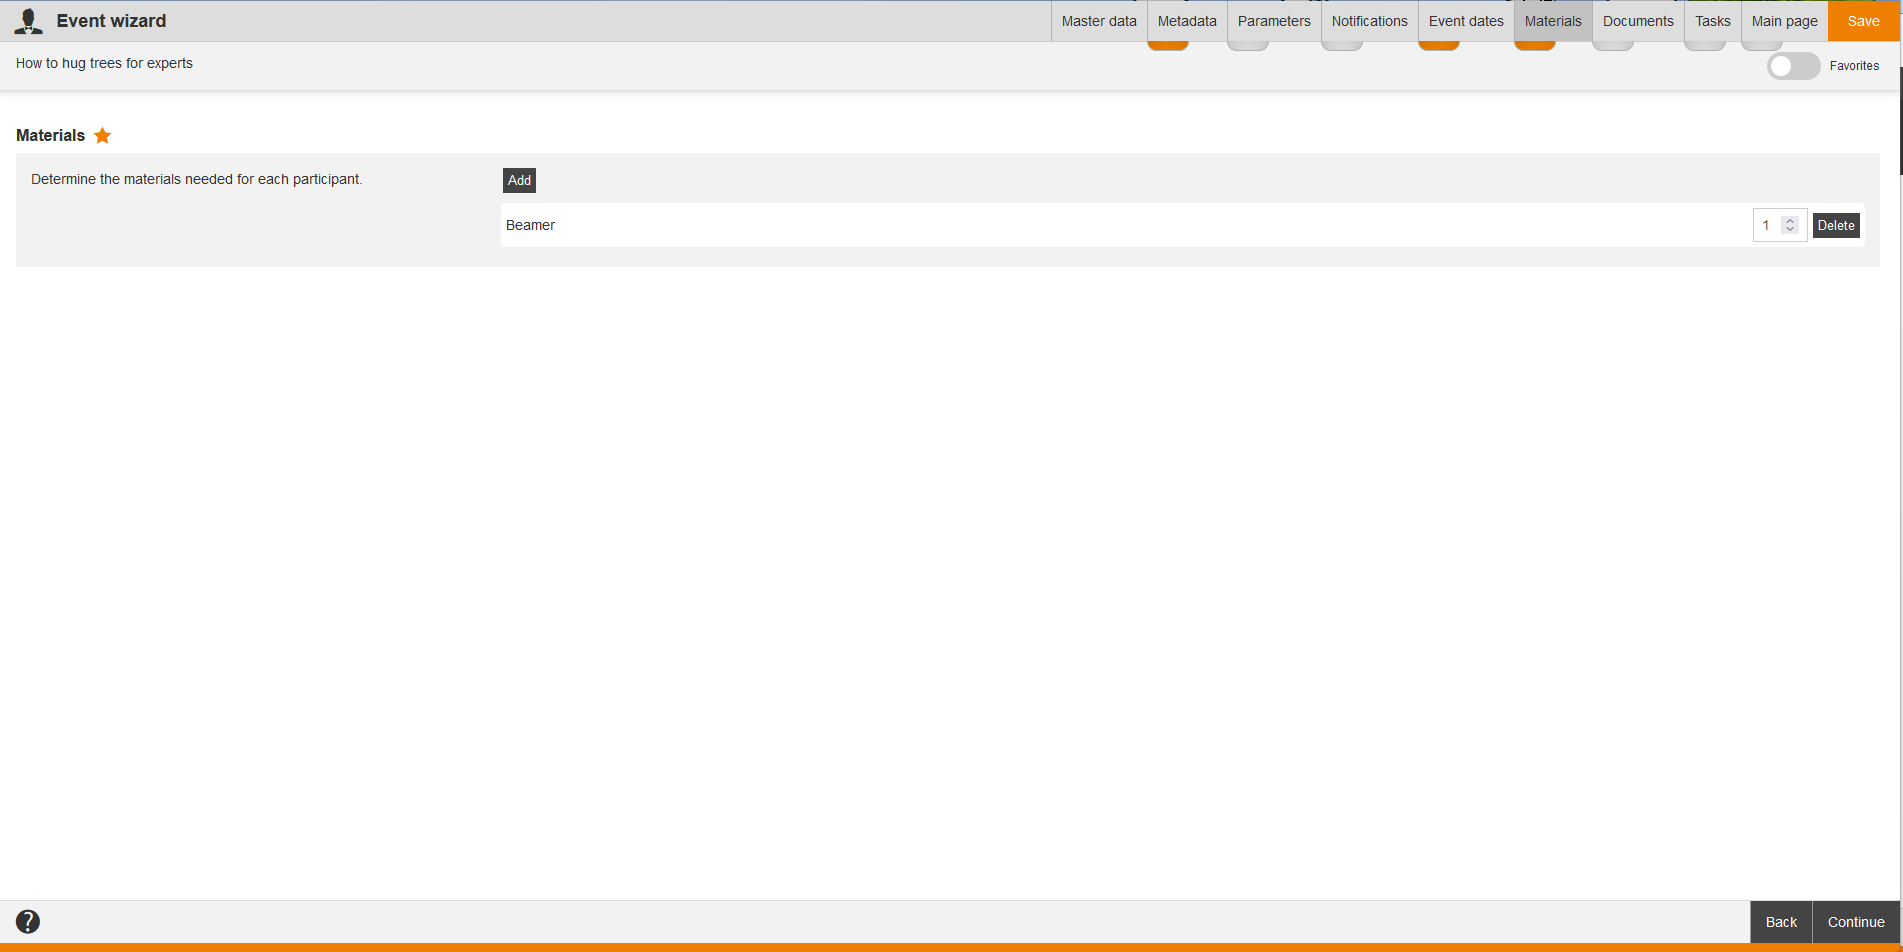
Here you can select the needed materials for an event, for example: books, scripts, exam papers or writing utensils.
Therefore click on the button Add. A new dialog window opens, on which you select available materials or create new materials. To increase or decrease the number of a material, select the appropriate material and define the number via ![]() and
and ![]() on the right side.
on the right side.
You create new materials under Resources → Materials .
Documents
Select the media, which should be displayed as documents for the event date. You can use this document list before the event date for making preparing materials available for example. You can also add a document to the document list after an event date for making edited documents available.
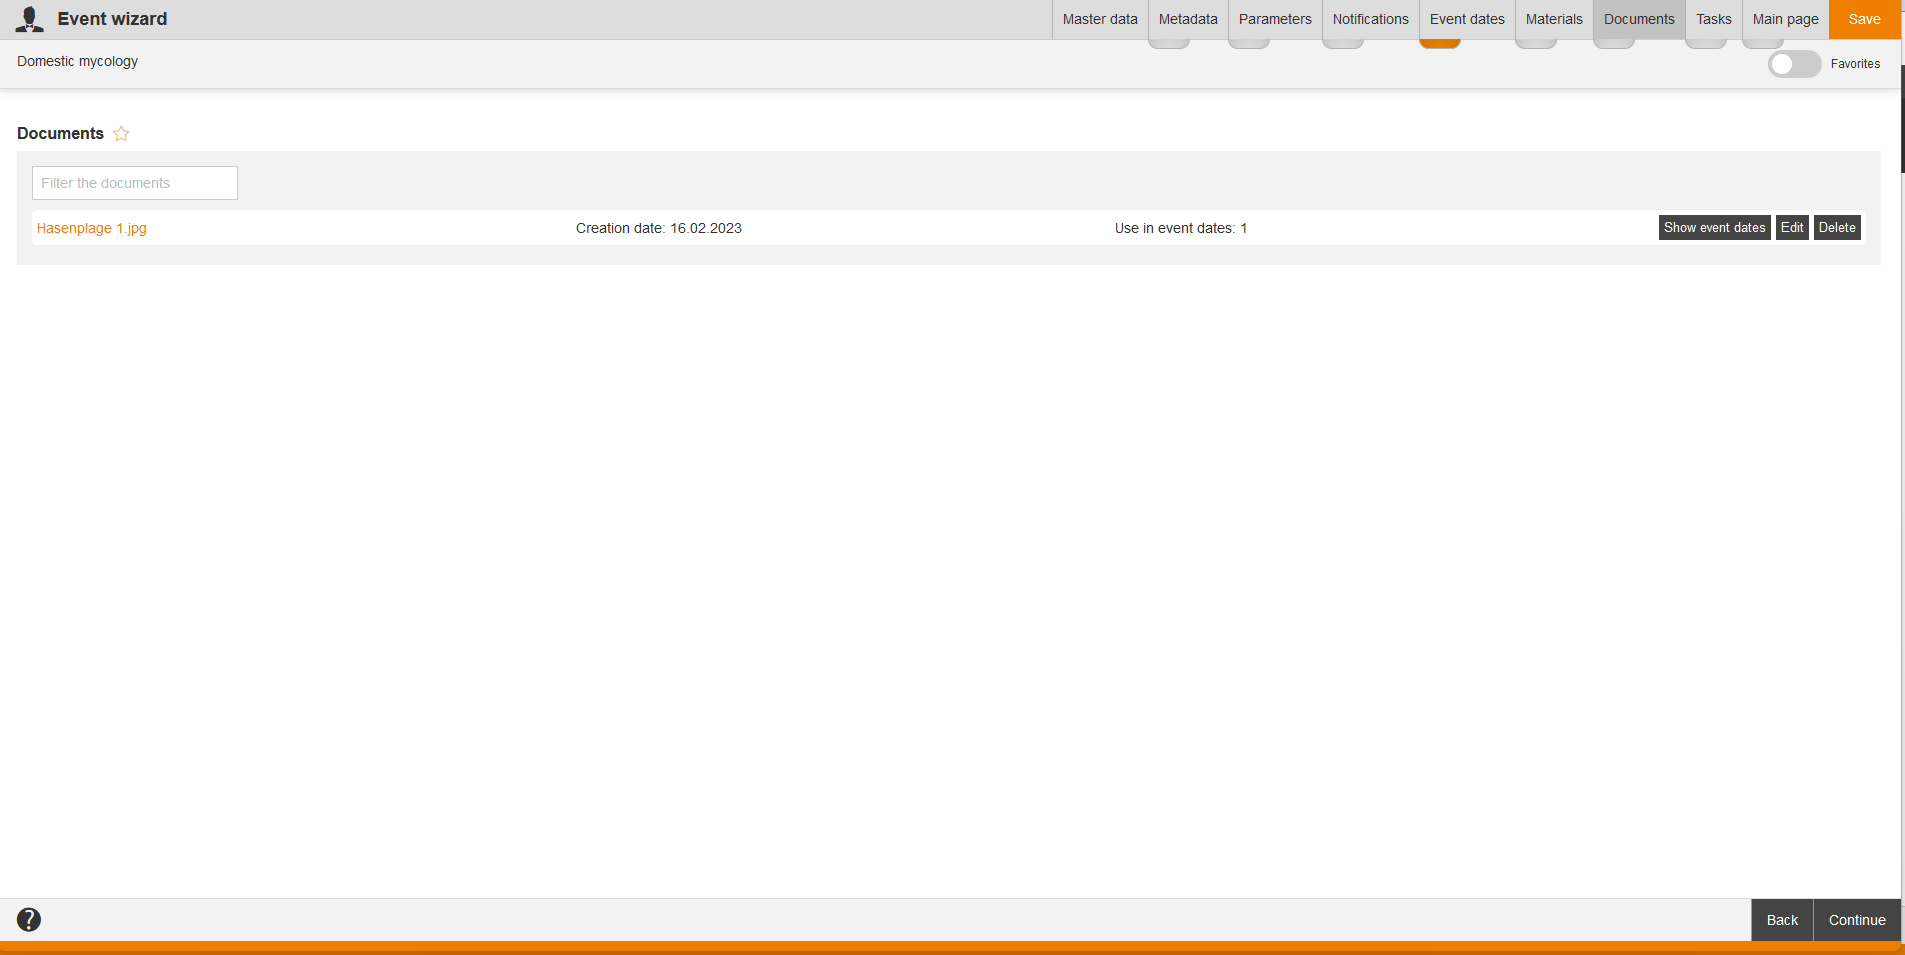
On the tab Documents you see the documents, which belong to an event. To add a document or a file to an event, you have to upload it before in the media center and then you have to add the favored document on the tab Dates (→ Create new event date → Document list). Only then the corresponding data is shown on this tab.
You can display documents depending on the selected event date. You can edit or delete the documents, too.
Also you can filter by the title of the document.
Edit
Opens the central media center for editing or replacing the medium.
Delete
Deletes the selected medium from the document view.
Document view (Table)
You see all documents in the table, which are in the event included.
Title
Click on the title of the medium for displaying the file or for downloading it. If applicable you can search for certain media via the entry field.
Creation date
Shows the date, on which the medium was created.
Use in event dates
Represents the number of event dates, in which the document is used.
How to add a document list to an event (Quick instruction)
To add a document list to an event, do the following steps:
- Choose Learning content → Events → Create new event. The Event wizard opens.
- Click on the button Create event date on the tab Dates. The Event date wizard opens.
- Scroll to the document list and click on the button Add document. The Media center opens.
- You can select an already uploaded file or you can upload a new file via the button New media.
- After clicking Save you can do the settings for the document. See for more information.
- Then click on the button Apply & Save. You see now the uploaded file on the tab Documents in the Event wizard.
- Select the file and click on the button Show event dates for displaying to which event date the document belongs.
- Switch to the tab Description and select Empty page or a favored design template.
- Click on the button Add document in the editor. Define, how the event documents should be displayed (width, height and scroll bars). Important: If you don’t add this area for the documents there will be displayed no documents, even if there are.
- Click on the button Save and close the Event wizard.
Tasks
Direct task templates
Task template
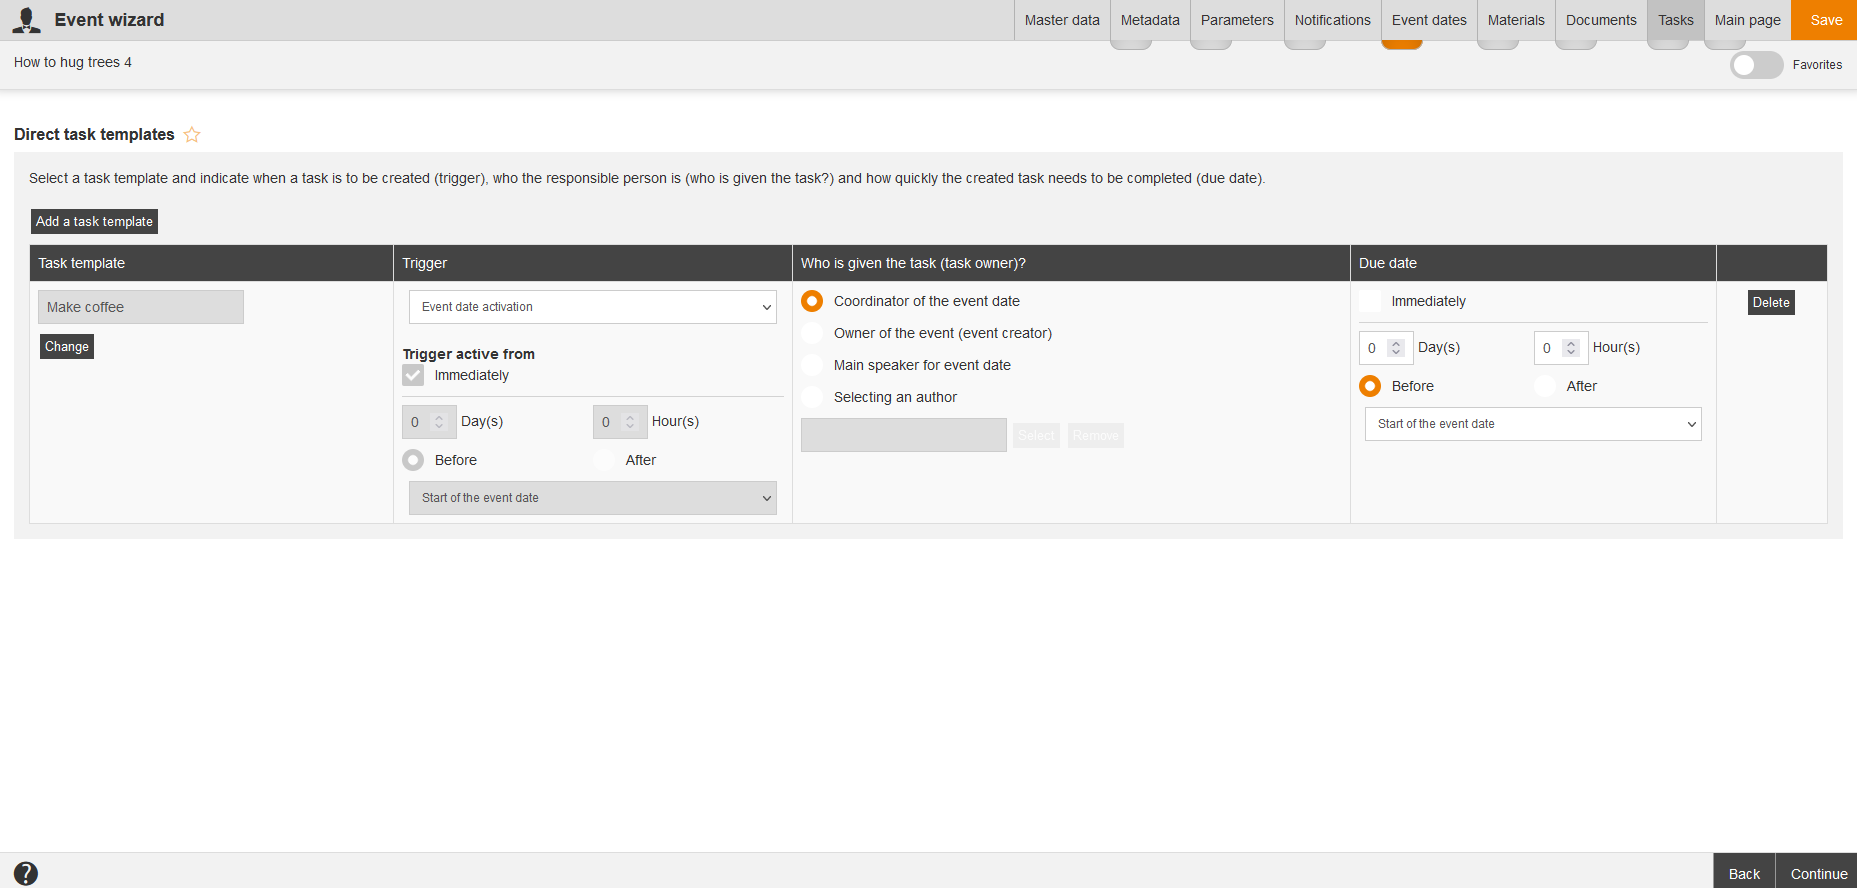
Select a task template and configure the person responsible for it (coordinator, owner, main speaker for event date or select an author) and the due date for the task. You can change the selected task template via the button Change.
Trigger
You can select the following trigger:
- Event date activation,
- Changed food requests,
- Changed overnight stay bookings,
- Substitute participants,
- Registrations,
- Registration cancellations,
- Advance on the waiting list,
- Too few participants,
- Too many participants,
- Event date initializing,
- Event date planning or
- Event date cancelation.
You define by setting the check box, if the trigger is
- immediately active or
- how many hours and days before or after Start of the event date, Registration deadline or Deregistration deadline.
If you have selected the trigger Event date activation, Event date initializing, Event date planning or Event date cancelation, you cannot define Trigger active from, because these triggers are always immediately active from. Via the trigger Event date initializing and Event date planning the coordinator can create and edit tasks, which are before the Event date activiation.
On trigger Event date activation the task is created as the event date status switches from Initialized to Active.
On trigger Event date initializing the task is created as the event date status switches from Planned to Initialized.
On trigger Event date planning the task is immediately created as the author saves the event date and the event date status is Planned.
On trigger Event date cancelation the task is immediately created as the event date status switches from any status to Canceled.
If you’ve selected the triggers Changed food requests, Changed overnight stay bookings, Substitute participants, Registrations, Deregistrations, Advance on the waiting list, Too few participants or Too many participants you can also select before or after closing date for hotel booking. Further information about the Closing date for hotel booking you find under the Event oder Event date wizard.
If you have added task templates with the trigger Registrations and Advance on the waiting list and a participant has been moved up from the waiting list and then will be registered by the waiting list, Avendoo® generates a registrations task and when the participant moves up from the waiting list an advance on the waiting list task.
Who is given the task (task owner)?
Define the responsible person for the task by selecting the appropriate radio button:
- Coordinator of the event date
- Owner of the event (event creator)
- Selecting an author
Click therefore on the button Select, select the appropriate author from the list and confirm with the button Select.
Due date
Define the due date of the task in the following format:
- Hours
- Days
- Addtionally you select, if the due date of the task should be
- before start of the event date, registration deadline or deregistration deadline or
- after start of the event date, registration deadline or deregistration deadline.
Via the button Delete you can delete the task assignment.
