Employees
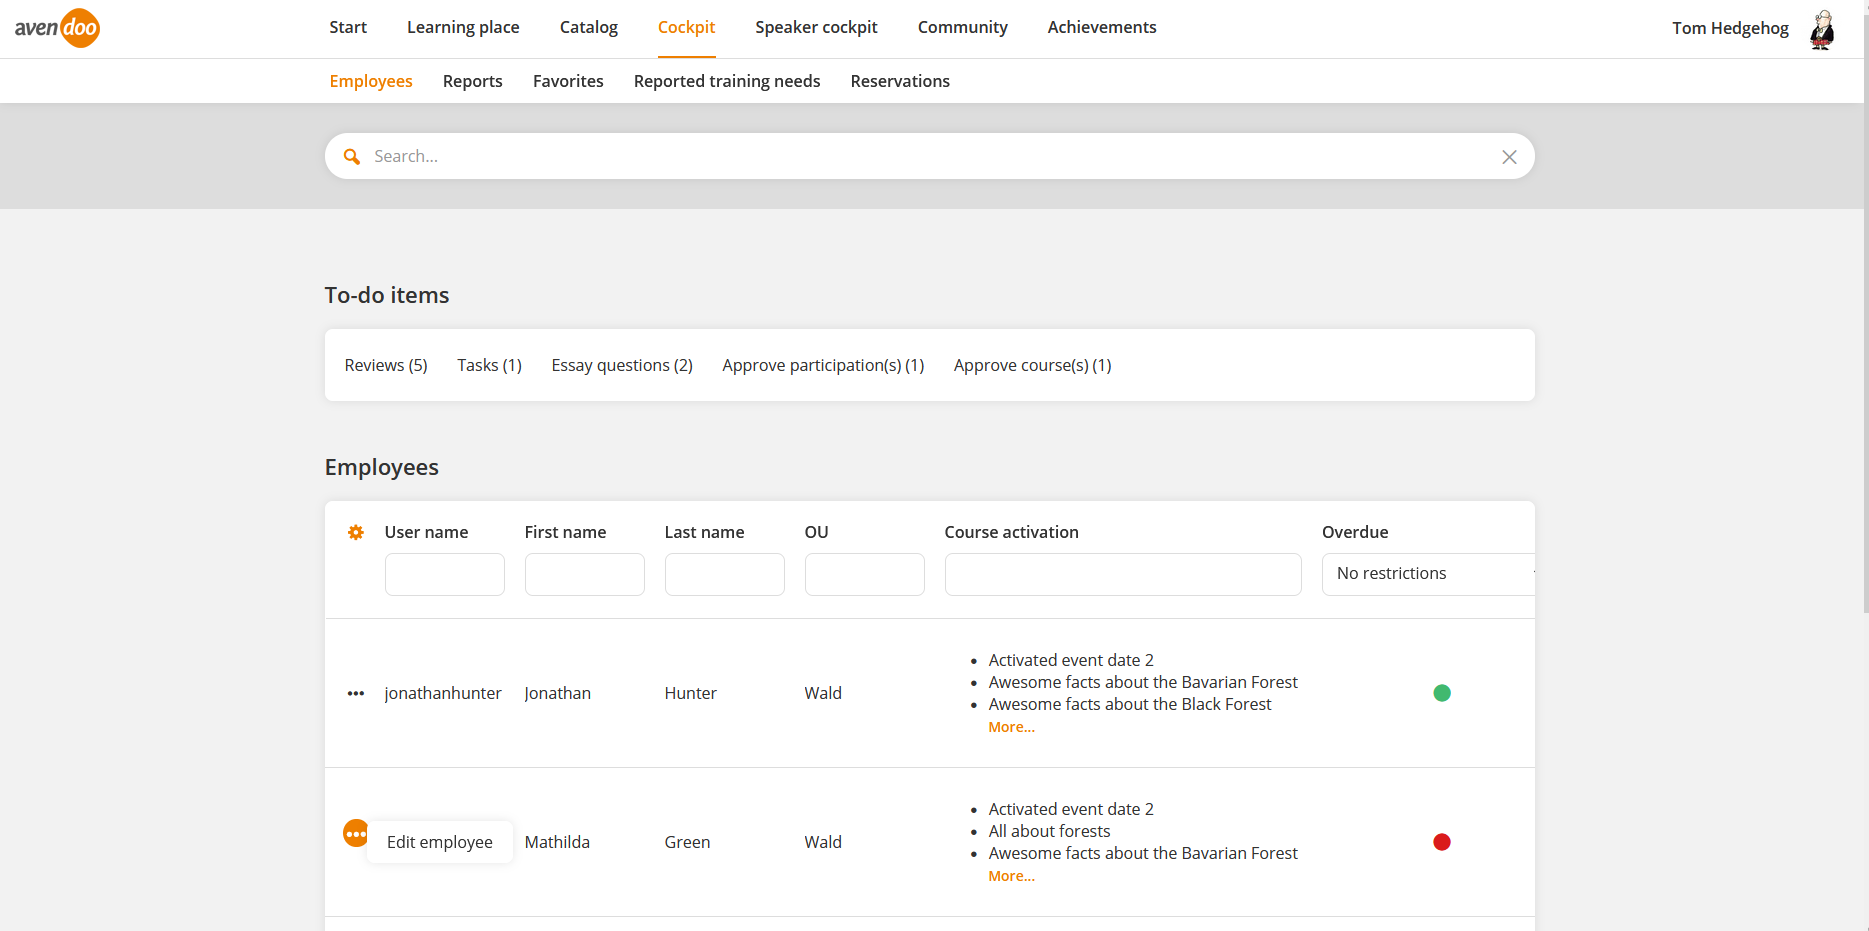
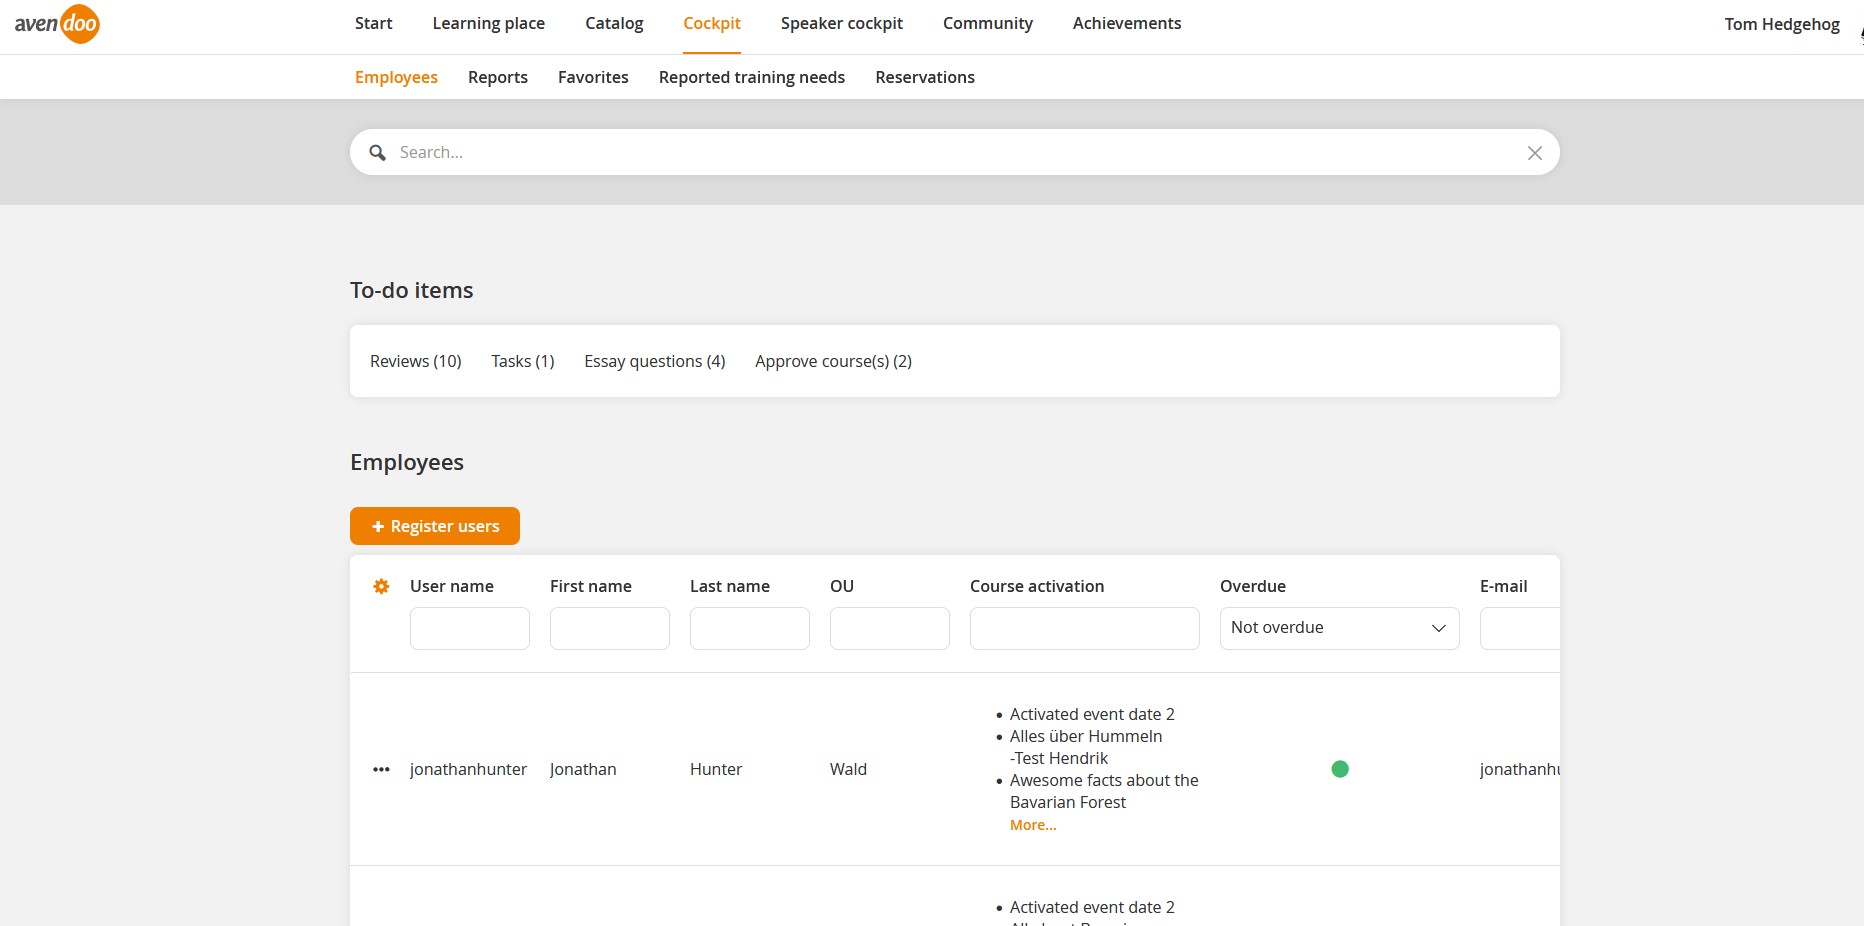
On the tab Employees you see the individual users listed by their user name, first and last name, e-mail address, organizational unit (OU) and course activation. You can edit current training offerings and the training inventory. You get the OU listed, if you assigned the OU to the appropriate user on the sub tab Company of the tab Master data in the User wizard. If you click besides the user name on the left side on the icon
the menu entry Edit employee appears. If you click on this menu entry, the dialog window for editing opens. There are the first and last name of the employee in the title and the tabs Personal data, Address, Billing address, Extended, Website, Personal description, Absences and Memberships. You can only edit these data, at which the author has set the check mark Editable by team leader in the User profile assistant on the tab Parameters. The author has assigned the user profile to the user on the sub tab Extended of the tab Master data in the User wizard. For showing the column User status the author has added this column in the system setting “cockpit.table.employeeslist.columnconfig.allowed” (35=User status) before.
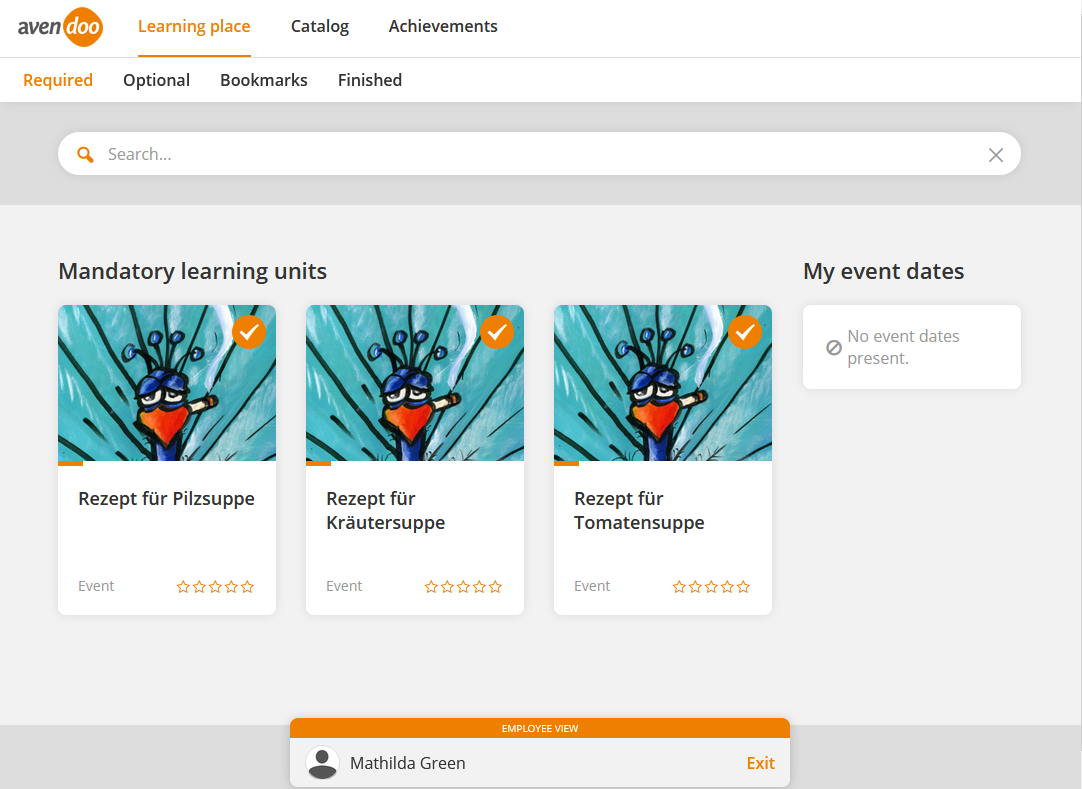
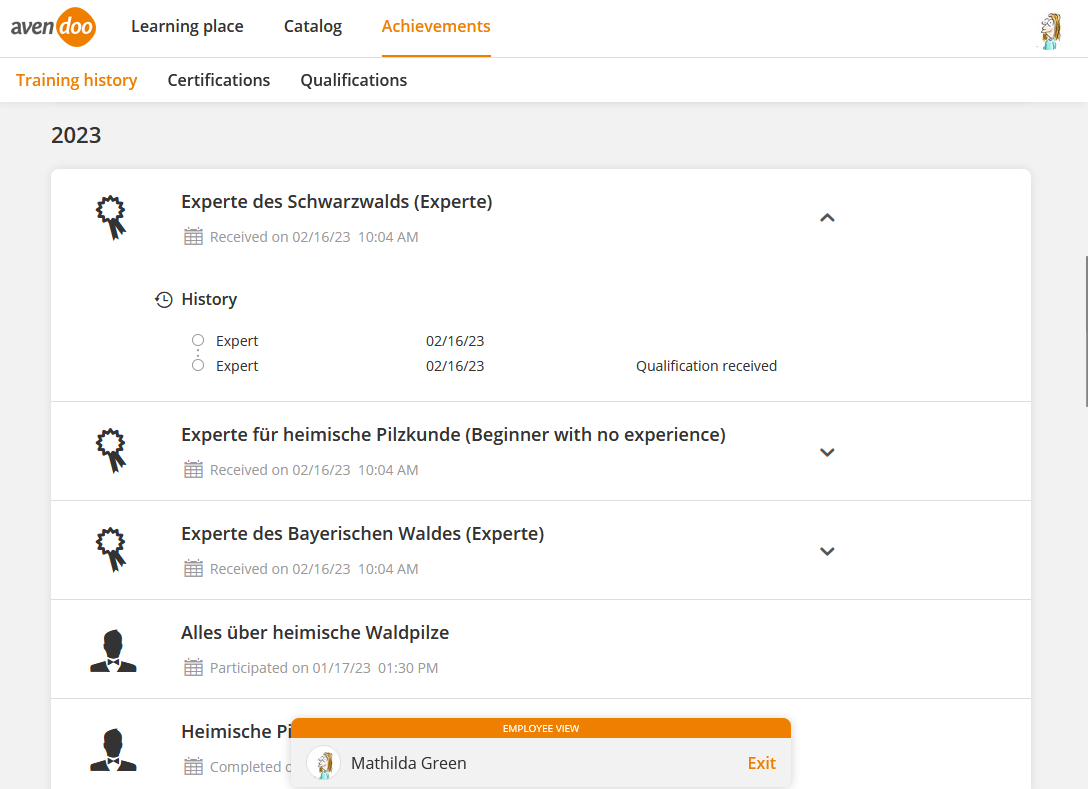
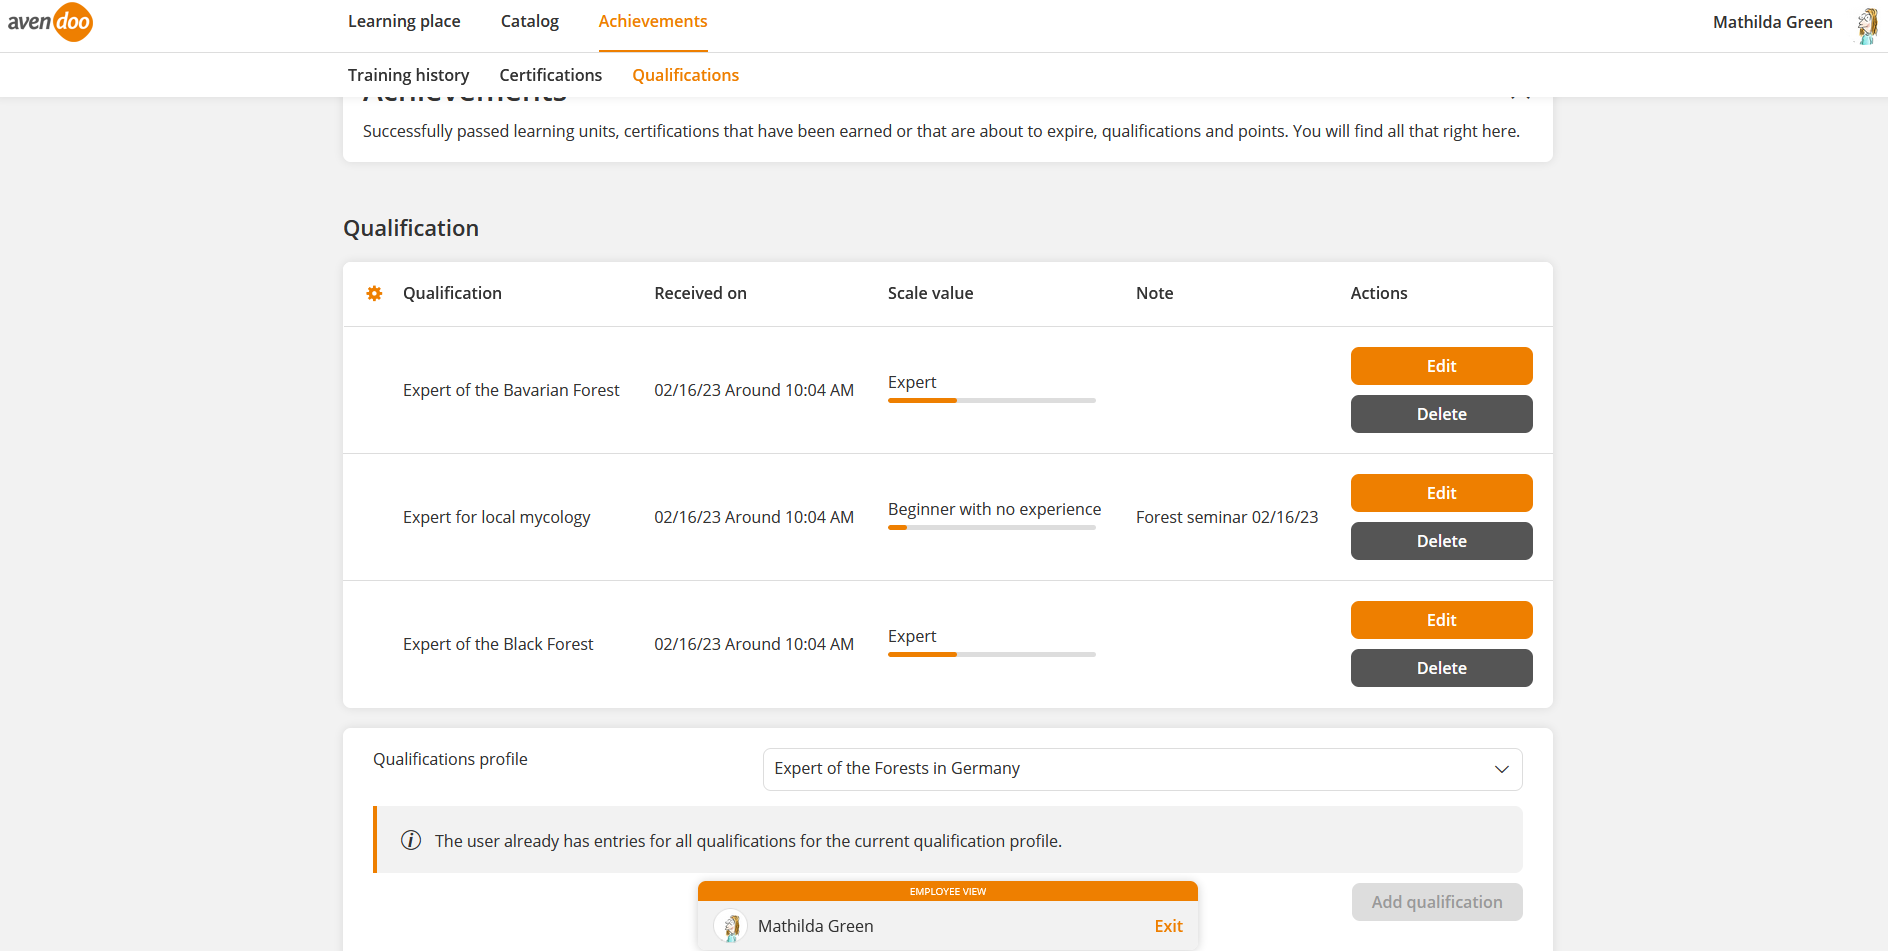
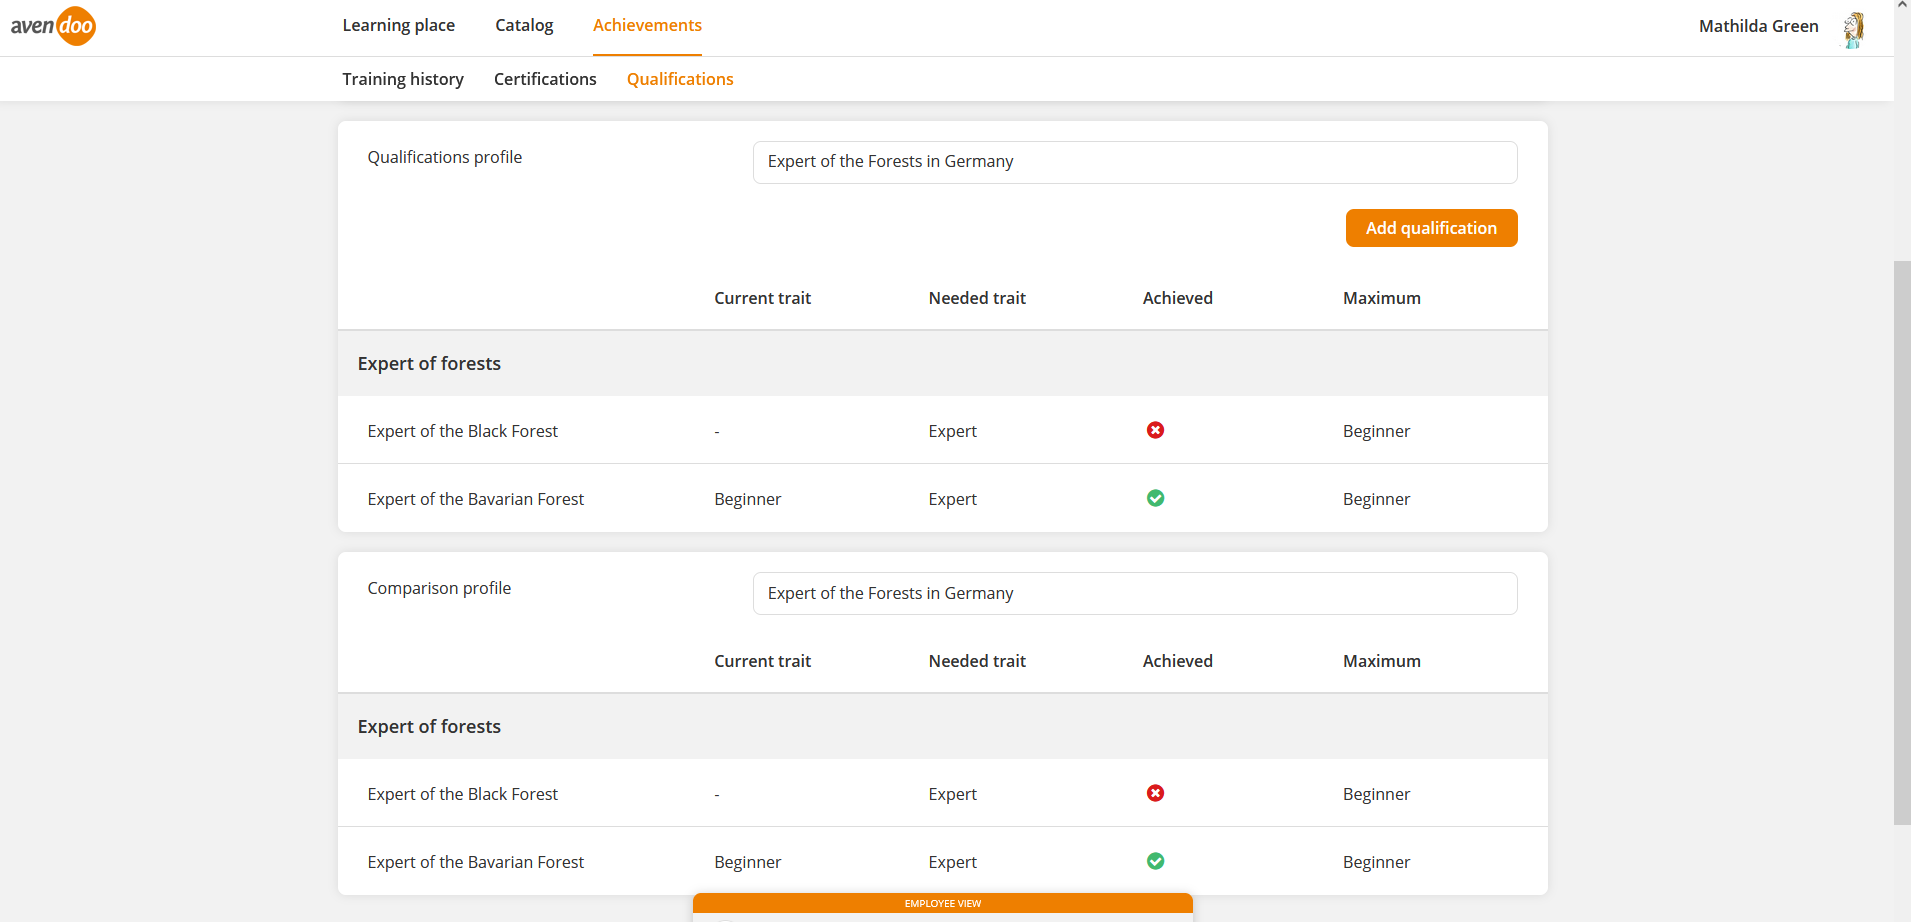
Via click on the user name you get to the following tabs of the Employee view: Learning place, Catalog (if activated)/Search and Achievements of the employee. You see on the tabs Training history and Qualifications of the Achievement page of the employee, if the employee got qualifications with downgrading (see screenshot number 5 and 6). You can edit and delete these qualifications on the tab Qualifications.
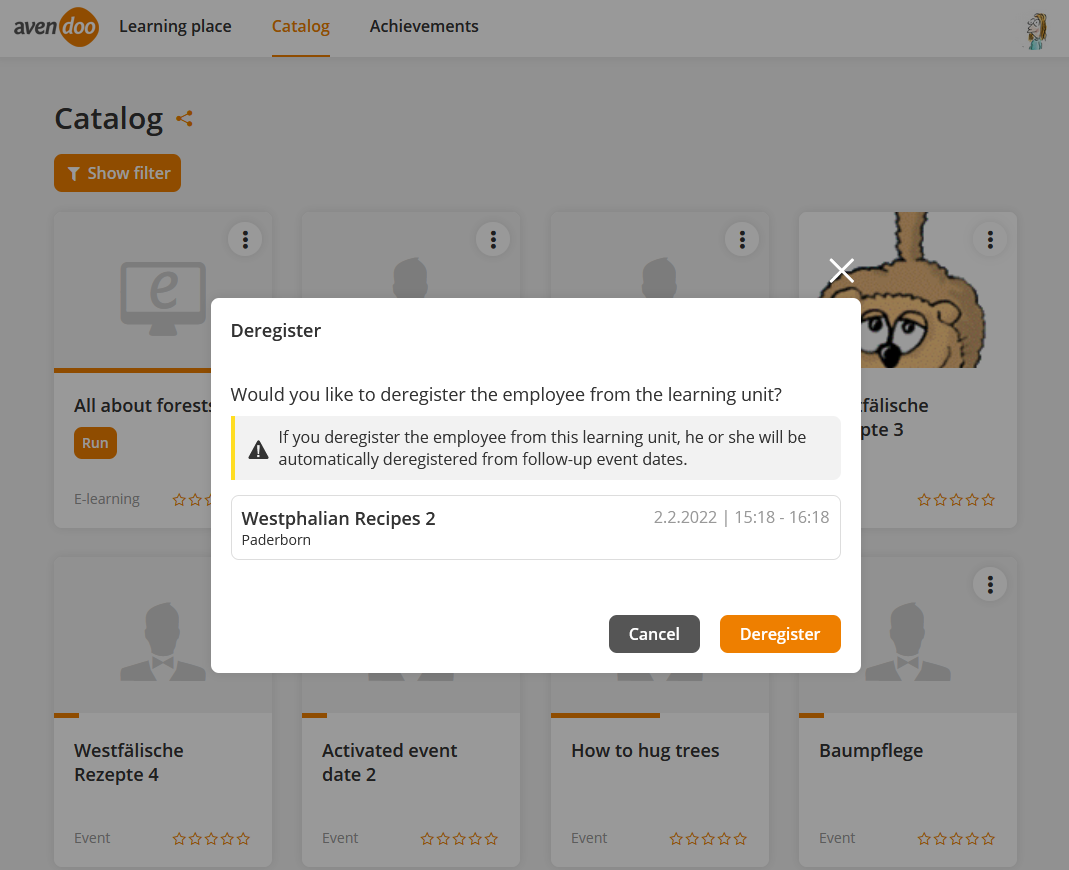
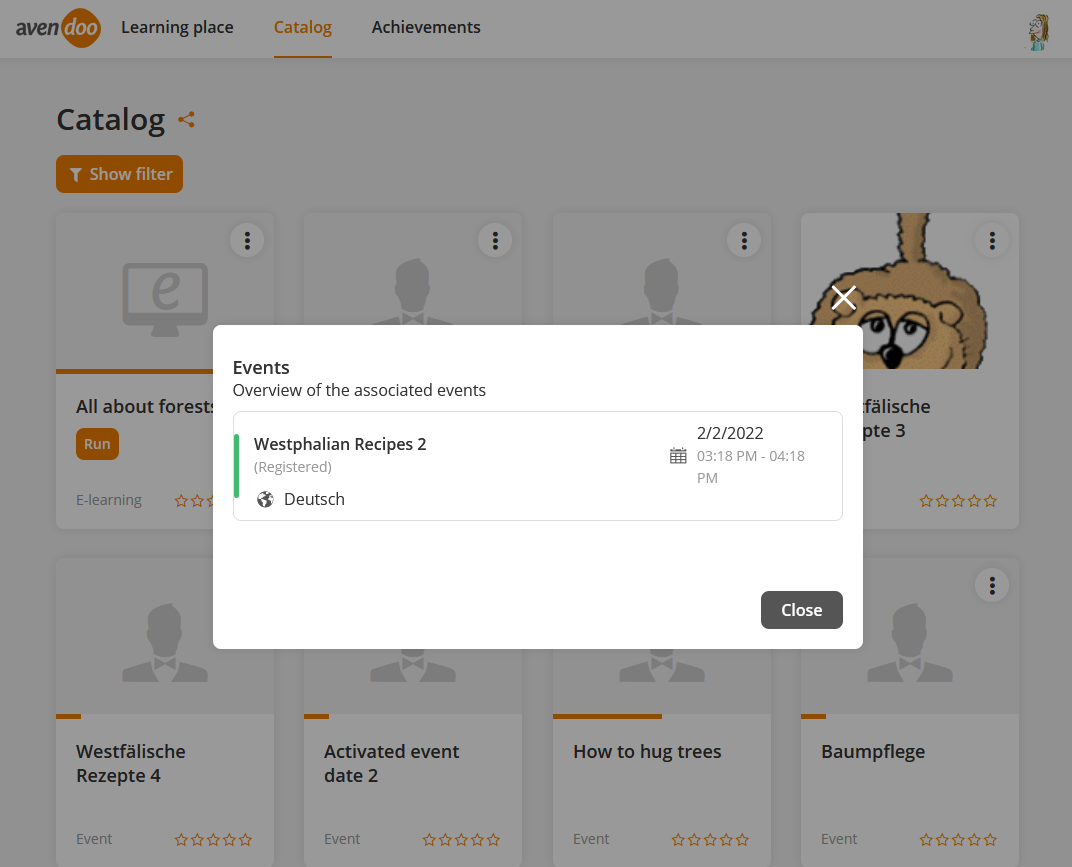
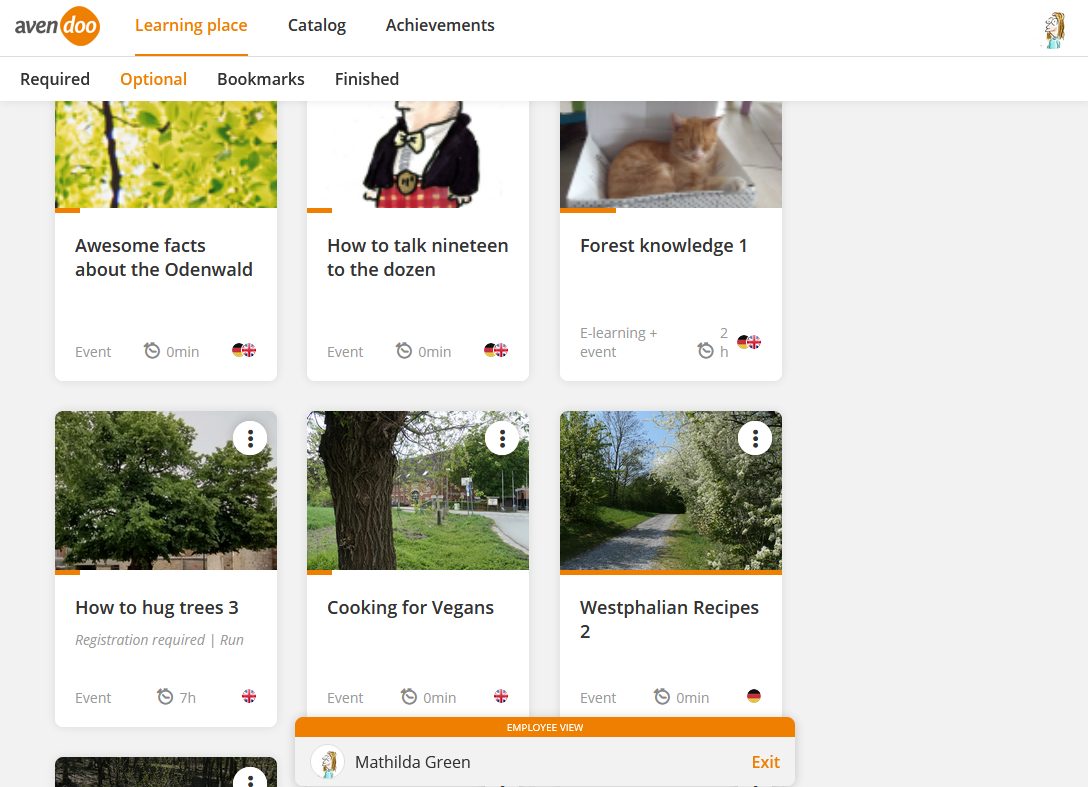
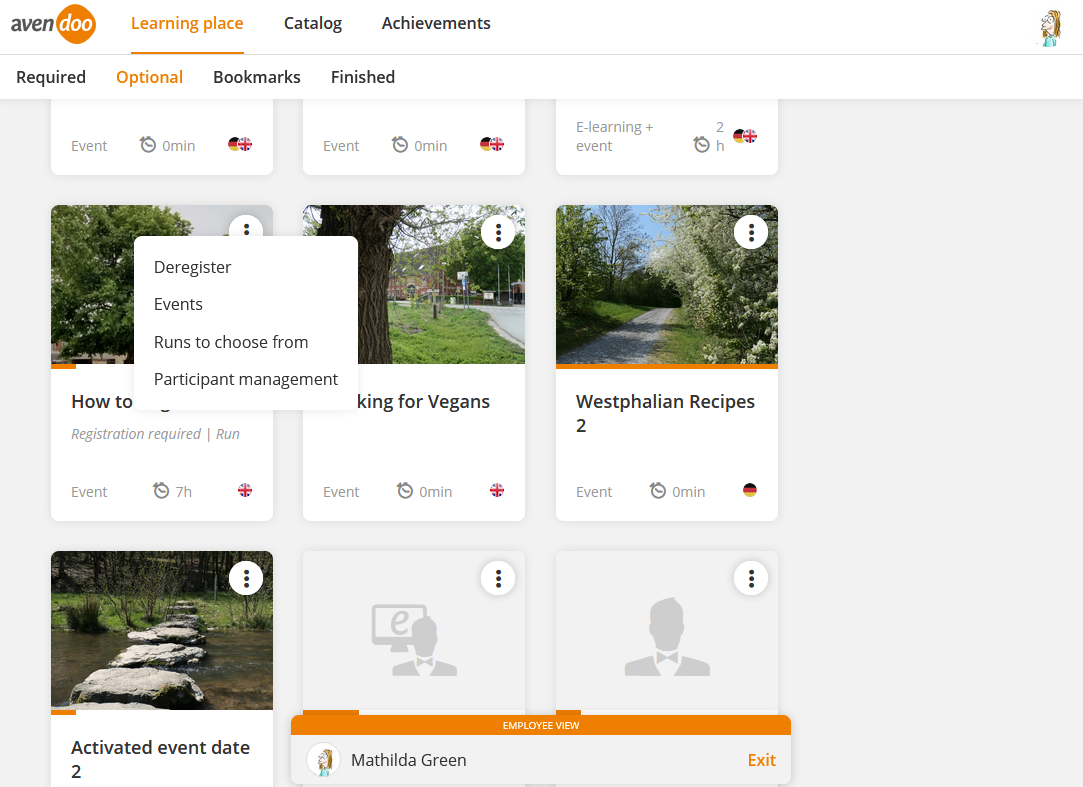
You see in each opened window in which employee’s view you are as a team leader. If you click on the three points of the course tile the context menu on the learning place and/or in the catalog is shown (see screenshot number 4). If you click on Deregister on the tile in the employee view, the dialog window Deregister opens. In this dialog window you can deregister the employee from this course and/or run (see screenshot number 7). If you click on Events in the context menu on the tile in the employee view, the dialog window Events with an overview of the associated events opens (see screenshot number 8). To get on the favored event date page, click on the favored entry. As user team leader you can get via the context menu of the course tile which is marked as Run (see screenshot number 9) also to the run selection (see screenshot number 10). The text Run is shown on the course tile on the learning place and in the catalog of the employee if there’s a run in the course.
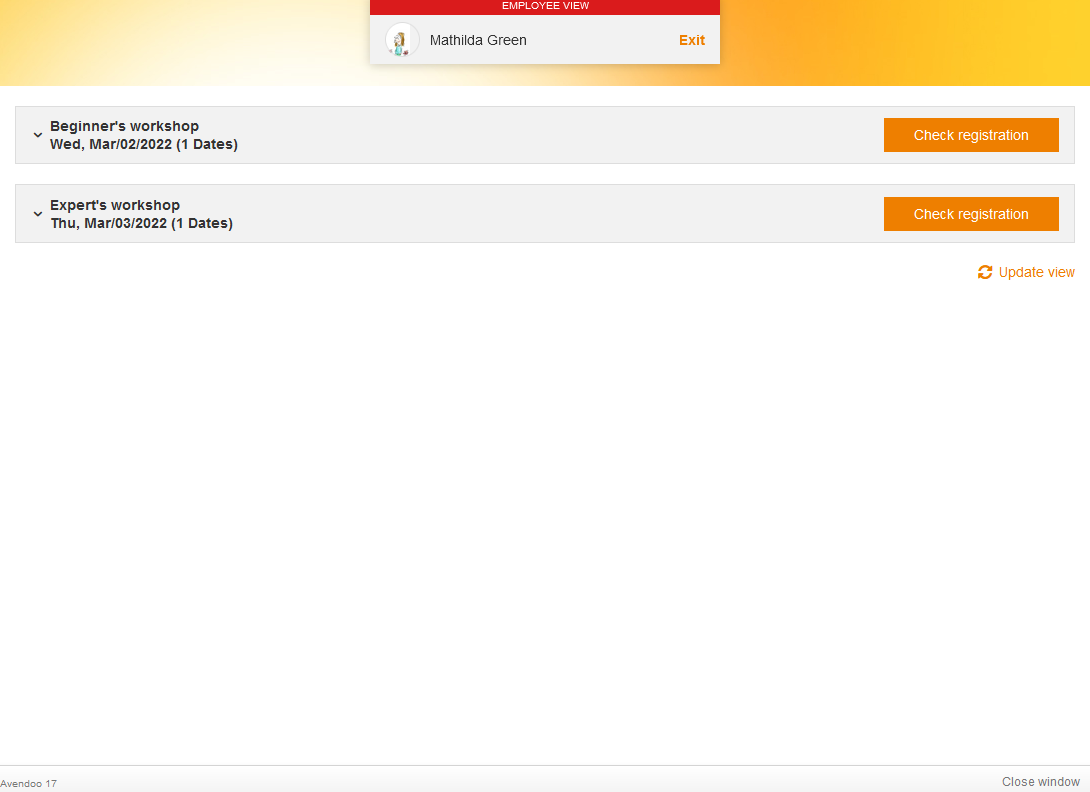
If you click on Runs to choose from, you get to the list of runs (see screenshot number 11), to which the employee is registered. If the run registration is incomplete, this is shown. You can check the deregistration if required. After the successfull check of the deregistration the button Deregister is shown (see screenshot number 12). Also you can show the Details.
If you want to configure a check for forbidden characters in phone numbers, just see under Checking phone numbers for forbidden characters.
If the author has configured the system setting insuranceDistributionDirective and has activated IDD (IDD is only relevant in Germany) in the course activation or in the rule on participants and the IDD ID exists, you see in the view Employees the columns IDD not yet sent, IDD in progress and IDD done in current year of the appropriate employee (see screenshot). Dependent on the limit in the system setting the IDD hours not yet sent are calculated while considering the IDD hours in progress.
Via click on the gear wheel you can add the following columns in the employee view: Overdue, e-mail, learning group, report, personnel number, IDD completed (current year), IDD in progress, IDD not yet sent, region, country, town, street, ZIP code, division, group and company. The configuration for displaying these columns defines the author with the right Edit system settings in the system settings „cockpit.table.employeeslist.columnconfig.default“ und „cockpit.table.employeeslist.columnconfig.allowed“.
Furthermore you can do an import of further OUs for user team leaders. Further information about this import you find here.
Register users
Prerequisites
- The author has assigned you the team leader right Register users via your User account or your permission group.
- If you want to give several registration codes for selection the author has to set the check mark Activate under Selection for team leader on tab Master data in the Registration code wizard for Login or Login and API interface.
- The support-author-mb has set the parameter “allowUserRegistrationByTeamleader” on the individual page of the user area to “true”.
- This function is shown with dependency on the client.
Step by step procedure
- To create own employees via registration code and CSV file, click the button Register users (see first screenshot).
The dialog window Register users opens (see second screenshot). - Under Step 1 Registration code you enter a registration code defined by the author and valid in your client in the field Registration code for one or more employees. The author can use upper and lower cases, numbers and special characters, when he defines the registration code (see second screenshot).
If there are several registration codes activated for selection you can select a registration code from a dropdown list. - Click the button Continue.
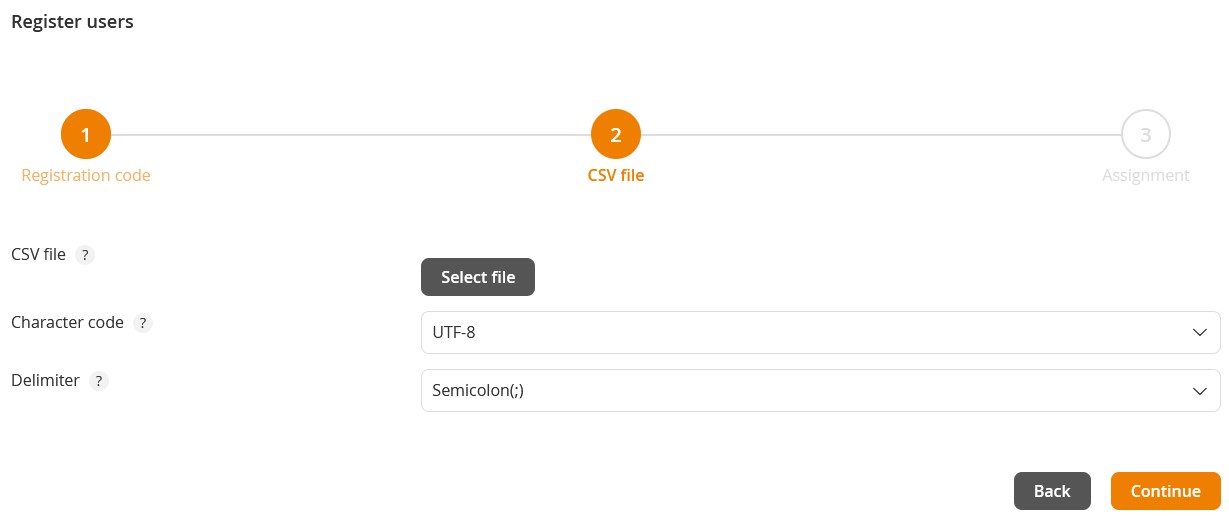
Step 2 CSV file in the dialog window Register users is shown (see third screenshot). If required you can click the button Back. - Now you can add users manually or you can add them via an example file which you first download. This an import of users to add users.
- To add users manually, click the button +add users manually.
You see a table to enter the user data. Mandatory entries are first and last name, and password. - To import a CSV file, click first Download example file.
That file is saved in your download folder. - Adjust that file and save it again.
- Click the button Import via CSV file.
The data is saved automatically in the table. - To add further user, click the button +Add users manually. These users are removable.
- Select between UTF-8 and ISO-8895-1 on Encoding.
- To add users manually, click the button +add users manually.
- To prepare the favored user data for the import, click the button Select file and select your favored CSV file.
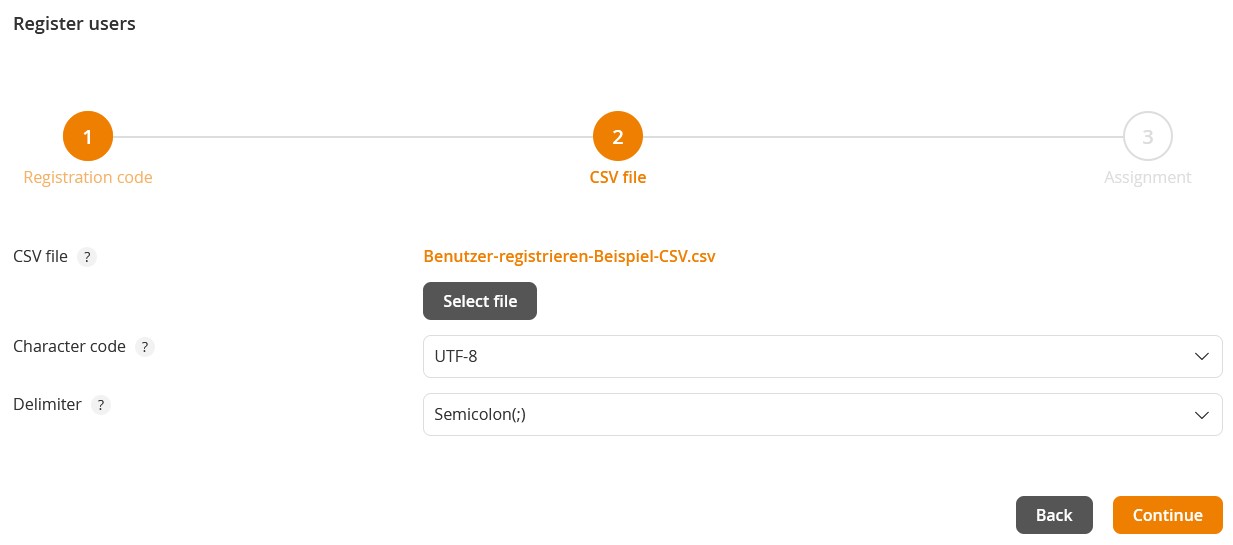
As you’ve confirmed your selection of the CSV file, the file name is shown (see fourth screenshot).
- Select the favored Character code, this means UTF-8 or ISO-8895-1.
- Select the favored Delimiter, this means between Semicolon(;), Comma(,) and Tabulator.
- Click the button Continue.
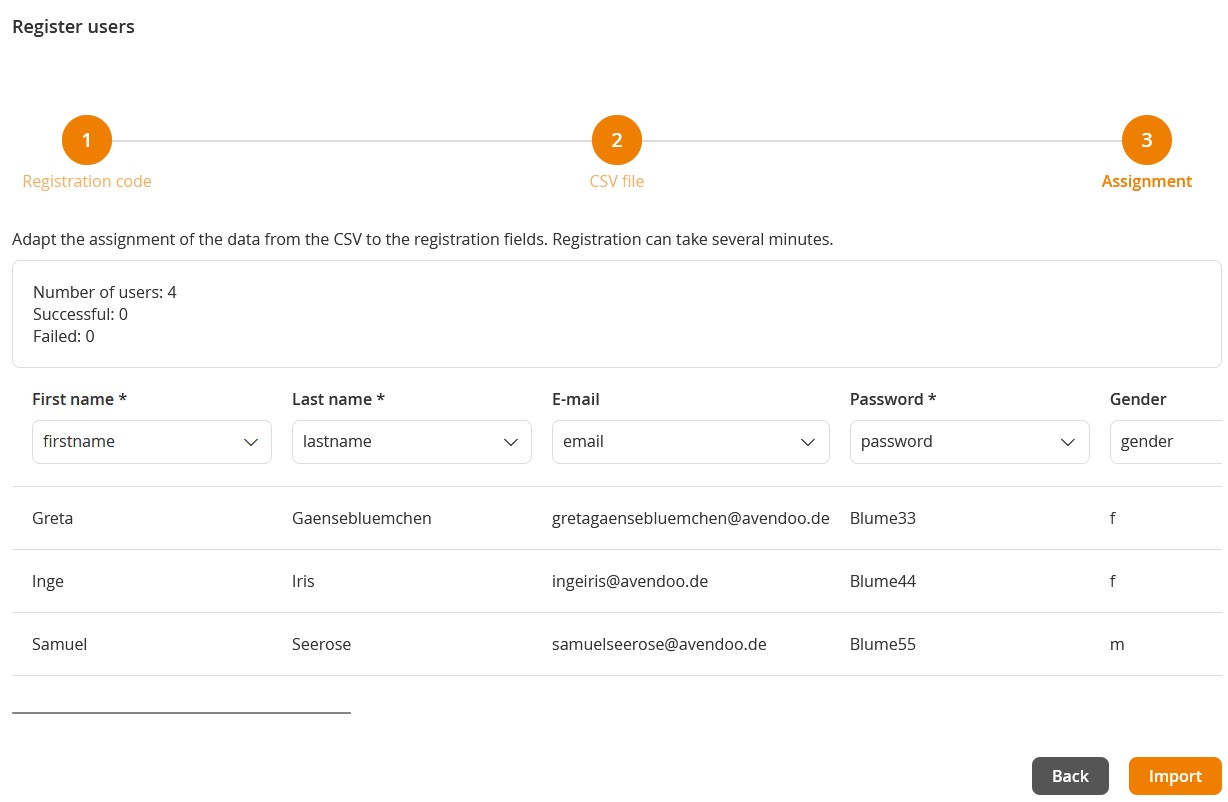
Step 3 Assignment is shown (see fifth screenshot). If required you click the button Back.
In the upper area of the dialog window you see the number of user, the status Successful and Failed. This data is updated whn you click Read.
Also you see the table with the selected CSV file data: first name, last name, e-mail addresse, password, gender, company name and HTML text of the check boxes. - Click the button Import.
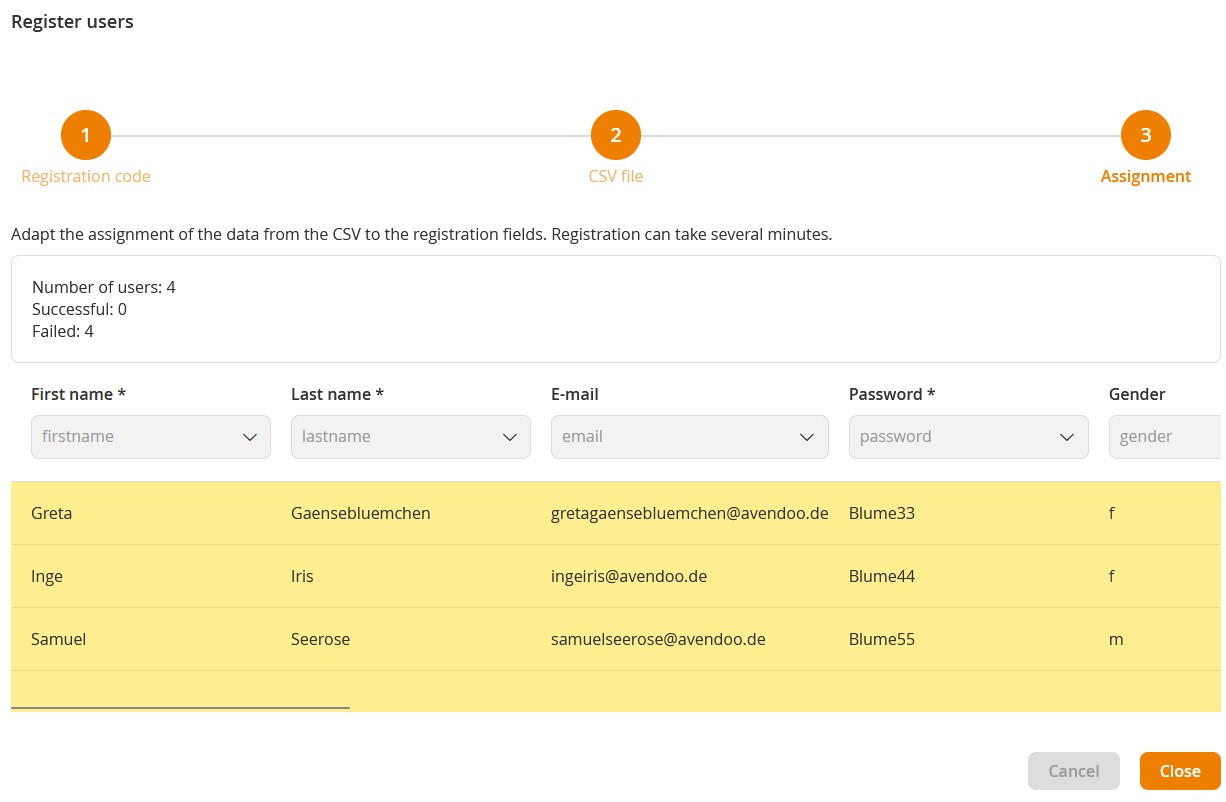
The import of the user data starts. - During the import of the user data you see the progress of the import shown by color for each line and in the upper right corner as text (see sixth screenshot).
- To close the dialog window Register users, click the button Close.
Filters and sorting
You can configure via the gear wheel which columns will be shown and you can define their order via drag and drop by moving
to the favored place.
You can filter the entries of the employees table via the following columns:
- User name,
- First name,
- Last name,
- OU (Organizational unit),
- Course activation,
- Overdue (No restrictions, Not overdue, Warning level or Overdue),
- E-mail,
- Learning group,
- Personnel number,
- Division,
- Group and
- Company.
Furthermore you can filter learning content by qualification. Further information about how to configure the display of columns on the tab Employees you find on the page “System settings”.
You can sort the entries of the employees table ascending and descending via clicking the title of the table column of the following columns:
- User name,
- First name
- Last name,
- OU,
- Course activation,
- Overdue,
- E-mail,
- Personnel number,
- Division,
- Group,
- Company.
If there is no registration to an event date of the course, in the line of the course activation appears the icon
.
Overdue
If you want to show the column Overdue, click on the gear wheel in the table header, click on the line Overdue with plus and then on the button Save.
There are three views:
- Green stands for Okay (this means there is no exceeded duration of a course activation for the appropriate user and there is no duration reminder),
- Yellow represents need for action like a duration reminder is active (see screenshot). This means there is something on the escalation level for the appropriate course activation, for example duration reminder of three days.
- Red shows an urgent need for action like an exceeded course activation duration.
The red traffic light view means that there is something overdue for the appropriate user.
This fact is only related to the duration of a course activation and not related to Todos and certifications.
To open My Learning Place of the appropriate user, click on the traffic light view. If you click on a red traffic light view, you on My Learning Place of the appropriate user which duration of a course activation is exceeded (see screenshot).
Additionally you can select the following filters in the column Overdue:
- No restriction
- Not overdue (represents Green)
- Warning level (represents Yellow)
- Overdue (represents Red)
Tasks
If you register or deregister participants in the OE view, tasks are generated. Further information about tasks you find here.
Learning place
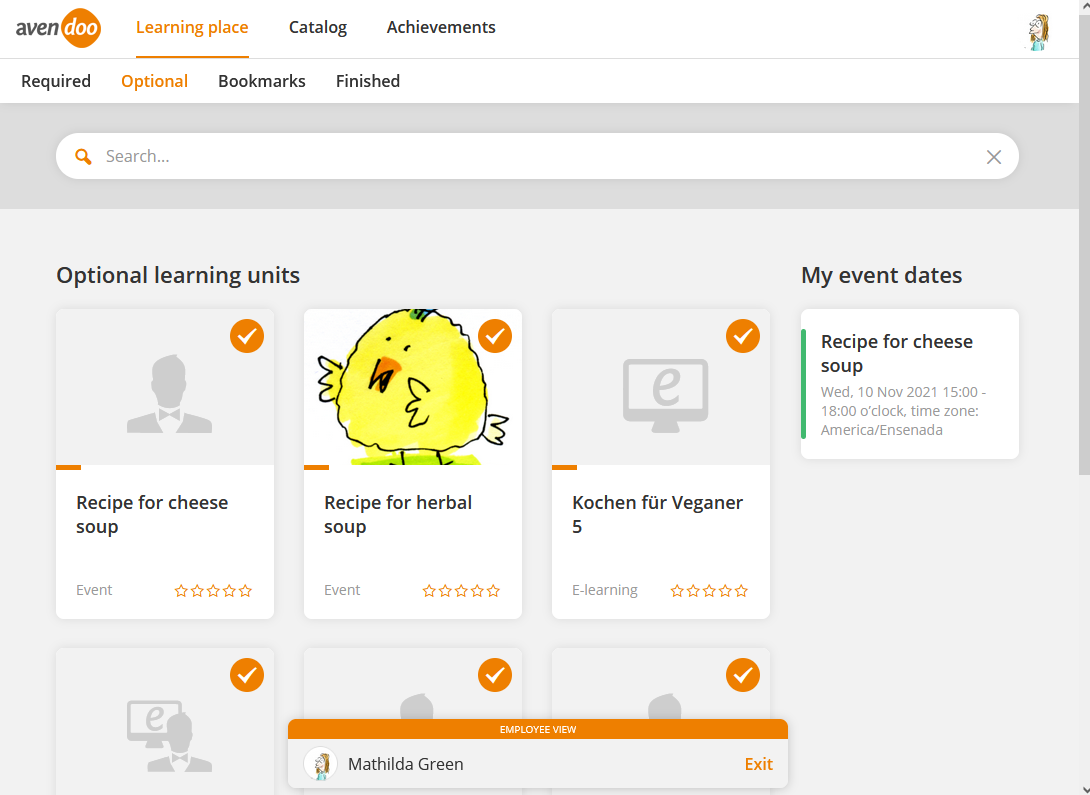
To display the “Learning place” of the appropriate employee, click on the link of the appropriate user name. You get an overview of “Required” and “Optional” and “Finished” learning units. Also you get the edit status in per cent, the Todos (for example assessments or tasks) and the calendar of the appropriate employee (see screenshot number 2). If you click on the calendar entry, you get in the employee view and can depending on permissions deregister the employee or book a train ticket.
Note that the edit status in per cent is related to the completion of the “Required” learning units and that the Todos are related to these of the team leader.
Furthermore you see the Bookmarks and the Achievements of the appropriate employee.
Catalog/Search
Optionally
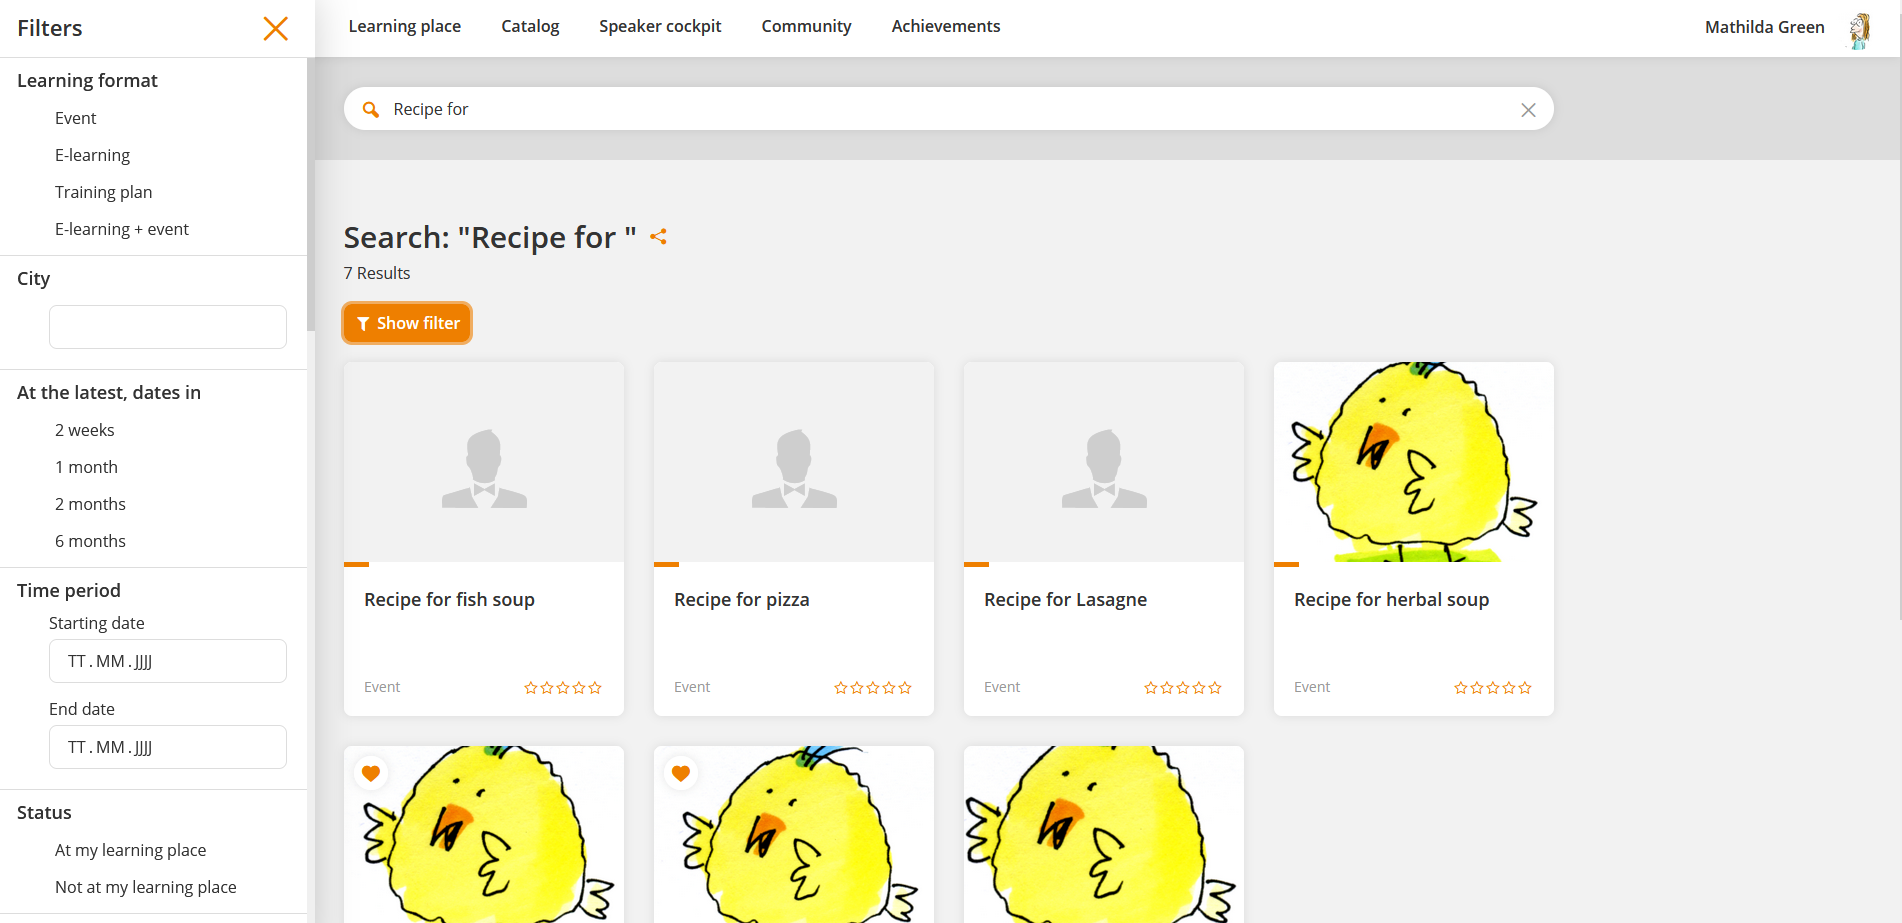
To display the catalog of the appropriate employee, choose the tab Catalog/Search. You get an overview of the learning units, sorted by Most recent learning units, title, learning format, next date or location. If you click on the title of the appropriate course, you get to the info page with the button Register.
To share the results of your catalog or of your search as SSO link, click on the symbol Share results and then on Copy link behind the SSO link. You can use this copied link also for an individual stream.
If you click on the button Show filter, you can do a filter search by Title/teaser, learning format, location, at the latest, dates in, time period, status, approval and appropriate classifications. By clicking the appropriate filter line you activate the filter, by clicking the X you deactivate the filter.
Via click on the appropriate event date you get to the list of event dates. Otherwise you can select the list of runs if applicable.
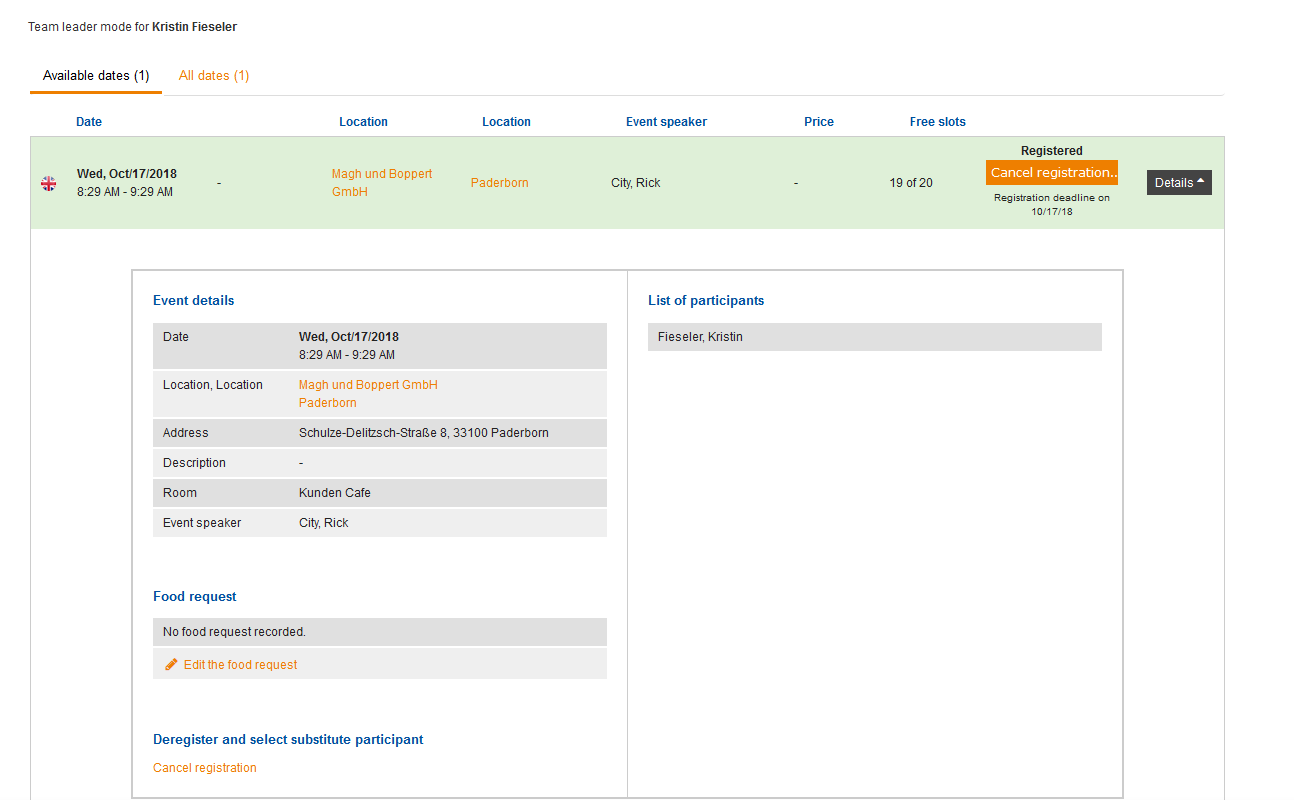
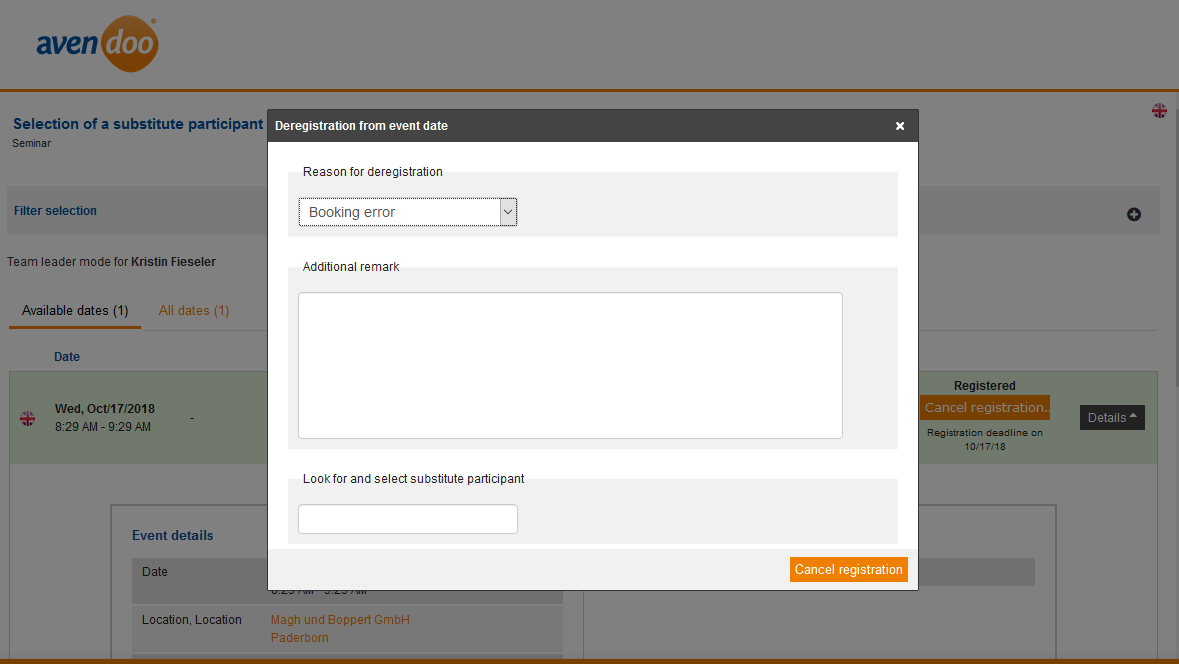
If the authors has activated the option Substitute participant can be entered till the close of registration or Substitute participants can be registered up to the start of the event date on the tab Configuration in the Event wizard of the appropriate event, the function substitute participant selection is available. If you want to use the function of selection of the substitute participant, the author has to activate additionally the option Enable the selection of a substitute participant for runs on the tab Registration management of the appropriate course activation.
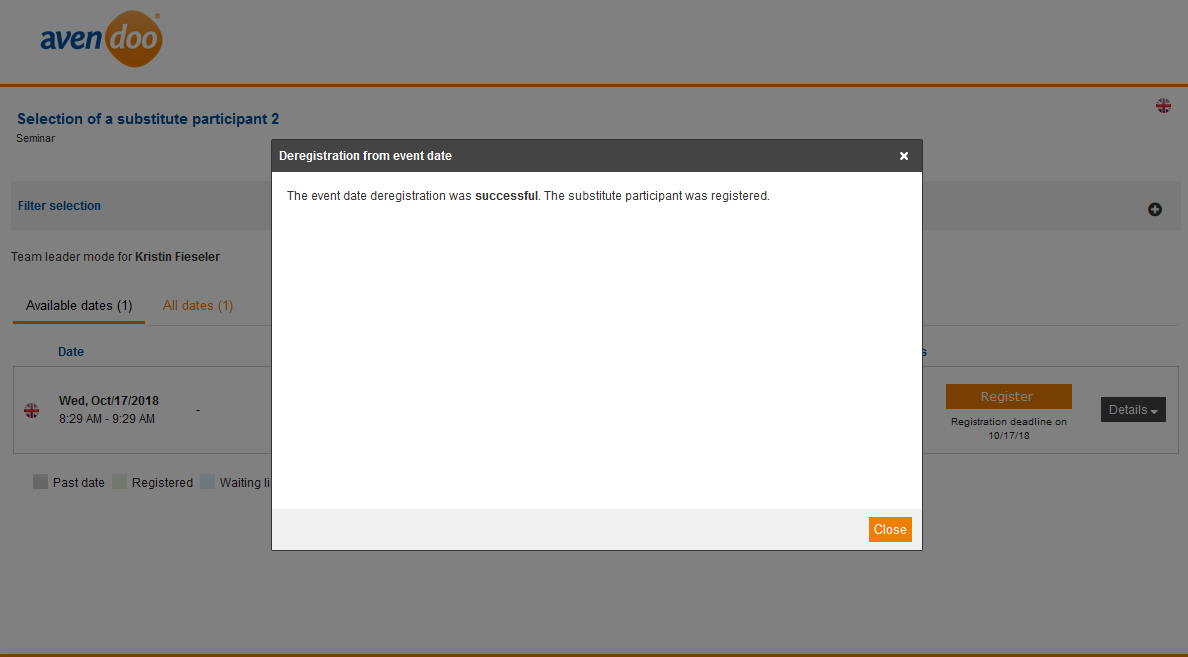
To select a substitute participant for the registered participant, you can click the button Cancel registration in the appropriate event date or the appropriate run in the event date view (via the link Open date view on course level) or the detail view under the tab Deregister the registered participant & select a substitute participant. The dialog window Deregistration from event date opens. Choose in the drop down menu a reason for the deregistration, enter if applicable an additional remark and search and select a substitute participant. There you get all team members as substitute participants for selection, who are already registered to the appropriate course activation and for whom the team leader can do a registration. On deregistration of the original participant the deregistration deadline is considered. If the registration of the substitute participant isn’t successful, the original participant remains registered. If the deregistration of the origin participant and the registration of the substitute participant are successfull, notifications are sent to both participants.
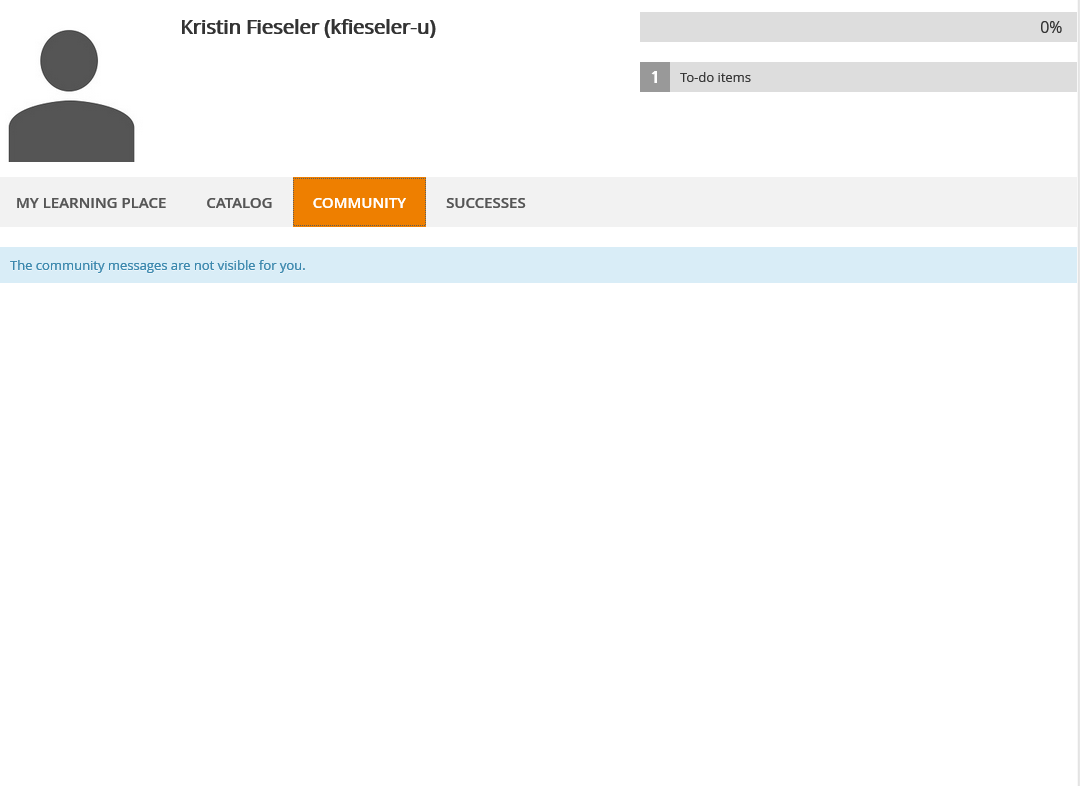
Community
Achievements
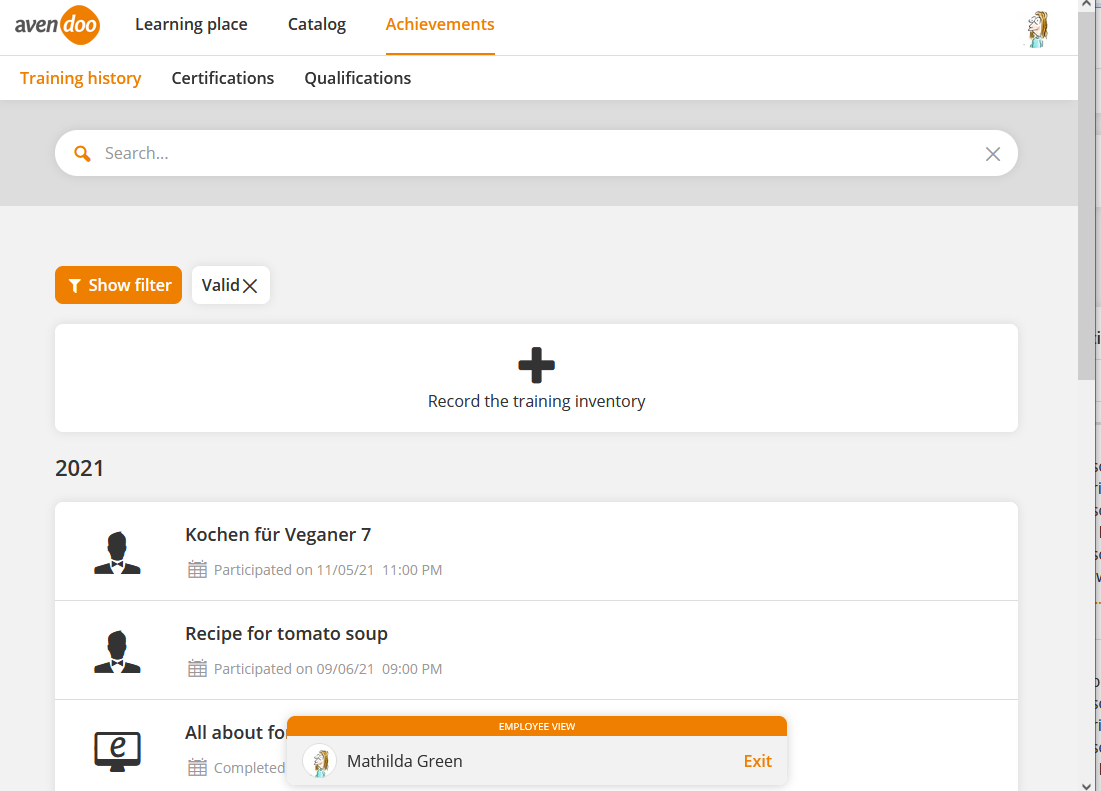
To display the achievements of the appropriate employee, choose the tab Achievements. You get an overview of Events, Certifications, Courses, Training plans and Qualifications on the sub tabs Training history, Certifications and Qualifications, sorted by time or title.
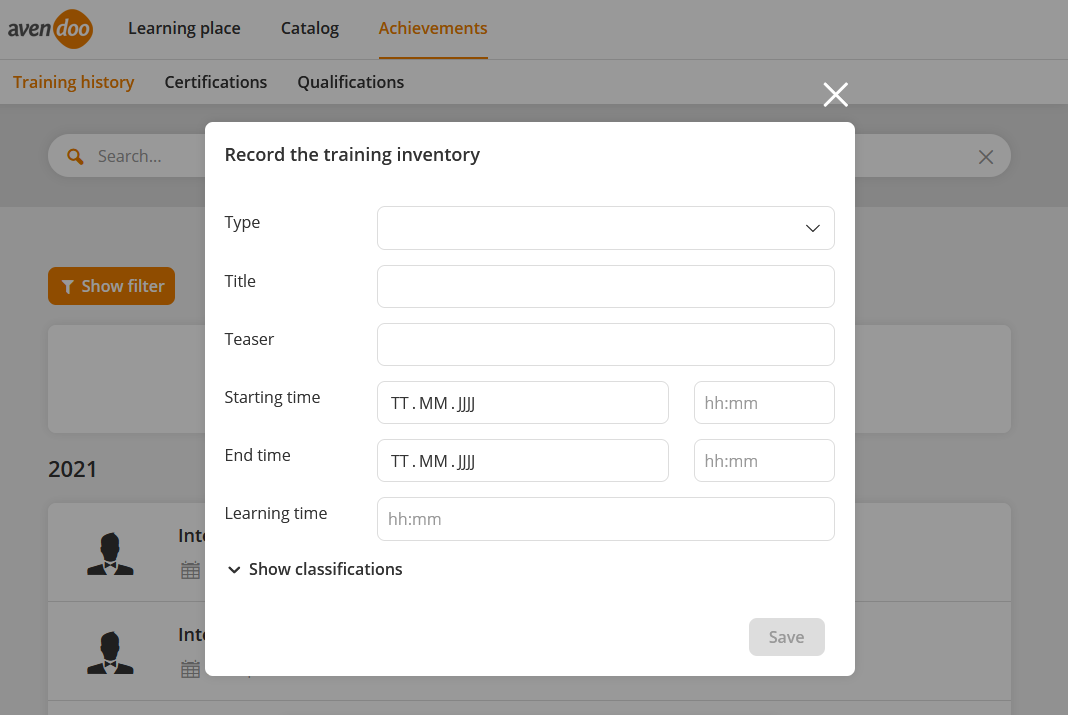
On the sub tab Training history of the appropriate employee you get an overview of participated and completed events. On this page you can create training inventory +Record the training inventory. In the opening dialog window Record the training inventory you can enter the following data: Type, title, teaser, start and end time and learning time and classifications. Finally you click on the button Save.
If you click on the button Show filter, you can do a filter search by type (event, certification, course, training plan or qualification) or validity (valid, expires soon, expired). By clicking the appropriate filter line you activate the filter, by clicking the “X” you deactivate the filter.
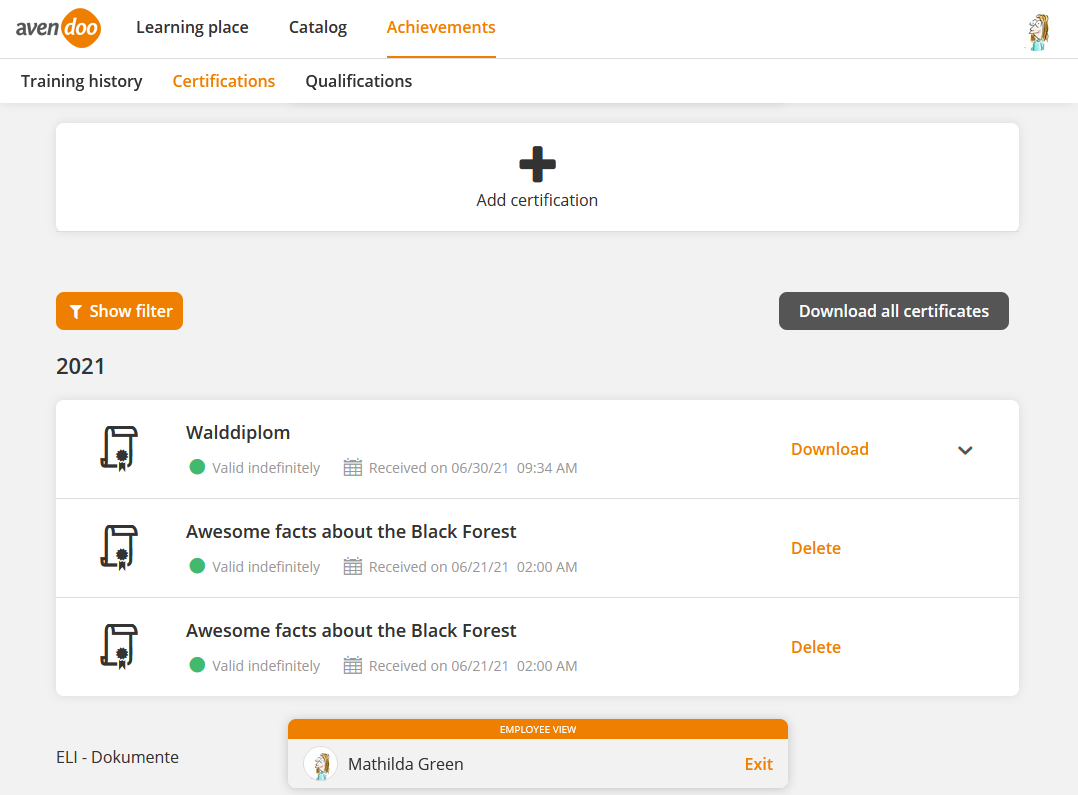
On the sub tab Certifications the number of valid certifications of the appropriate employee are shown.
The certifications on the sub tab Certifications can have the following colored markings:
- Green: this means they are always valid,
- Red: this means they are invalid or
- Orange: this means the expiration of the validity should be shown x days before.
To record a certification or to create a new certificate, click on the button Add certification. In the form Add certification you can upload a PDF file or upload an image. Choose then an existing certificate via button Choose. If you want to change the certificate, click on the button New. Click again on the button New to close the editing or click on the button Save after done the appropriate changes. If applicable activate the option Valid indefinitely. To create a new certificate, click on the button New (Prerequisite: The author has activated the team leader right Create certificate). Then enter the title and the provider. Furthermore you can select the notification date, for example Notify 6 months prior to expiration, and the notification recipient, for example certificate owner. Finally you choose the appropriate classification and click on the button Save.
Furthermore you can download via the button Download all certificates all certificates of the appropriate employee. Also you can download or delete single certifications.
If you click on the button Show filter, you can do a filter search by validity (valid, expires soon, expired). By clicking the appropriate filter line you activate the filter, by clicking the “X” you deactivate the filter.
On the sub tab Qualifications you get an overview of already added qualifications of the appropriate employee with scale value and note. Via the buttons Edit and Delete you can edit or delete the qualifications.
On this view even the course activations are considered, which the employee doesn’t see and which are valid by the rule on participant function “Controlled by team leader” via the option “Edit mode can be changed by team leader” or “Employees unable to see this course activation are allowed to be registered by the team leader”. Furthermore you can click on all possible course activations, which can close a “qualification gap”, in the comparison profile.
After selecting the favored qualification profile you can add further qualifications via the button Add qualification.
Via a selected comparison profile you get a comparison to the existing qualifications of the appropriate employee, if the needed scale value is achieved.
Configure additional columns and filters
You can add additional or remove columns via the settings (click on the gear wheel). The following columns are available: user name, first name, last name, e-mail, OU, learning group, course activation, report, personnel number, overdue, IDD done in current year, IDD in progress and IDD not yet sent.
Furthermore you can show or hide the filter (personnel number, user name, first name, last name, e-mail address, OU, learning group, course activation and report) and you can filter the learning content per qualification. Further information of configuring the display of the table on the tab Employee you find here.


