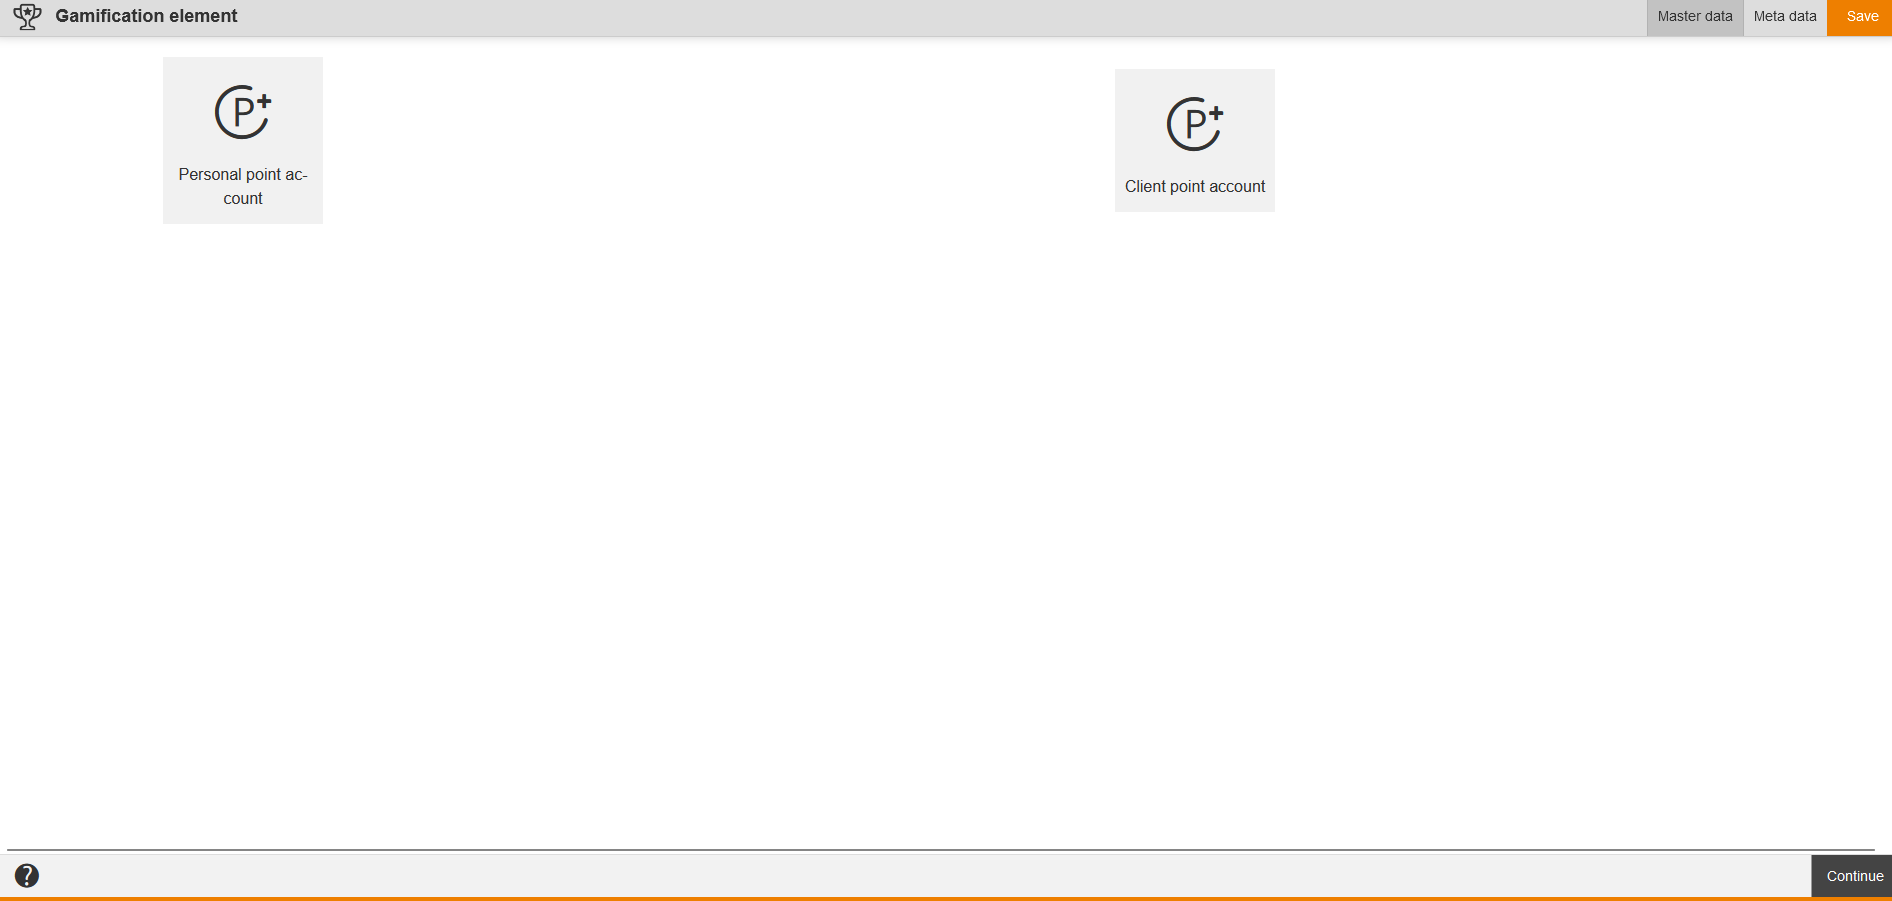
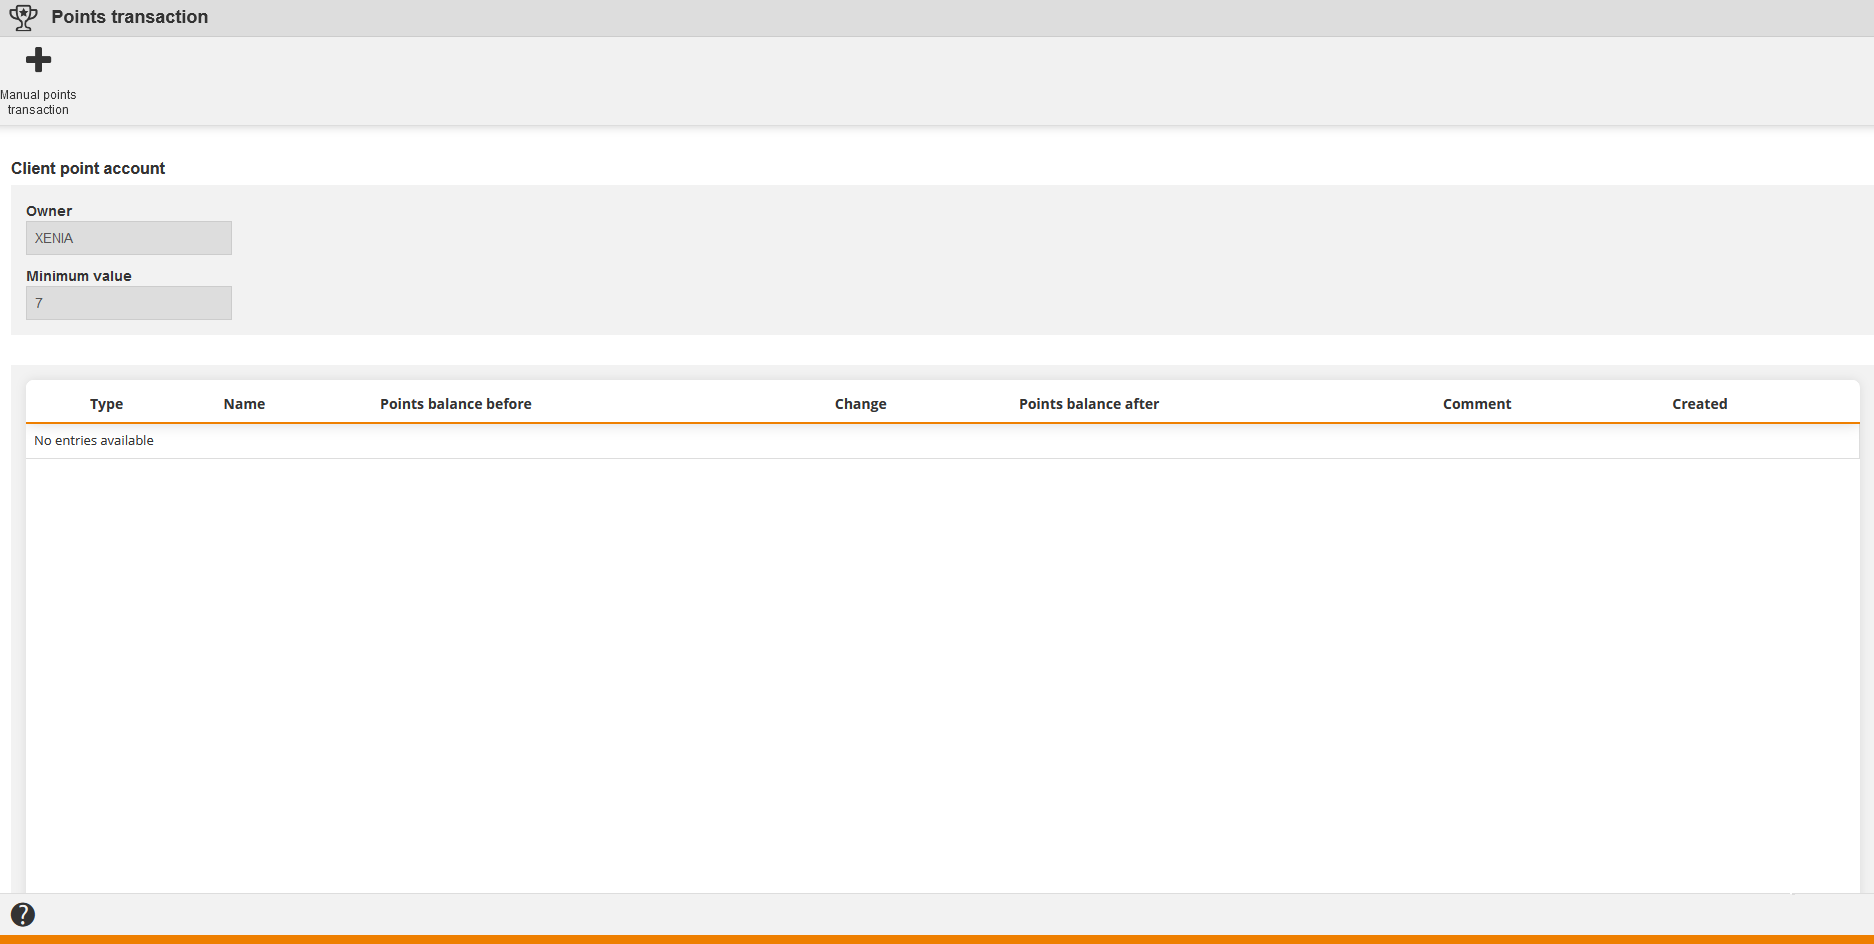
The component Gamification enables you to create or edit one or more gamification elements for a Personal point or a Client point account (see first screenshot) and to assign this or these to the course activation. Thus each participant of the corresponding course activation receives points and they are available to these users on the page Successes as a display of bundled points of all gamification elements, just depending on the trigger type (Completion of course activation, Self-registration or External registration by team leader).
You can check the assignment of the gamification elements in the corresponding course activation in the User wizard of the corresponding user. Furthermore you can display points for each gamification element.
Additionally, you define in the gamification element, independent from the point account type, via the Mininum value on the tab Master data, until which value it’s allowed to book via the trigger type. It’s possible to define negative values, too.
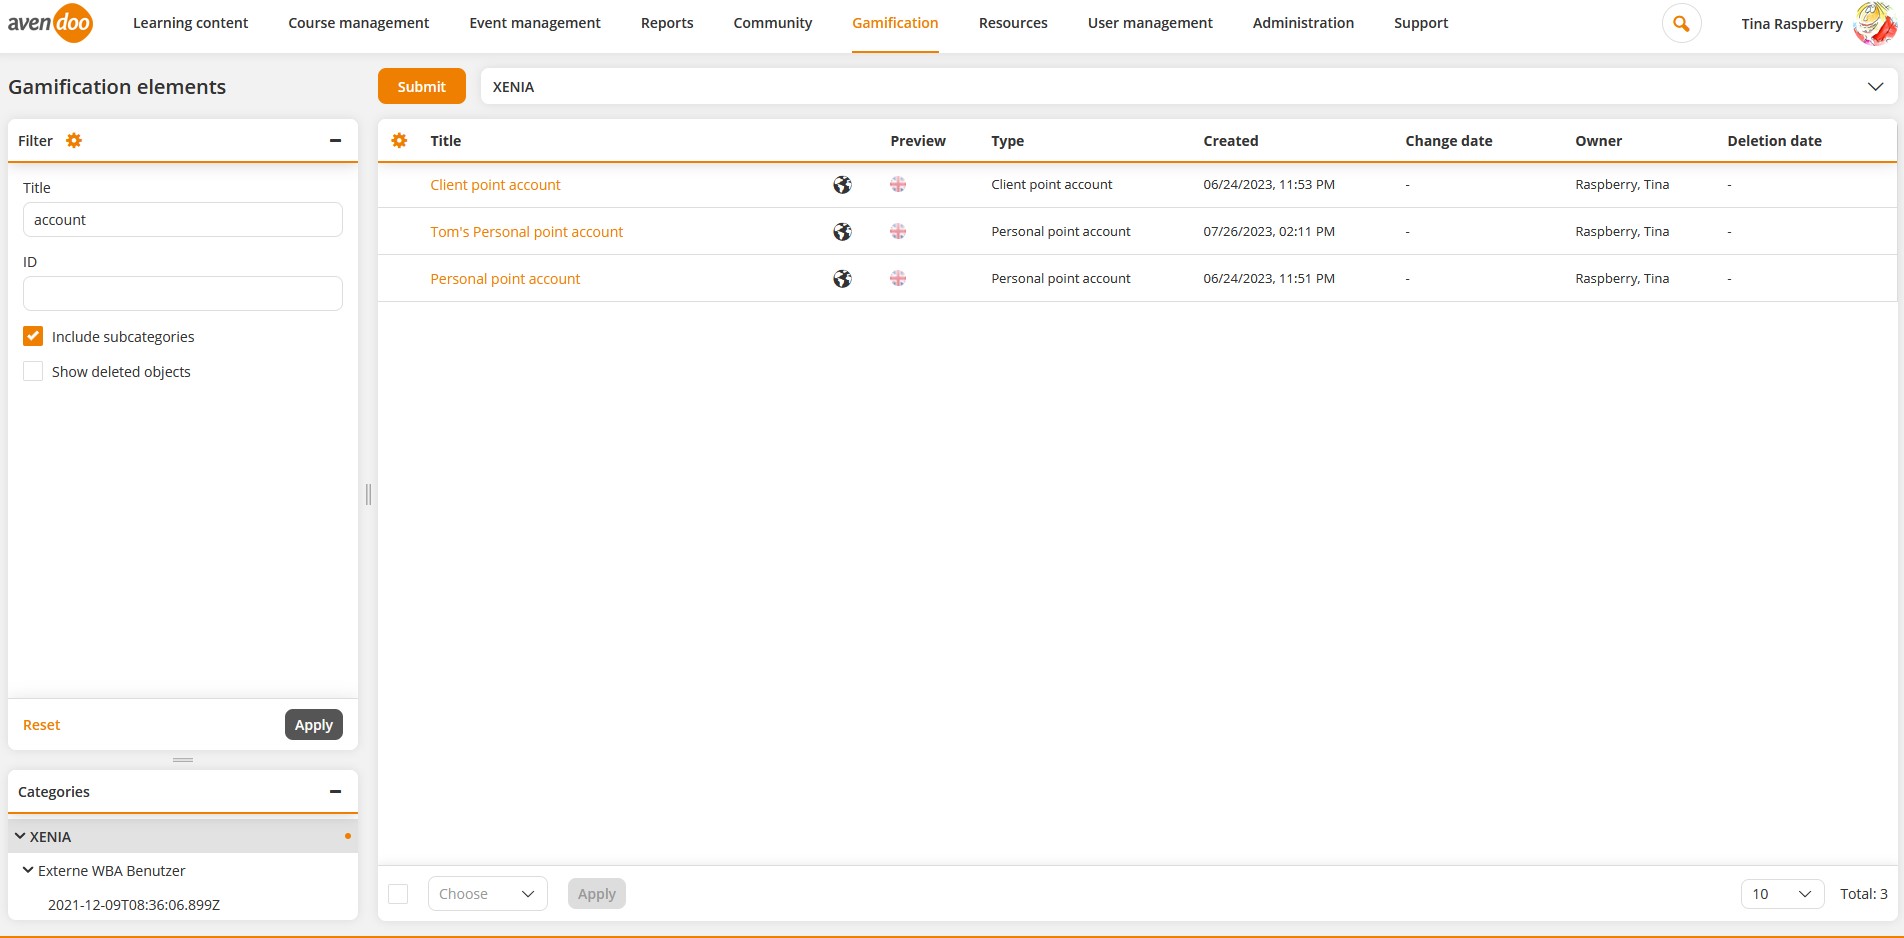
On the Overview of the gamification elements you can edit display of columns and order via right clicking the table header.
The table got the following columns: Titel, Translation area, Preview, Type, Created, Change date, Owner and Deletion date.
You can sort the data in each column ascending or descending via clicking the title of the column, except the data in the columns Translation area and Preview.
Furthermore you filter the overview of the gamification elements by the following criteria: Title, ID, Point account type (No restrictions, Personal point account or Client point account), Language (Original language or selected language from list), Sub categories or Show deleted objects.
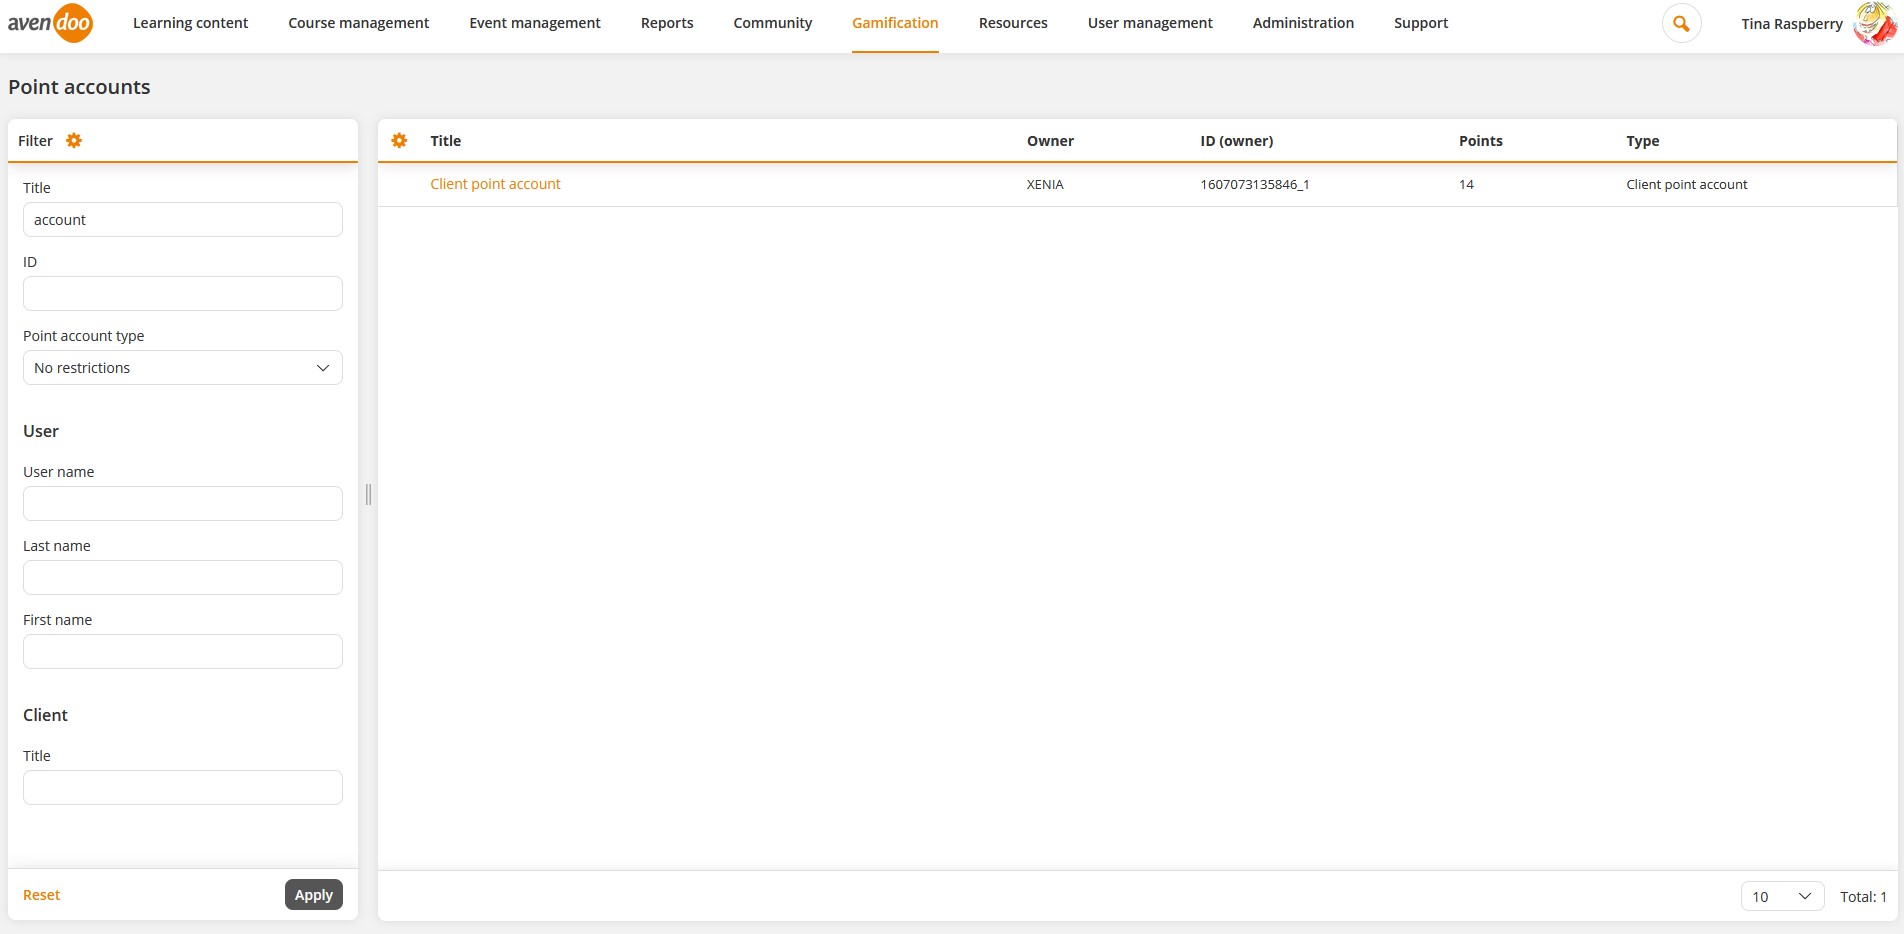
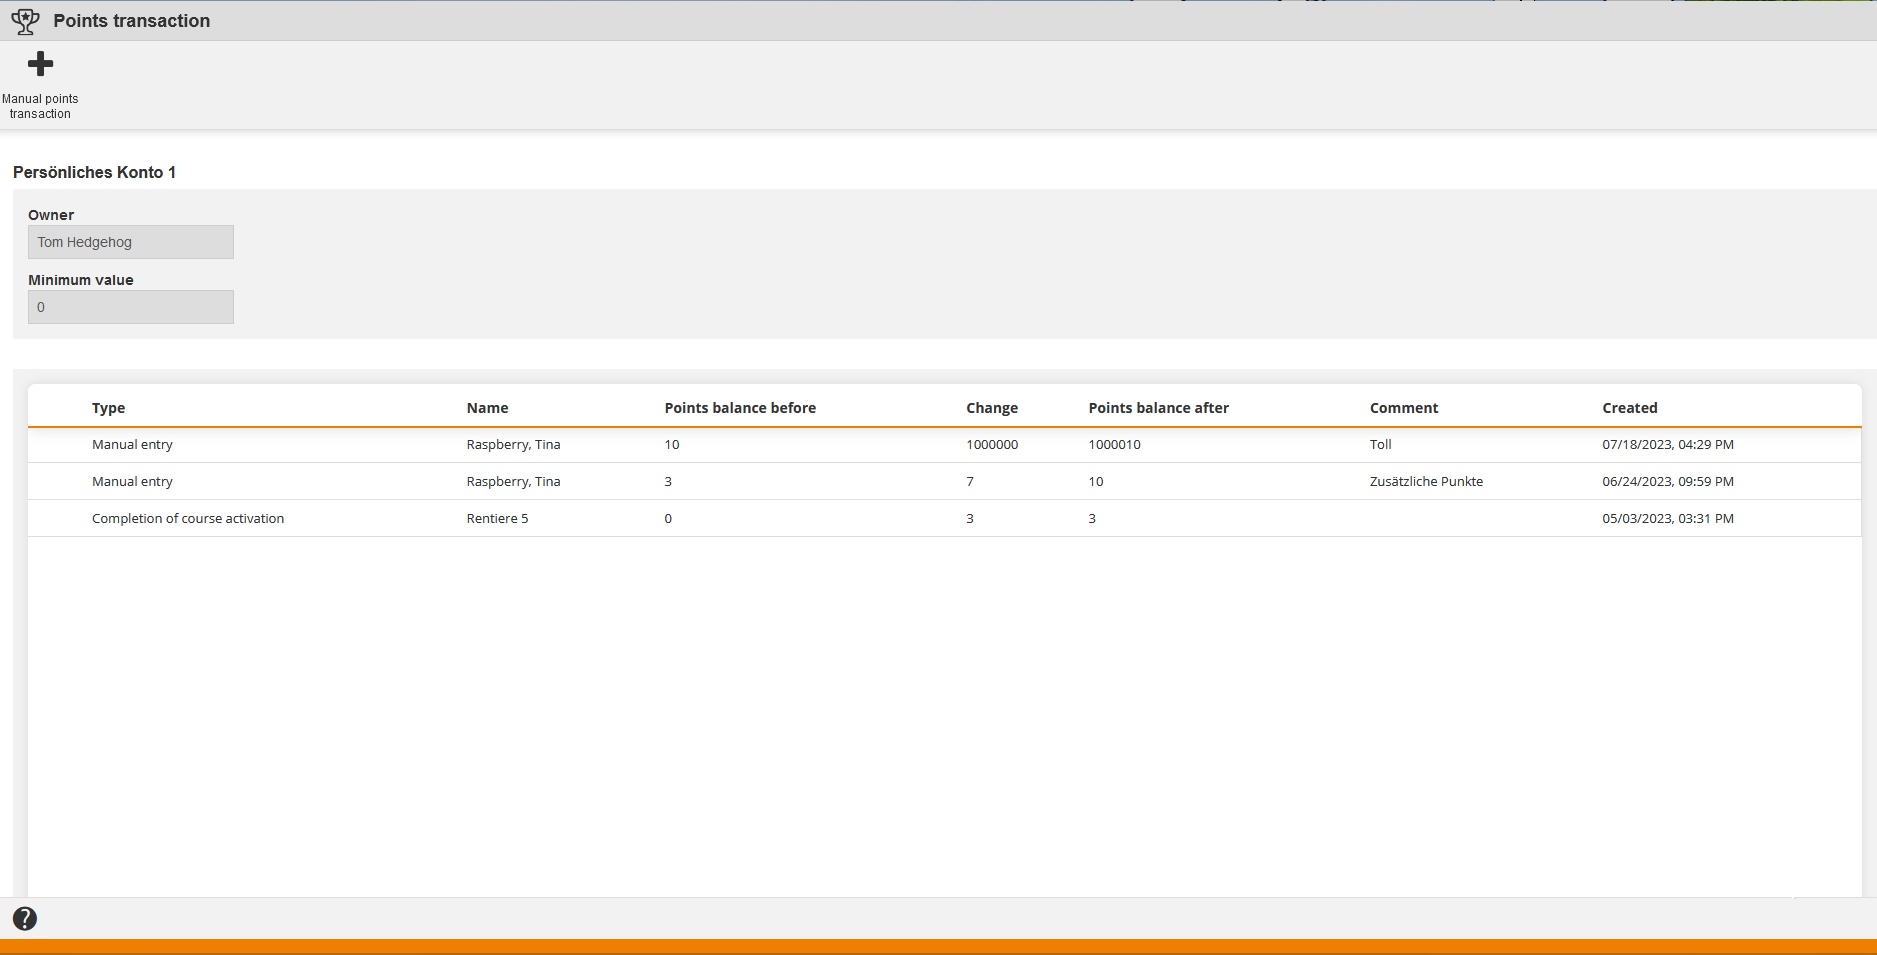
As the trigger option has been fulfilled, you see the corresponding points accounts under Gamification → Point accounts (see second screenshots). You can do Manual points transcations in the wizard Points transaction, this means you add these points not by using trigger types. You see the Points balance before and the Points balance after as well as the Change. You can not change the owner and the minimum value in this wizard. You can do that only in the corresponding gamification element.
If the point account does not show a sufficient balance to transact a registration to a course activation, the potential participant (user) is shown a hint on the course info page.
On the overview of Point accounts you can edit display of columns and order via right clicking the table header.
The table got the following columns: Title, Owner, Points, Type and ID (owner).
Furthermore you can filter on the overview of Points accounts by the following criteria: Title, Point account type (No restrictions, Personal point account or Client point account), User (User name, Last name and/or First name) and Client (Title).
To adjust the level structure of gamification, define the corresponding settings in the system setting gamification.configuration.
Via clicking the symbol of translation area you get into the translation management of the corresponding gamification element.
There are the mass processing functions Copy, Move and Delete for gamification elements. More information about these functions you find under Gamification elements: Mass processing functions.
The following functions are available via the context menu of the corresponding title of the gamification element.
Gamification elements
To create a new gamification element, choose Gamification → Gamification elements → New gamification element. The wizard Gamification element opens.
Then you select the account type. Select between:
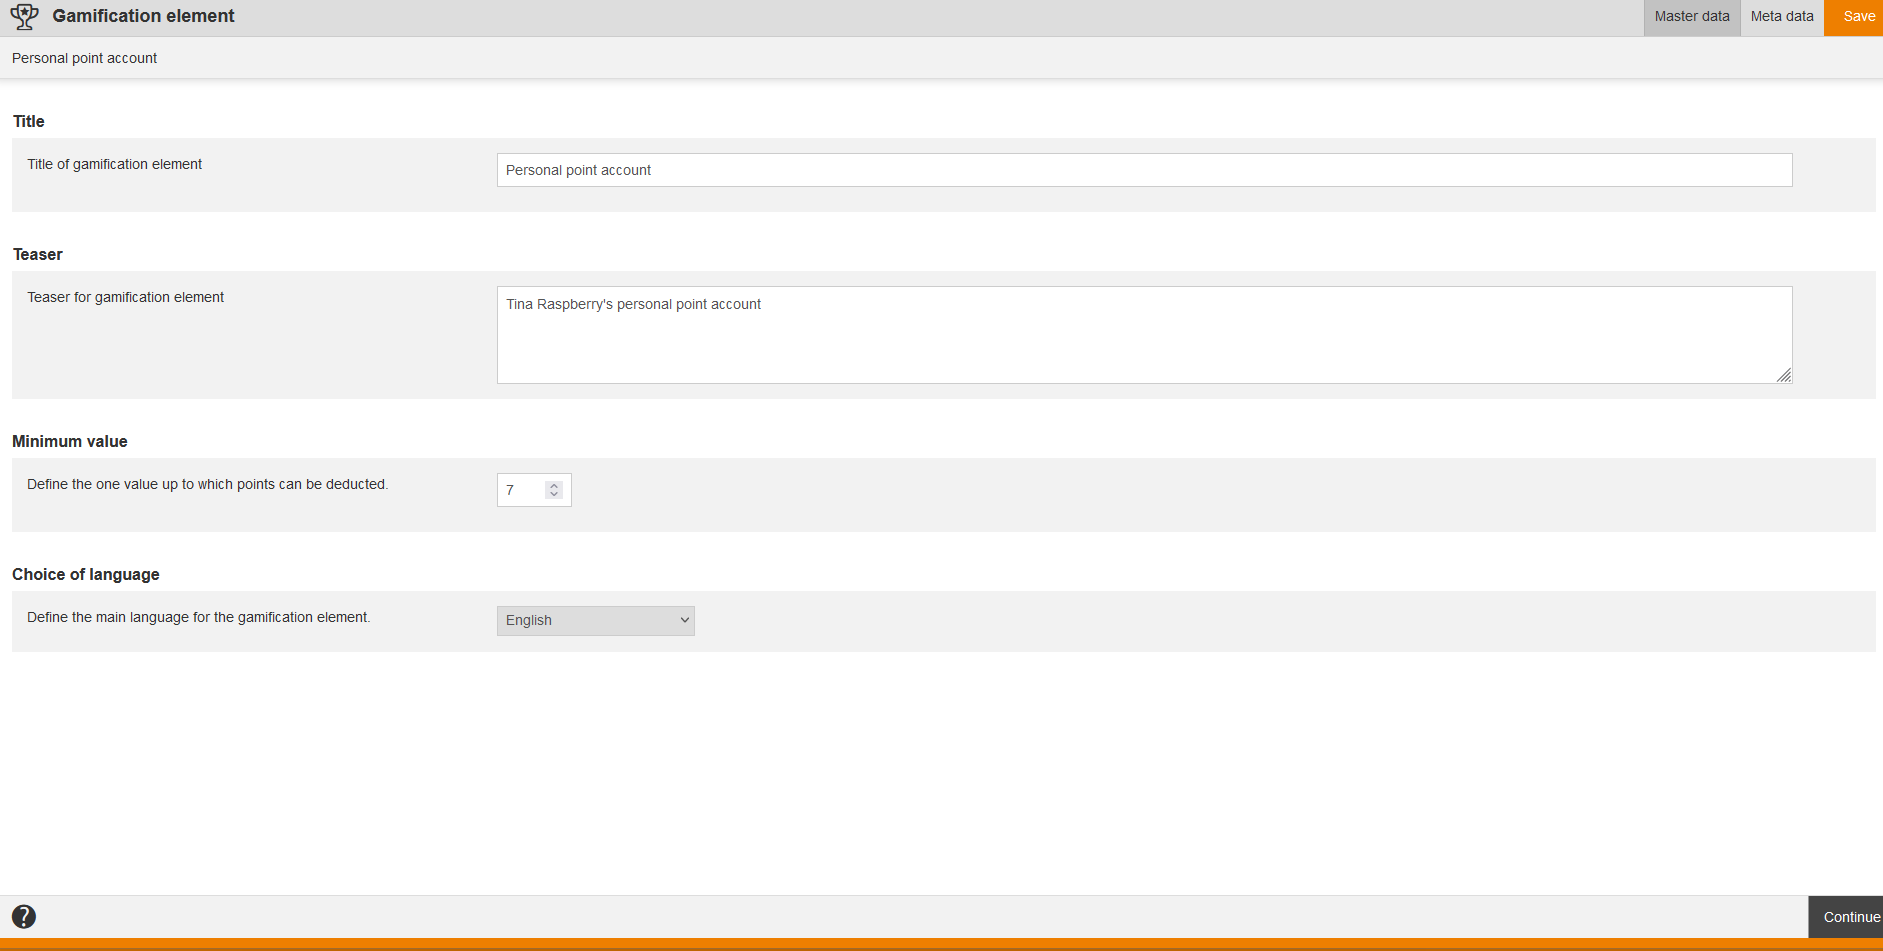
Master data
Title
Enter the title of the gamification element.
Teaser
Enter the teaser for the gamification element.
Minimum value
Enter the value or click the arrows to define the minimum value, this means until which value the point transaction is allowed to be done. You can enter positive as well as negative values.
Additionally, you simultaneously define, at which point the point acount does not show a sufficient balance and the user will be not allowed to register. In this event a corresponding hint will be shown to the user on the course info page.
Choice of language
Stipulate the main language of the gamification element.
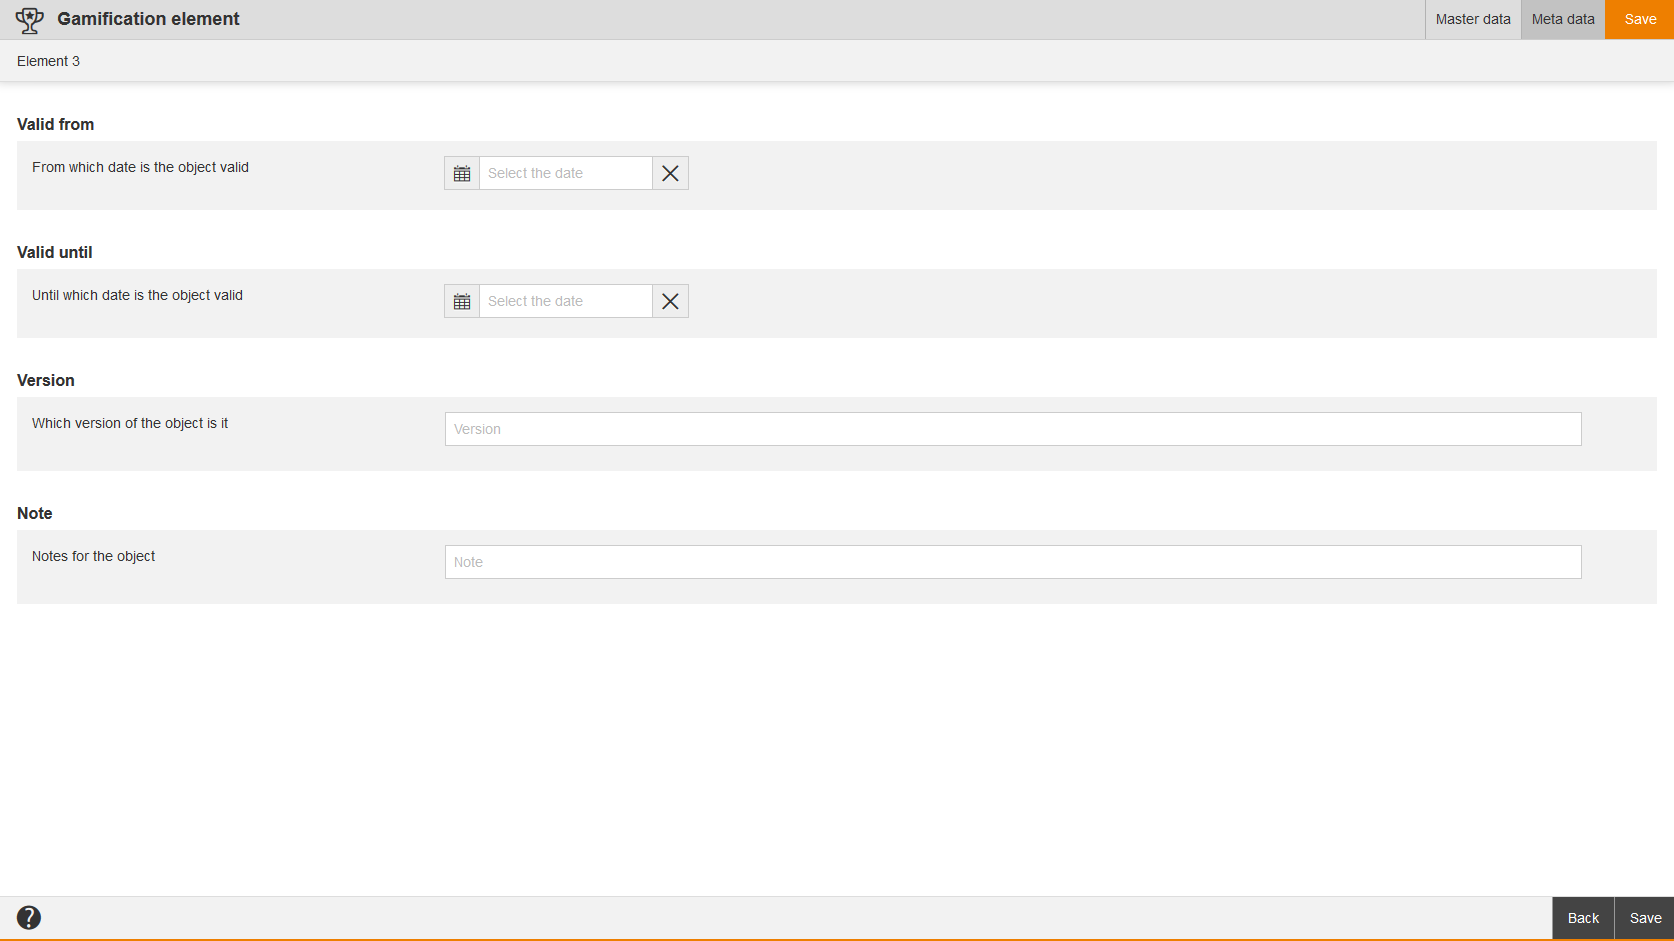
Meta data
Valid from
Select the corresponding date, from which the gamification element should be valid.
Valid until
Select the corresponding date, until the gamification element should be valid.
Version
Enter the version of the gamification element.
Note
Enter the notes for the gamification element.
Point accounts
To edit the point accounts (Personal point accounts and Client point accounts), choose Gamification → Point accounts → Click the title of the point account. The wizard Points transaction opens.
Under Point accounts you see the Personal point accounts of the users, who have received points by a trigger. A Personal point account is generated by the defined trigger type per user (this means owner of the point account). You can define several trigger types in one gamification element. Additionally, you can do manual points transactions with comment.
To manually add points to the corresponding Personal point account of the owner (this means the user or participant of the course activation), do the following steps:
- Click the Title of the favored Personal point account, while recognizing the column Owner and to which the account refers to.
The wizard Points transaction opens (see first screenshot). - Click the button + Manual points transaction.
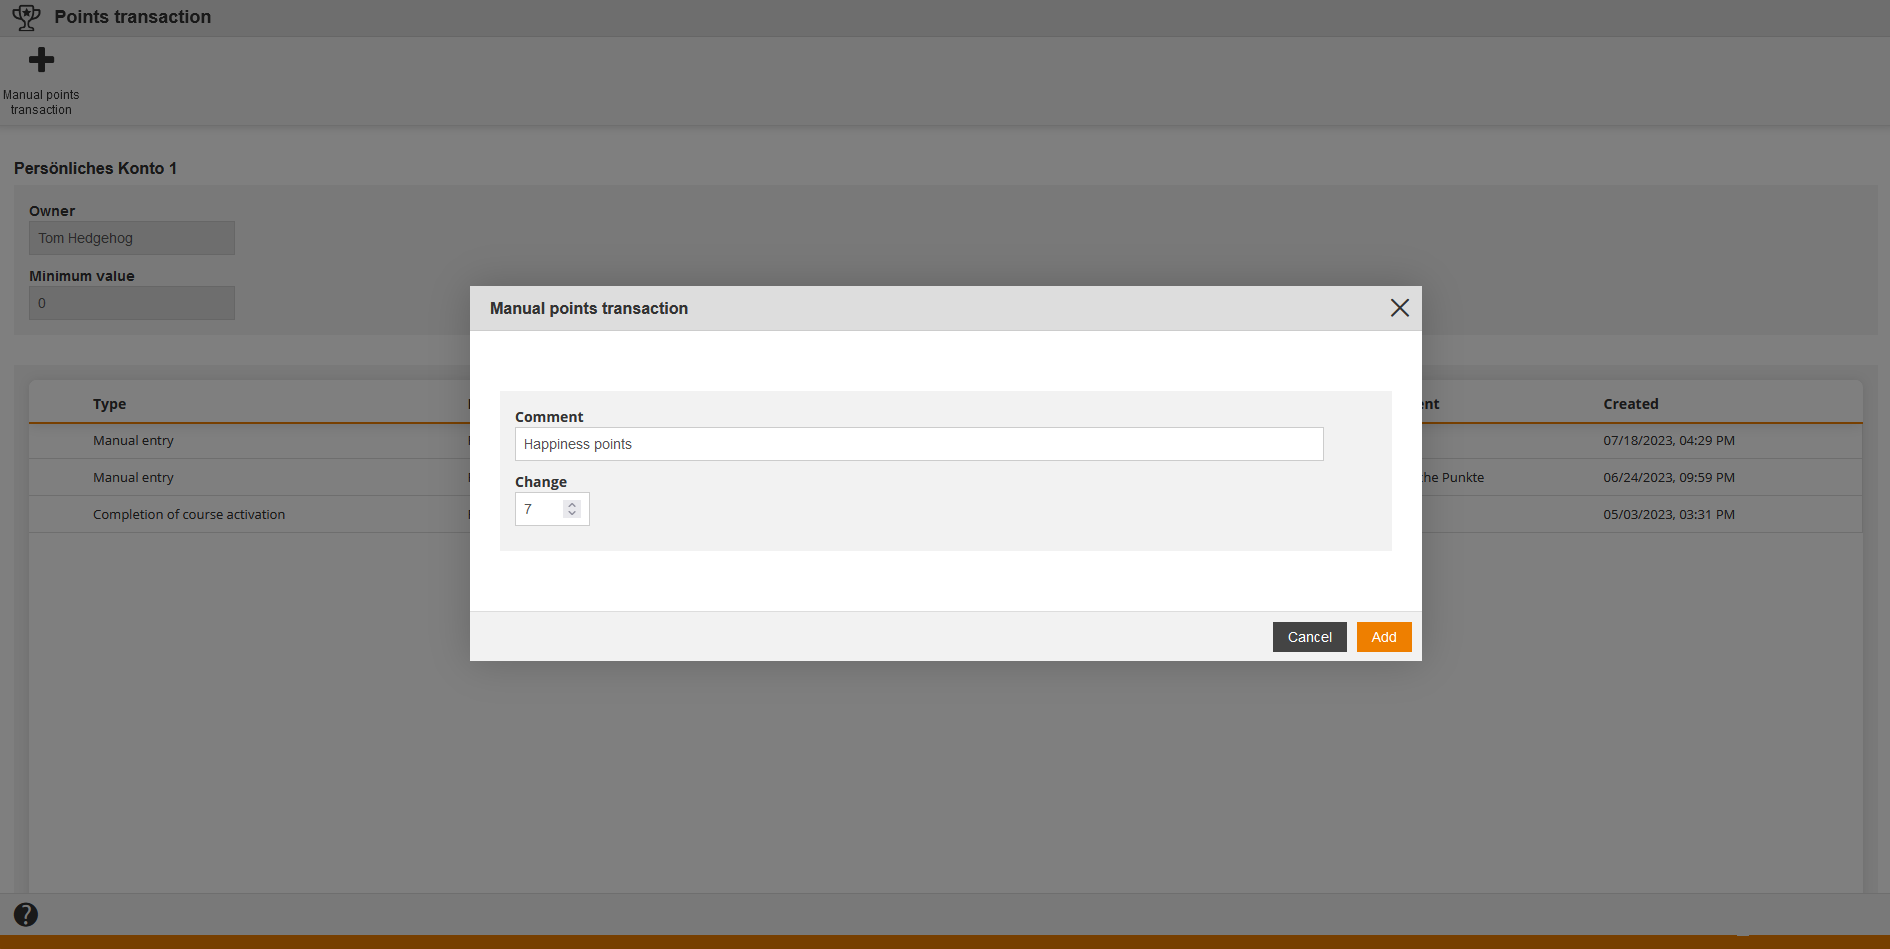
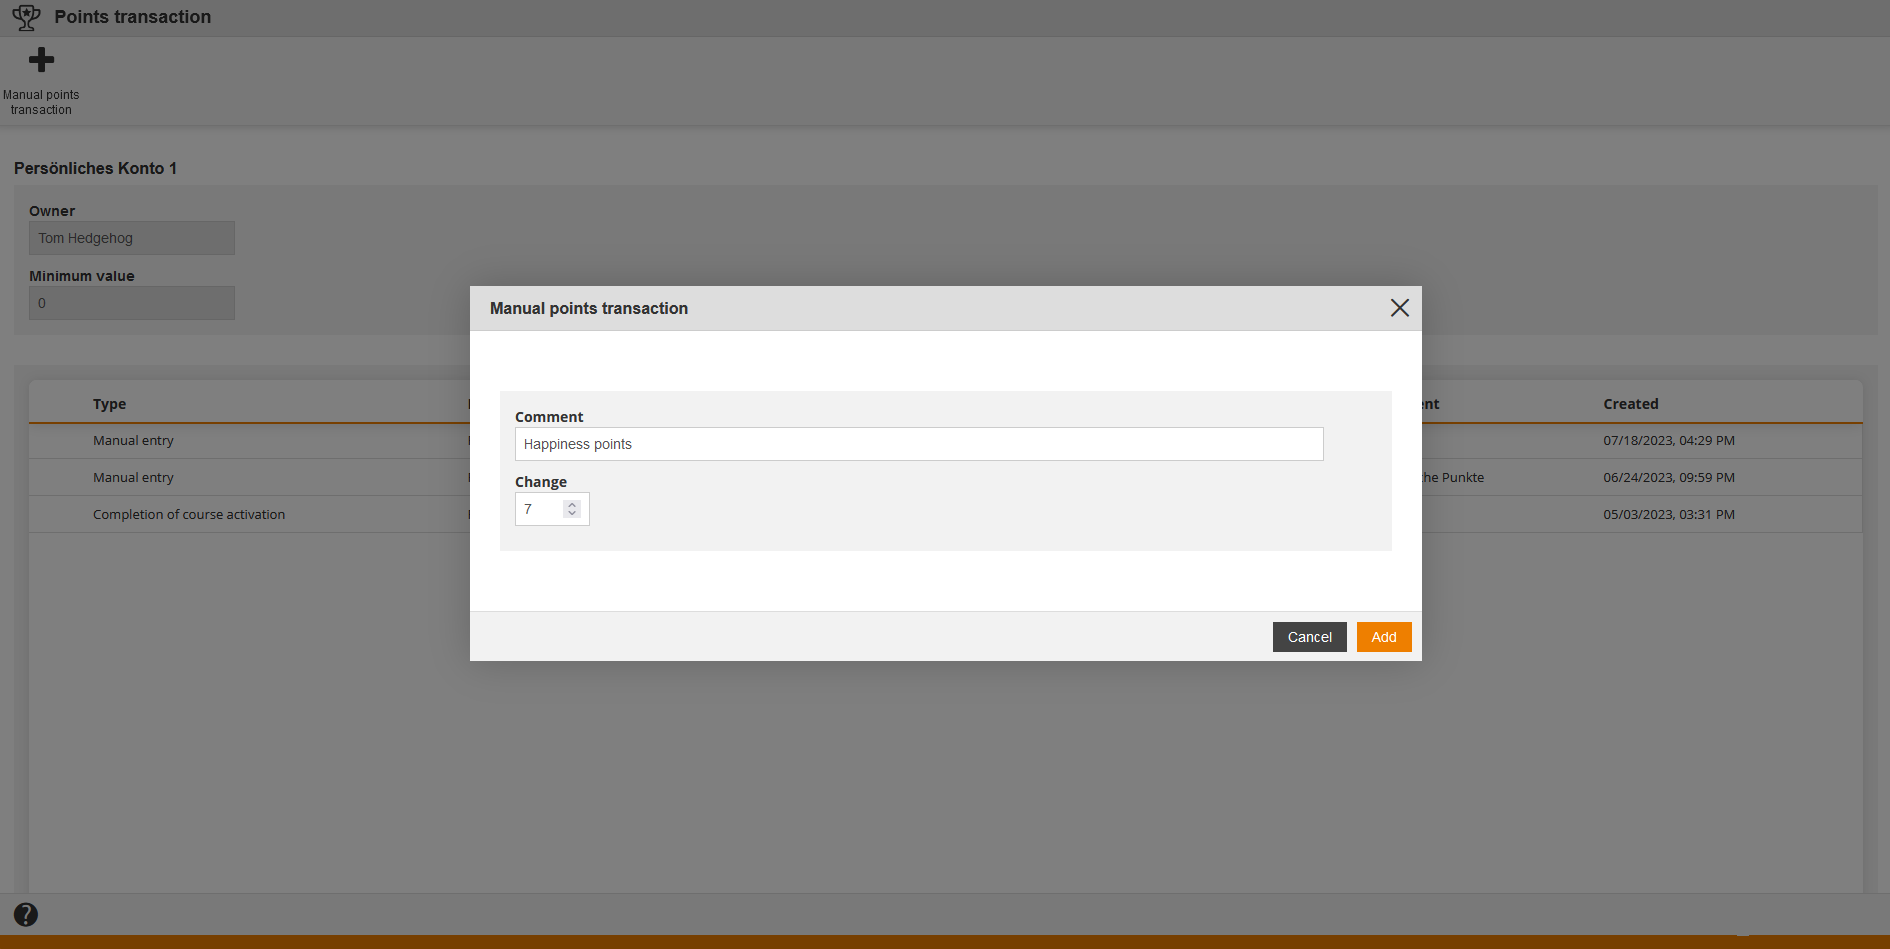
The dialog window Manual points transaction opens (see second screenshot). - Enter if required a comment like the reason for the manual points transaction into the comment field.
- Enter a point value or click the arrows to get the favored value. You can enter +/- “10000000” as maximum value.
- Click the button Add.
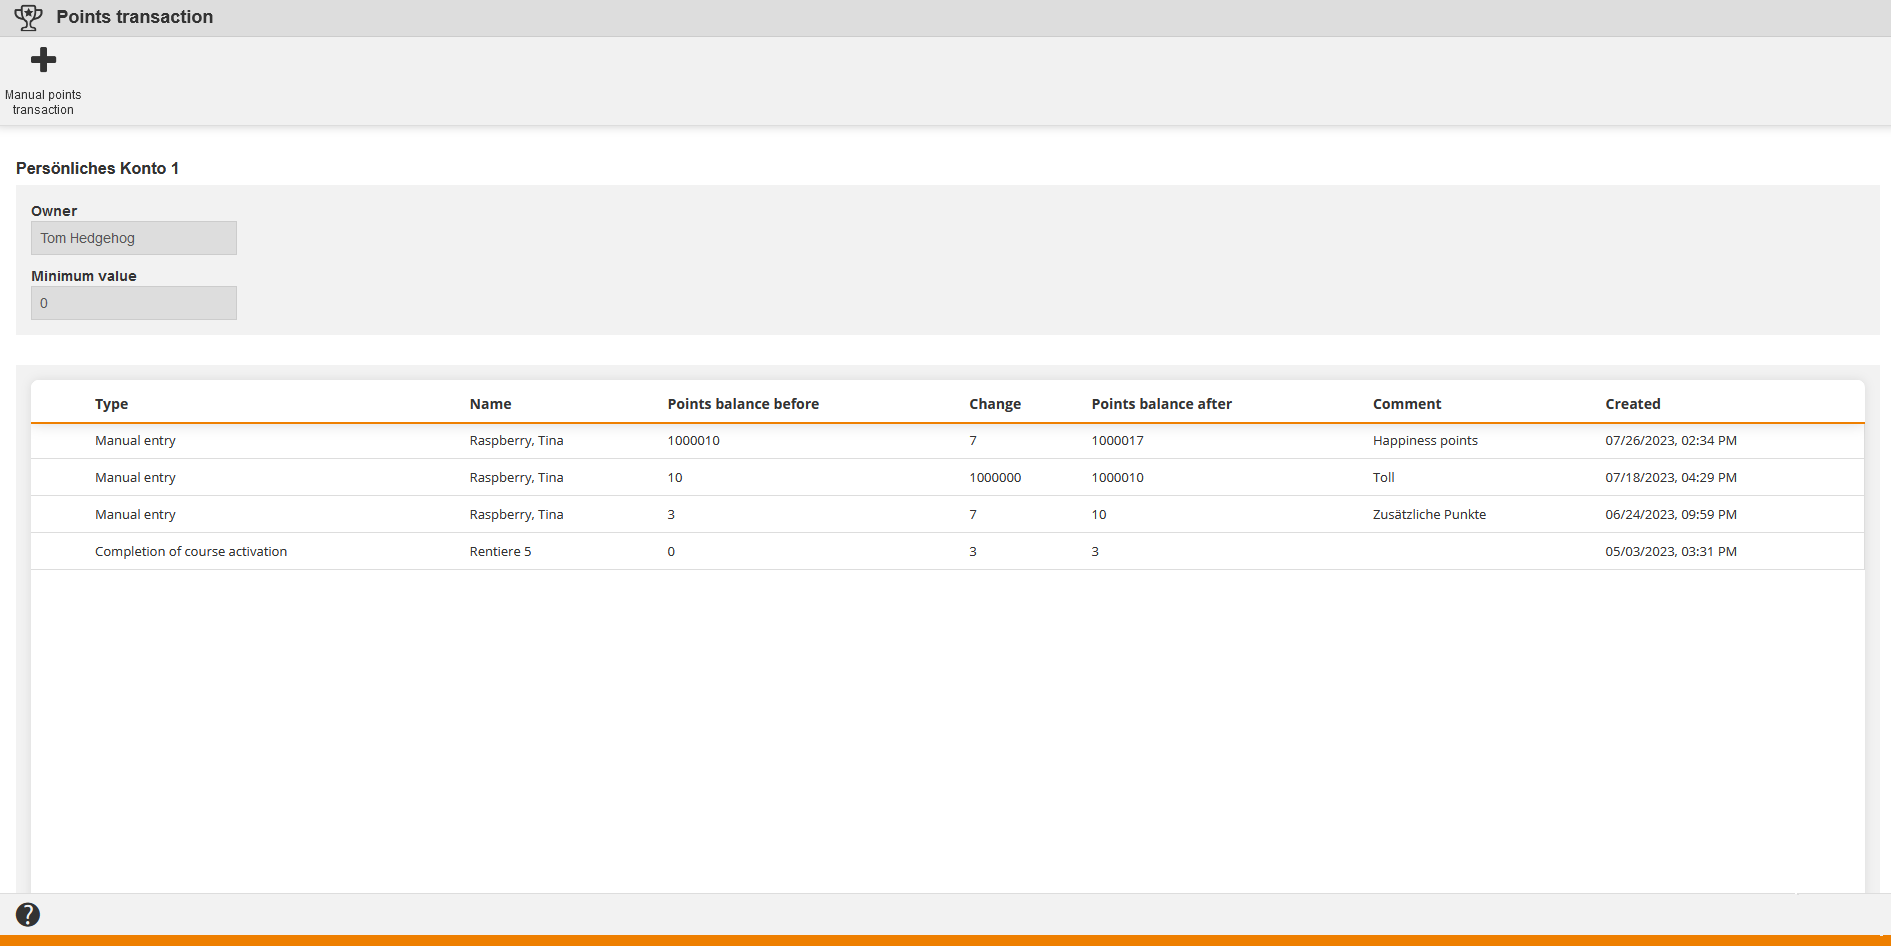
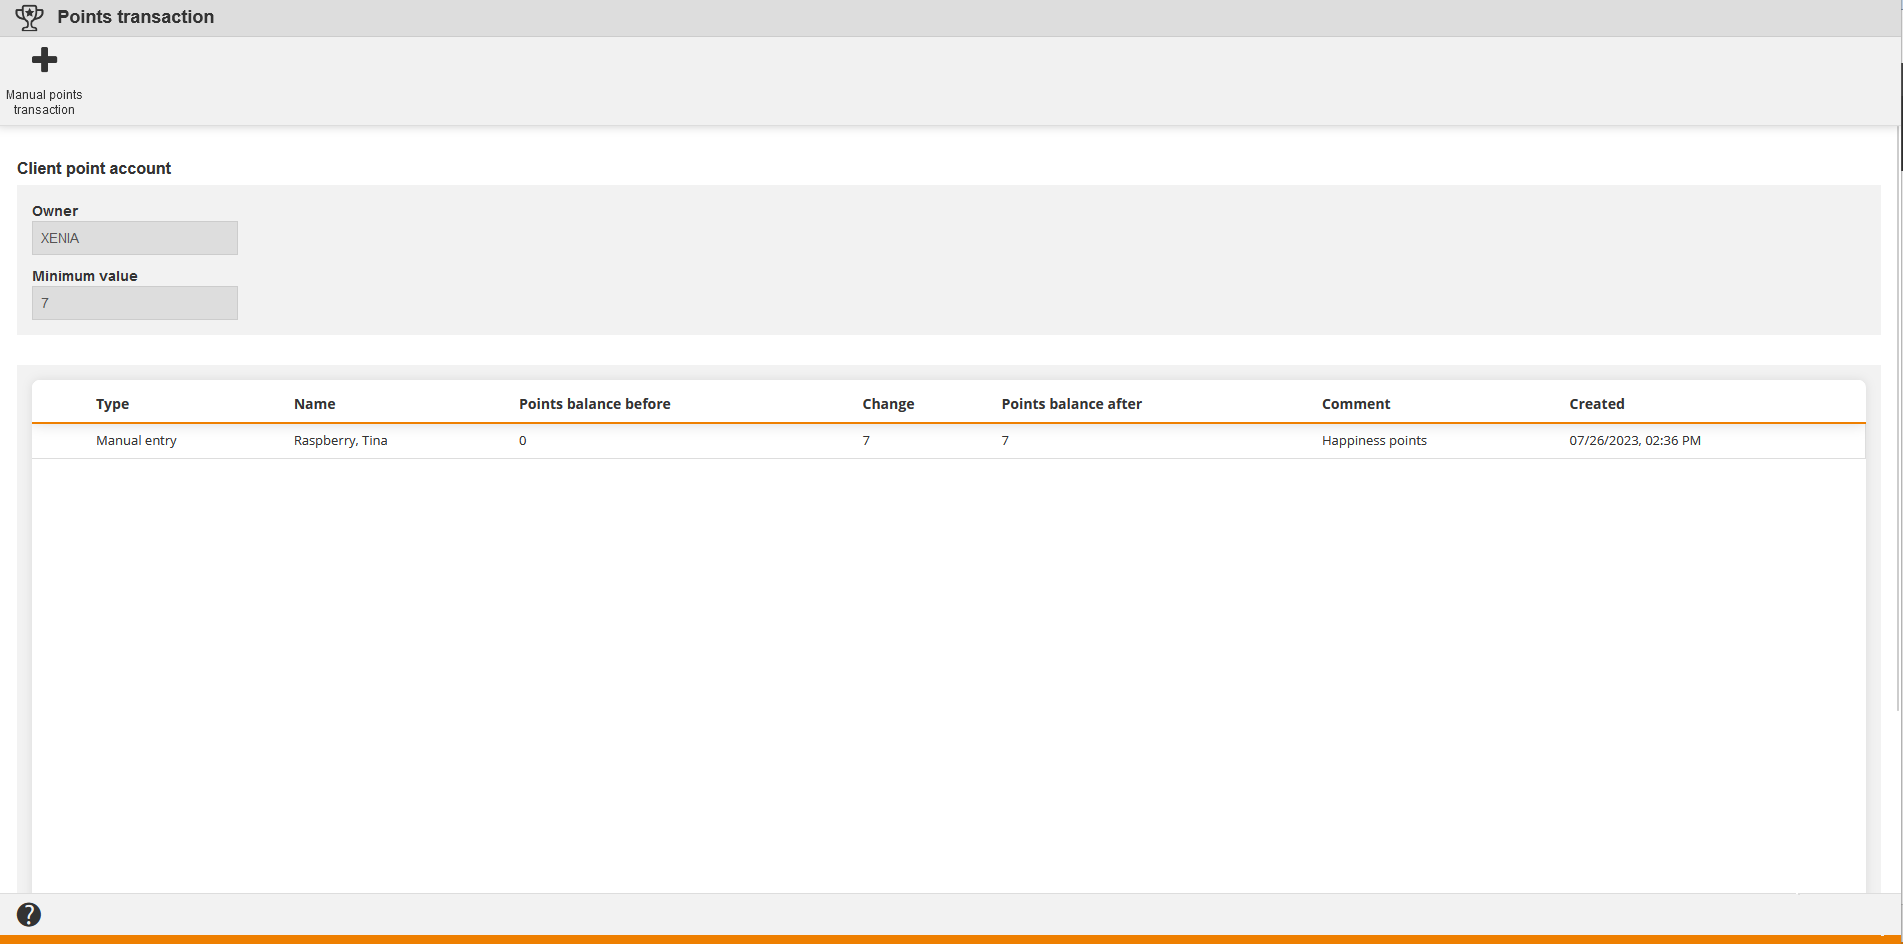
The dialog window Manual points transaction closes and the new table entry is shown (see third screenshot).
You see under Name your last name, first name and in the column Created the day and the time of the manual points transaction.
If there are automatic points transactions you see the name of the course activation instead in the column Name. - Close the wizard Manual points transaction via clicking the X.
The points of the corresponding Personal point account are updated in the table on the overview of the point accounts.
You can also manage the Client point account under Point accounts. You can add manual points transactions to this account type. Note that the client is defined as owner.
To manually add points to the corresponding Client point account of the owner (this means the client from the category tree), do the following steps:
- Click the Title of the favored Client point account while recognizing the client in the column Owner.
The wizard Points transactions opens (see first screenshot). - Click the button + Manual points transaction.
The dialog window Manual points transaction opens (see secibd screenshot). - Enter if required a comment like the reason of the manual points transaction in the comment field.
- Enter a value or click the arrows to get the favored value. You can enter +/- “10000000” as maximum value.
- Click the button Add.
The dialog window Manual points transaction closes and the new table entry is shown (see third screenshot). Your last name, first name is shown in the column Name. If there are automatic points transactions you see the name of the course activation. - Close the wizard Points transaction by clicking the X.
The points of the corresponding Client point account are updated in the overview table of the Point accounts.
