As you have been entered as speaker or co-speaker in an event date, the speaker cockpit is shown. The author defines in the Client wizard on the tab Options under the option Pages in the user area, which pages are deactivated in the user area. A deactivation of the speaker cockpit is possible, also a restricted view on learning place, team leader cockpit and speaker cockpit for example.
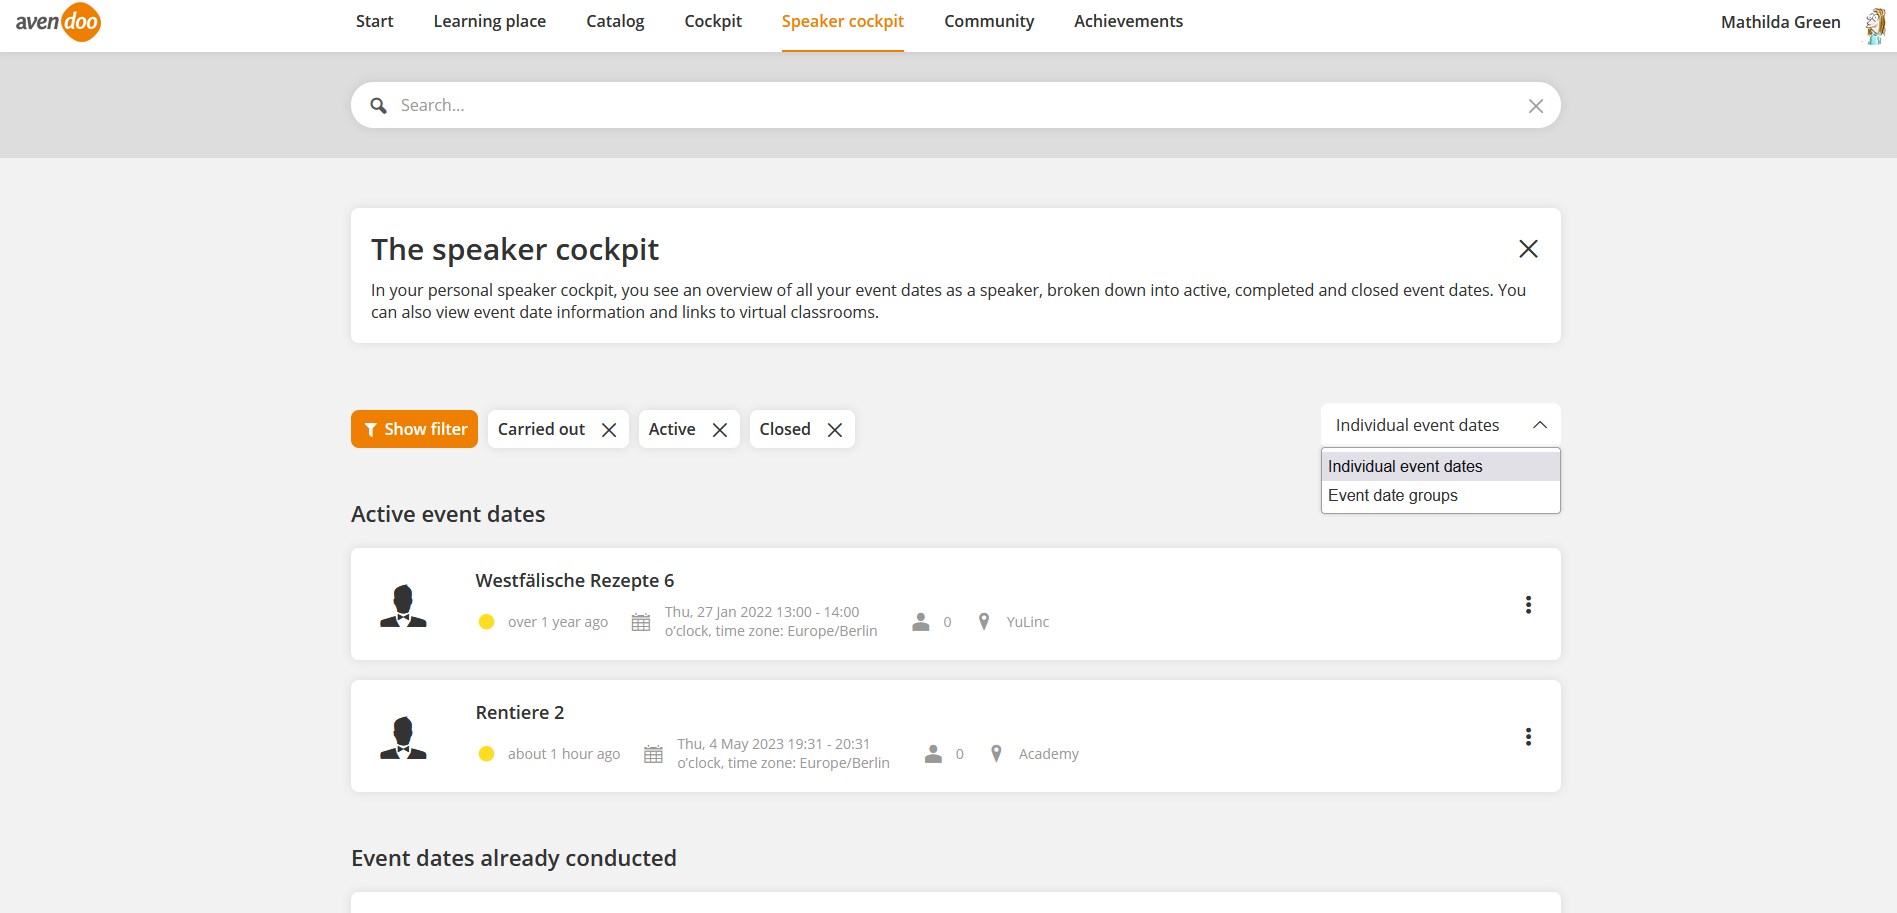
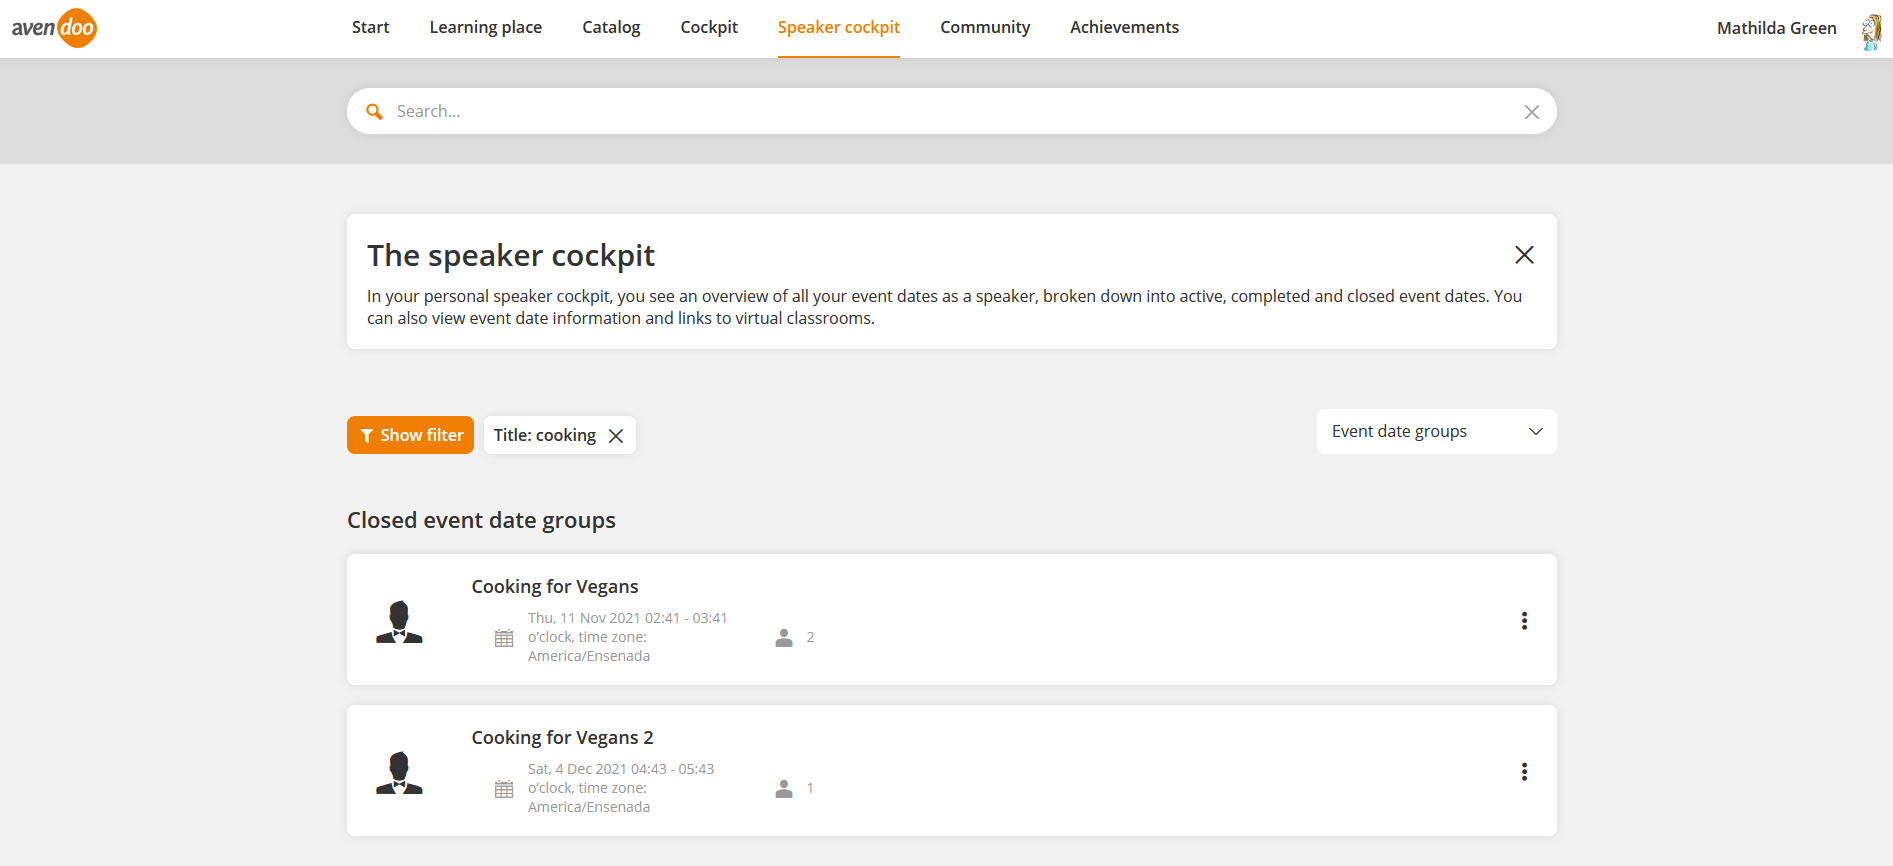
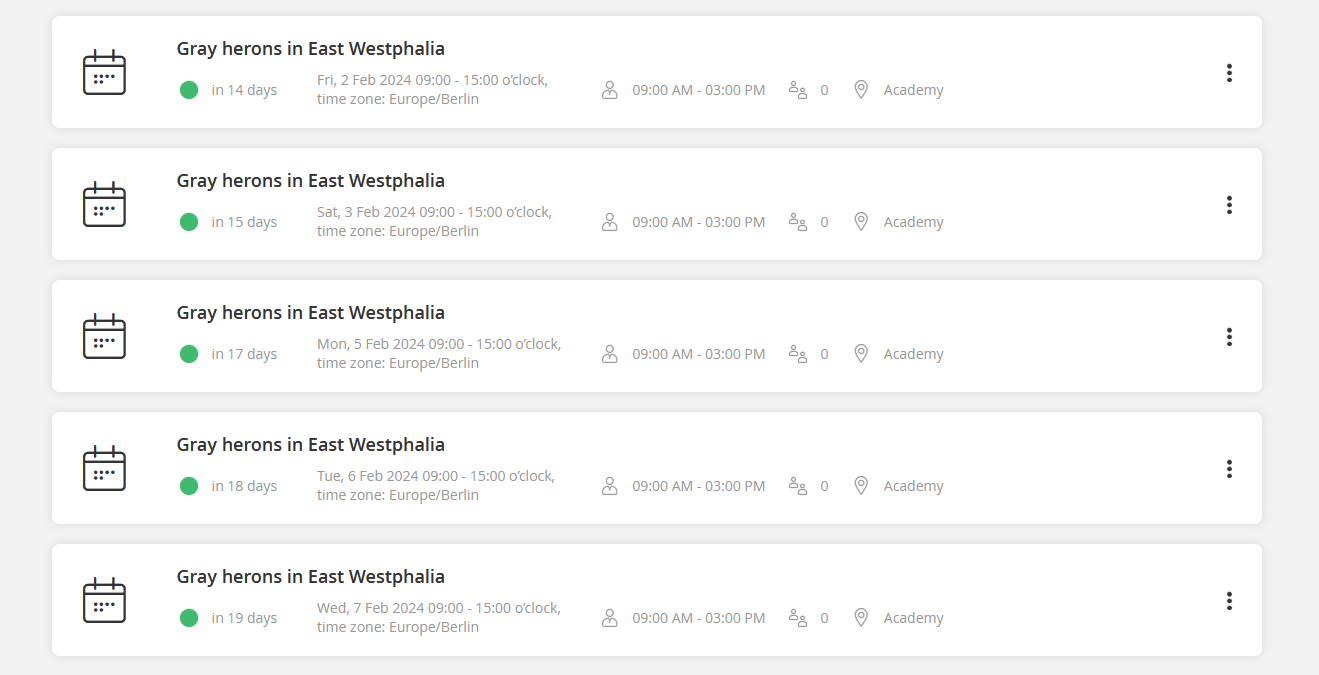
You can select between Individual event dates (see first screenshot) and Event date groups (see second screenshot).
You see in the speaker cockpit as a speaker all your event dates at a glance and sorted by:
- initiated,
- active,
- already conducted,
- closed and
- canceled.
The oldest event date regarding starting date is listed first.
You see the single categories only, if there are event dates of this category.
You can read the status of the event date and see:
- when a future event date will start,
- when an event date is processing and how long the event date has been processing and
- if there has to be recorded an attendance list on a processed event date.
On virtual classrooms you find depending on settings sooner or later a link, which directs you directly into the room.
If the author has assigned you the user right “Record attendance at an event/an event date involving user-generated content instead of the usual author-generated content”, you can record the attendance list of the participants in the already conducted event date and you can show the attendance list of closed event dates. When recording the attendance you also see all participants, who are registered, even if they are in another client. Furthermore you can change the display and the order of the columns of the attendance list.
If the author has defined the Dynamic attendance list in the event under Sending attendance list in your event in which your’re speaker, you can download the attendance list as PDF.
Filters
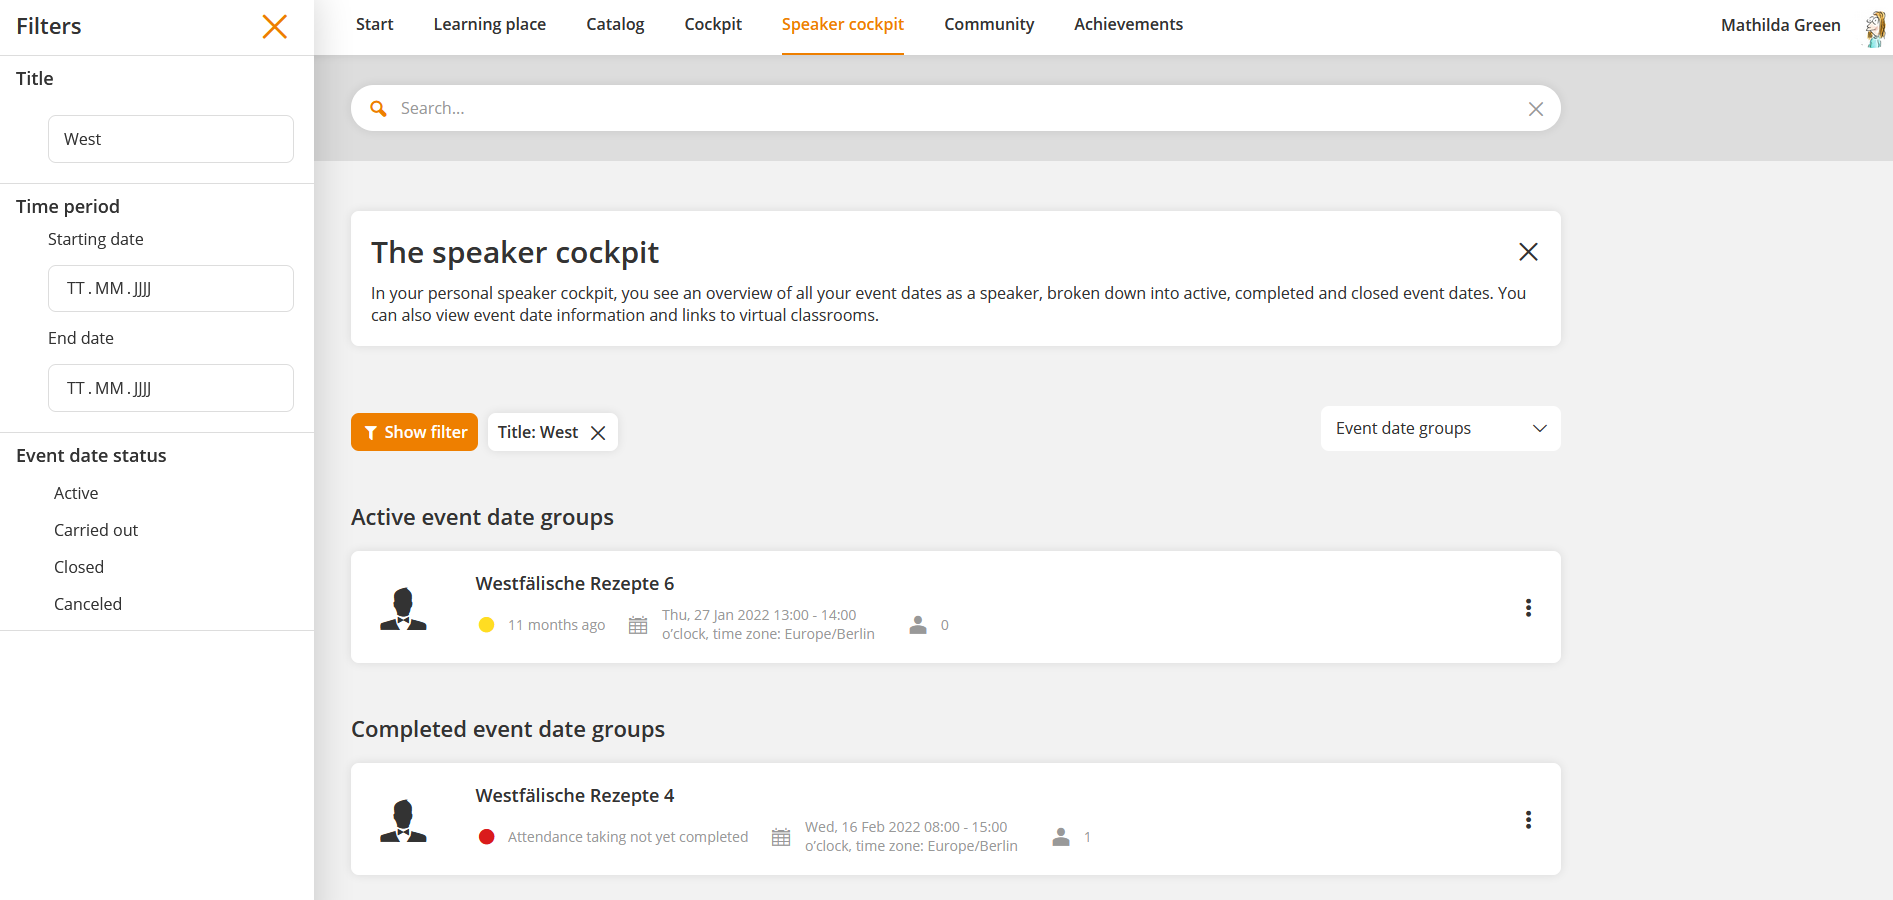
If you want to show the filters, click the button Show filter. Now you see a list of filters on the left side (see screenshot). There you can select your favored filters via clicking the corresponding line. Via clicking the X, this list closes.
You can filter by the following criteria:
- Title
- Time period
- Starting date
- End date
- Event date status
- Initiated
- Active
- Carried out
- Closed
- Canceled
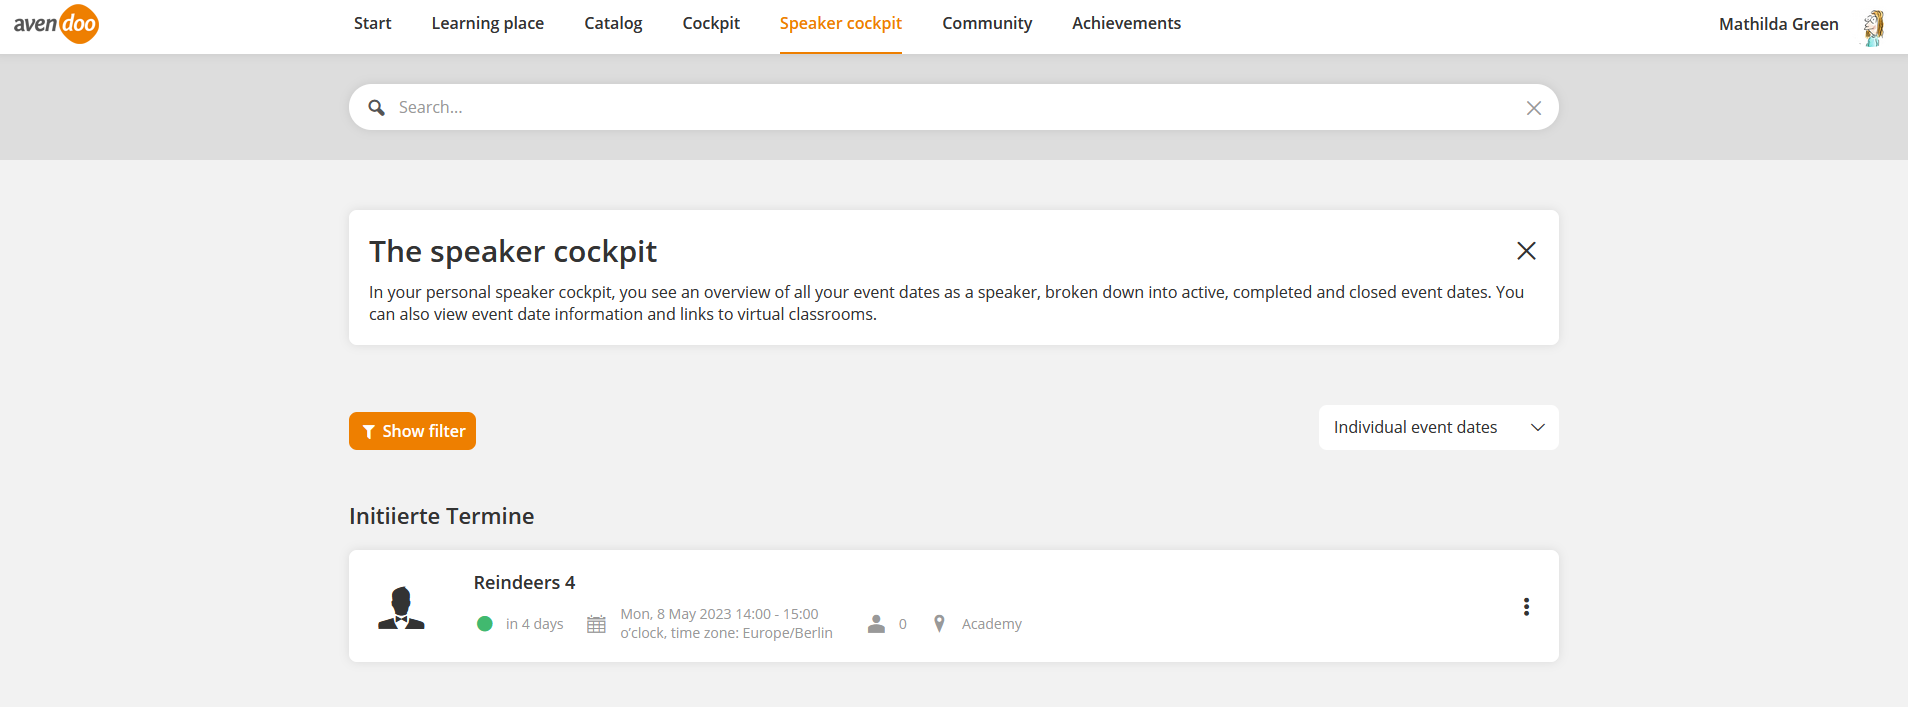
Initiated event dates
Under the category Initiated event dates you see all still not activated event dates.
Prerequisite for uploading documents
The author has assigned you the user right Create media for user content.
If you click the three points of the tile, you can click Go to date on Individual event dates and To the event date group on Event date groups (see second screenshot), to show event dates and event date groups.
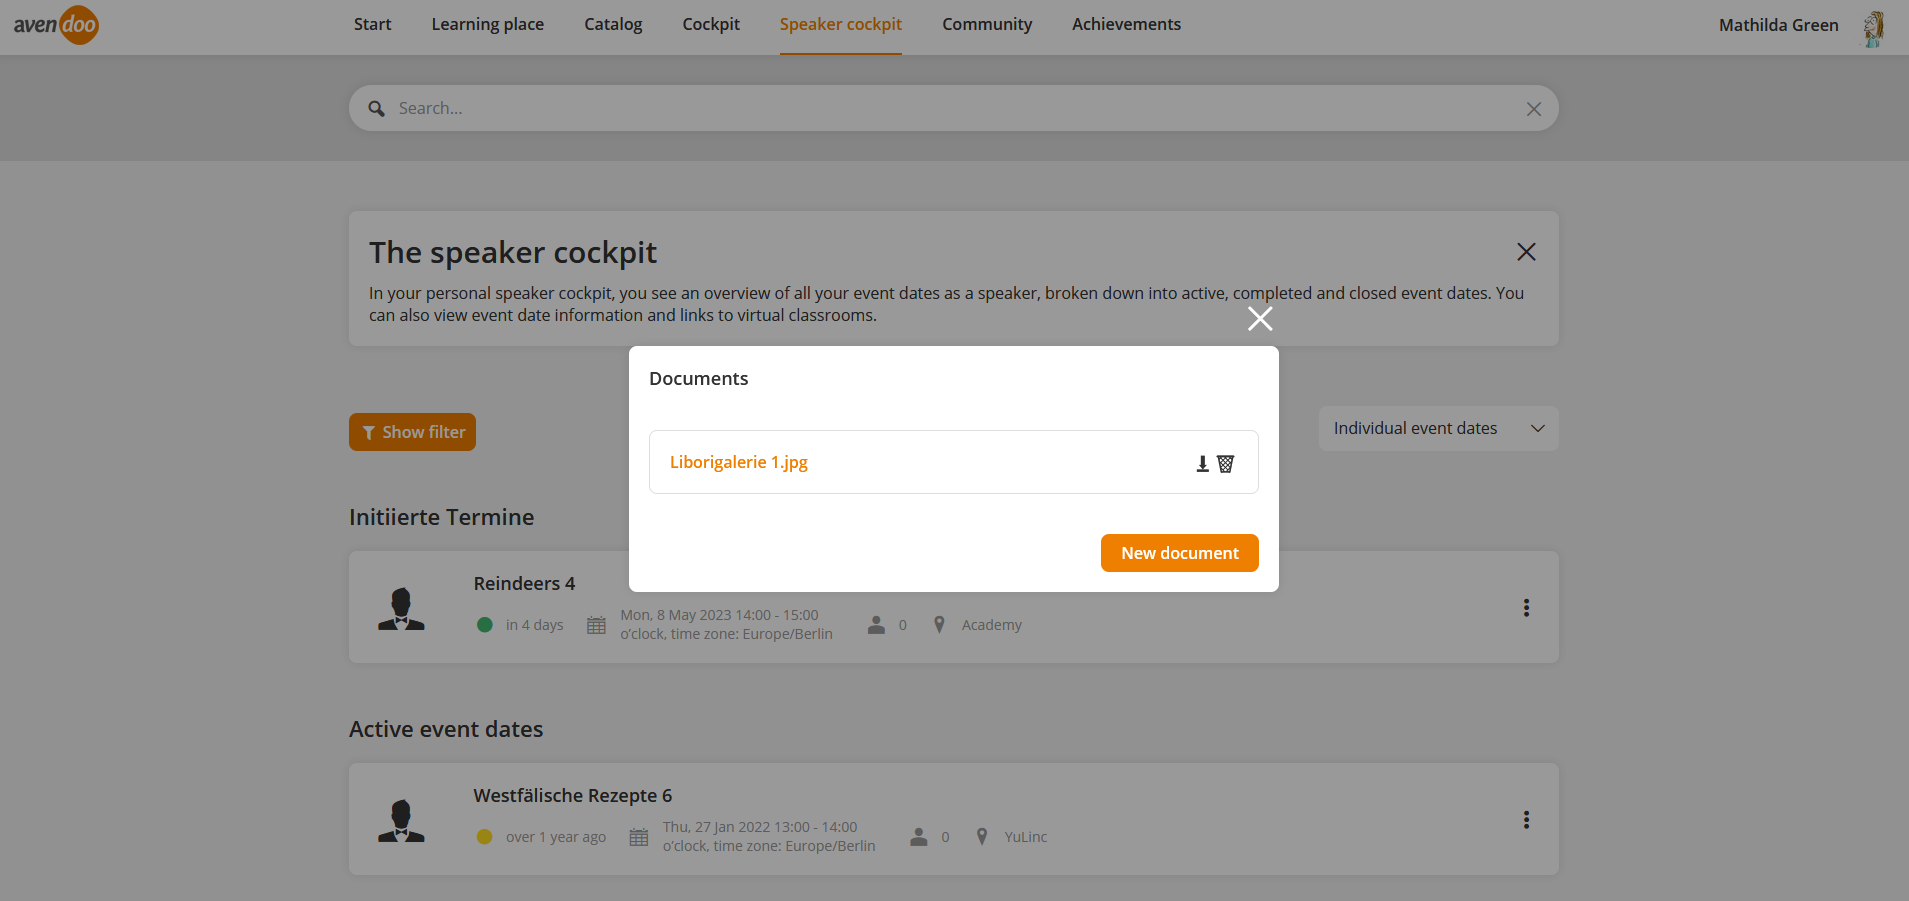
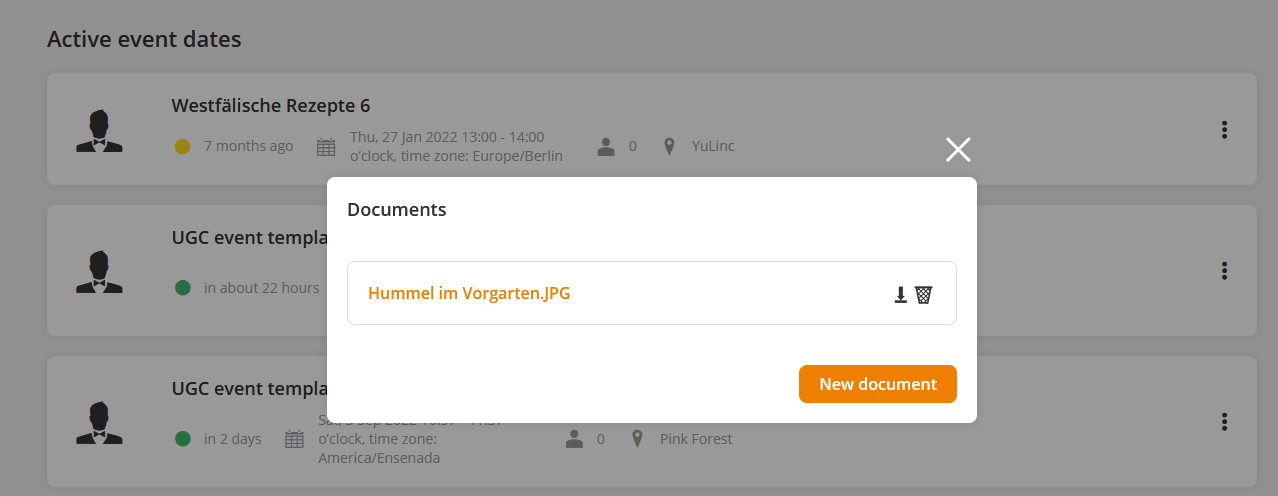
If you click the three points of the tile, you can click Documents of individual event dates (see third screenshot) to display and/or add new documents.
If you have chosen the view Individual event dates, you can get to the corresponding event date via the link Show QR-Code per Deeplinking.
If you have chosen the view Individual event dates, the single times as speaker are shown on the corresponding event date tile (see fourth screenshot).
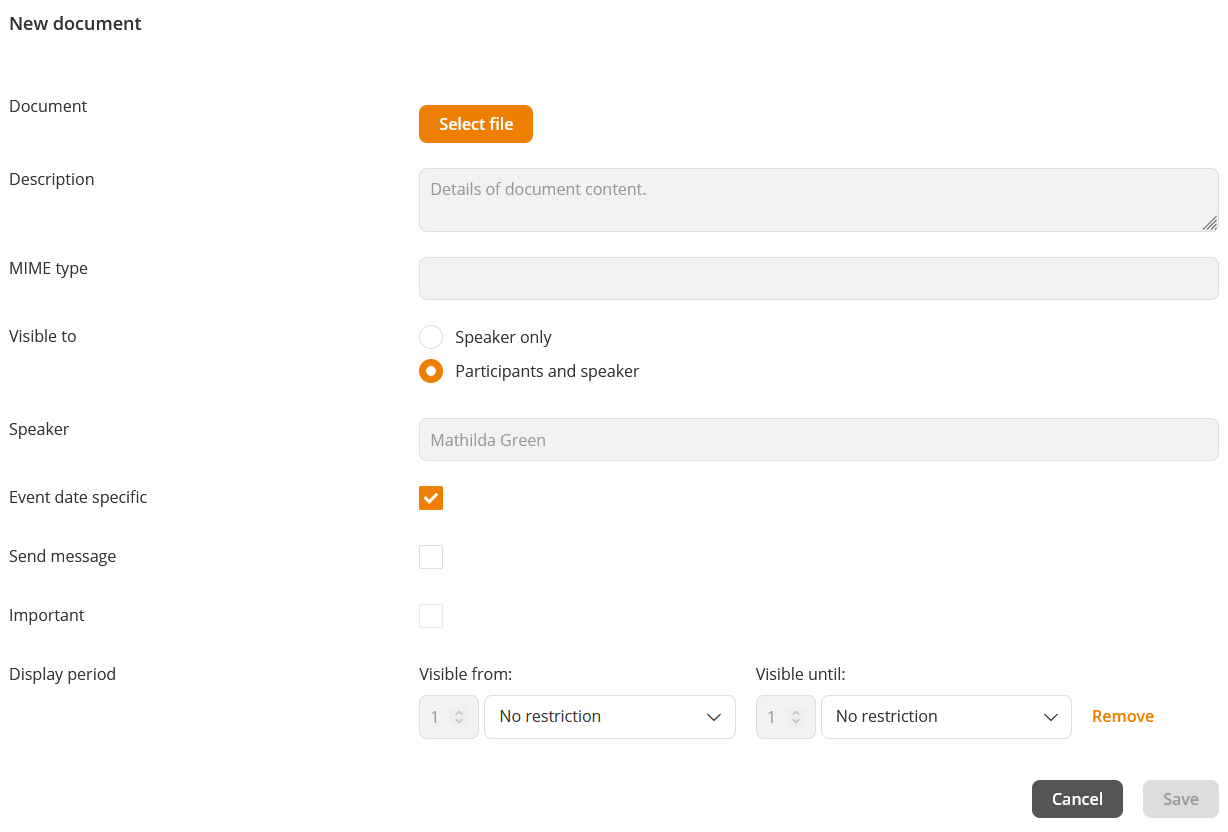
- To add new documents click first the three points, then on Documents and after that the button New document. The dialog window New document opens (see fifth screenshot).
- To select a file or medium click the button Select file. The dialog window Select file opens (see sixth screenshot). A search with date and title is available and you can upload a new medium. You confirm your selection finally by clicking the button Choose.
- The fields Description, MIME type and Speaker are shown as not changeable.
- Select under Visible, for whom the document should be visible: Speaker only or Participants and Speaker.
- If required set a check mark by Event date specific (set per default), Send message and/or Important.
– If you set the check mark Event date specific, then the document is only for this event date and their participants relevant. The document will not be copied when the event date is copied and thus the corresponding document is not available in the copied event date.
– If you set the check mark Send message a notification for this document will be sent.
– If you set the check mark Important this document can also be opened if there’s no longer access to the course.
– Only the author can set the check mark Important on the tab Documents in the Event date wizard for making the document accessible, even when there’s no access to the course anymore. - For the display period of the document is No restriction per default. You can select Visible from and Visible until in combination with Start of event, Visible x days before start of event or after start of event. If required you can also remove the display period. The options are shown again if you click on the button Add.
- Finally, you click the button Save. The dialog window documents with the added documents are shown (see seventh screenshot).
- You can edit the document via clicking the title. Also you can upload or delete it.
- Via clicking the X you close the dialog window Documents.
If you click the three points of the tile, you can also click Go to date (see second screenshot) to show the preview of the event date.
Note that you will see no event dates, because this event date is only initiated and thus no user can register to it.
Active event dates
Under the category Active Event dates you see all active, still not carried out or not already closed event dates.
If the author has configured a Virtual Classroom for the course, the corresponding link To the Virtual Classroom is shown (see first screenshot).
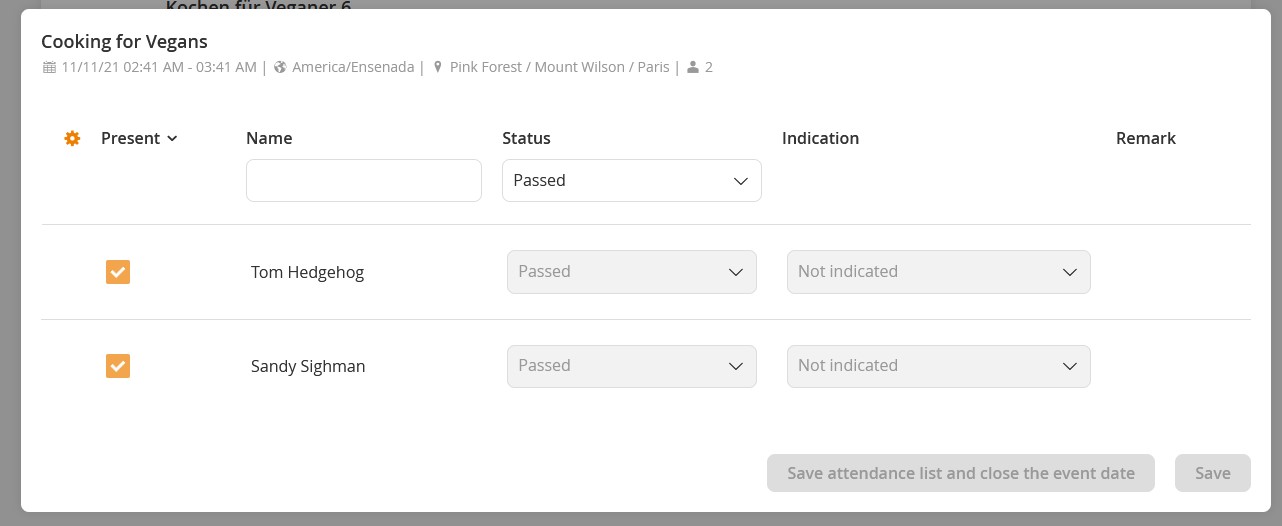
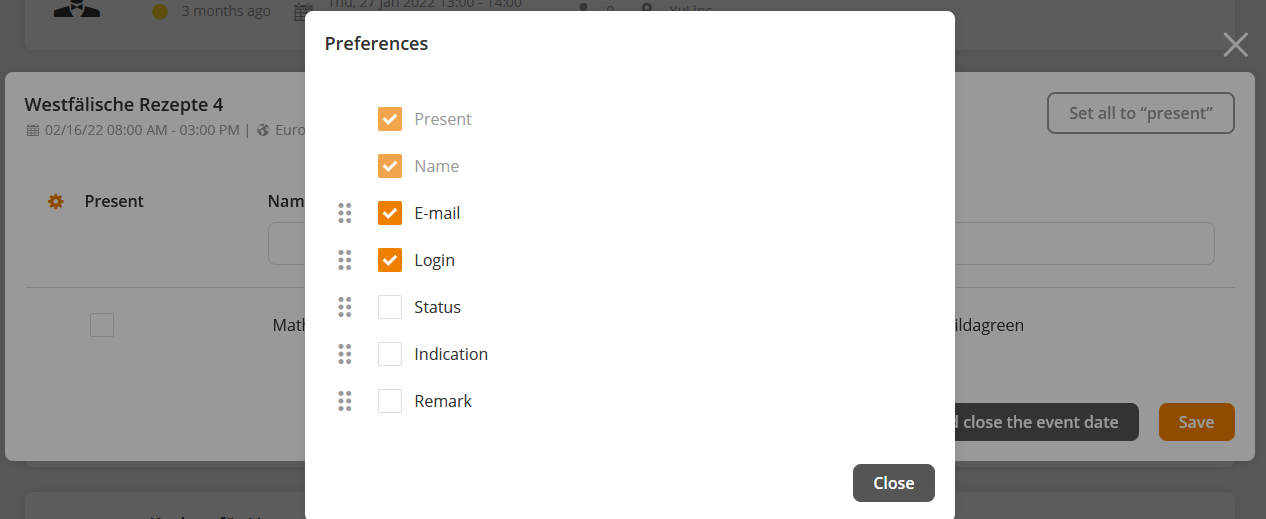
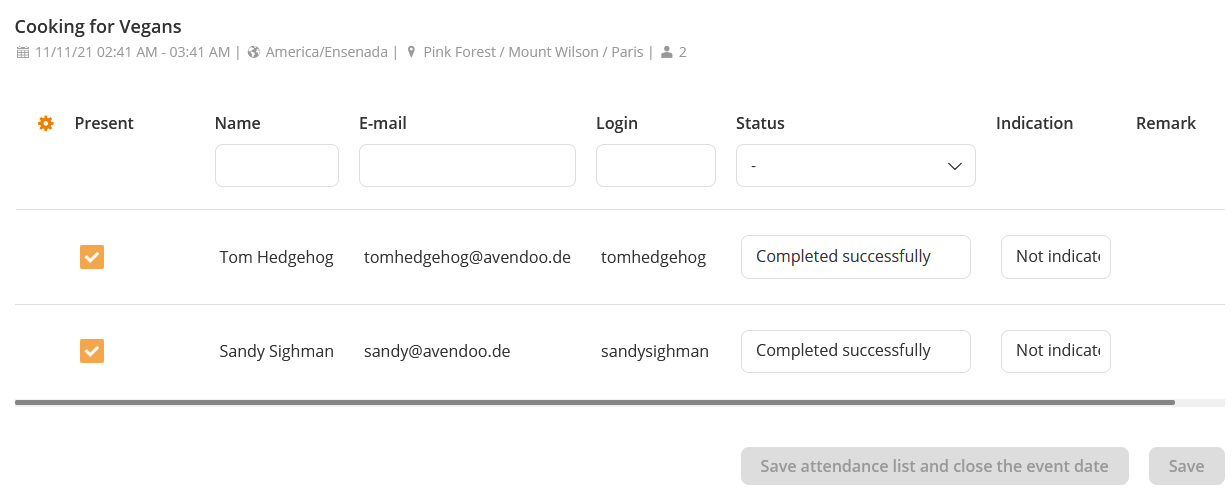
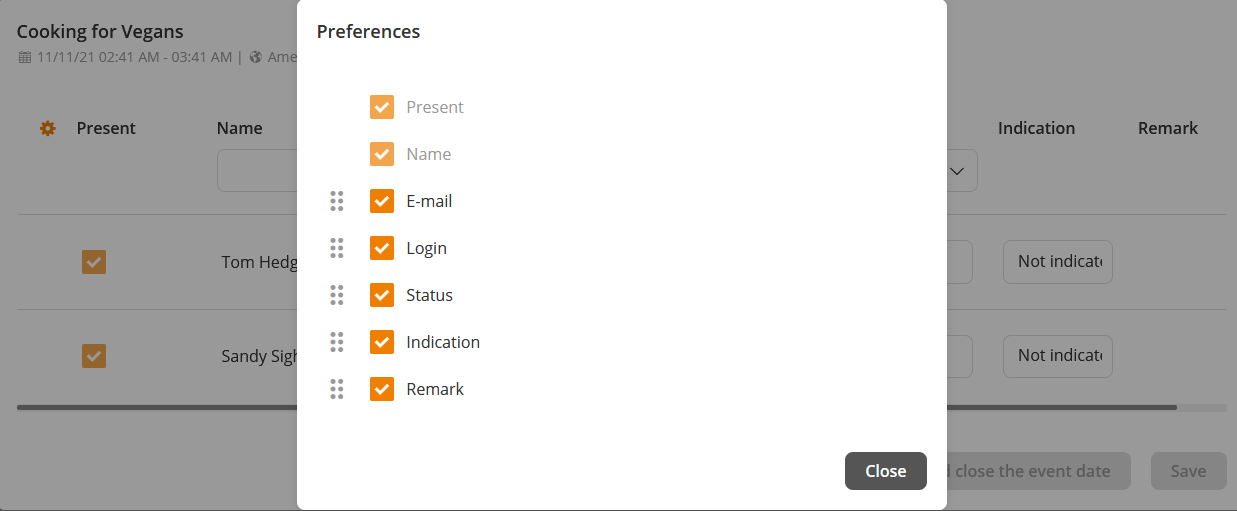
- If you click the three points on a course tile, then you can click Attendance list of Individual event dates and of Event date groups (see second screenshot). The dialog window with the title of the event opens. Via clicking the Rear wheel you can configure the columns of this dialog window (see third screenshot). You can show the following columns: Present, Name, E-mail, Login, Status, Indication and Remark. Additionally, you change the order by using drag and drop.
You see the participants data of the attendance list, which the author has maintained in the Event manager. You can filter this list by Name, E-mail, Login and Status.
Furthermore you can set all participants to Present, save the attendance list and close or your can only save the attendance list.
As the event date gets the status Closed, you can download the attendance list. - If you have chosen the view Individual event dates, the single times as speaker are shown on the corresponding event date tile.
- If you have chosen the view Individual event dates, you can get to the corresponding event date via the link Show QR-Code per Deeplinking.
- Prequisite for assessing particpants
The author has assigned the user right Assess participants (speaker) to your account.
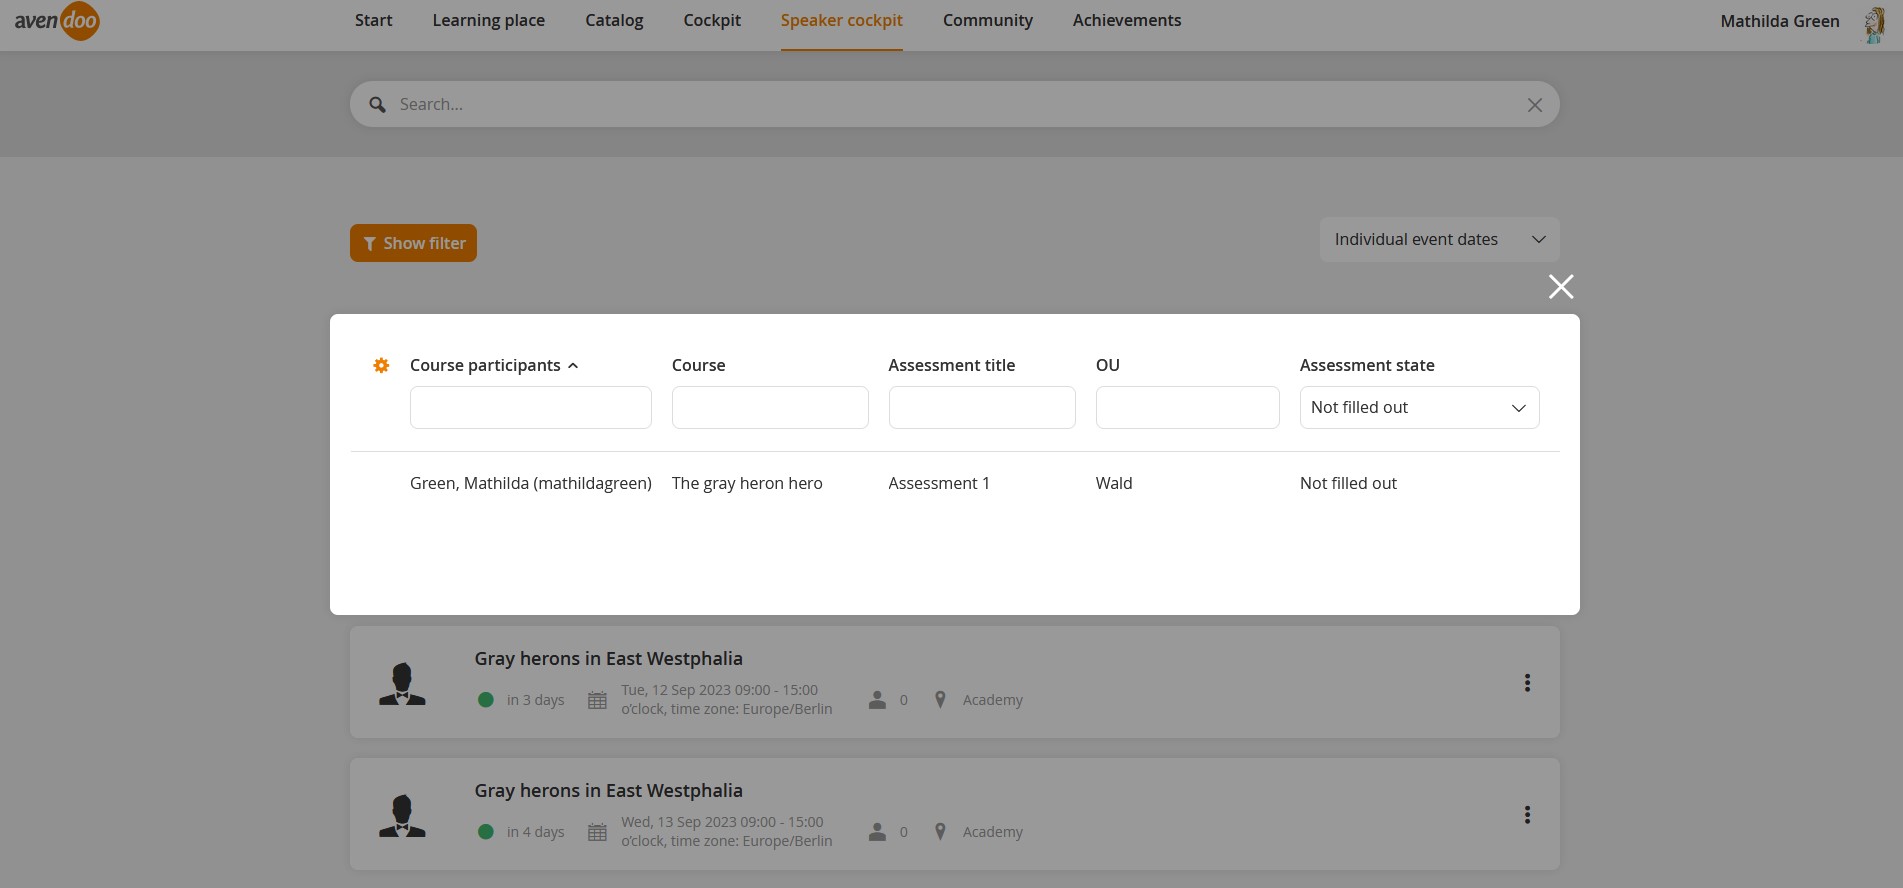
If you click the three points of a course tile, you can choose Assess participants of Individual event dates and Event date groups. The dialog window with the title of the event opens (see fourth screenshot).
Via clicking the Rear wheel you can configure the columns of this dialog window. You can show the following columns: Course participants, Course, Title, Assessment title, OU and Assessment state. Additionally, you change the order by using drag and drop.
You can filter this list by Course participants, Course, Assessment title, OU and Assessment state (Not filled out, Filled out, Filled out- passed and Filled out – did not pass.
Prerequisite for uploading documents
The author has assigned you the user right Create media for user content.
If you click on the three points of the tile, you can click on Documents of individual event dates (see second screenshot) to display and/or add new documents.
- To add new documents click first the three points, then on Documents and after that the button New document. The dialog window New document opens (see fifth screenshot).
- To select a file or medium click the button Select file. The dialog window Select file opens (see sixth screenshot). A search with date and title is available and you can upload a new medium. You confirm your selection finally by clicking the button Choose.
- The fields Description, MIME type and Speaker are shown as not changeable.
- Select under Visible, for whom the document should be visible: Speaker only or Participants and Speaker.
- If required set a check mark by Event date specific (set per default), Send message and/or Important.
– If you set the check mark Event date specific, then the document is only for this event date and their participants relevant. The document will not be copied when the event date is copied and thus the corresponding document is not available in the copied event date.
– If you set the check mark Send message a notification for this document will be sent.
– If you set the check mark Important this document can also be opened if there’s no longer access to the course.
– Only the author can set the check mark Important on the tab Documents in the Event date wizard for making the document accessible, even when there’s no access to the course anymore. - For the display period of the document is No restriction per default. You can select Visible from and Visible until in combination with Start of event, Visible x days before start of event or after start of event. If required you can also remove the display period. The options are shown again if you click on the button Add.
- Finally, you click the button Save. The dialog window documents with the added documents are shown (see seventh screenshot).
- You can edit the document via clicking the title. Also you can upload or delete it.
- Via clicking the X you close the dialog window Documents.
If you click the three points of the tile, you can also click Go to date (see second screenshot) to show the preview of the event date.
Event dates already conducted
Under the category Event dates already conducted you see all already conducted event dates, to which the attendance list still has to be recorded.
If you have chosen the view Individual event dates, the single times as speaker are shown on the corresponding event date tile.
Prerequisites for the display of the attendance list
The author with the right Edit system settings has configured the system settings “coach.cockpit.table.presencelist.columnconfig.allowed” and “coach.cockpit.table.presencelist.columnconfig.default” in an appropriate way.
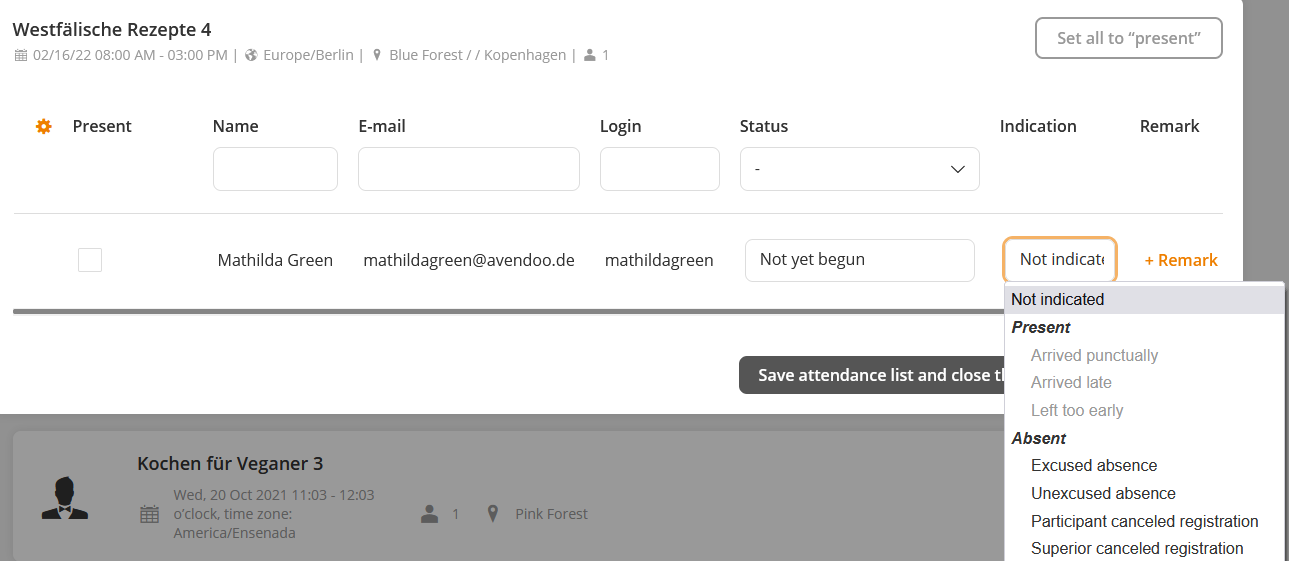
To record the attendance list of an already conducted event date, click Attendance list. The dialog box for recording the attendance of the already conducted event date opens. Here you find the title of the event in the first line and below the event dates with time zone, location and number of registered participants.
You can set the status of single participants to “Present” by setting a check mark, a status (Not attempted, Failed or Passed), choosing a Indication and then clicking the button Save. Alternatively, you can set all participants to “Present” by clicking the button Set all to “present” and then clicking the button Save.
Via clicking the gear wheel you can define the columns. Here you can add the columns Status, Indication and Remark, and you can change the order of the columns E-mail, Login, Status, Indication and Remark via drag and drop.
Furthermore, it’s possible that you search for registered participants. By doing this you can search for name, e-mail address, the login name and the status.
To save the attendance list and set the event date to status “Closed”, click the button Save attendance list and close the event date. Now you find this event date under Closed and you can’t further record any attendance.
If you still haven’t clicked the button Save attendance list and close the event date, the event tile got the text Attendance taking not completed.
If the Dynamic attendance list is assigned to your event, you can click the link Download attendance list (see first screenshot). This attendance list shows you independent from the client all participants of the event date.
If you have chosen the view Individual event dates, you can get to the corresponding event date via the link Show QR-Code per Deeplinking.
Prequisite for assessing particpants
The author has assigned the user right Assess participants (speaker) to your account.
If you click the three points of a course tile, you can choose Assess participants of Individual event dates and Event date groups. The dialog window with the title of the event opens (see fourth screenshot).
Via clicking the Rear wheel you can configure the columns of this dialog window. You can show the following columns: Course participants, Course, Title, Assessment title, OU and Assessment state. Additionally, you change the order by using drag and drop.
You can filter this list by Course participants, Course, Assessment title, OU and Assessment state (Not filled out, Filled out, Filled out- passed and Filled out – did not pass.
Closed event dates
Under the category Closed event dates you see all closed event dates, to which the attendance list of an already conducted event date was recorded and so it’s valid as closed. As the event date is closed the billing data sets are generated.
If you have chosen the view Individual event dates, the single times as speaker are shown on the corresponding event date tile.
If you have chosen the view Individual event dates, you can get to the corresponding event date via the link Show QR-Code per Deeplinking.
If the event dates are closed you can open the attendance list via the link Attendance list and you chan show it. You can search for name, e-mail address and the login name.
Via clicking the gear wheel in the attendance list you can define the columns. By doing this you can add the columns Status, Indication and Remark, also you can change the order of the columns E-mail, Login, Status, Indication and Remark via drag and drop.
Prequisite for assessing particpants
The author has assigned the user right Assess participants (speaker) to your account.
If you click the three points of a course tile, you can choose Assess participants of Individual event dates and Event date groups. The dialog window with the title of the event opens (see fourth screenshot).
Via clicking the Rear wheel you can configure the columns of this dialog window. You can show the following columns: Course participants, Course, Title, Assessment title, OU and Assessment state. Additionally, you change the order by using drag and drop.
You can filter this list by Course participants, Course, Assessment title, OU and Assessment state (Not filled out, Filled out, Filled out- passed and Filled out – did not pass.
Canceled event dates
Under the category Canceled event dates you see all canceled event dates or event date groups, which the author has canceled via the mass processing function Change the event date status → Canceled by selecting a reason for cancelation.
If you have chosen the view Individual event dates, the single times as speaker are shown on the corresponding event date tile.
Example
The author has entered Mathilda Green as speaker in the following events:
- “Interesting facts about the Bavarian Forest” on May 31th 2021 from 8 a.m. until 4 p.m. in the hotel “Pink Forest”, no registrations
- “2nd event run” on July 20th 2021 from 8 a.m. until 5 p.m. at “Magh und Boppert”, one registration but no attendance still recorded
- “Cooking for Vegans 3” on October 20th 2021 from 11 a.m. until 12 a.m. in the hotel “Pink Forest”, one registration, attendance recorded
- “Cooking for Vegans 6” on October 25th 2021 from 8 a.m. until 12 a.m. with virtual classroom, no registrations
Mathilda Green takes a look on October 20th 2021 at 3 p.m. into her speaker cockpit. Where and with which comments she would see the event dates?
- Number 1 and 3 is listed under Closed event dates.
- Number 2 is listed under Carried out event dates and got a red point because the attendance of the participant still isn’t recorded (Participant icon got the number 1).
- Number 4 is listed under Active event dates and got a green point. Furthermore she sees the comment “in 5 days” and the number besides the Participant icon is zero. Also there’s a link called To the virtual classroom.
