Inhalte
- 1 What are learning units?
- 2 Search
- 3 My event dates
- 4 Required
- 5 Optional
- 6 Bookmarks
- 7 Finished
- 8 My content
- 8.1 Filters
- 8.2 Event dates
- 8.3 Learning unit
- 8.3.1 Step-by-step procedure
- 8.3.1.1 Step 1
- 8.3.1.2 Step 2
- 8.3.1.3 Step 3
- 8.3.1.4 Step 4
- 8.3.1.5 Step 5
- 8.3.1.6 Step 6: Add new section (optionally)
- 8.3.1.7 Step 7: Add new obstacle (optionally)
- 8.3.1.8 Step 8: Add new event (optionally)
- 8.3.1.9 Step 9
- 8.3.1.10 Participant management
- 8.3.1.10.1 Step 1
- 8.3.1.10.2 Collective registration
- 8.3.1.10.3 Copy from (copy participants)
- 8.3.1.10.4 Participant rules
- 8.3.1.10.5 Filters in the participant management
- 8.3.1.10.6 Preferences in the participant management
- 8.3.1.10.7 Sorting in the participant management
- 8.3.1.10.8 User selection in the participant management
- 8.3.1.10.9 Save
- 8.3.1.11 Result
- 8.3.1 Step-by-step procedure
- 9 View of the learning units (tiles)
- 10 My calendar
After successful self-registration or authentication as user by OpenID Connect or login as user by Single Sign-On with SAML2 you get to the Learning place.
Additionally, you see Remote content activations with content connector LTI (Lecturio or Masterplan for example) on your learning place. Note that you see these remote content activations only, if you’ve opened and edited them in the catalog before.
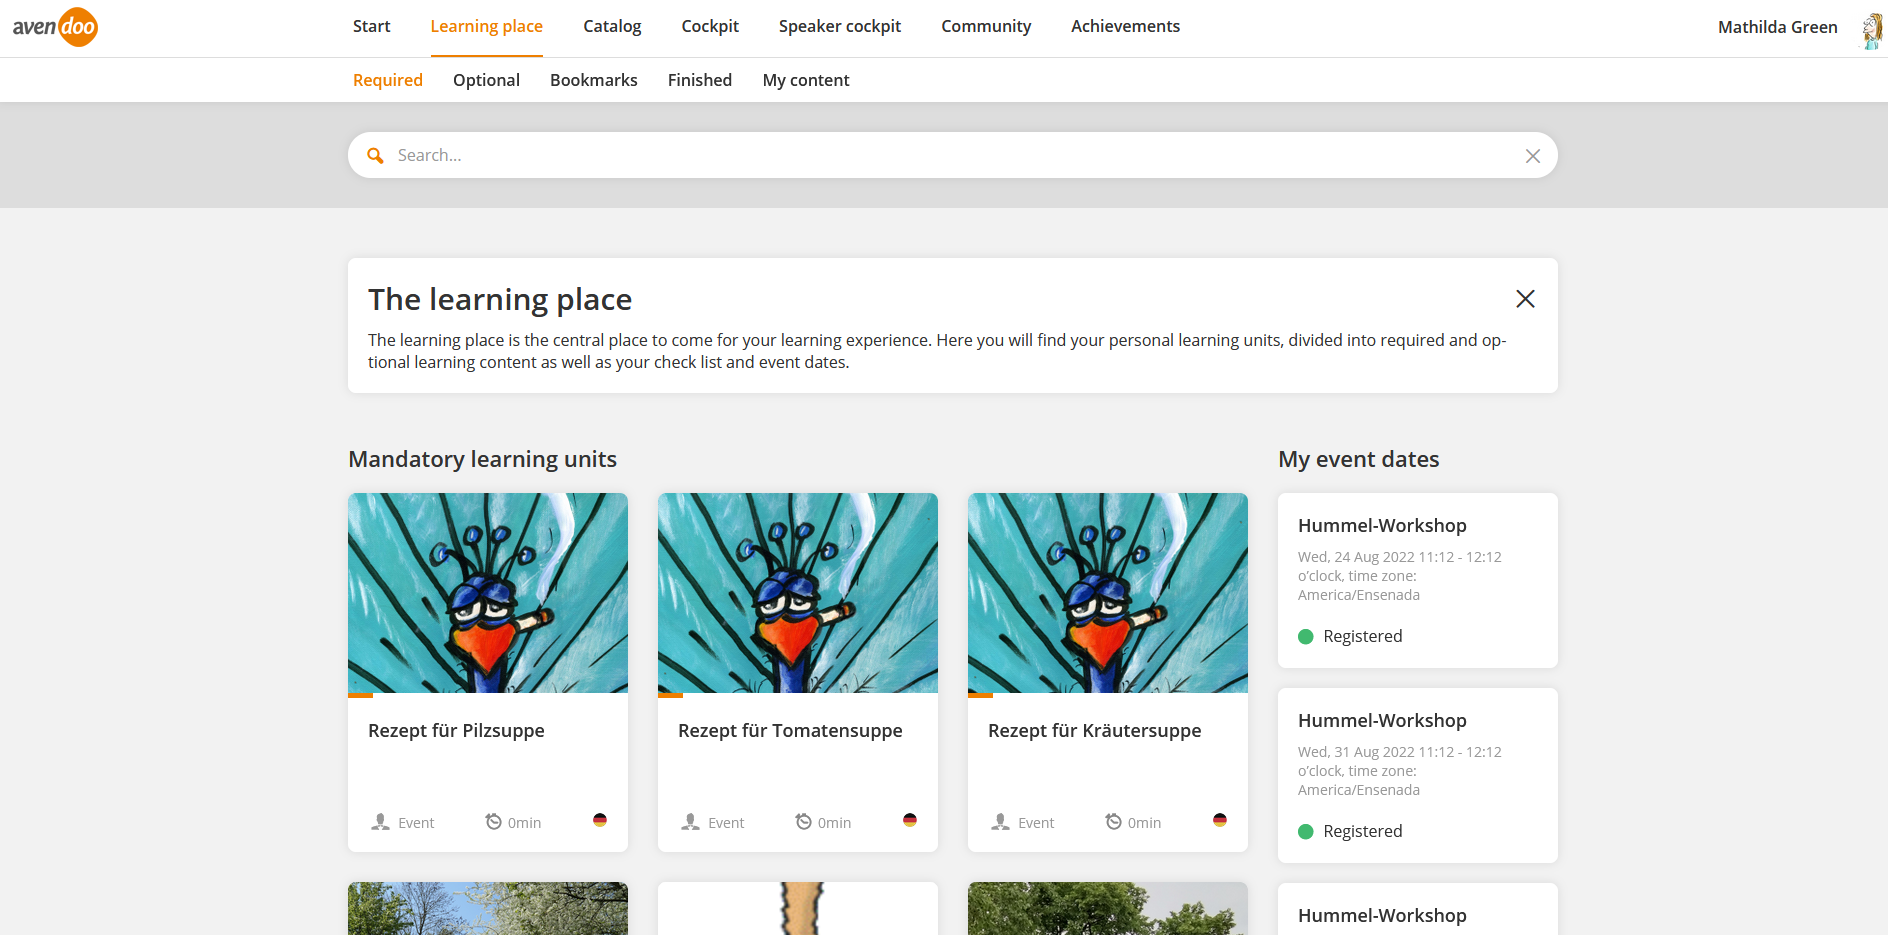
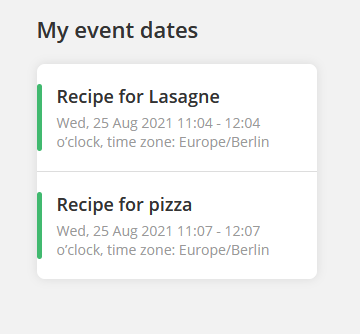
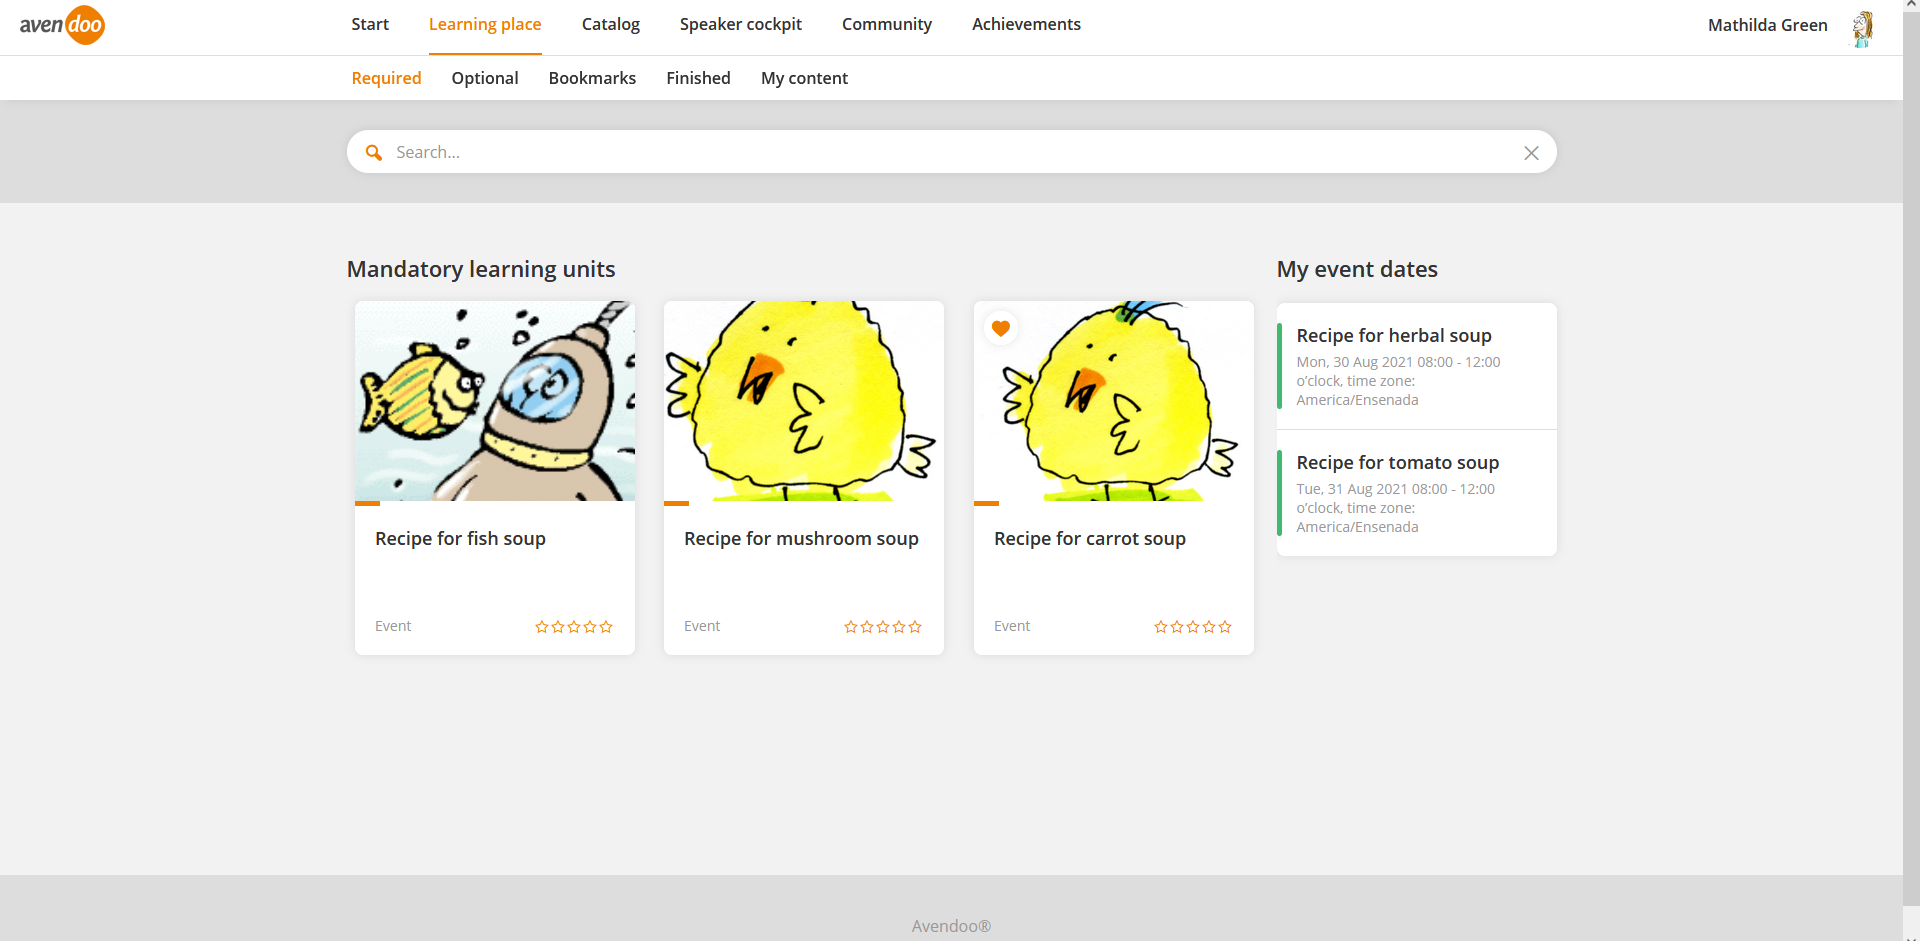
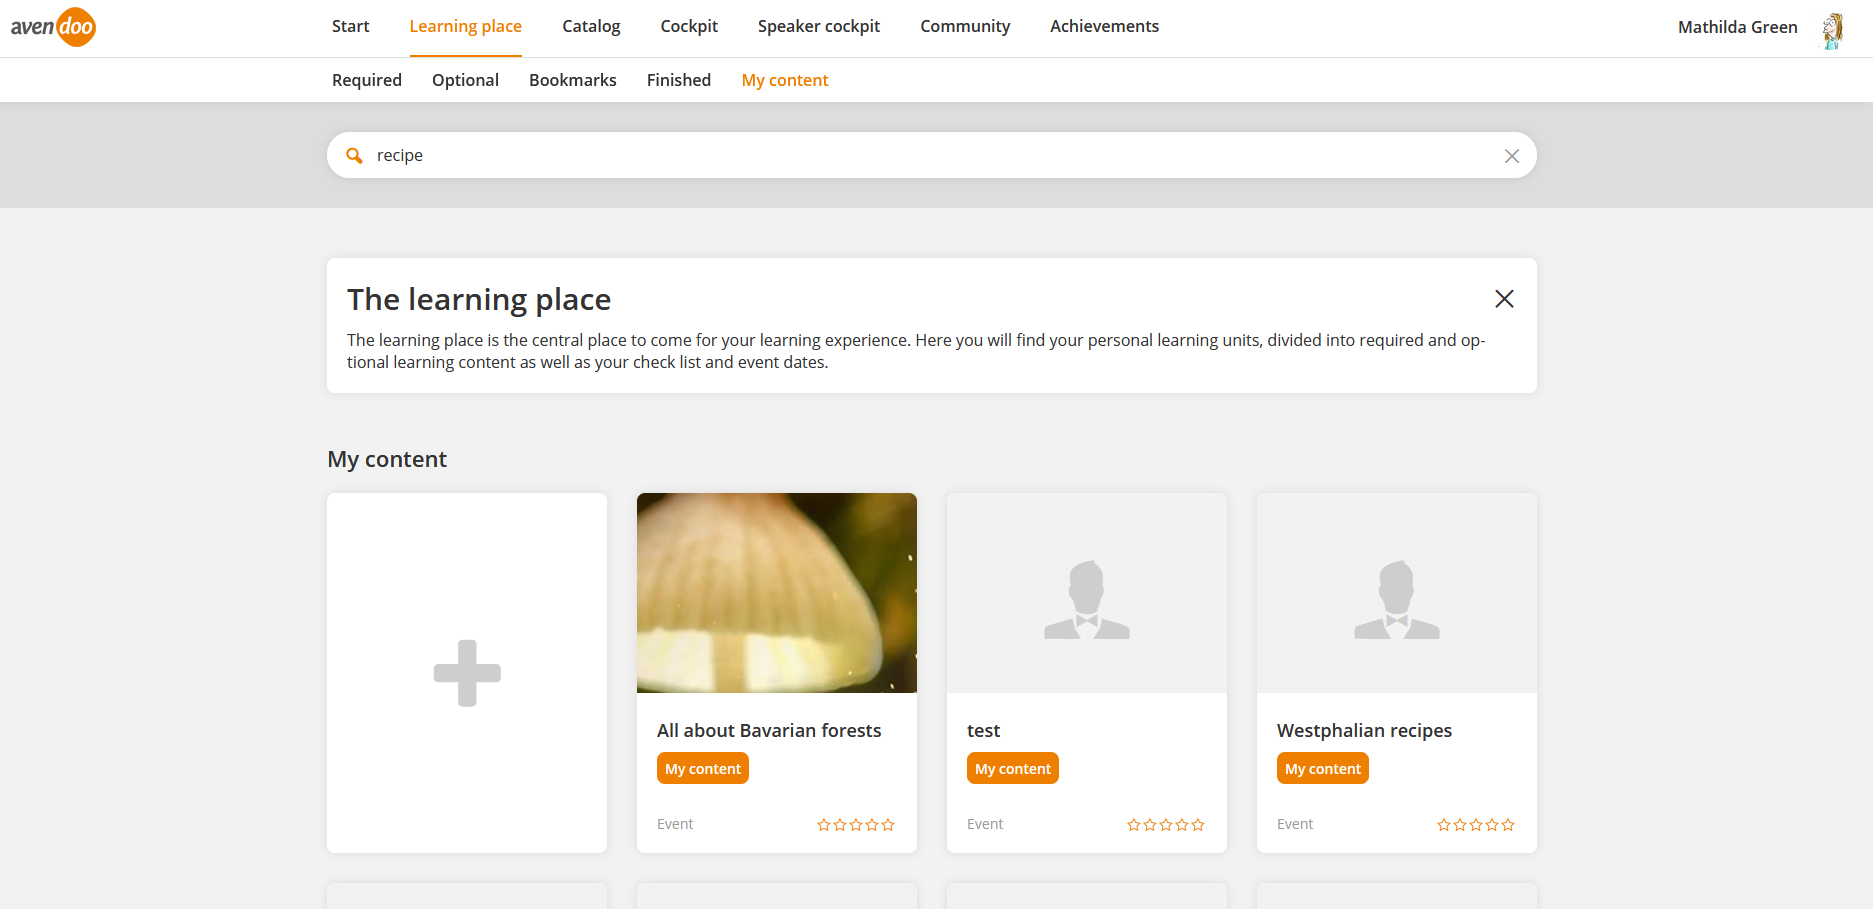
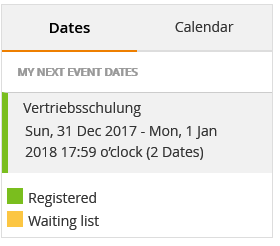
All mandatory, optional and finished learning units and also the learning units you’ve liked (bookmarks) and your content are shown on five tabs at your learning place. You get the preview image displayed, which the author has uploaded in the Course activation wizard under Options -> Preview. Under My event dates you see, which event dates are next. Here you see the title of the event or the course, the date, the time and the time zone of the event location. The event dates are listed one below the other.
The rubric My event dates is shown on the tabs Required, Optional, Finished and Bookmarks. You see up to four event dates. If you click on the link All event dates under the last event date you get to My calendar. Under My event dates you see which event dates you got next. Here are the title of the event or the course, the date, time and time zone of the venue shown. The event dates are listed among one another. You get to the detailed view by clicking on the corresponding event date.
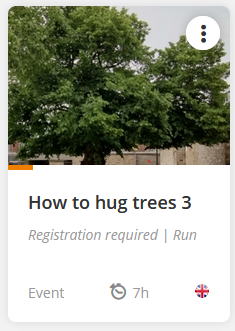
If there’s an event in a course and you still haven’t registered as user and the event got event dates in future, you see the text Registration required on the course tile on the learning place.
If team leaders or authors have assigned learning units already to you, these units are shown in the overview. Via clicking the title you start the corresponding learning unit. You also find your added learning units on one of these tabs (Mandatory learning units, optional learning units and completed learning units). You add new learning units via the catalog or the search. Furthermore you can fold and expand the filter results at “My learning place” plus you can cancel the registration of the appropriate registered learning unit.
Frontend users can show the classification and the classification values of the course activations via CSS on the Start page and at the learning place. Therefore the author has added the variables “CourseClassificationAndValues” and/or “CourseClassificationValues” on the appropriate course page. Further information about variables you find under courses.
What are learning units?
Learning units in Avendoo® stand for tools of knowledge transfer. You can differ four learning formats in Avendoo®, which are explained below.
Training plans
A training plan shows you a path for different courses, that means a certain number of defined courses should be processed in order and should be completed. But you can choose between multiple paths in a training plan and thus you can complete the whole training plan in several ways.
Events
Events are for example face-to-face sessions, which are planned via Avendoo®. They are characterized by interaction between people. They can represent a meeting on location for example, also a conference call or an internet conference. Under Event details you find information about date, location, address, description, room, event speaker, free slots, price, group, business e-mail address and business phone number.
E-learning
Learning units of the type e-learning contain only objects, which you can process directly in the system.
Blended learning
Learning units of the type blended learning are a combination of e-learnings and events.
Search
You can search in the whole user frontend or team leader cockpit for learning untis. You set a filter regarding your just entered searching item. You get the corresponding learning units as result. You can open them via clicking them. If you click the button Show filter, filters are shown on the left side. You can select the corresponding line by clicking it. You close the filter via clicking the X.
You can show all mandatory and optional learning units via the filter At my learning place.
You can set the following filters:
- Learning format
- Event
- E-learning
- Training plan
- E-learning + event
- City
- At the latest, dates in
- 2 weeks
- 1 month
- 2 months
- 6 months
- Time period
- Starting date
- End date
- Status
- At my learning place
- Not at my learning place
- Classifications
- Approval
- Approval requested
- Approval not required
- Language
- Minimum rating
- Relevant to IDD
- Only relevant courses
- Content connector
- Certification
My event dates
Under My event dates you see the events dates, to which you are registered.
If you click the corresponding entry, you get to the corresponding detailed view of the event date in the original language (German for example). You can deregister if you want and if it is possible, you can create or edit additional services as well as you can add or change accompanying persons. You see besides the details of the event date the participants and the speakers.
Required
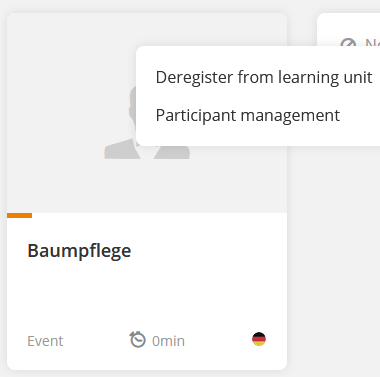
Under Required you see all learning units regarding reported needs which your team leader has created, and the learning units you have created under My content. Furthermore you see the learning units to which your team leader has registered you with the option Set “mandatory”. Via the context menu three points on the tile you can choose the menu entry Deregister from learning unit (see second screenshot).
Also you can open the Participant management and edit the list, if the author has activated you as team leader the object permission Register users to a course activation (to register users) via the course activation and the object permission Change edit mode for the favored users via the course activation (to set “optional” or to set “mandatory”). Further information about the object permissions you find here.
To open a learning unit, click the corresponding tile.
Optional
Under Optional you see all learning units, to which you can register. Furthermore the Remote contents with content connector LTI are shown.
Also you see here the learning units in which your team leader has registered you with the option Set “optional”. Via the context menu three points on the tile you can choose the menu entry Deregister from learning unit.
Also you can open the Participant management and edit the list, if the author has activated you as team leader the object permission Register users to a course activation (to register users) via the course activation and the object permission Change edit mode for the favored users via the course activation (to set “optional” or to set “mandatory”). Further information about the object permissions you find here.
To open a learning unit, click the corresponding tile.
Bookmarks
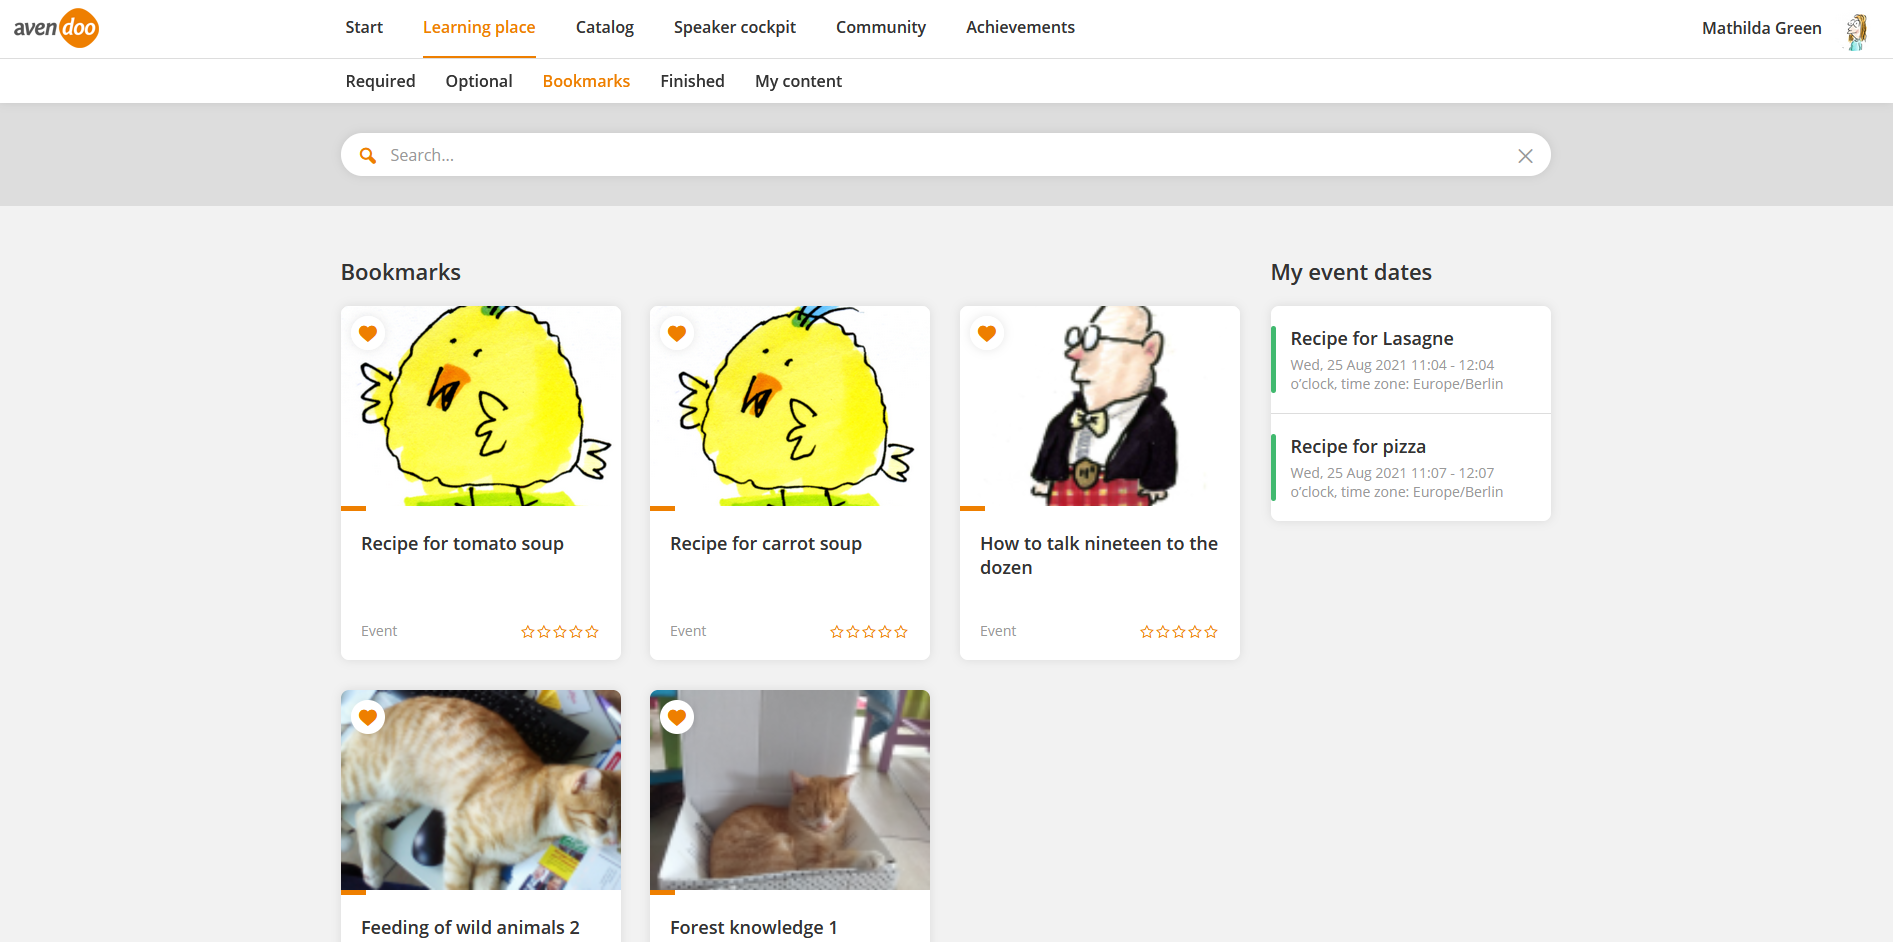
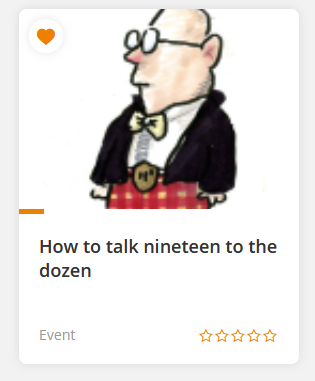
Under Bookmarks you see all marked learning units, which you have liked, this means via clicking the heart symbol in the upper left corner of the tile.
To open a learning unit, click the corresponding tile.
Finished
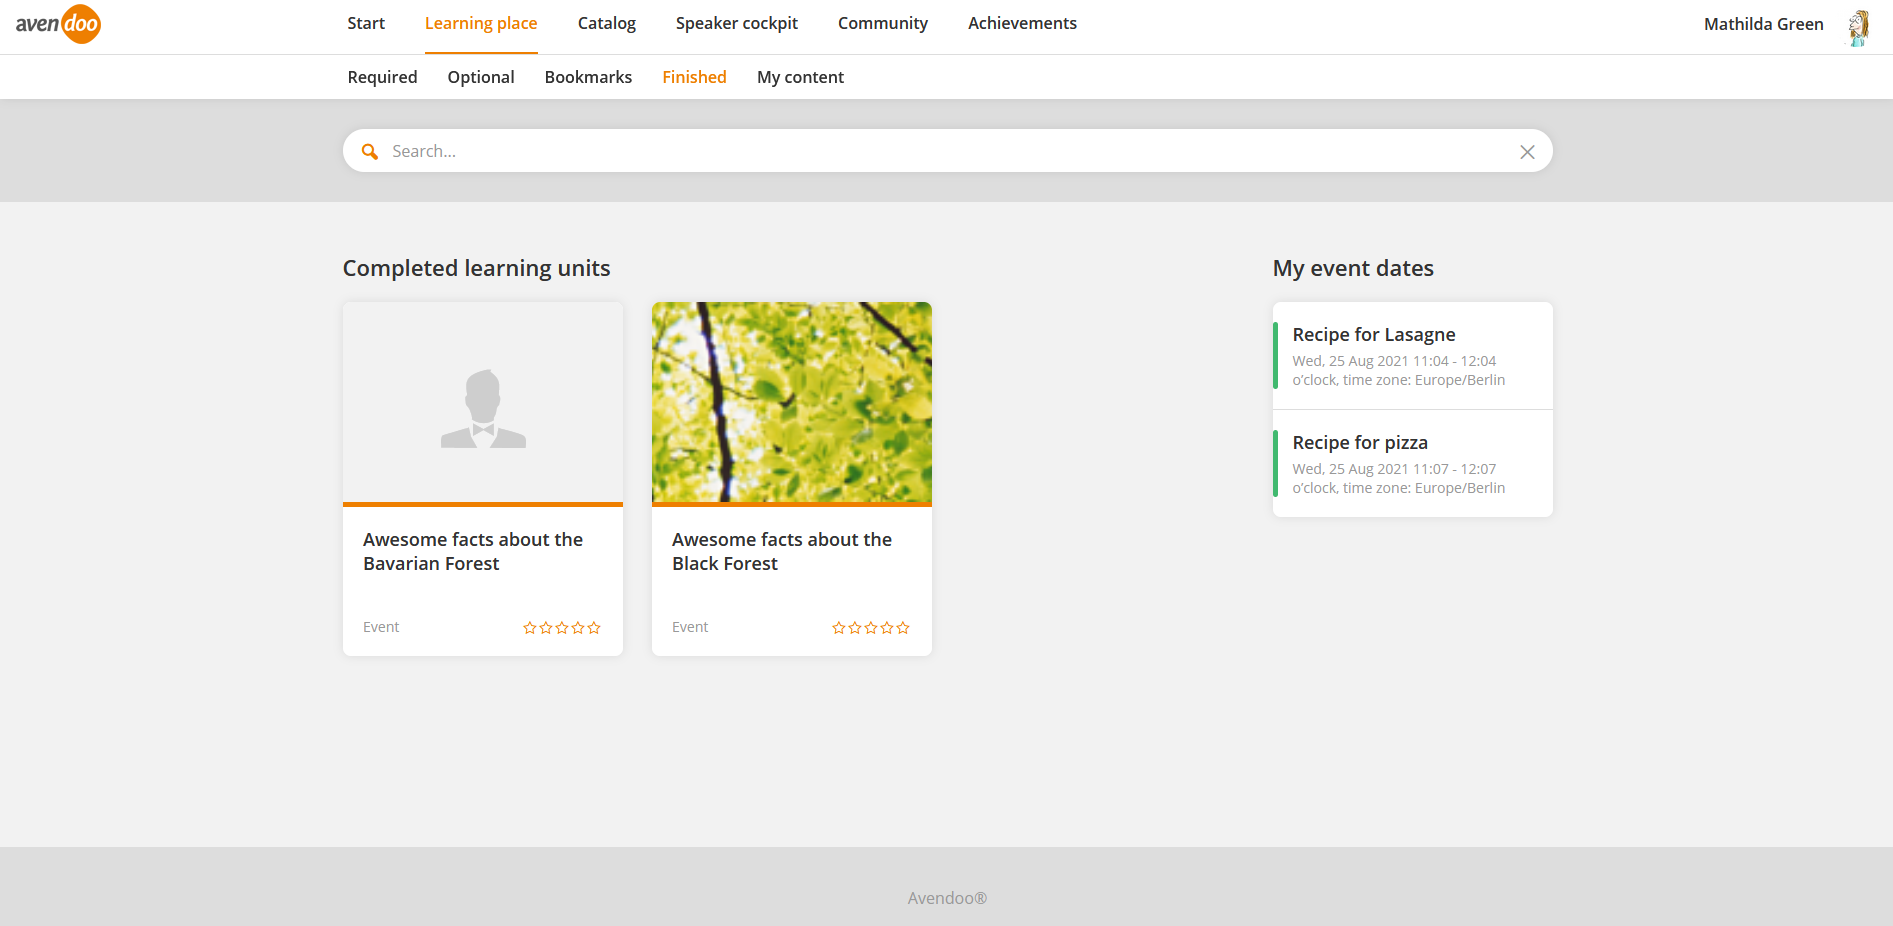
Under Finished you see the learning units, for which the event dates are closed.
The learning units are listed by descending completion date, this means that the learning unit with latest completion date is listed first.
You can like finished learning units. Then they got to the bookmarks.
To open a learning unit, click the corresponding tile.
My content
Filters
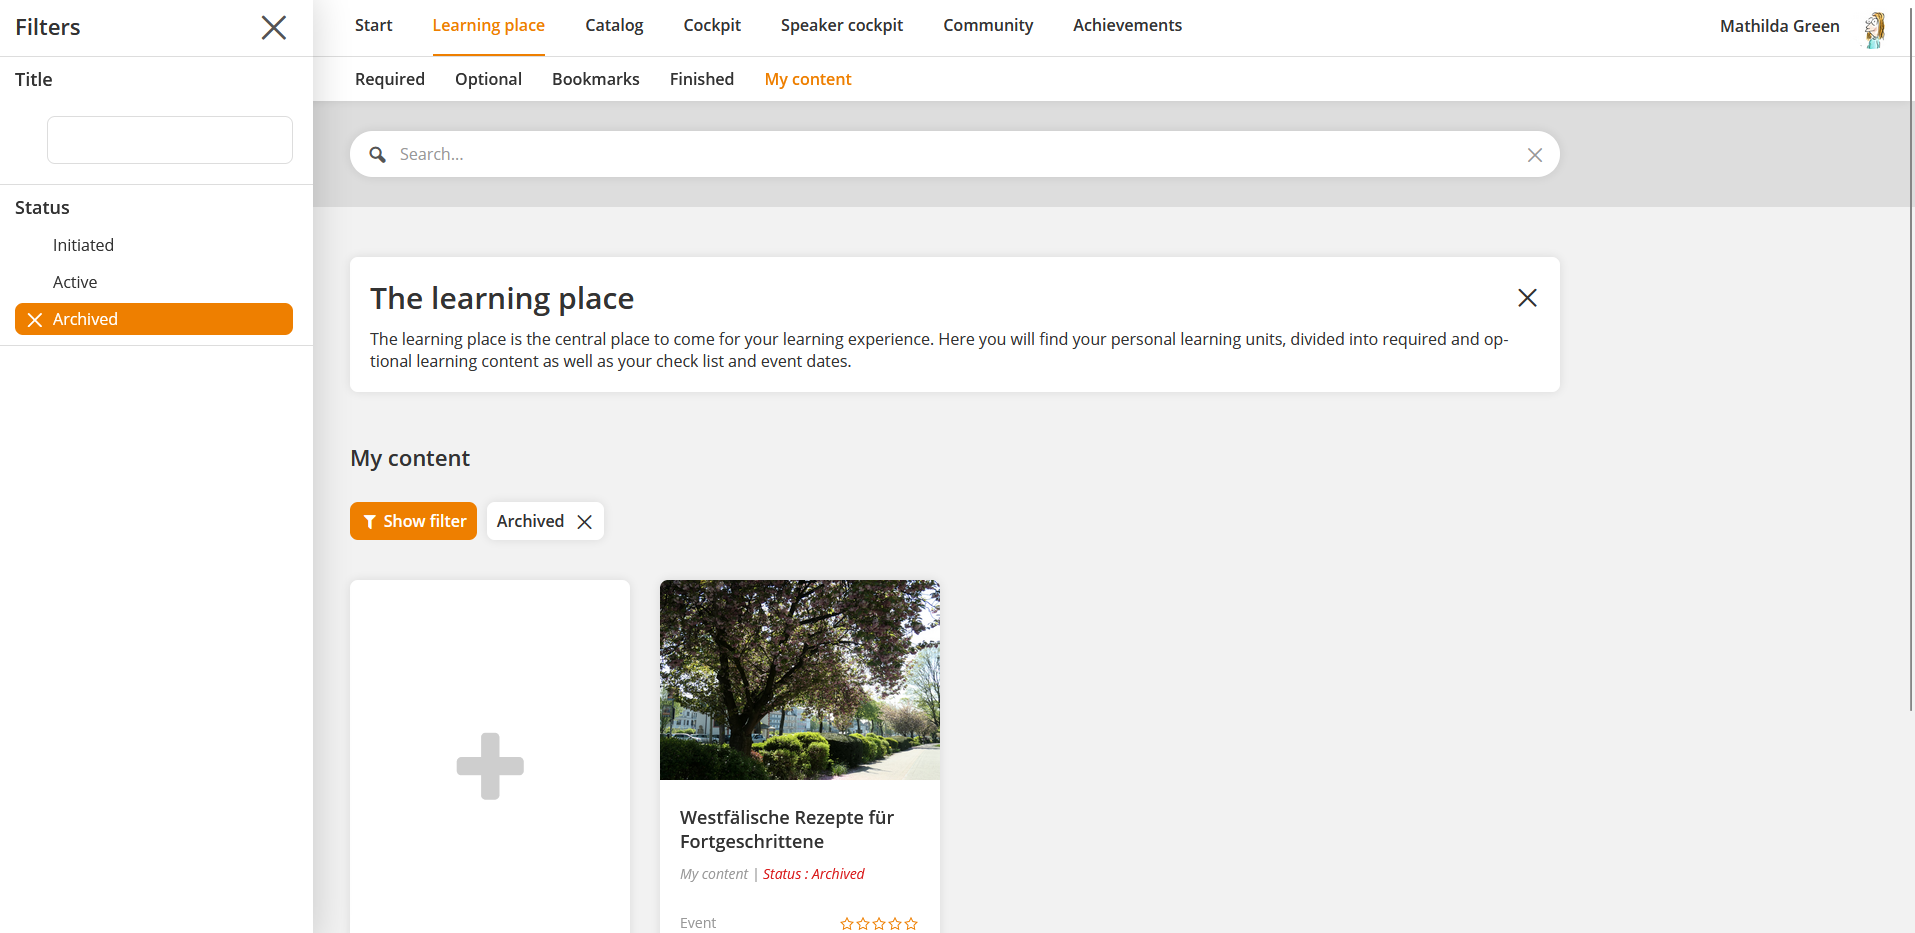
You can filter by the following criteria on the tab My content:
- Title (exactly searching by using double quote before and after the search term)
- Status
- Initiated
- Active
- Archived (this status is shown in red letters on the tile of the learning units)
Event dates
The prerequisites, this means which settings the autor has to do, you find under Settings in the author backend for UGC event dates.
Step-by-step procedure
Step 1
There are two ways to use the UGC wizard for event dates:
- Depending which event date template the author has chosen you get the corresponding entry mask.
- If you’re speaker in a course and user team leader, you can use this UGC wizard also post-maintaining certifications for activated event dates since Avendoo® Version 18.05.
If you create an UGC activated event date, you are also owner of this event date.
Prequisites are
- appropriate configuration of the Custom page User area
- appropriate configuration of the course template, which the author has selected in the Client wizard on tab Options under User content templates.
By that the certifications are copied from this course template. Thus you can allot these certifications from the new course. The author has added the certifications in the Course wizard on tab Course content in the correponding event via the General characteristics or/and in the Course wizard on the sub tab Certifications of the tab Parameters.
- Also you got the user right Record attendance for user content via your User account or your permission group.
- The author has activated the option Register other users as team leader via the UGC course activation template on the tab Registration management or the author has activated via the Registration settings directly in the UGC event template.
Alternatively, the author has activated this option in the table on the tab Users of the Participant management of the course activation. Thus it’s possible to do a registration, even the Activated event date is in the past.
Step 2
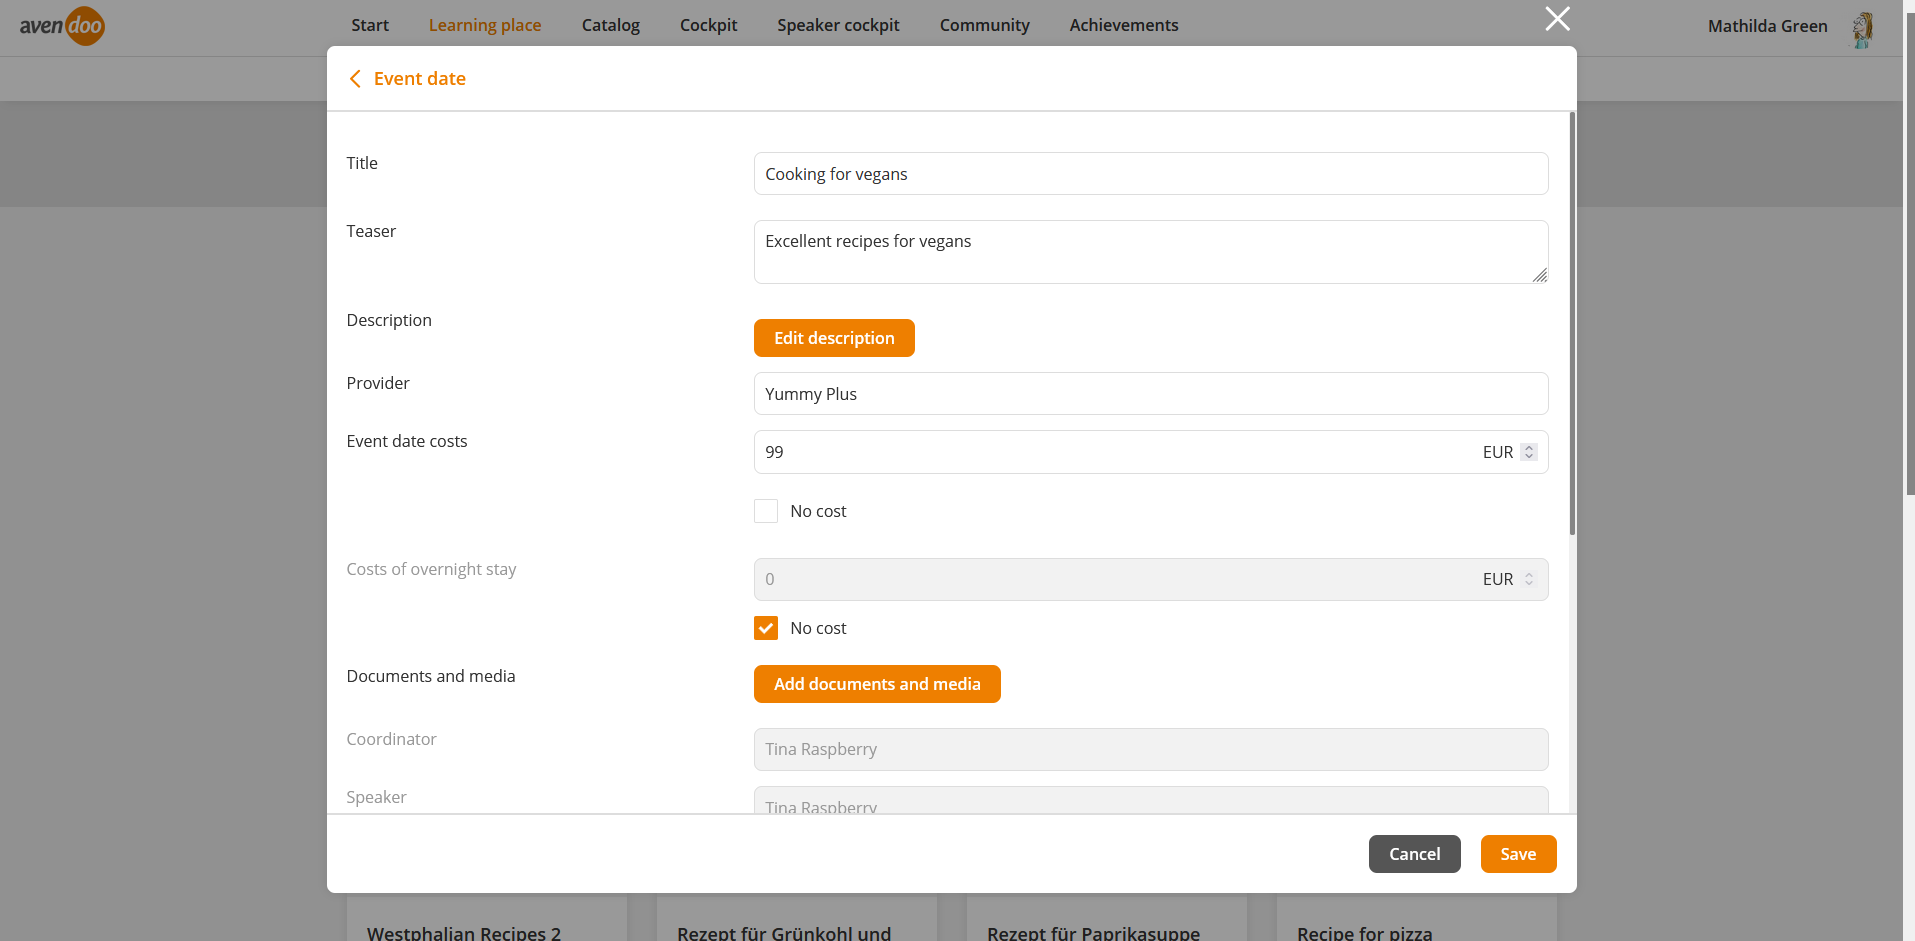
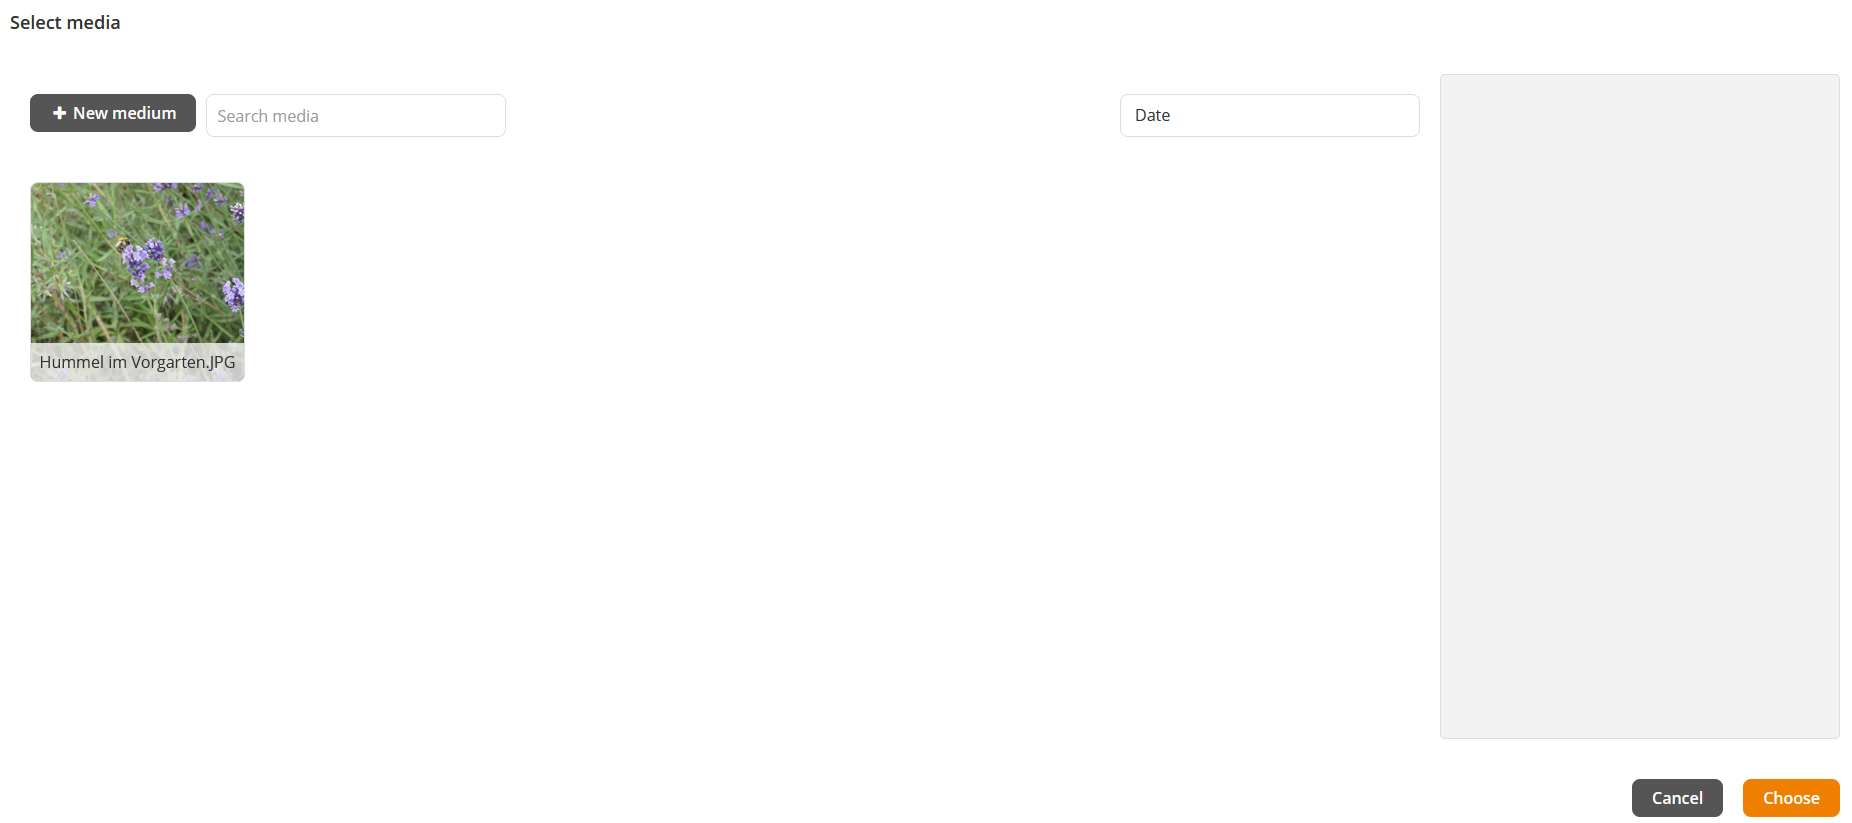
Enter the required data in the mandatory fields title, teaser, provider, event dates, location and room details. If you click on the button Edit description, you can create and edit an appropriate description for the even date via the Move editor. Tagging, tagging 2, event date costs (check mark No cost is set by default), costs of overnight stay (check mark No cost is set by default), documents and media (for uploading you need the user right Create media for user content; see second screenshot (Select media)) and the room are optional.
When the option “Calculate participant price automatically from the costs” is set in the event date parameters , you can adjust the price, additionally with the right Create an activated event for user content, and you can recalculate the price for the participants.
The first event date is suggested, but you can adjust it. The next day with the same time as starting time and end time an hour later is entered by default. You can add as many event dates you want.
Step 3
Click the button Submit.
Your entered event dates are saved as event date group with follow-up event dates under My content and under Required at the learning place. This event date group with follow-up event dates is saved in the author backend under Activated event dates. Each author with the corresponding right can edit the activated event date, as lons as the first event date hasn’t started yet.
This created event date can be used as template for for further event dates.
Following activities including recording attendance
As a new own content is generated, the event date group with follow-up event dates is shown also as tile on the tab Start in the stream New releases. As the first event date is completed, the follow-up event dates are still shown on Start and Learning place as My event dates. You can only deregister from these event dates via My event dates, if the first event hasn’t started yet.
Your own created content is shown as My content on the corresponding tile. Thus you recognize your content at once.
-
To edit your own event date, click the Pencil and do the changes and then click finally the button Save.
-
Via a clicking the three points on the corresponding tile a menu with the options Edit and Record your attendance opens.
-
-
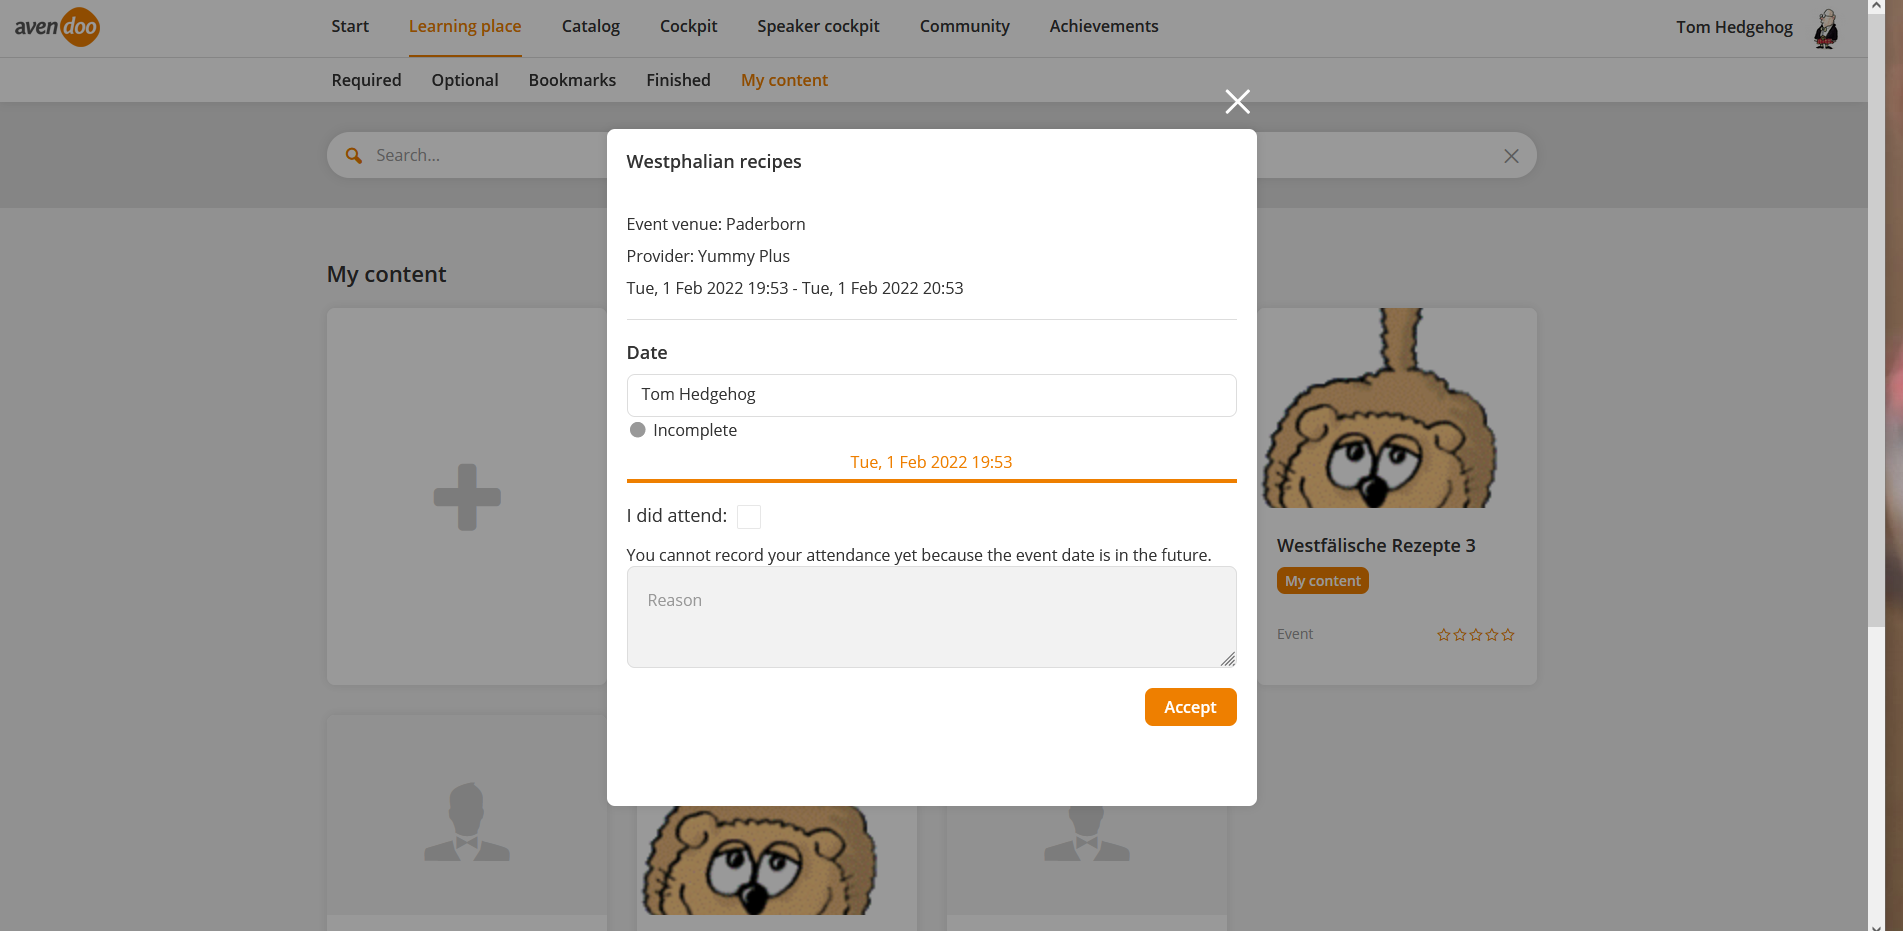
If you click Record your attendance, a dialog window for recording your attendance with the title of the course opens. You can set the check mark I did attend. Also you can enter a note if a reason is required. After clicking the button Apply the participant status changes from Incomplete to Successfully completed and the event date is automatically closed. Then you cannot adjust the attendance record anymore.
As user team leader you can record the attendance for employees, to who you got permission and who you had registered before or who registered by themselves and maybe you should approve their registration. Therefore choose under Date the desired employee in a drop-down menu and set the check mark I did attend, if this employee was present. Alternatively, you can enter a reason in the comment field. After clicking the button Apply the participant status changes from Incomplete to Successfully completed. After that you cannot adjust the attendance record anymore.
- If you’ve created an Activated event date, you can also choose the Participant Management via the context menu.
Therefore you need the right to manage participants (option Register other users as team leader is activated, see Prerequisites) and you have to be the owner of the event, this means the creator of the Activated event date.
You can register these participants for which the certificate should be given afterwards. Therefore you mark these as Present regarding the event date and click finally the button Close event date list and save the attendance list. As soon as this course activation is closed you get the certificate for the selected participants.
If you’re speaker of the event and the Speaker cockpit is available and allowed, you can switch via a button to the Speaker cockpit.
- There’s an API for closing event dates available. For further information contact our support team.
Learning unit
The prerequisites, this means which settings the autor has to do, you find under Settings in the author backend for UGC learning units.
Step-by-step procedure
Step 1
Click the +tile on the sub tab My content.
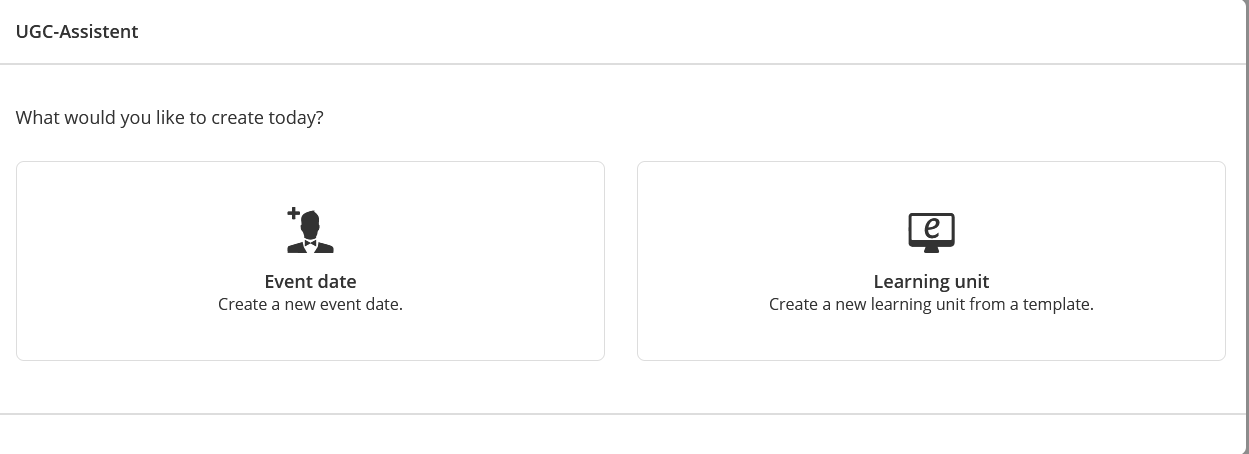
The dialog window UGC assistant opens.
Step 2
- Click in the UGC assistant the button Learning unit. The assisstant Learning unit opens .
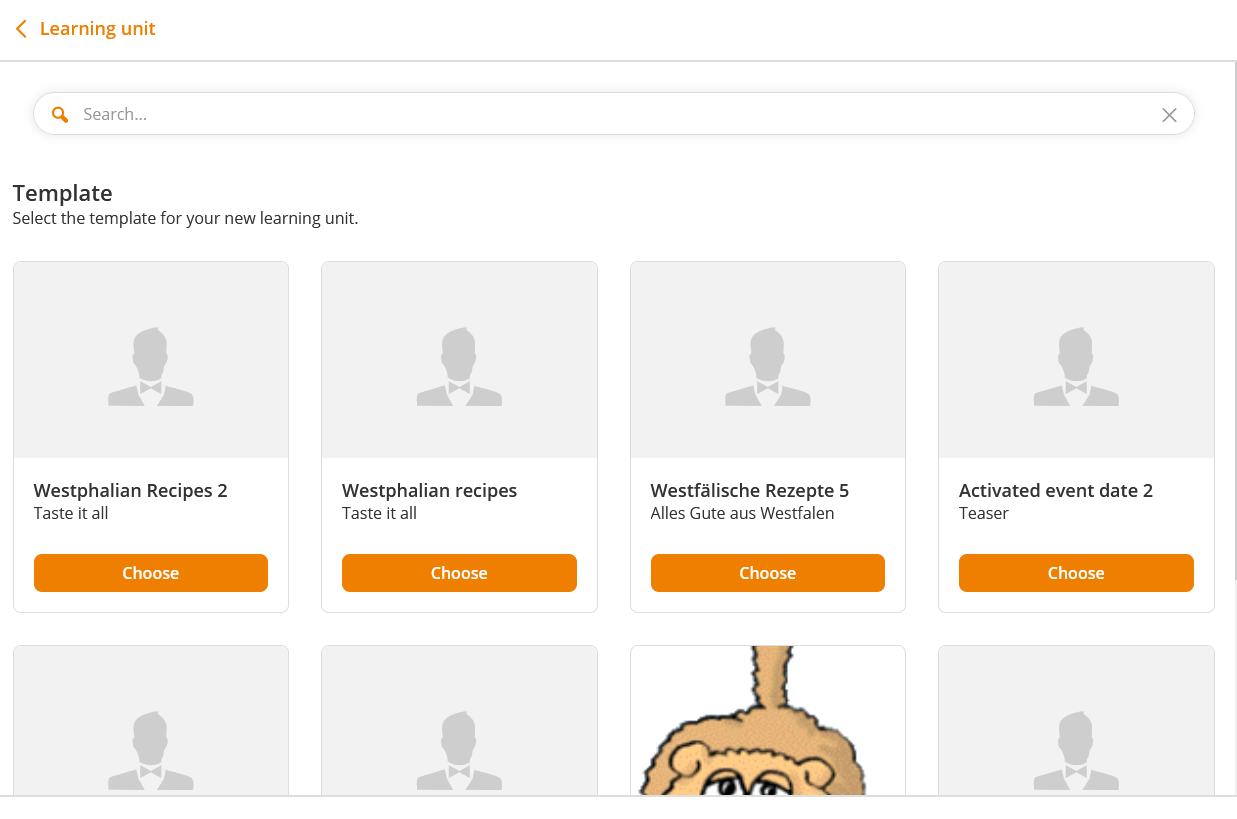
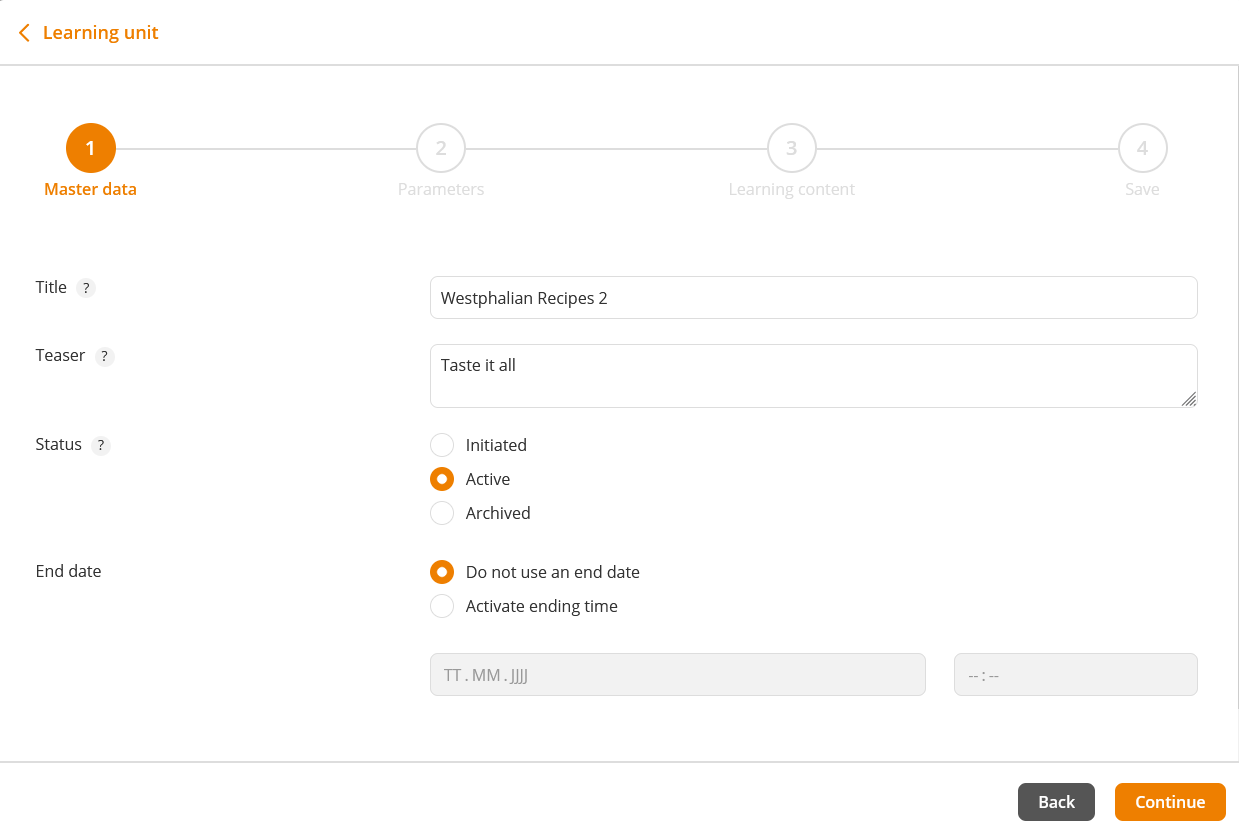
- To choose an existing template, click the button Choose on the corresponding tile. In this process the info page, start page, main page, final page, expiration page and the expanded layout can be from the course template of the client, whereas you can access to the course template of the client without any object permissions by reading. The API supports the CSS and JS for each page. The course content and all other settings are from the template. After selecting the template the tab number 1 Master data opens.
- If required adjust the title of the learning unit or course activation, because this title is later on shown on the learner’s learning place or in his/her catalog. The same is valid for the teaser of the learning unit or course activation. You can enlarge the entry box for the teaser by putting the cursor at the lower right corner, pressing the mouse key and dragging the corner down.
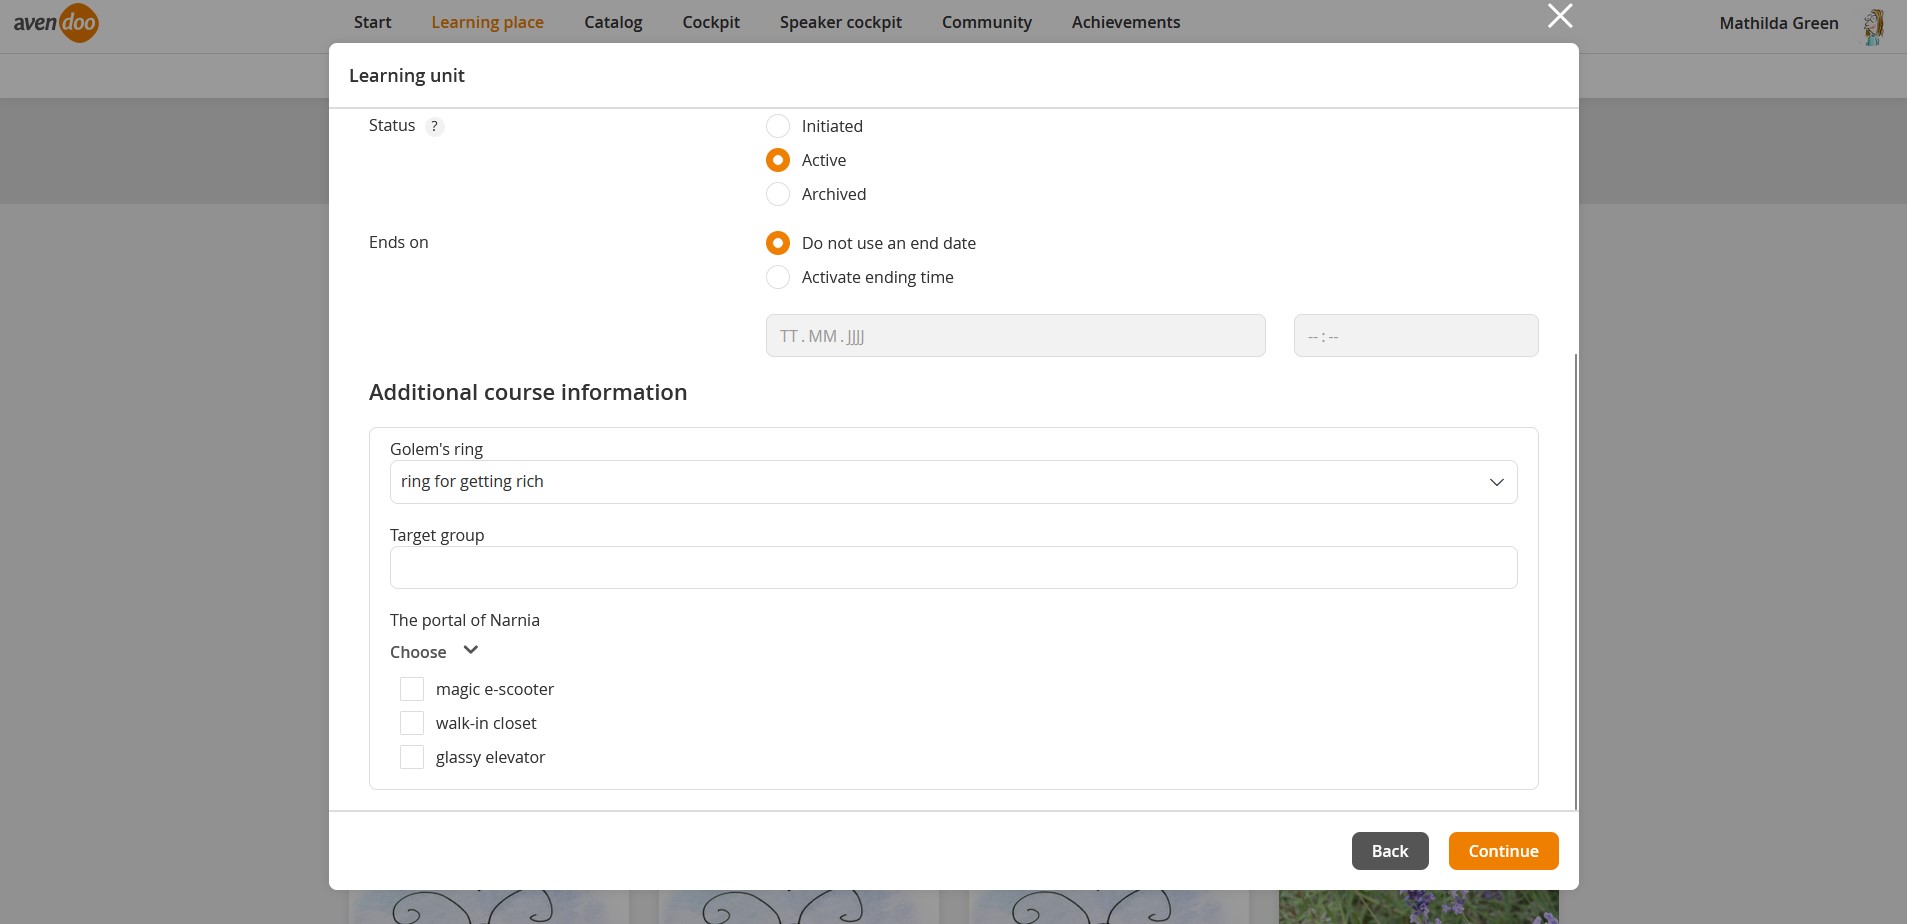
Regarding the status you can select between Initiated, Active or Archived (default status is Active).
Also you can select an end date by clicking the check mark Activate ending time. Then the current time stamp with date and time is automatically set. You can adjust this value. If this value is overdue, the status of the course activation turns to Archived. You can select a starting date, if the status is Initiated. In this case the status turns to Active. - Under Additional informationen (see third screenshot) the user-defined fields are shown, which the author has defined, like user-defined fields of the type Multiselect.
Prerequisite for the visibility of the corresponding user-defined field is basically that the user has set the check marks Can be set in user-defined activations and Active under Visibility in the user area on the tab Options field in the wizard User-defined fields.
If the content should be imported from a foreign system, the author has to set the chark Remote content for the link type on this tab in addition. Set the favored check marks.
Step 3
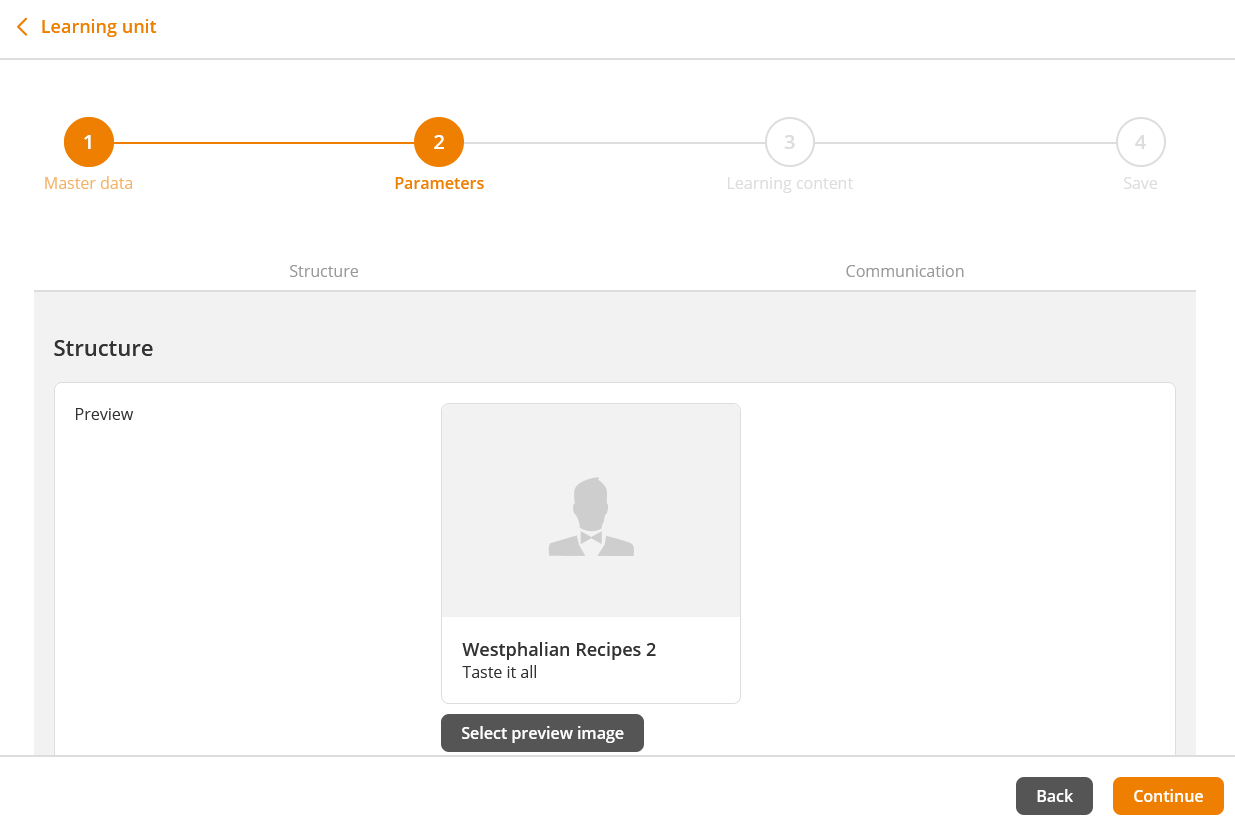
- Click the button Continue. You get on tab number 2 Parameters with the sub tabs Structure and Communication. If you got the corresponding object permissions the sub tab Course pages is also shown.
- If you apply the preview image from the template or if you want to add communication data, click the button Continue.
Otherwise you click the button Select preview image on sub tab Structure. Either you choose the favored medium under the existing media or you click the button +new medium in order to upload a new medium and you confirm by clicking Select file or using drag and drop.
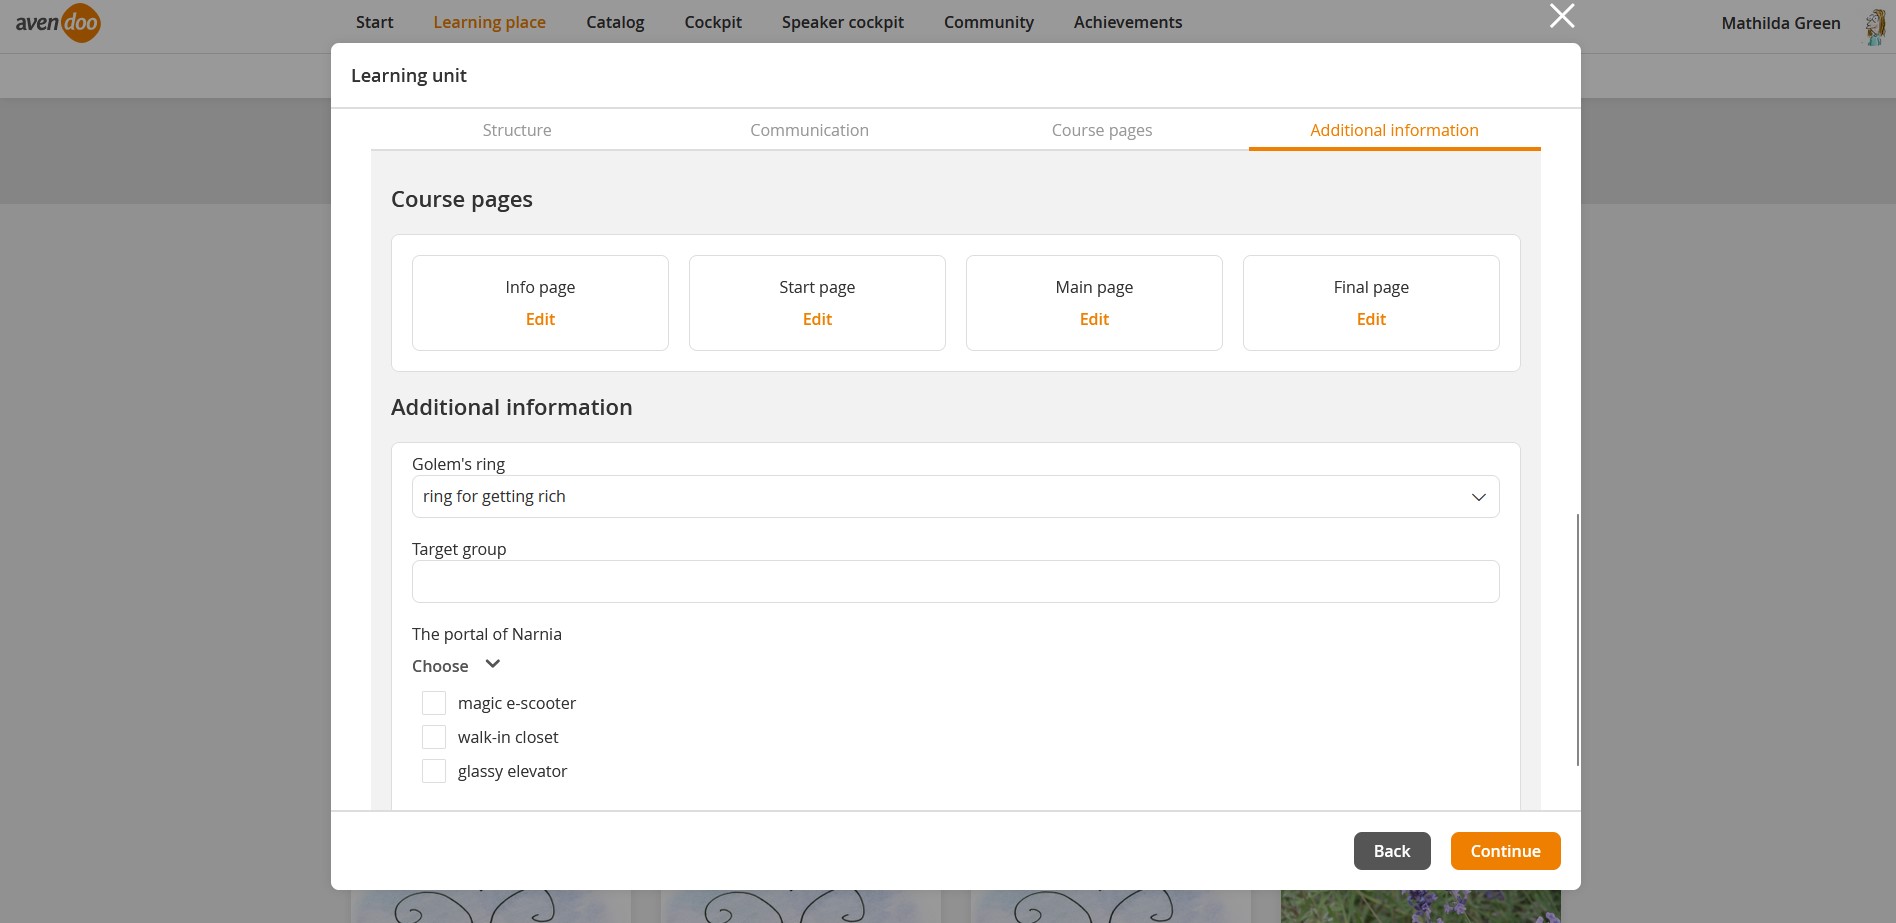
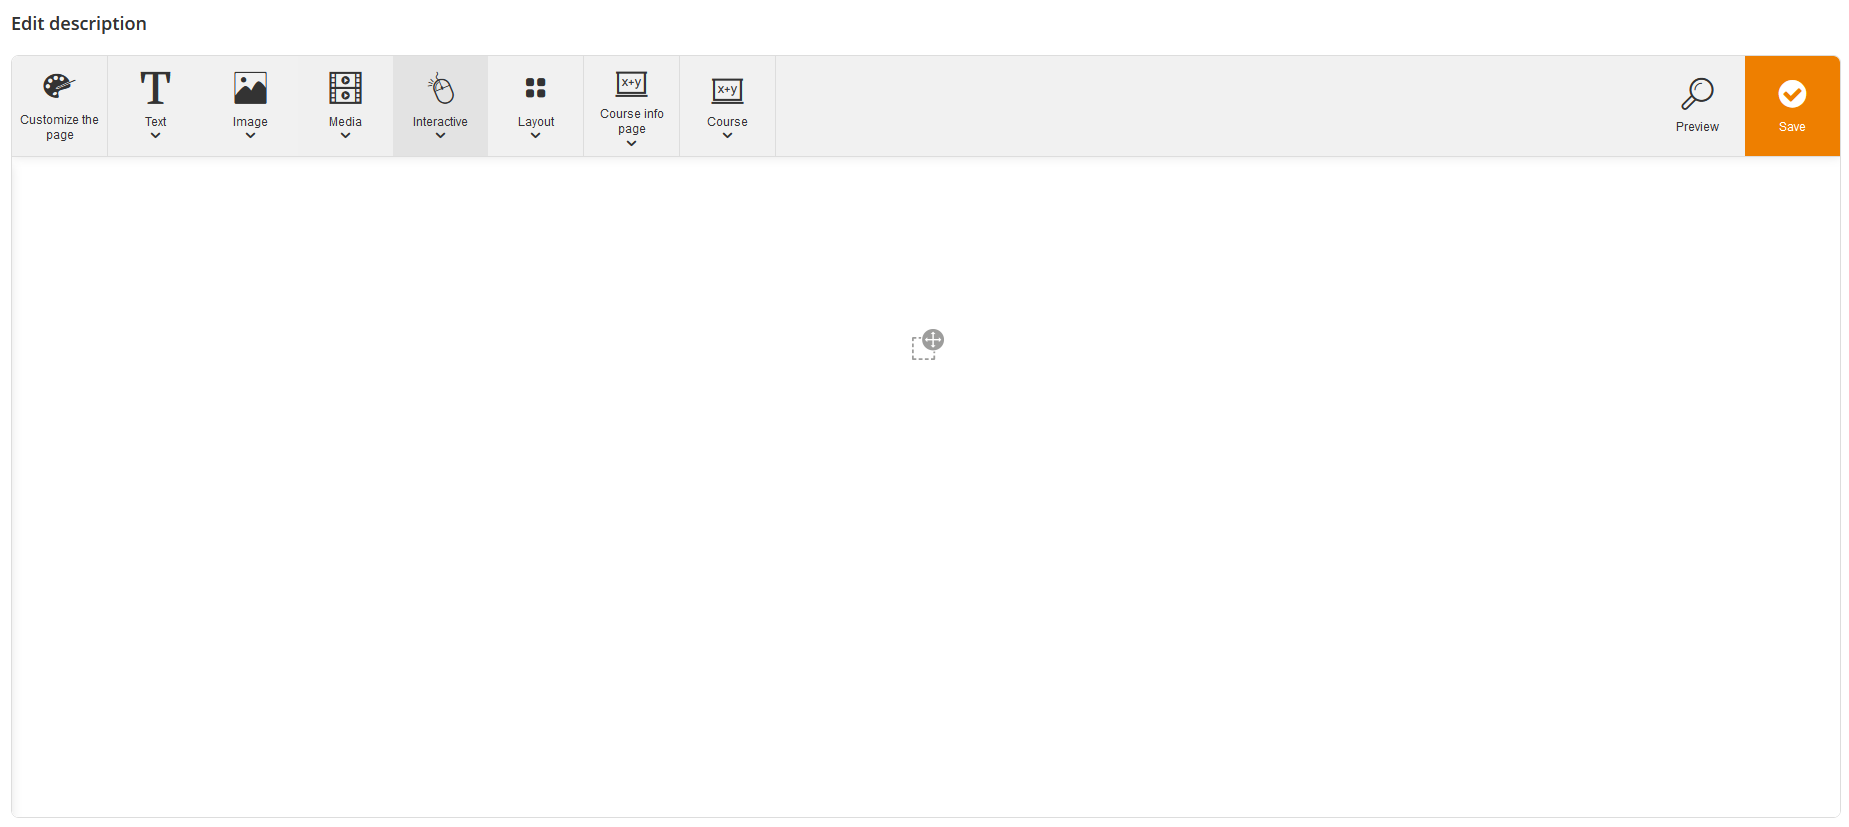
You can activate the community stream for all participants on the sub tab Communication by setting this check mark. Also you can add the total number of days a participant is given to finish and which notifications should be activated, if registration notification, reminder notification or escalation notification. - On the sub tab Course pages you click Edit info page for example (see second screenshot). If required you can reset that page first. After clicking Edit info page for example the Move Editor opens (see third screenshot) and you can insert, adjust or remove elements. If the editing process is finished you click the button Save. Thus you can edit and individually design the start, main and final page with Move.
- Only if the author has defined user-defined fields for learning units and has also set the check mark Can be set in user-defined activations in the wizard User-defined fields, you will see the further tab Additional information (see fourth screenshot). Enter the required data.
Which fields are shown on this tab depend on which user-defined fields the author with the administration rights Read user-defined field and Edit user-defined fields has created. This author chooses the field type (Text field, Object selection, Dropdown or Multiselect) and in which wizards the user-defined field is shown, this means in the Event wizard, Event date wizard, Course activation wizard, Course wizard, Remote content wizard (LTI and Offline with xAPI feedback channel), UGC wizard for learning units and/or Training suggestions.You find further information on the page “User-defined fields“.
Step 4
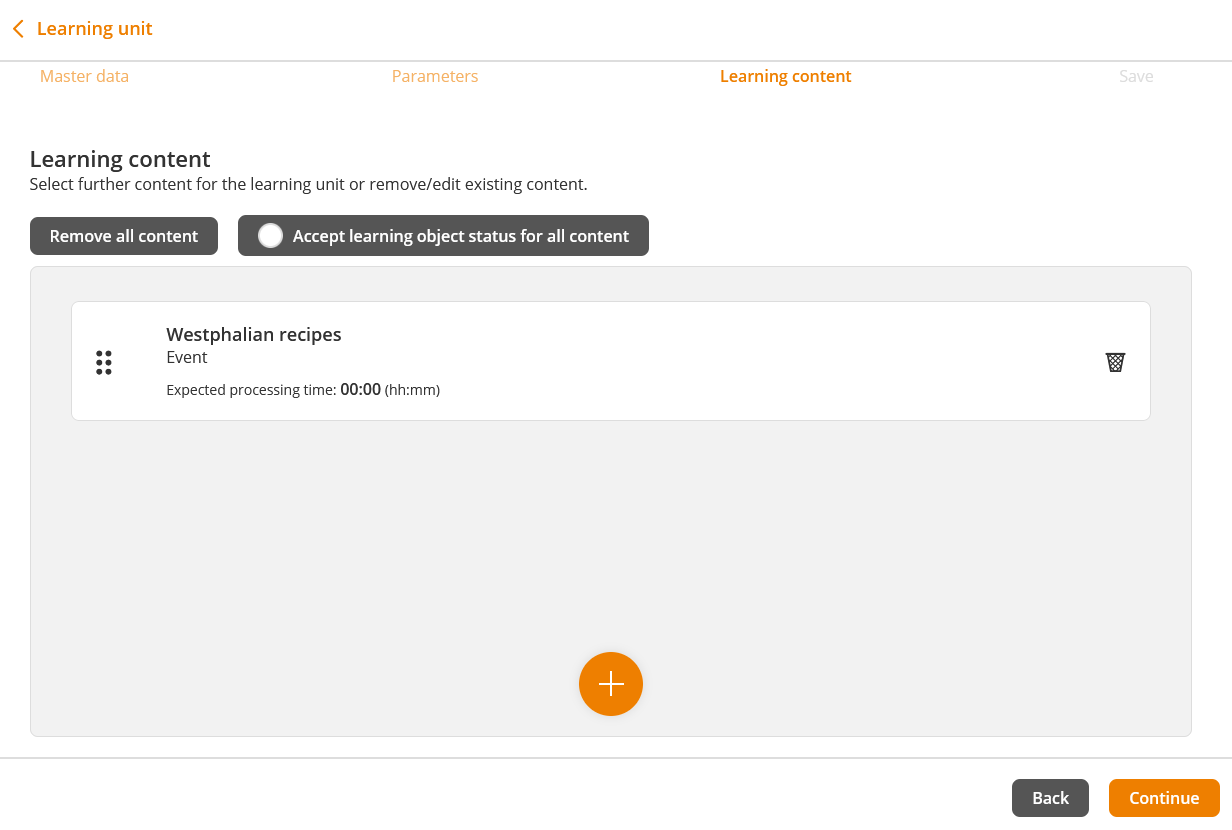
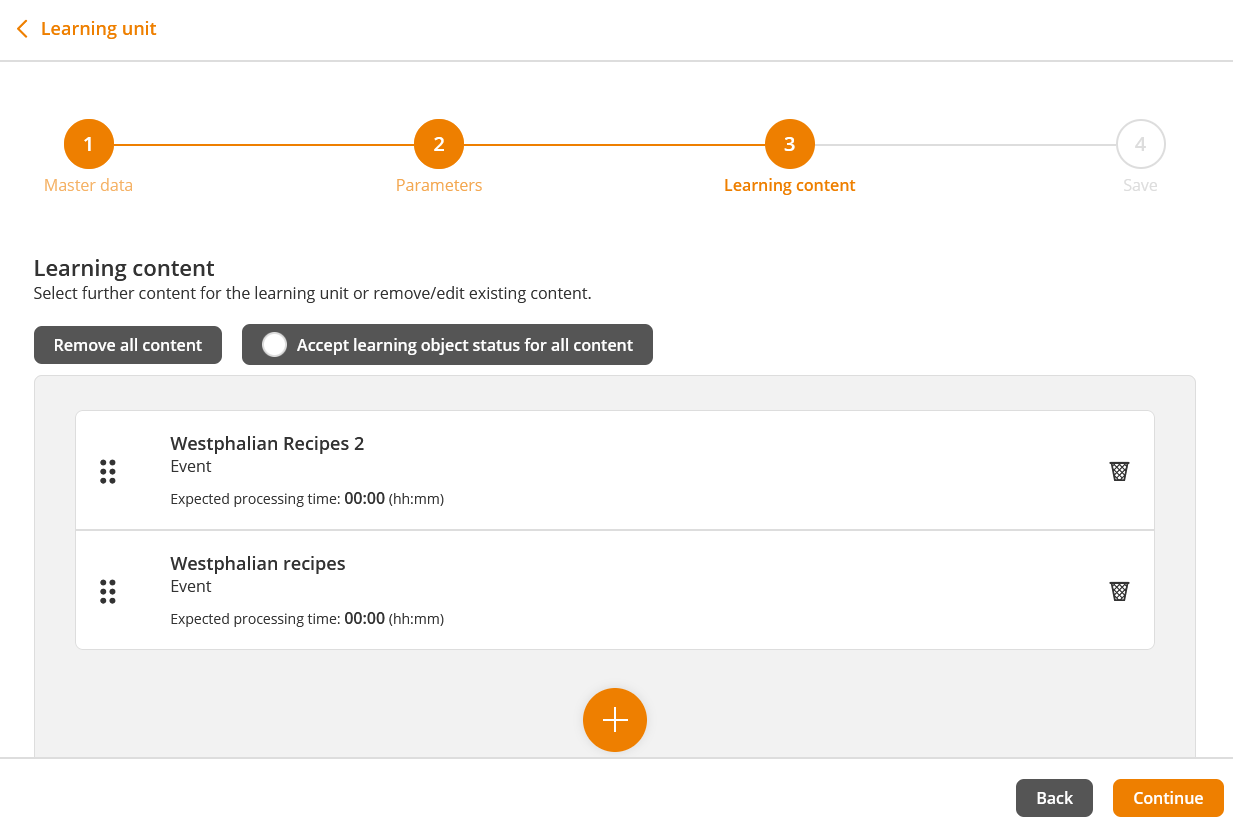
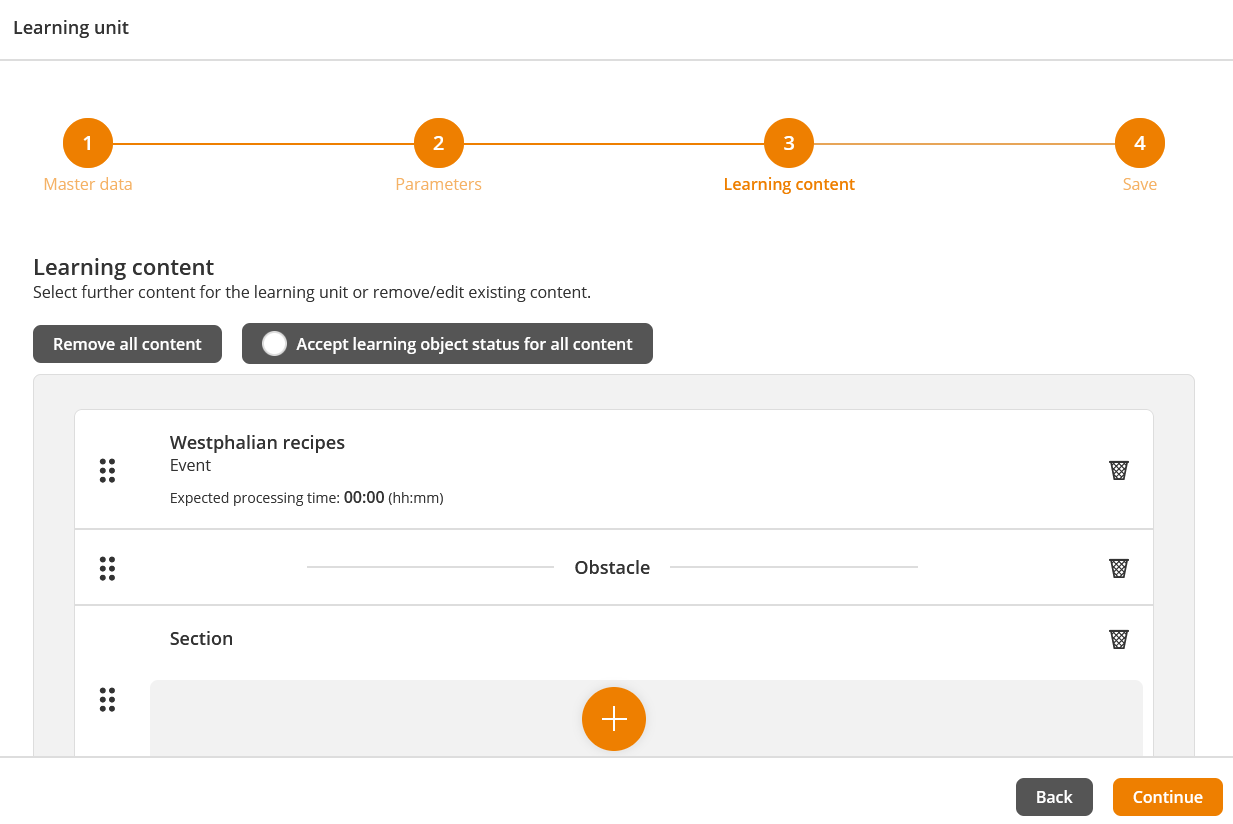
- Click the button Continue. You get to tab number 3 Learning content.
Note that you can change the positions of the single learning objects via drag and drop by clicking on the six points of the desired tile and moving it appropriate. - If you want to remove the whole content, click the button Remove all content. To remove single learning objects, click the recycle bin of the favored learning object.
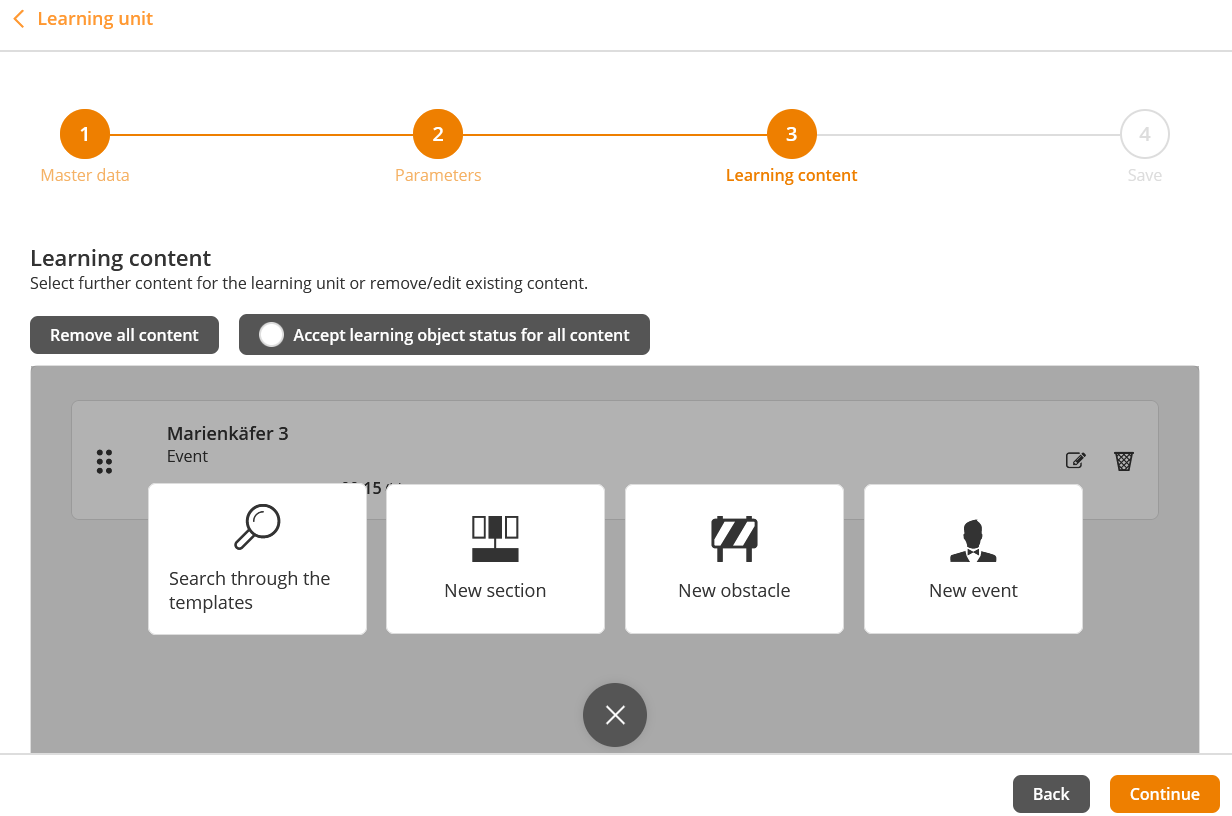
- To add further learning objects, click the +. Select between the options Search through the templates, New section, New obstacle and New event.
Step 5
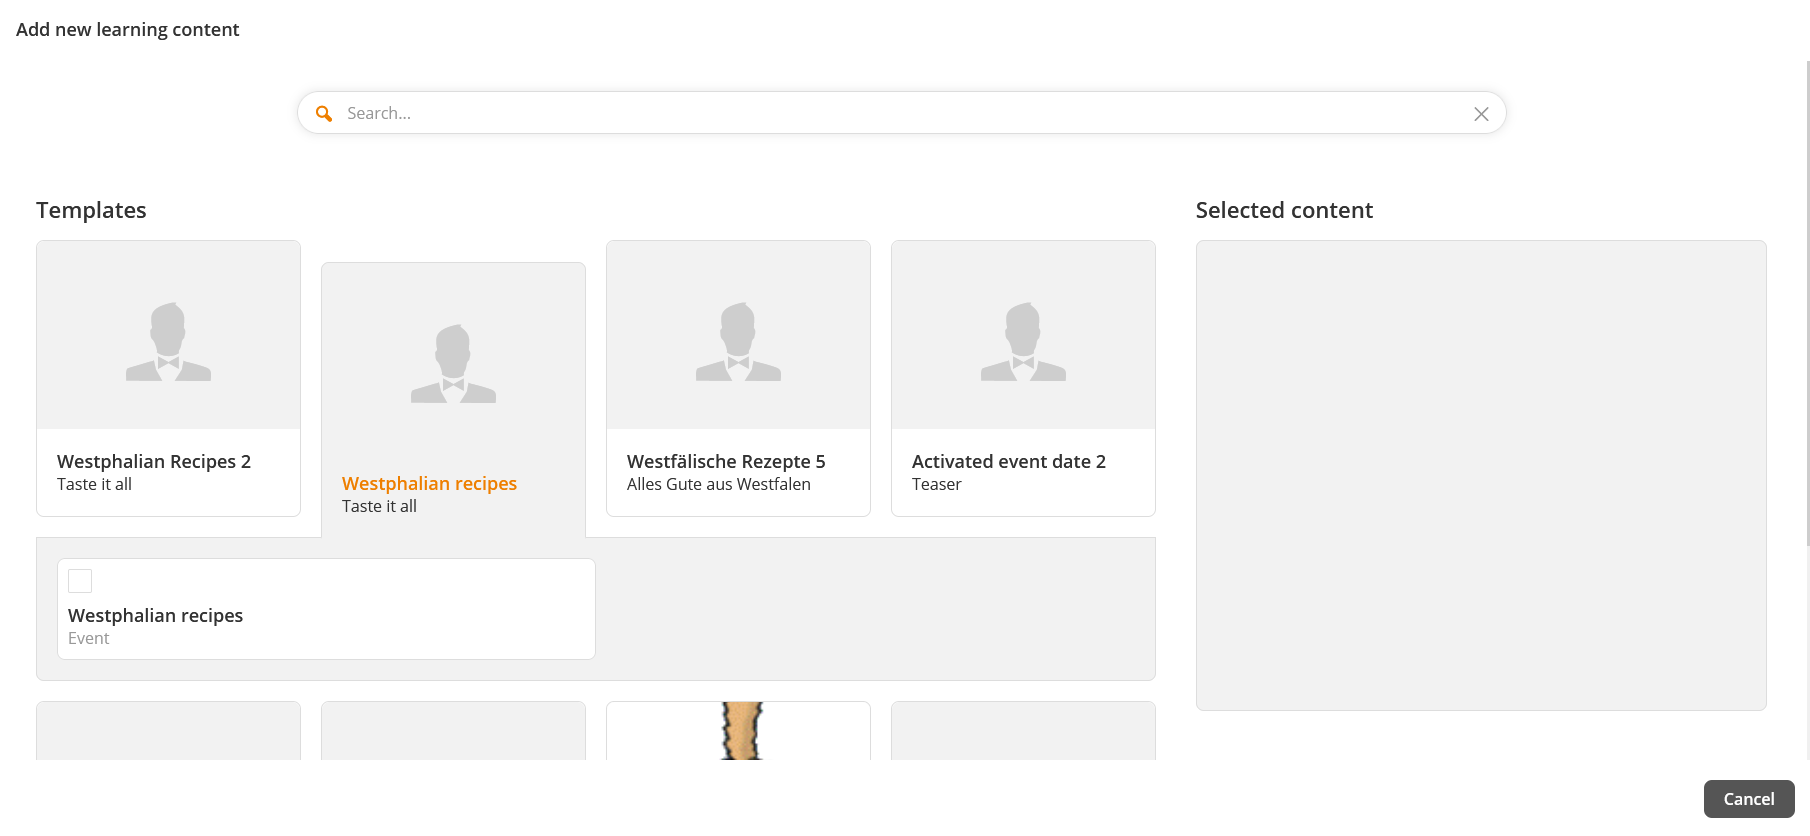
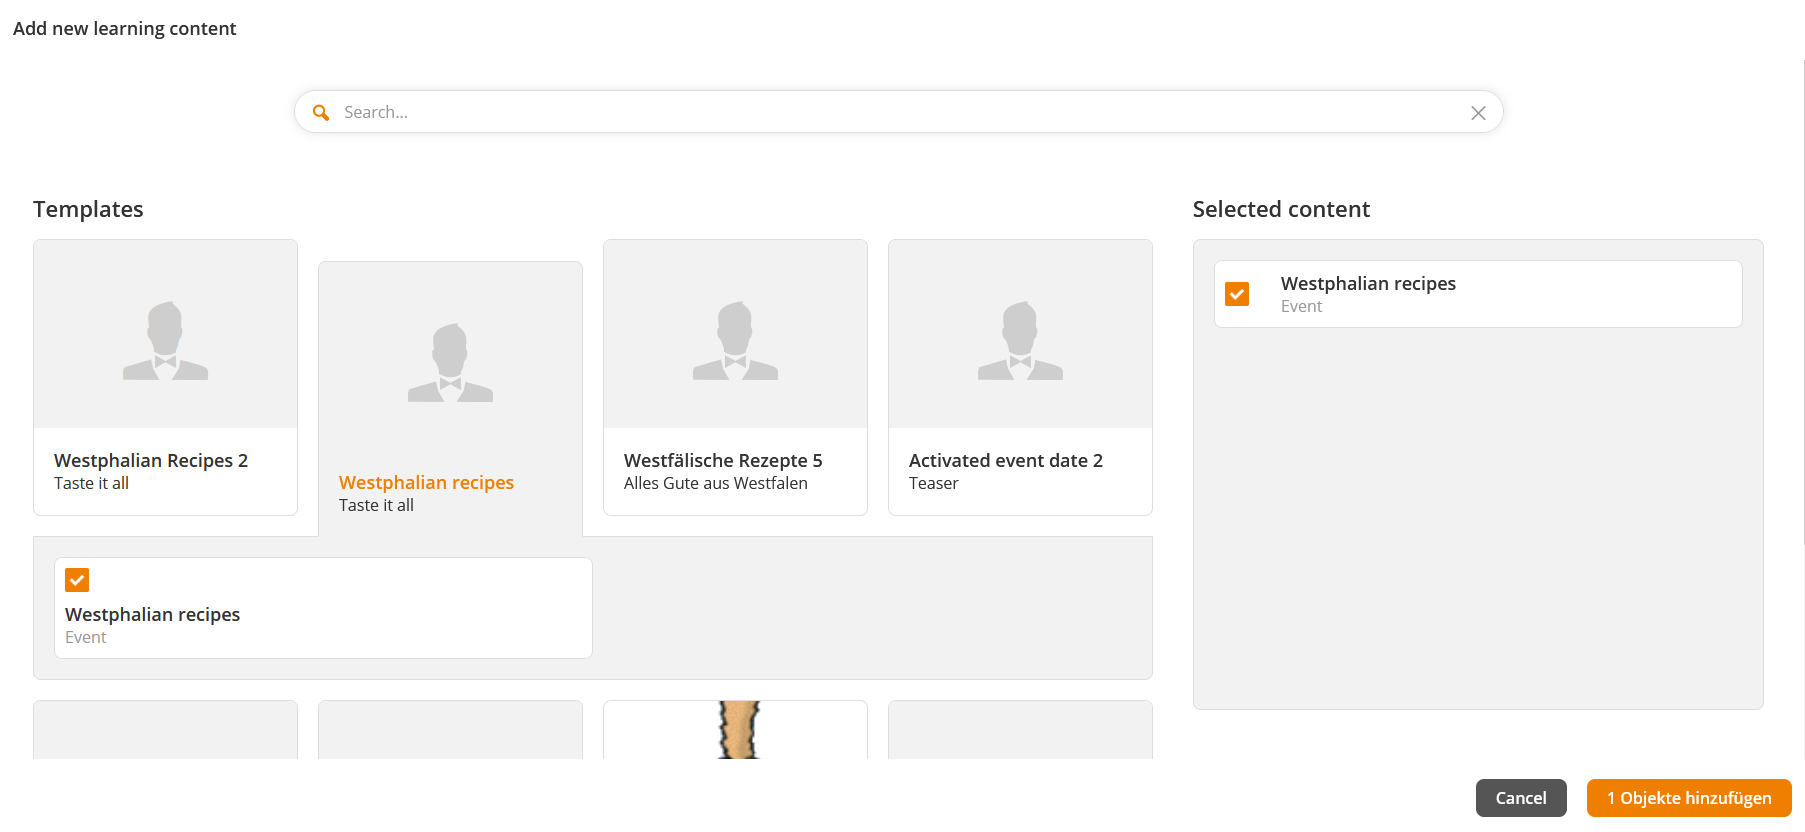
If you click the button Search through the templates, the dialog window Add new learning content opens. To select a template click the tile of the favored template. Then that template is marked and you set the check mark beneath the template. After that this template is shown under Selected content. Finally, you click the button Add objects, whereas the number of the objects is shown on the button. The tab number 3 Learning content opens again with the added learning objects.
To edit the desired learning object, click the tile of the learning object and change for example the Expected processing time of an event or/and accept learning object status, whereas already passed or failed learning status are applied from other learning units. Also you can accept the learning object status for all learning object by clicking the toggle Accept learning object status for all content.
You can edit the General characteristics by clicking the box of the corresponding learning content.
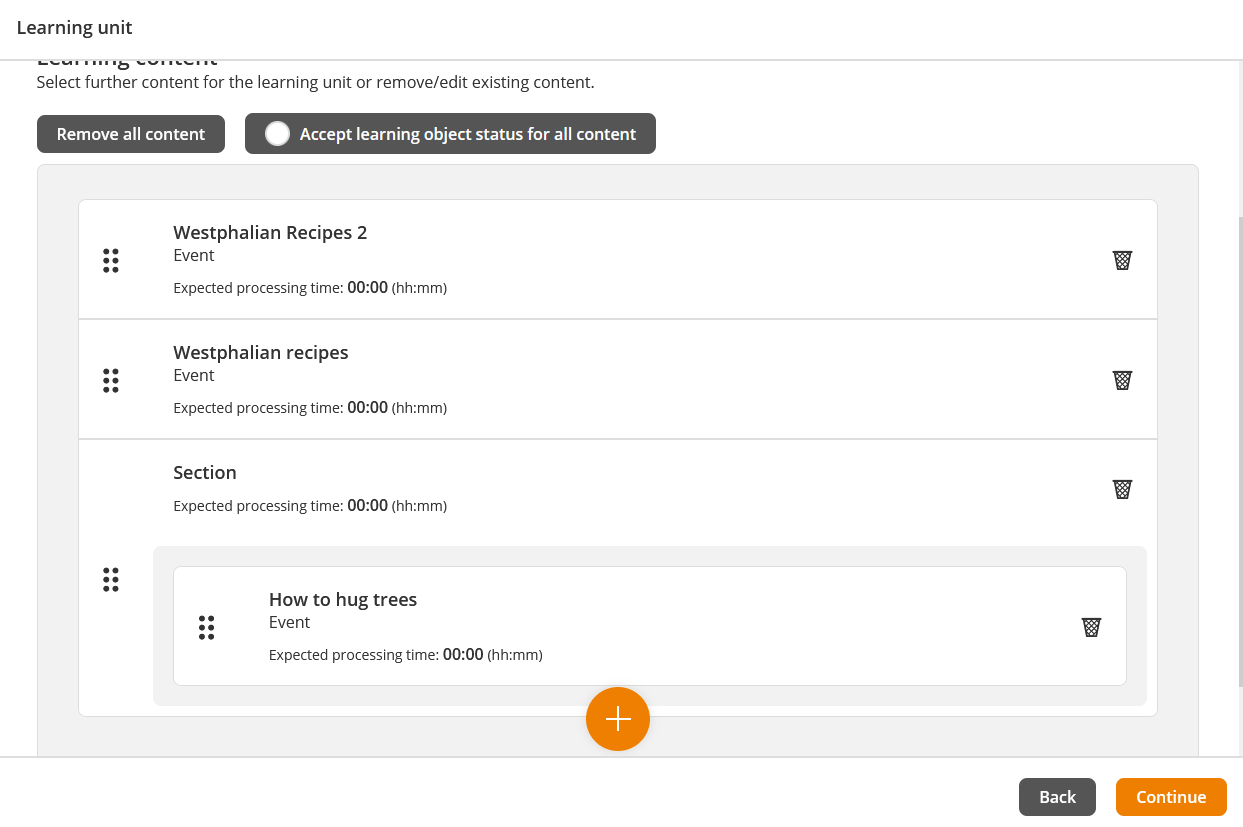
Step 6: Add new section (optionally)
Step 7: Add new obstacle (optionally)
If you click the button New obstacle, the obstacle is added at last place. You can change the position of the obstacle via drag and drop.
Step 8: Add new event (optionally)
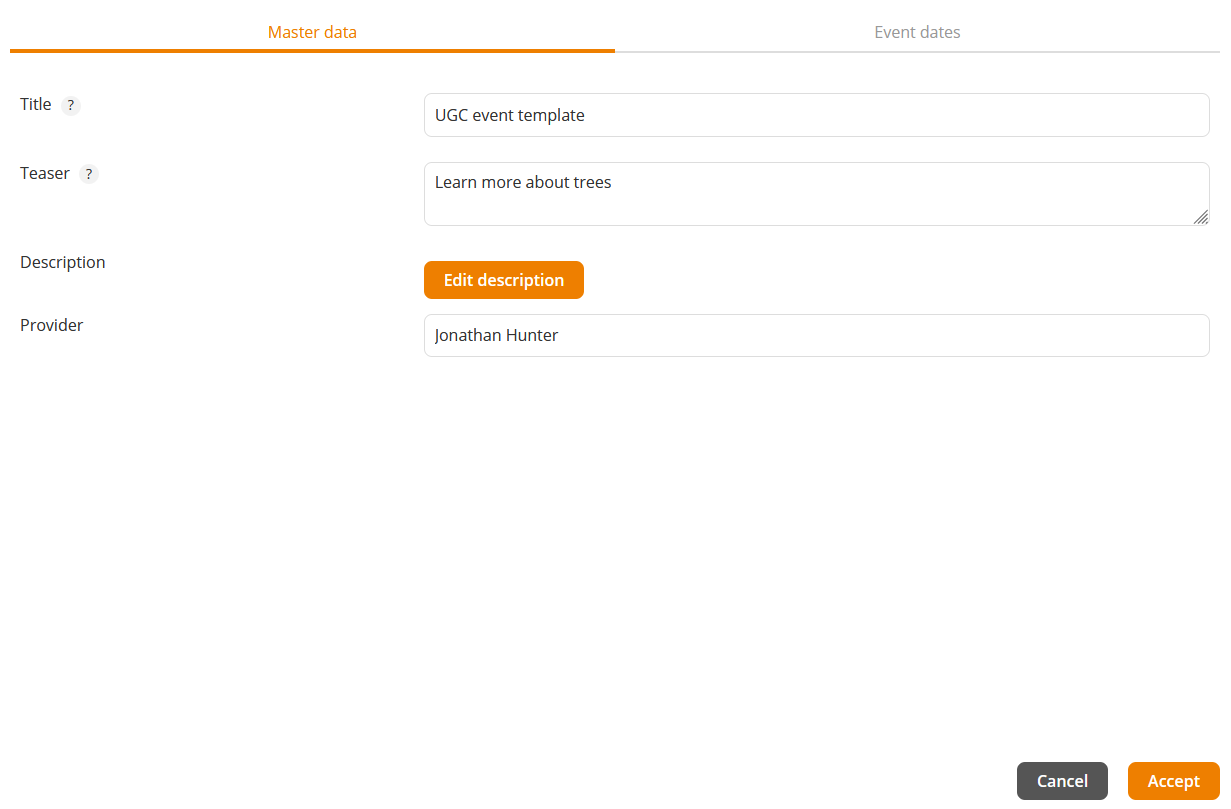
To add own events with own event dates, click the button New event. A dialog window with the tabs Master data and Event dates opens (see first screenshot). You get the title and the teaser text of the UGC template per default on the tab Master data.
- Adjust if required title and teaser. You can enlarge the entry box for the teaser by putting the cursor at the lower right corner, pressing the mouse key and dragging the corner down.
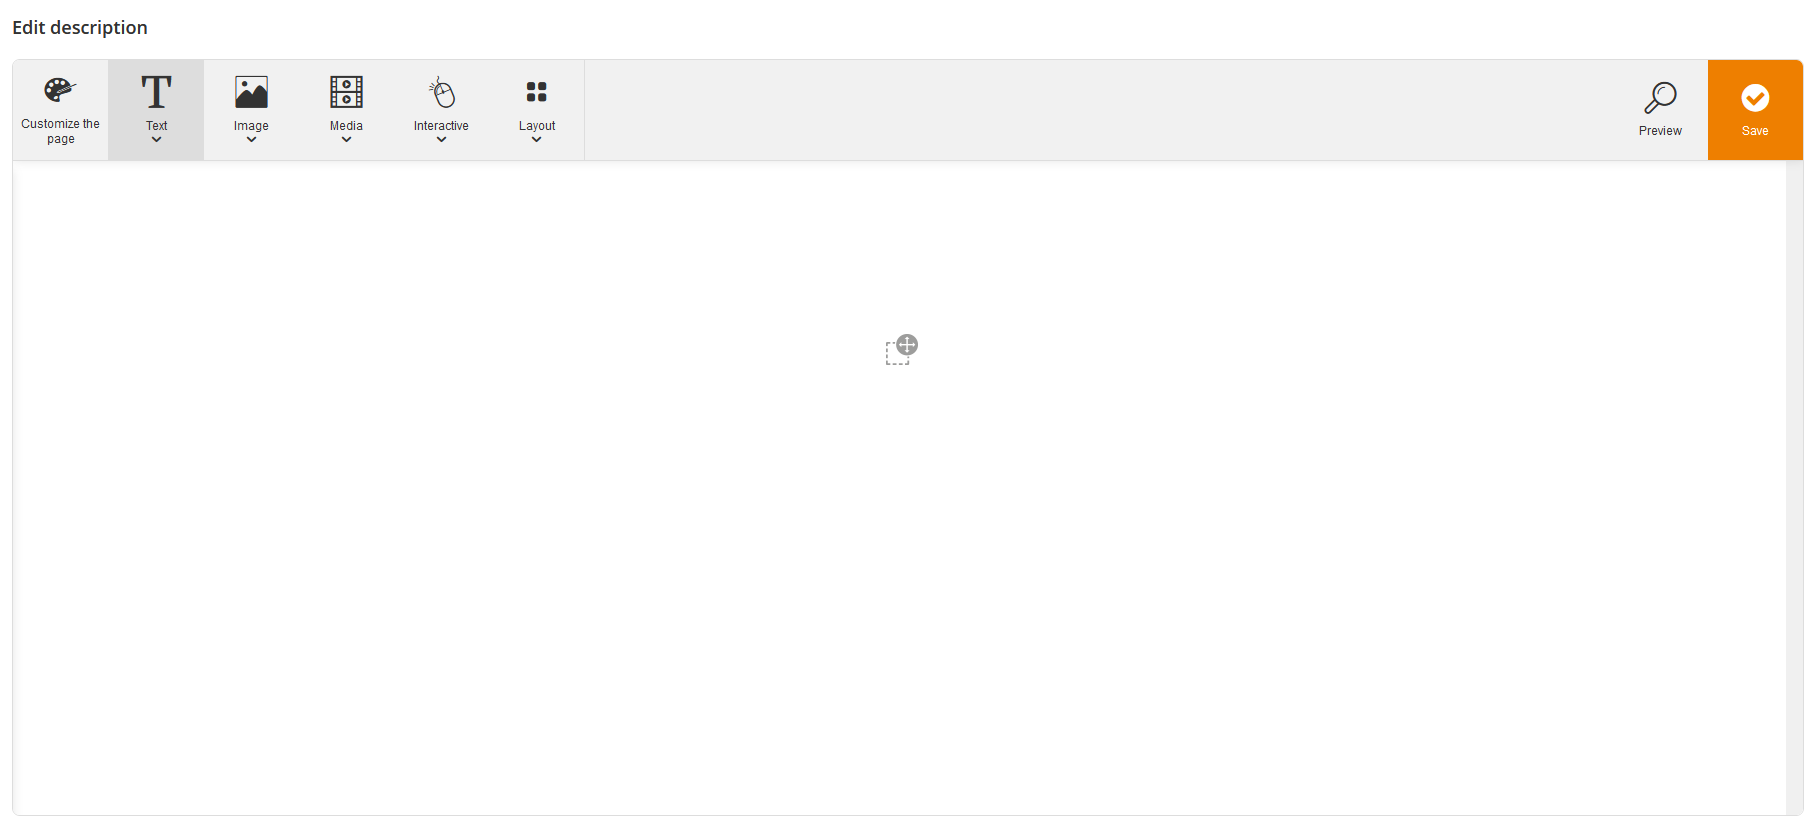
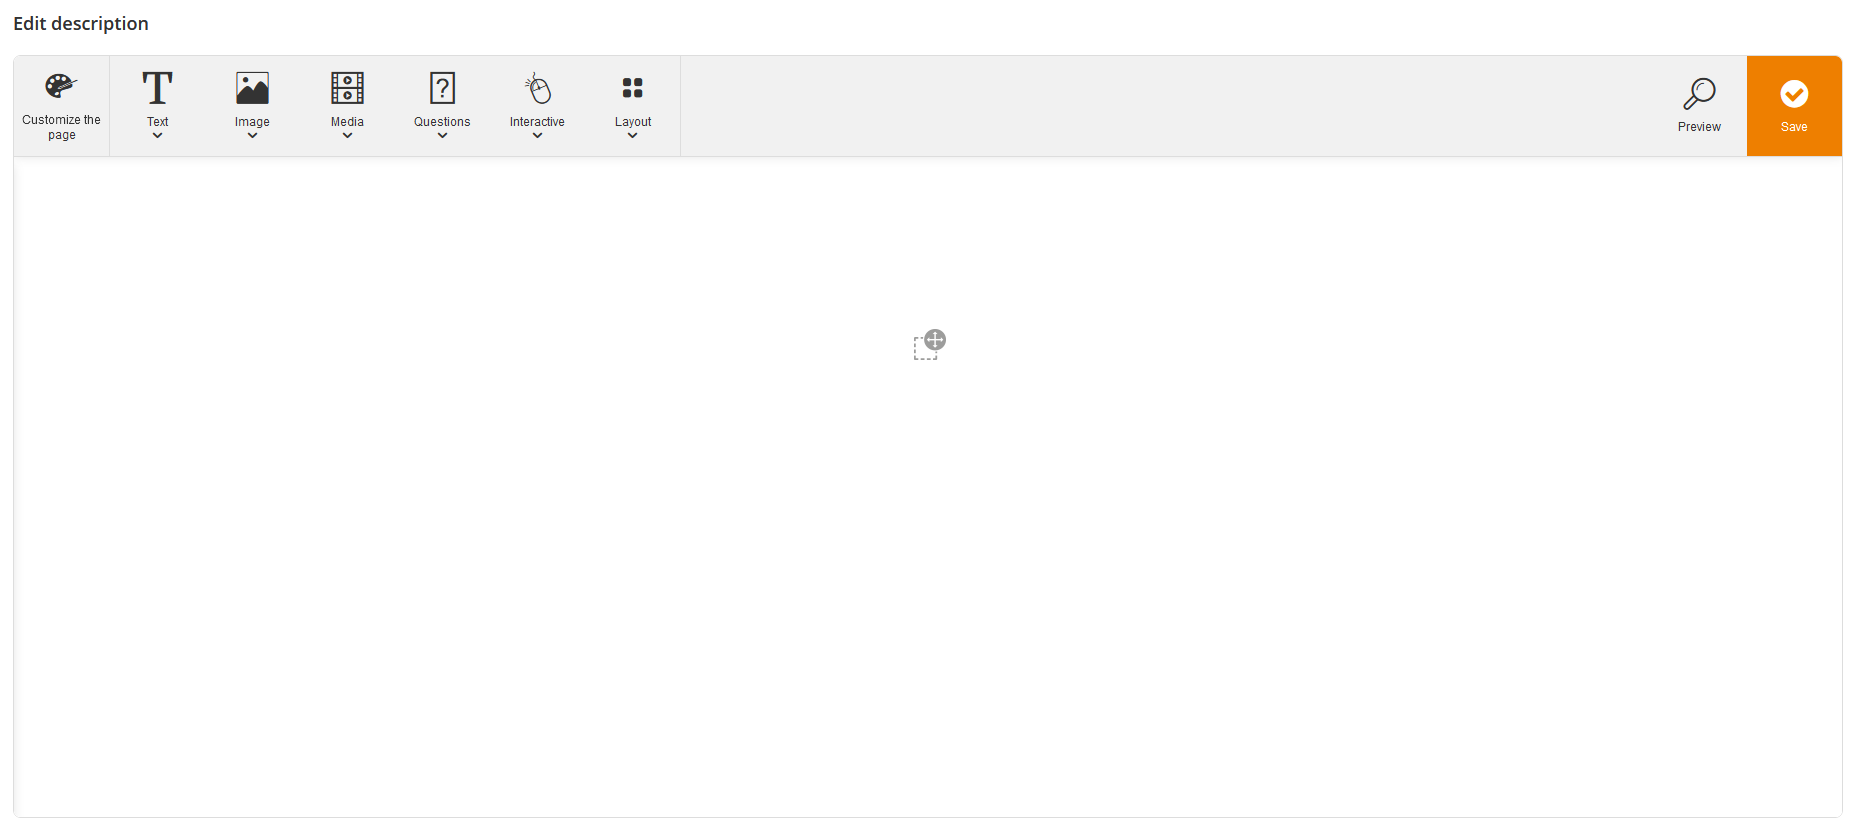
- To edit the description for the event via Move, click the button Edit description. The dialog window Edit description opens (see second screenshot).
- In this dialog window the functions of Move are available. You can display the Preview.
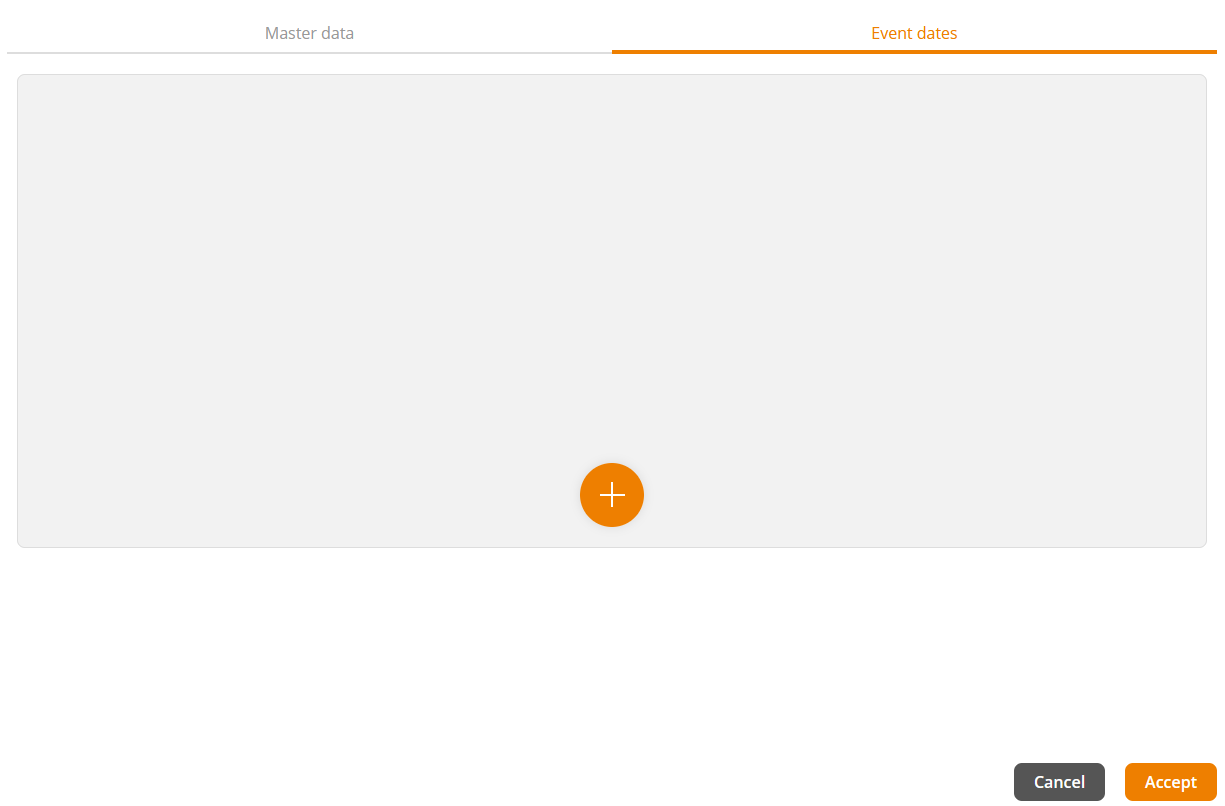
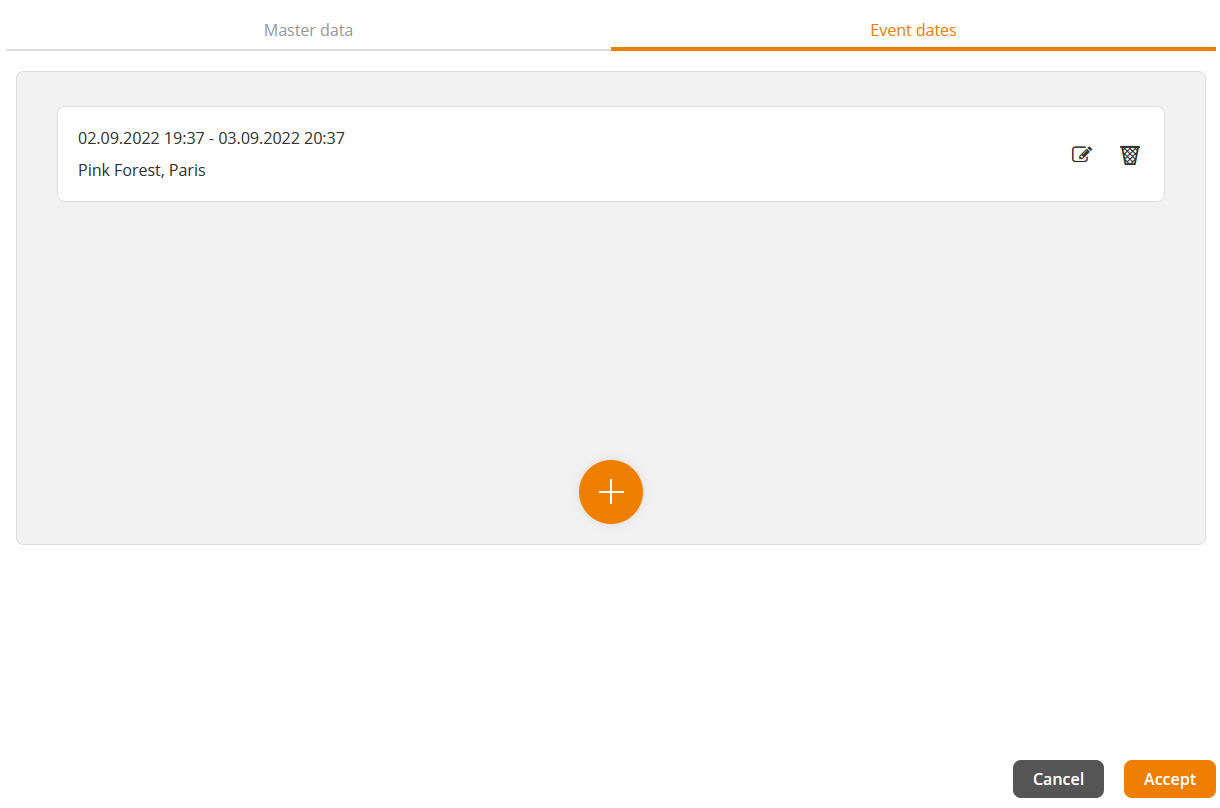
- If you’ve finished editing the description, click the tab Event dates to add own event dates.
- To add own event dates, click the + on the tab Event dates (see third screenshot). The dialog window Event date opens (see fourth screenshot).
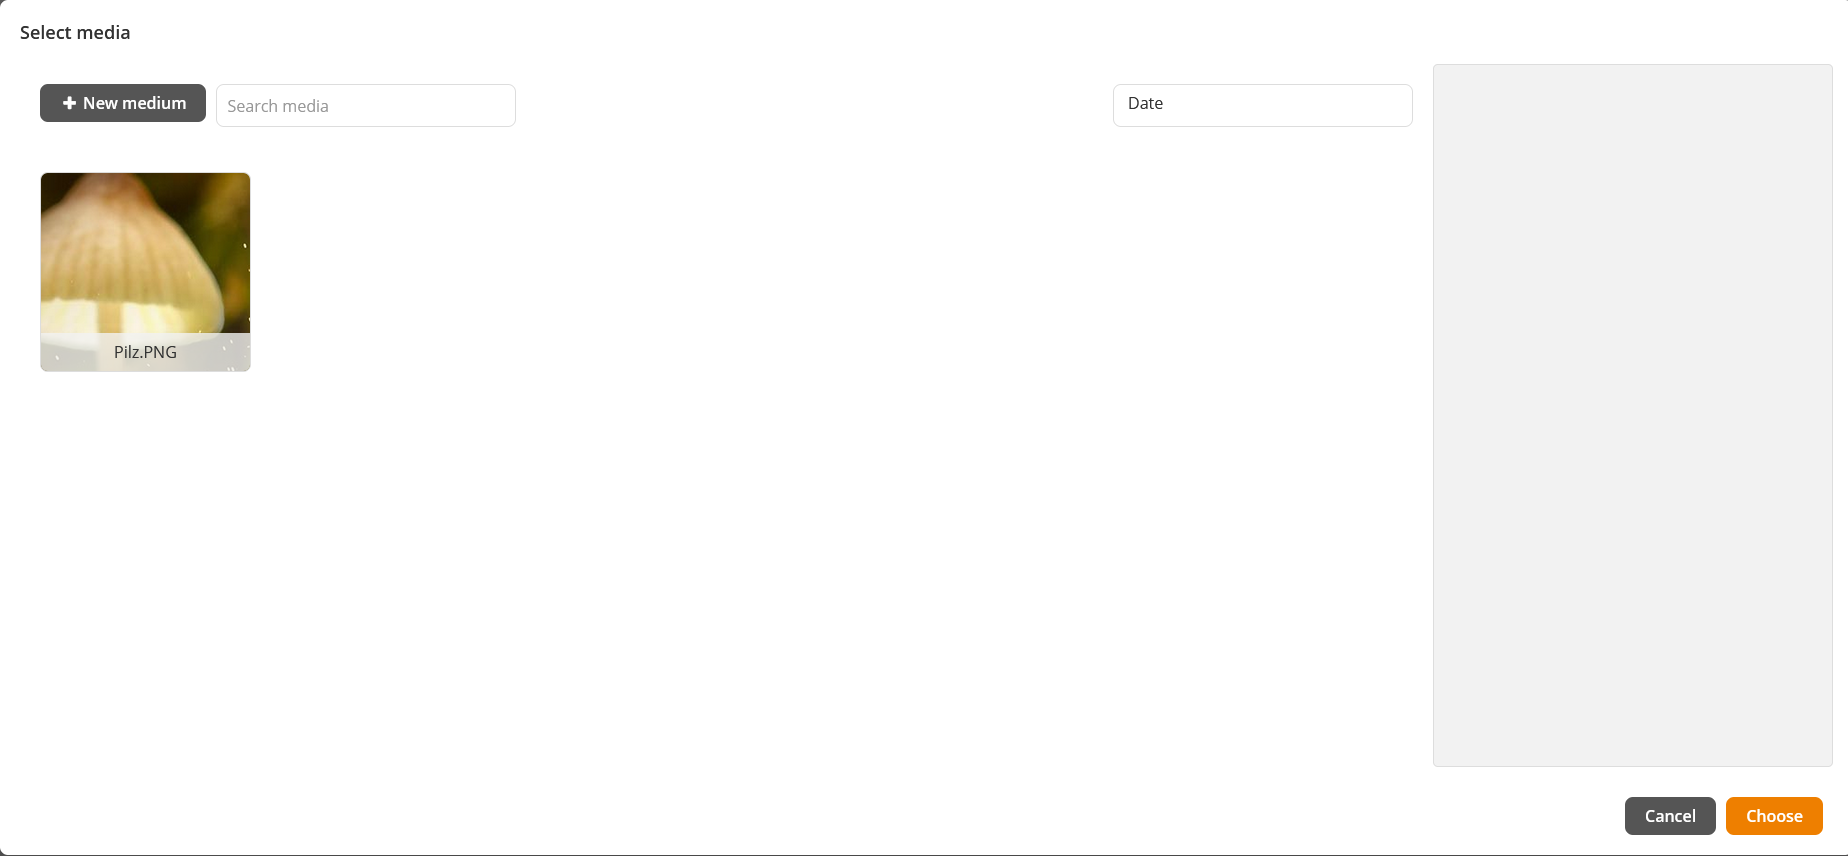
- To add documents and media, click the button Add documents and media. The dialog window Select media opens (see fifth screenshot). You can click suggested media for selecting it. Via the search function you can search for favored media. Furthermore you can upload and select new media by clicking the button +New medium.
- In the dialog window Event date Coordinator and Speaker are defined without the option to change them. Because it’s your learning unit, your first and last name are entered. There’s an event date with start date and time from to and learning time suggested. If required you can change that data.
- To add further event dates, click the button Add under Date. The date of the next day with the same time is automatically set, but you can change this data, too.
- The Maximum number of participants is taken from the UGC template, but you can adjust it if required.
- As location you see the location from the UGC template. If you click the button Manual location, you can enter the Event venue, Room and Details new (all are mandatory fields). To re-enter the location from the UGC template, click the button Location.
- Finally, you click the button Accept. The event dates are saved on tab Event dates (see sixth screenshot).
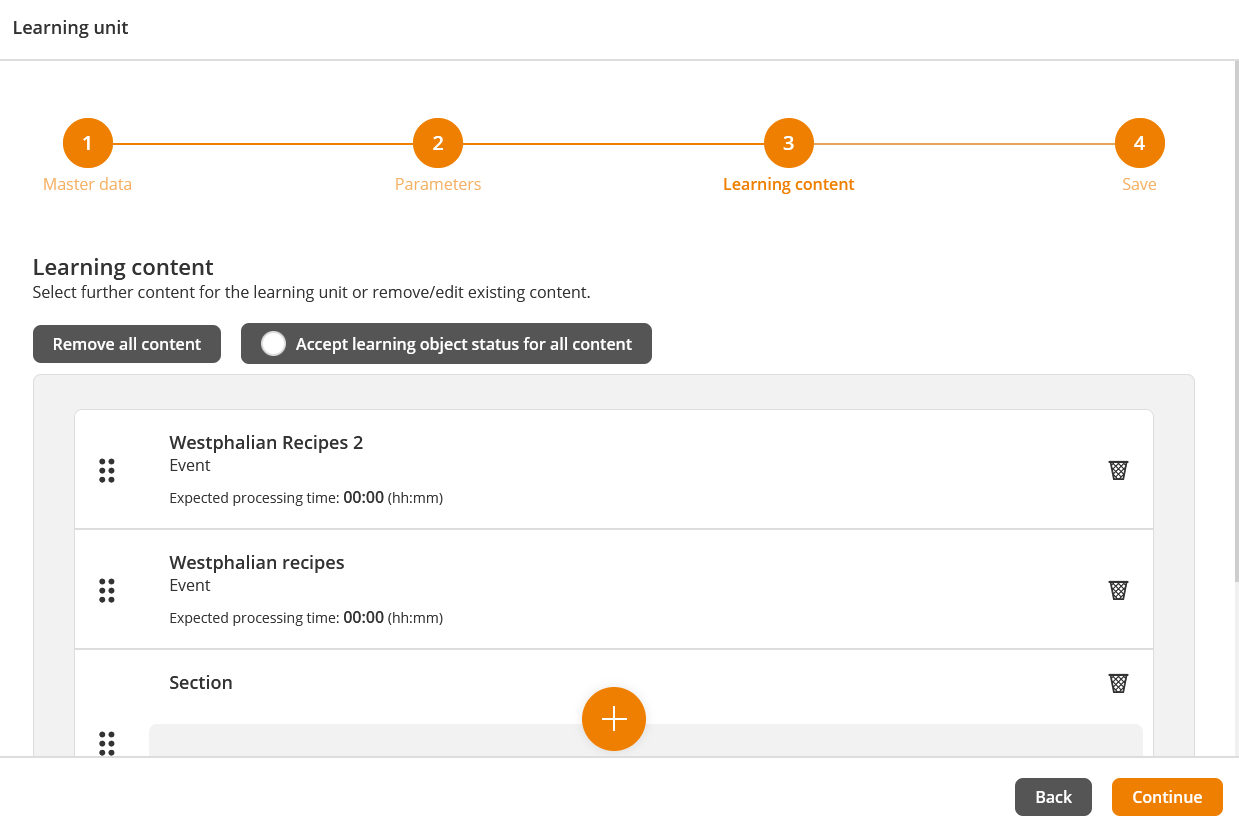
- Click the tab Event dates also the button Accept and the dialog window closes and the new event with event dates is saved as a tile on tab Learning content (see seventh screenshot).
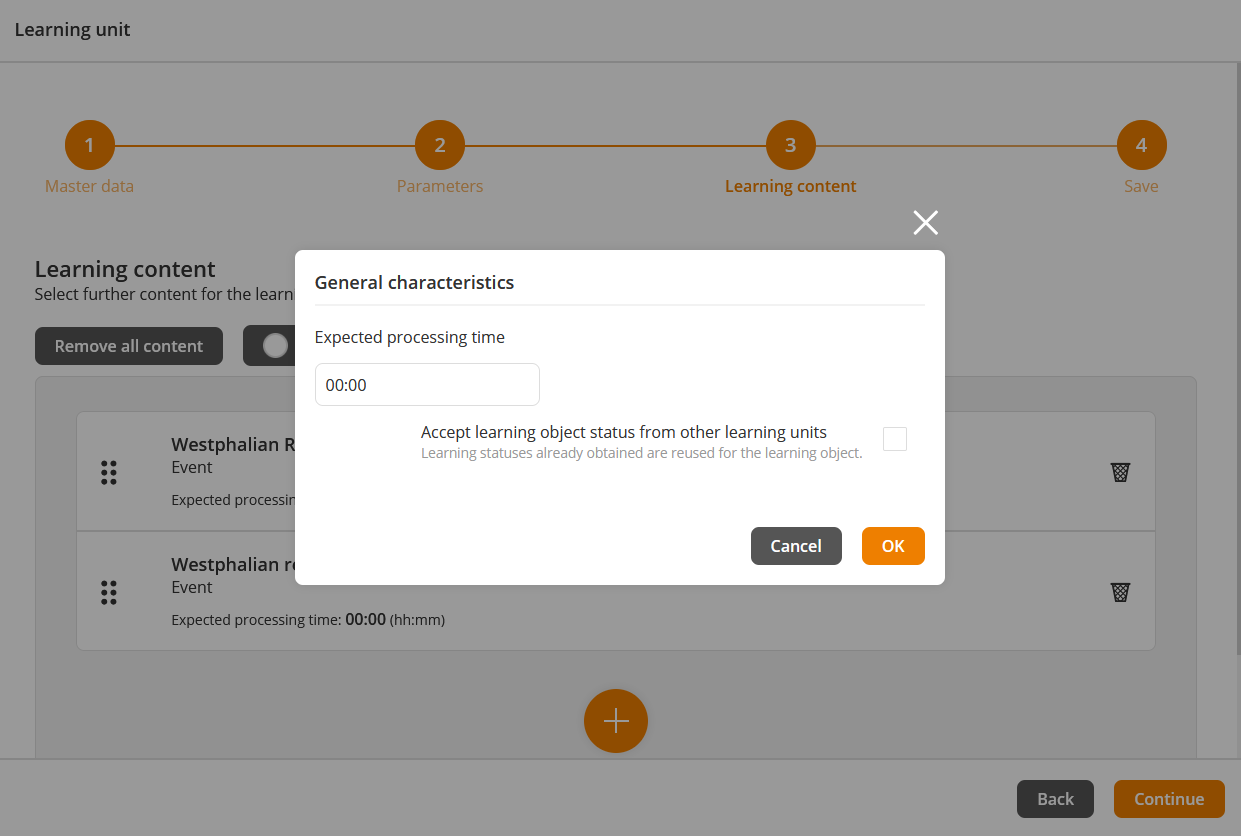
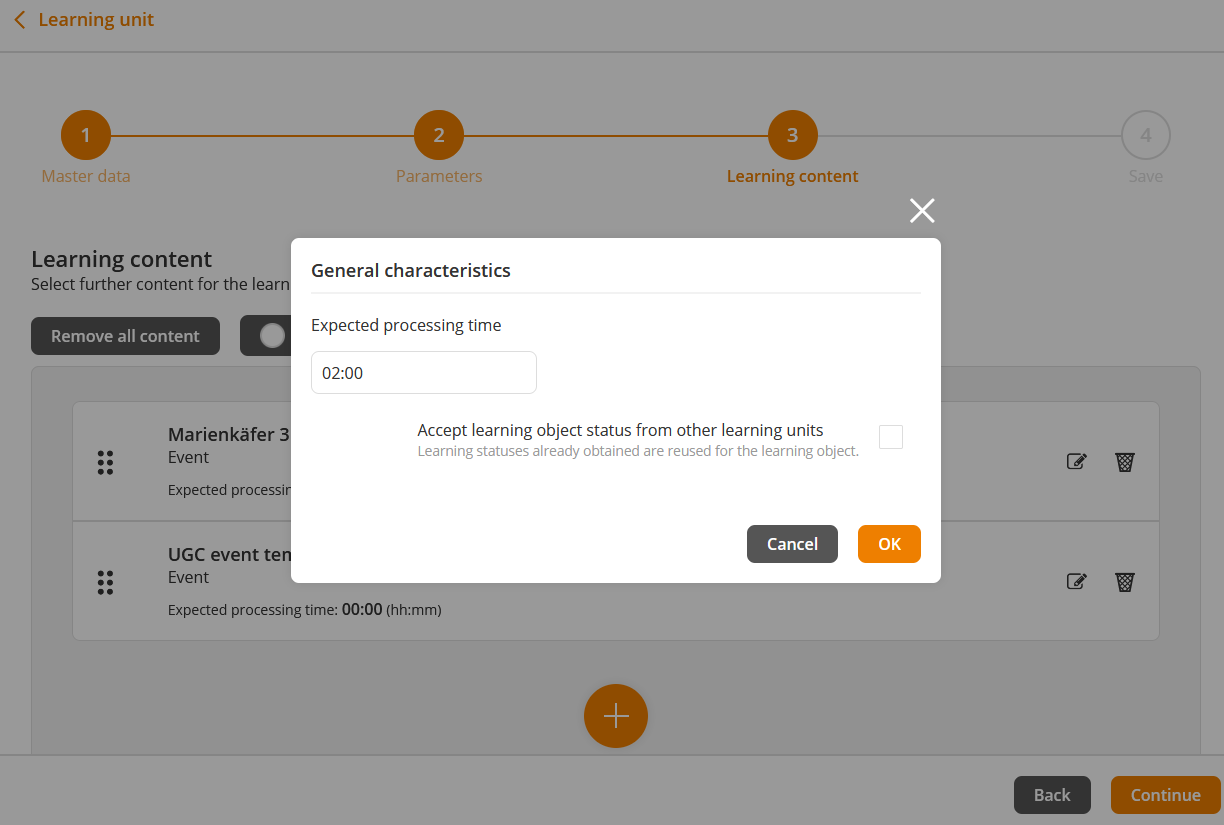
- If you click the Expected processing time of the favored tile, you can enter the expected processing time in the format “hh:mm”, and you can activate the option Accept learning object status from other learning units by setting the check mark and finally clicking the button OK (see eighth screenshot). Now the edited expected processing time is shown.
- You can move the tiles by moving with pressed mouse key on the six points.
- You change to the edit mode by clicking the Pencil.
- You can remove the event by clicking the Recycle bin.
Step 9
- Click the button Continue. You get to the tab number 4 Save.
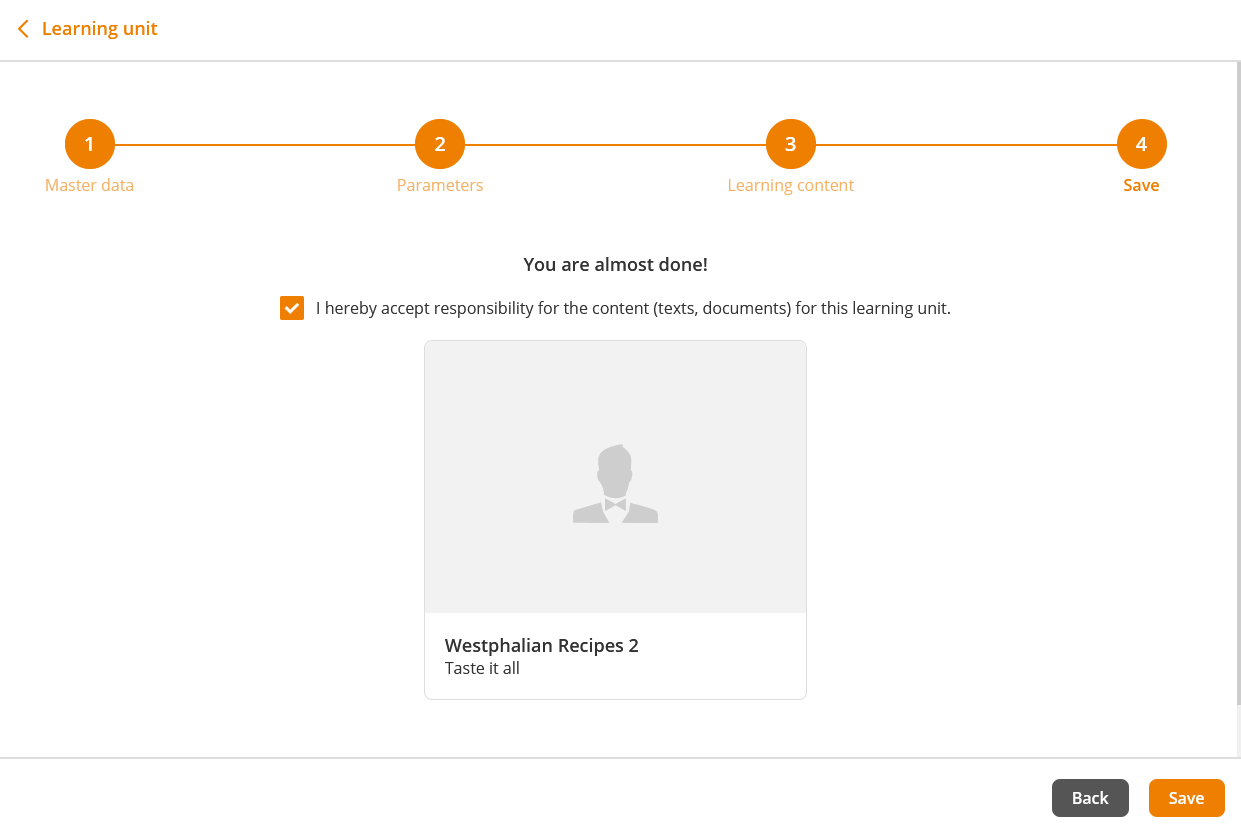
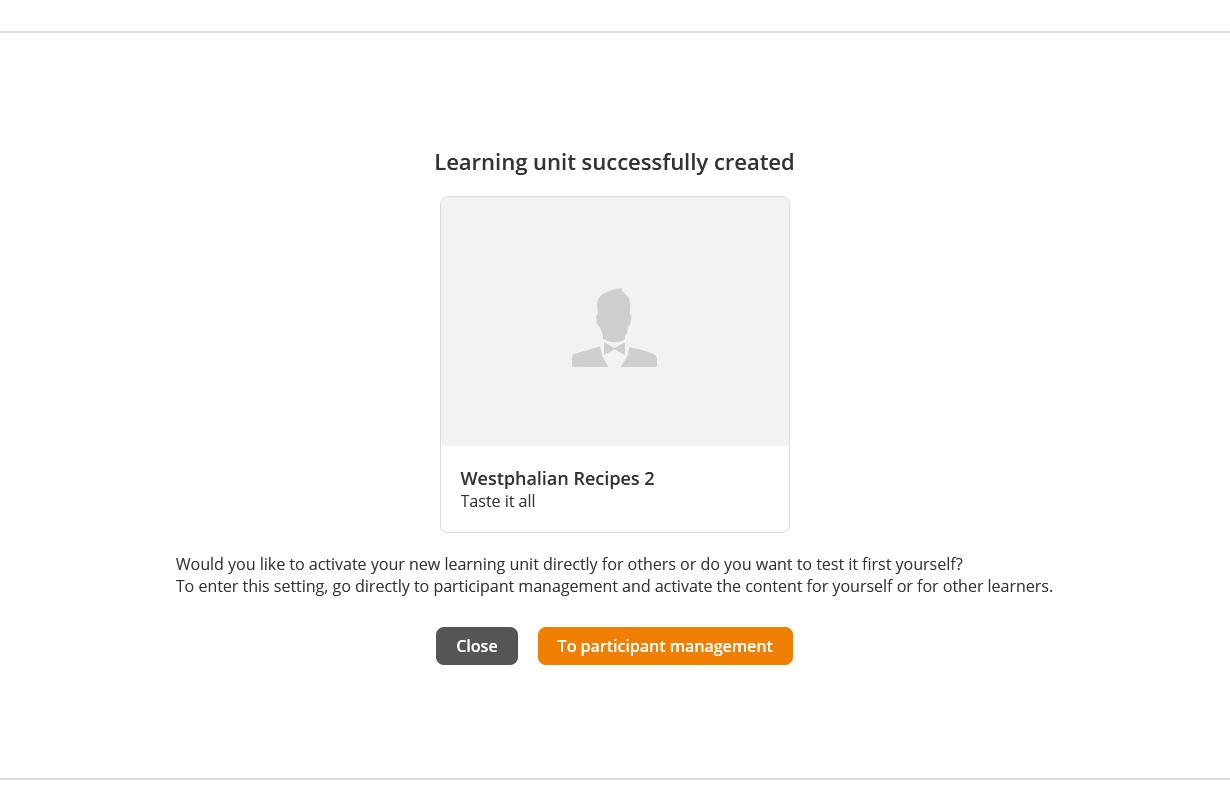
- To accept the responsibility for content, set this check mark (see first screenshot). Finally, you click the button Save. You are shown that the learning unit has been succesfully created (see second screenshot).
- Now you can close this dialog window by clicking the button Close or you can go to the participant management of this learning unit or course activation by clicking the button To participant management. You got two options. First you can test this learning unit by yourself or second you can activate it directly for the learners.
Participant management
Step 1
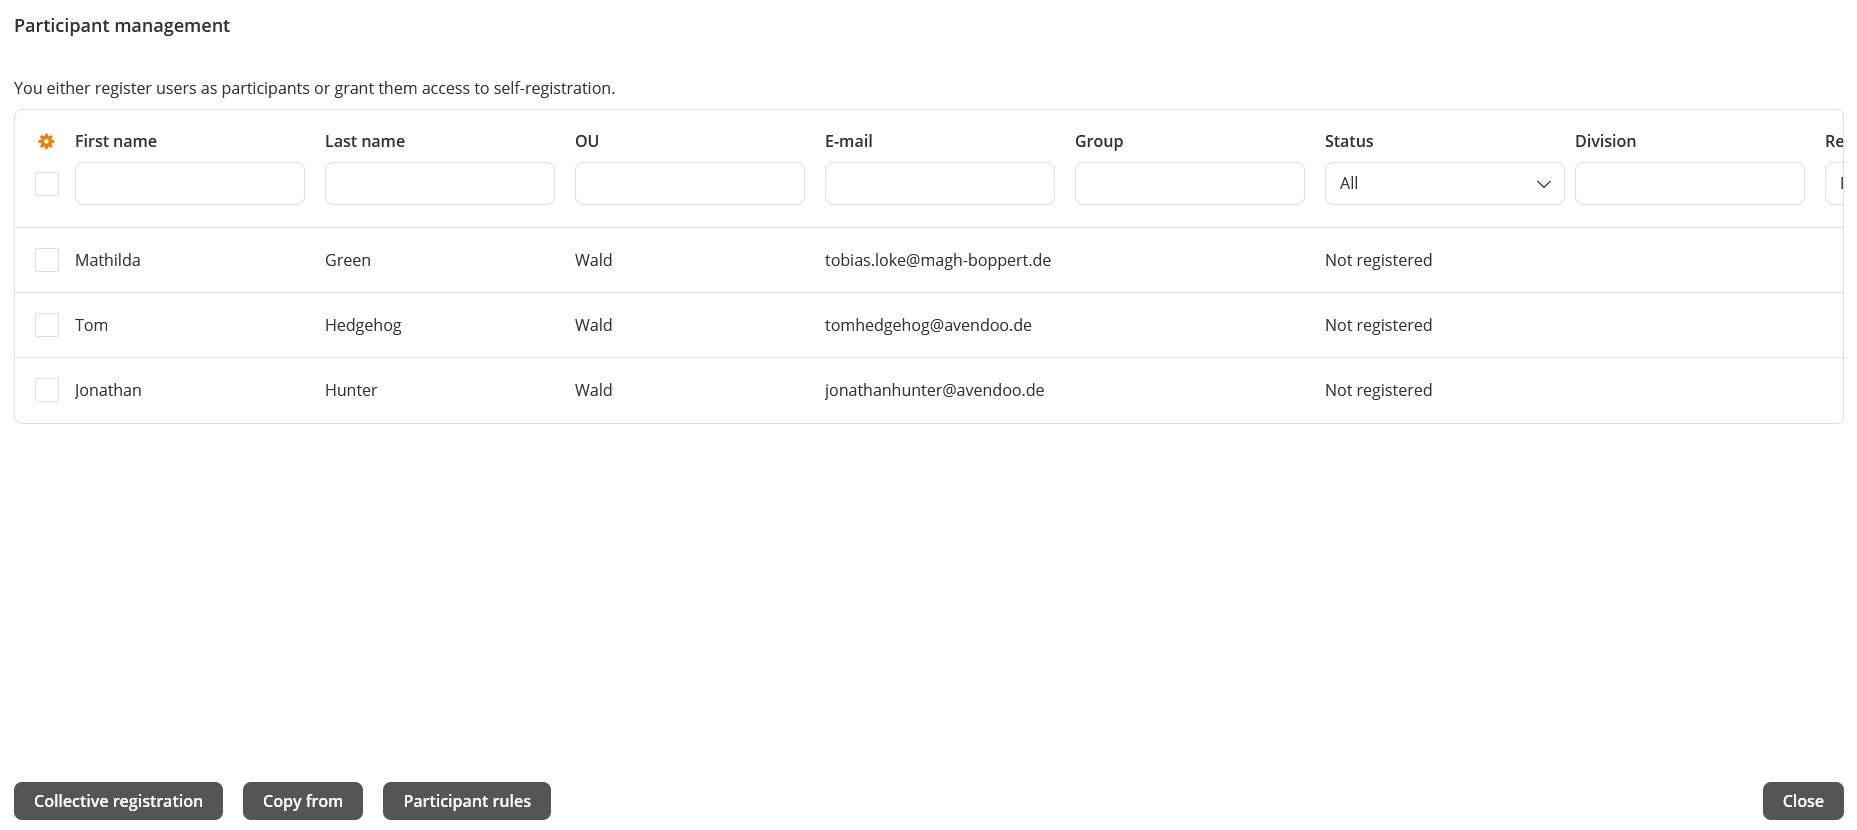
If you click the button To participant management or you choose in the context menu of the corresponding tile Participant management, the dialog window Participant management opens. As user with the object right Manage participants the participant management is shown in which you can manage only yourself. As team leader with the object right Manage participants or/and the team leader right Manage course participants you see all participants who you can also manage as team leader.
Collective registration
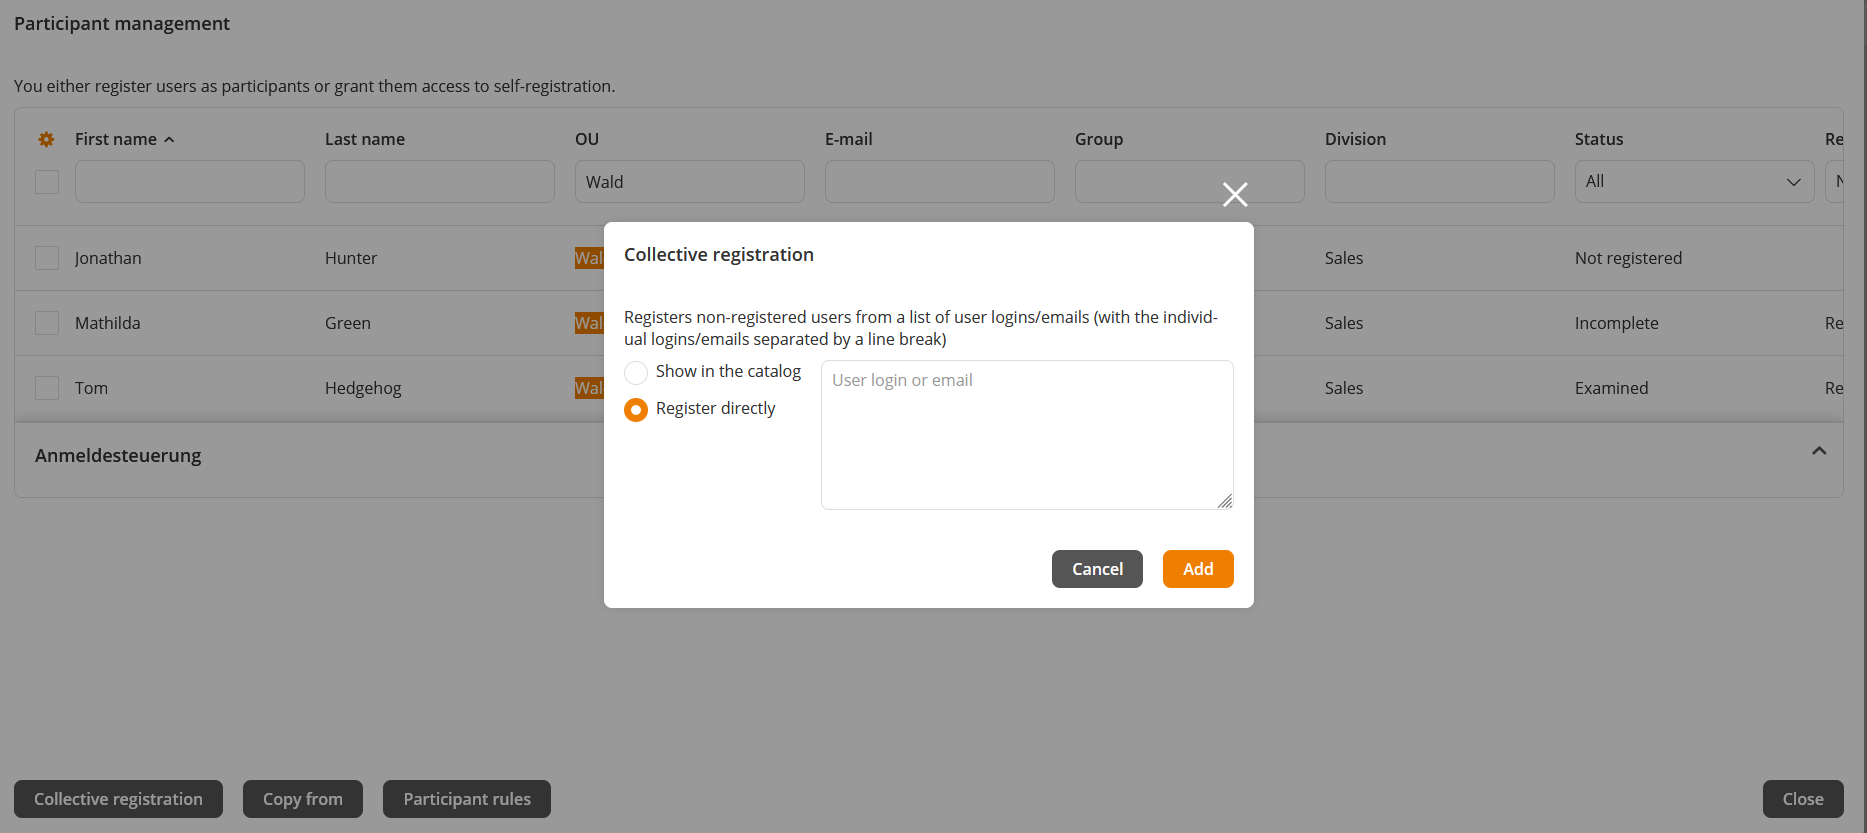
To register unregistered users from a list of e-mail addresses or user names, separated by line breaks, either directly or only with display in the catalog, click the button Collective registration.
Select the option Show in the catalog or Register directly and enter the user name or the e-mail address of the learner per line. Finally, you click the button Add and the entered users are added to the list of participant management.
Copy from (copy participants)
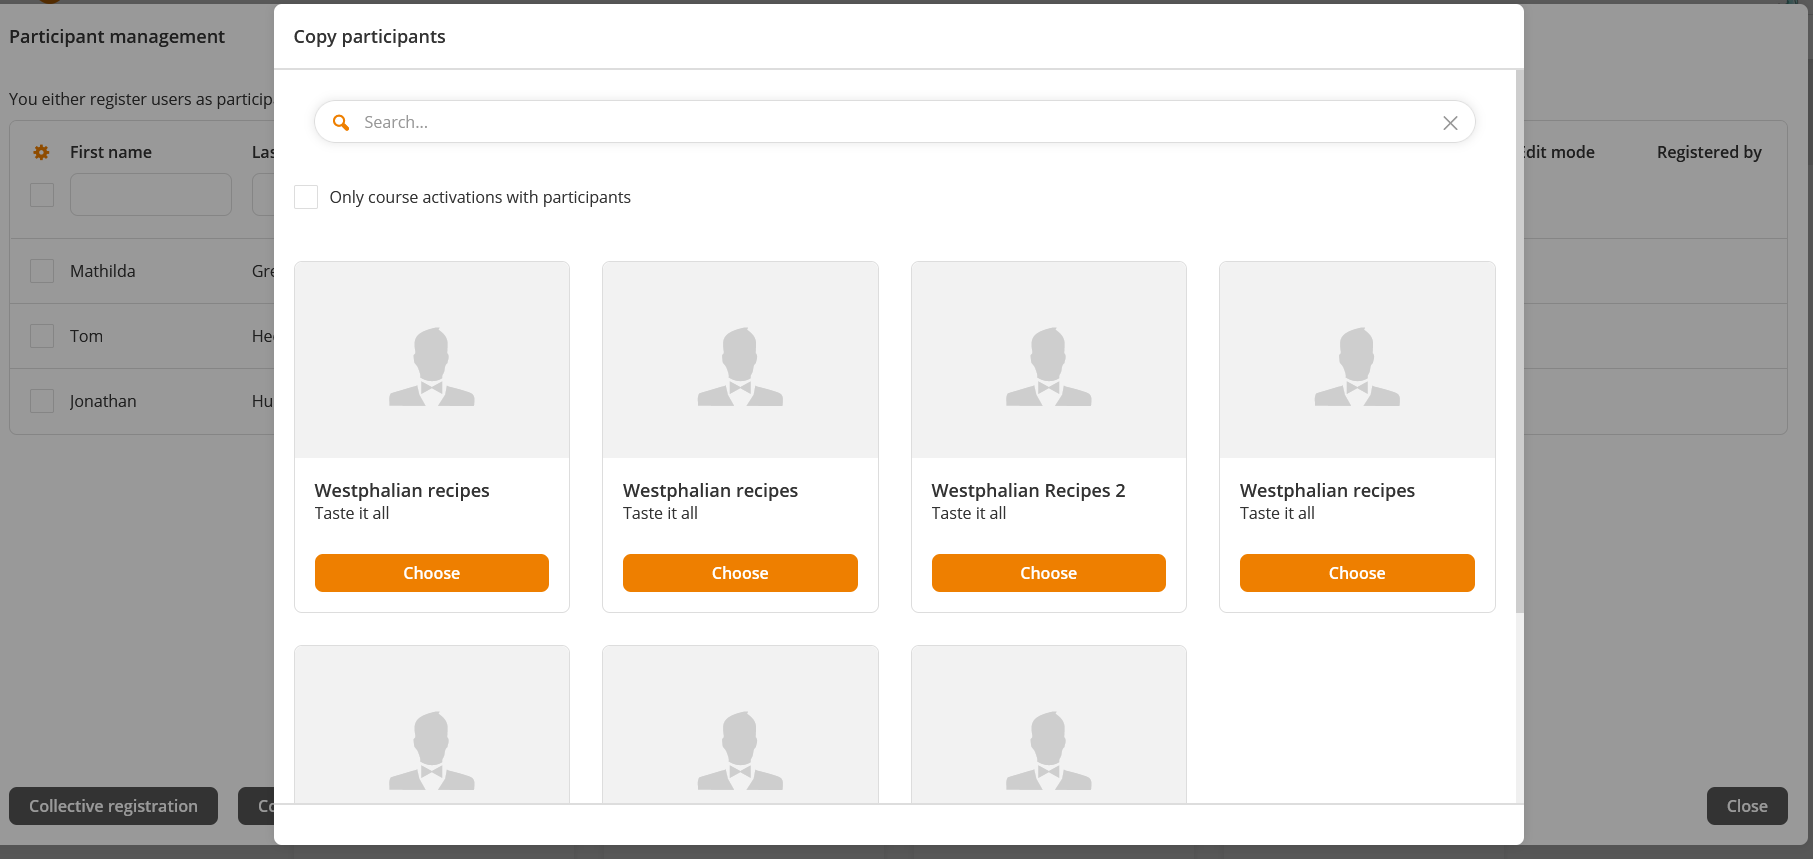
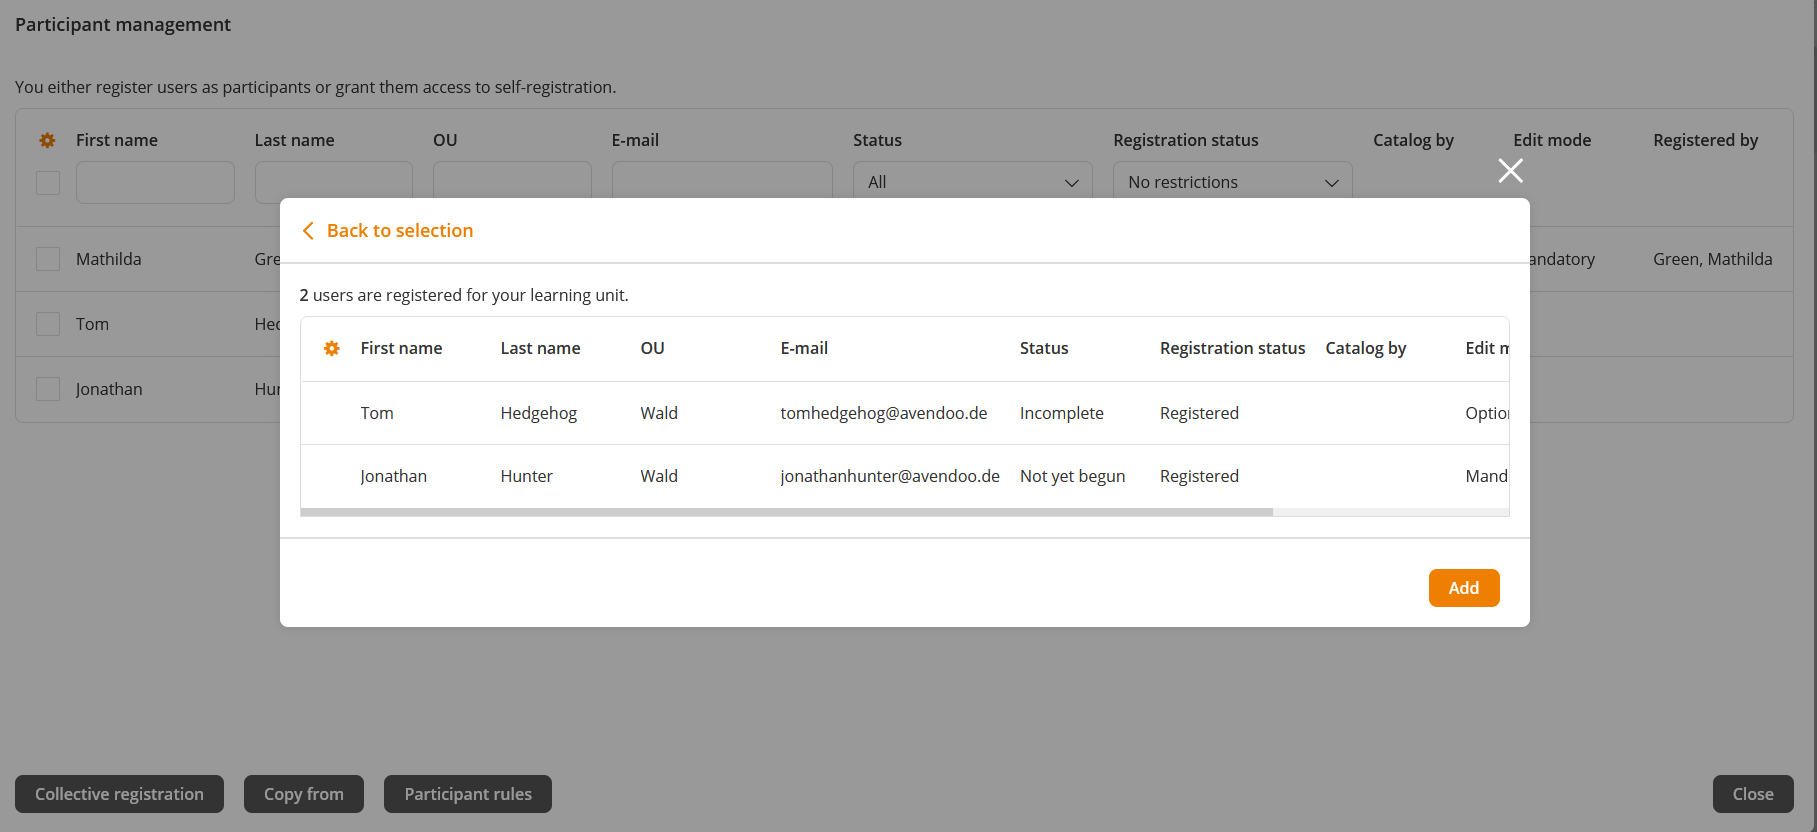
To copy participants from other learning units or course activations, click the button Copy from. The dialog window Copy participants opens.
To show only learning units or course activations with participants, set the check mark Only course activations with participants. Also you can search for certain learning units or course activations. Via clicking the button Choose of the desired learning unit or course activation you choose to accept these participants. The participants to be accepted are shown.
You can switch back to your selection. Only after clicking the button Add these participants are added.
Participant rules
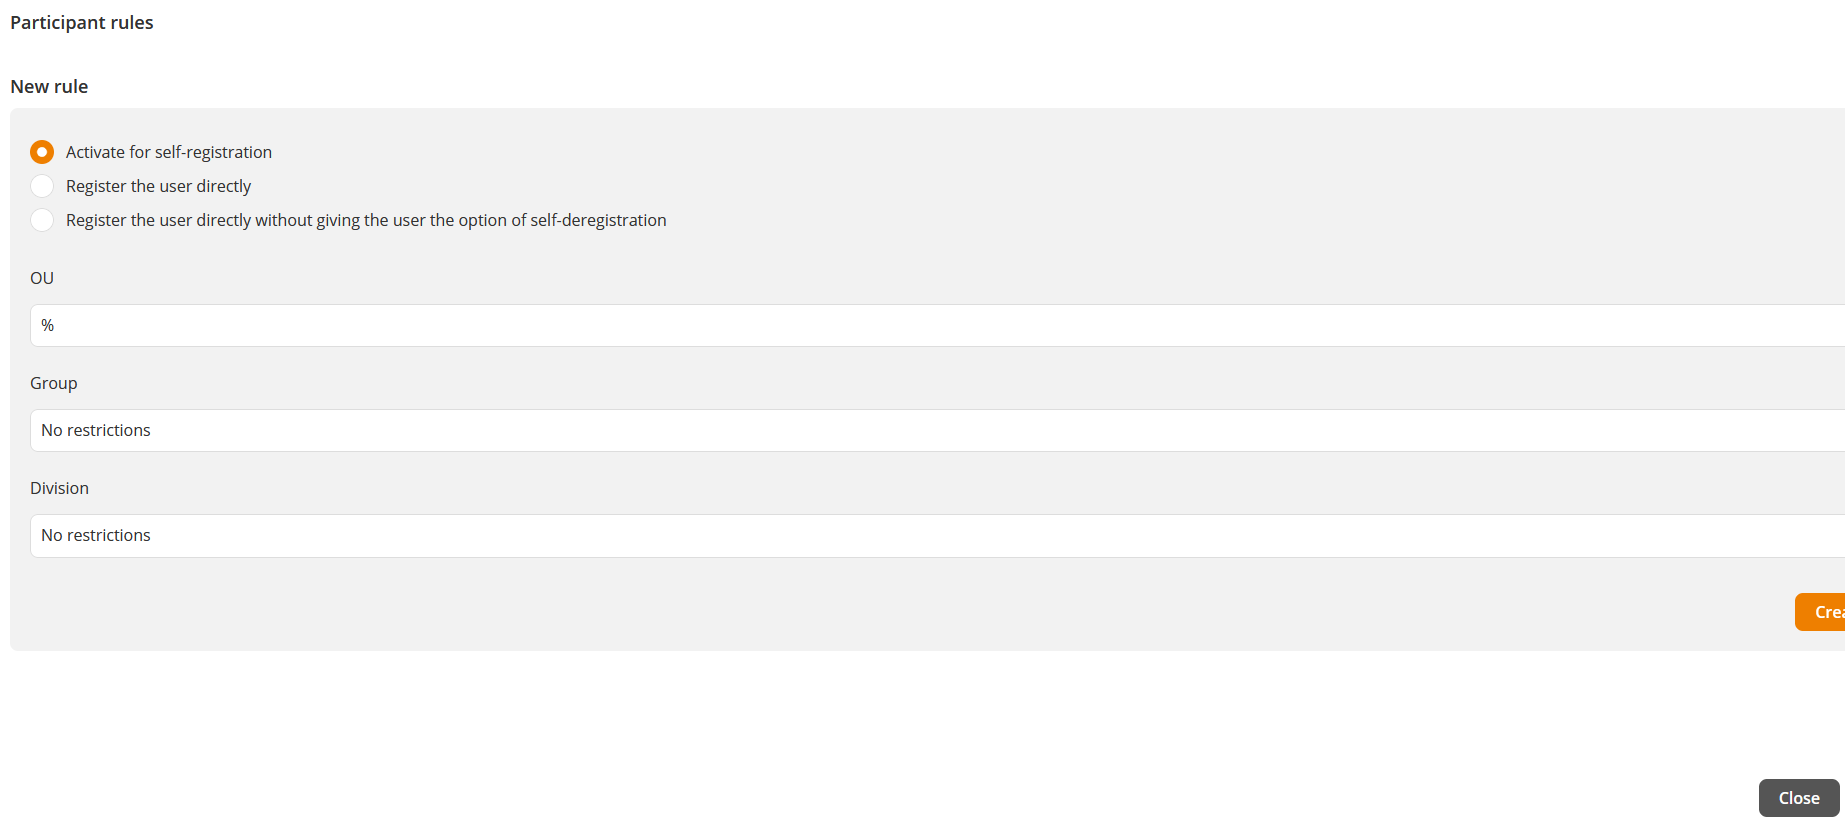
- To create participant rules or to show active participant rules, click the button Participant rules. The dialog window Participant rules opens.
- You can select between the options Activate for self-registration, Register the user directly or Register the user directly without giving the user the option of self-deregistration under New rule.
- You can select a Group or a Division via a dropdown menu (No restrictions or the data maintained in the user accounts regarding group and division).
- Finally, you click the button Create new rule. Then this rule is added to the Active rules. If required you can remove this rule.
The active participant rules of the learning unit or course activation are displayed under Active rules in a table with the columns Registration options (course activation) and Registration status. - If you click the gear wheel under Active rules, you can configure the column view of the participant rules. You can select between the following columns by setting a check mark:
– OU (Organizational Unit)
– Group
– Division
– Registration possibilities (Event)
– Approval procedure for event participants
– Registration possibilities (Course activation)
– Approval procedure for course activations
– Registration status
– Edit mode - You can edit the order of the columns via the menu 6 points, by clicking this menu and move it with pressed mouse key to the position you want.
- You close the editing of the column view by clicking the button Close. The changes have been saved.
- Finally, you click for closing the editing of the participant rules Close in the dialog window Participant rules. The changes have been saved.
Example
Mathilda Green creates a participant rule for users for the UGC learning unit “Westphalian recipes”. The users are in the group Top sales manager and in the division Sales for self-registering.
Therefore Mathilda selects Activate for self-registration in step 2 and the group Top sales manager and the division Sales in step 3. The added participant rule shows the registration status Catalog and the Edit mode Mandatory.
Mathilda can see, depending on the configured column view, if the approval procedures are Activated or Deactivated, this means With or Without Approval procedure for this UGC learning unit.
Filters in the participant management
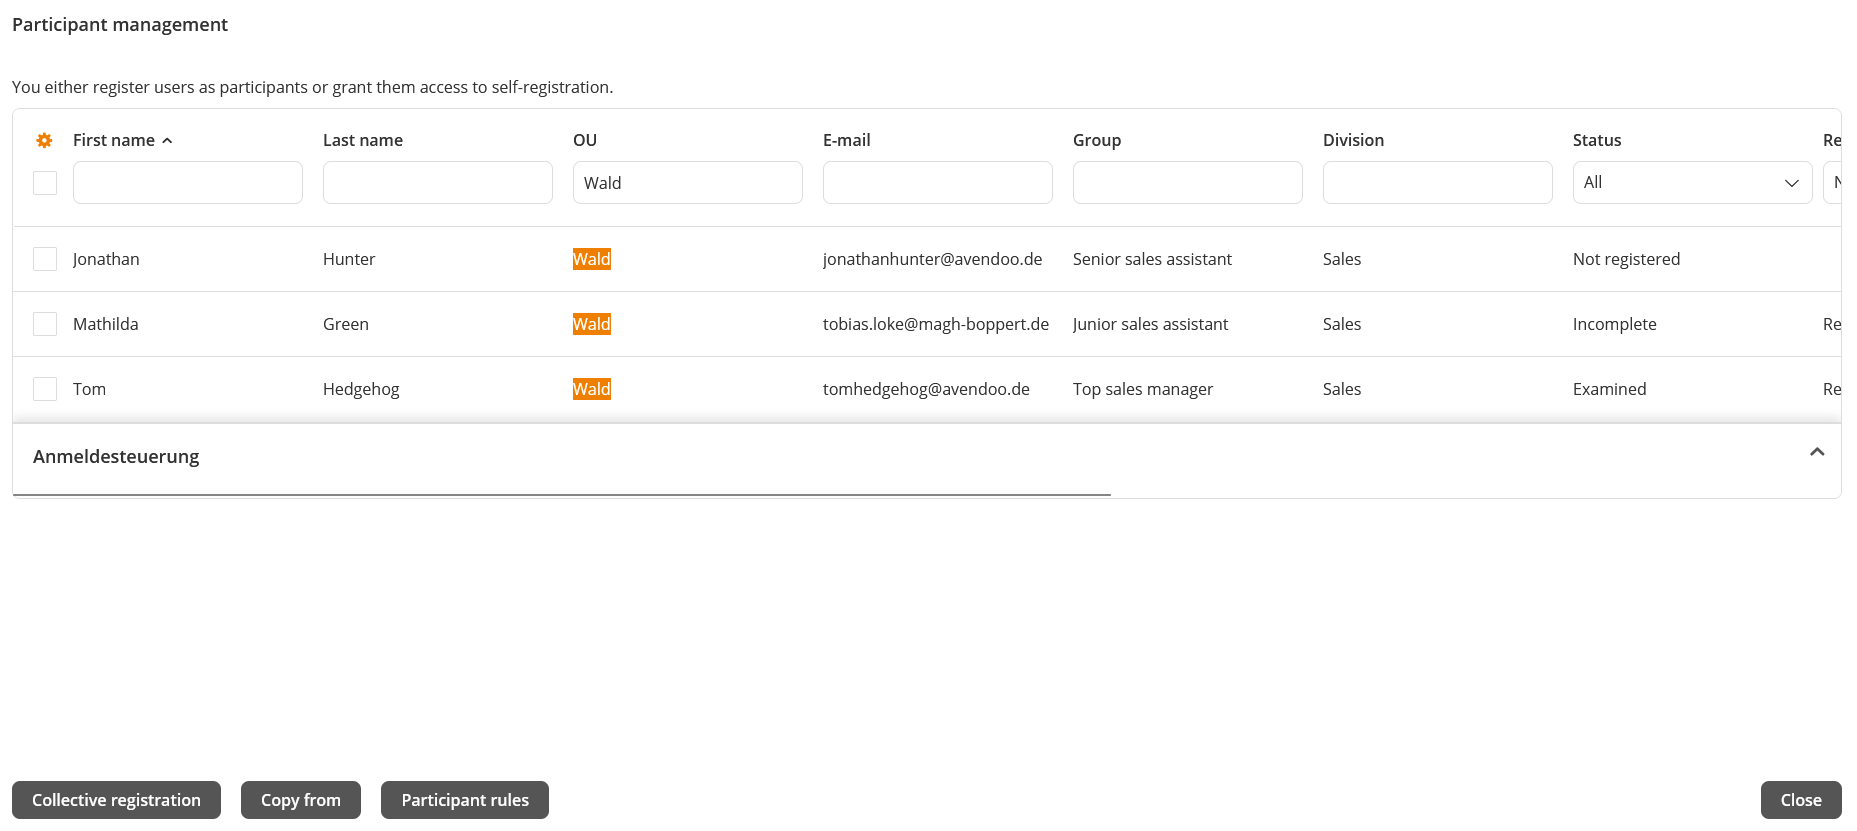
You can filter in the list of the participant management of the learning unit or course activation by the following criteria: First name, Last name, OU, E-mail, Group, Division, Status (All, Not registered, Not attempted, Browsed, Incomplete, Failed, Completed or Passed), Registration status (No restrictions, Catalog or Registered), Catalog by, Edit mode and Registered by.
Preferences in the participant management
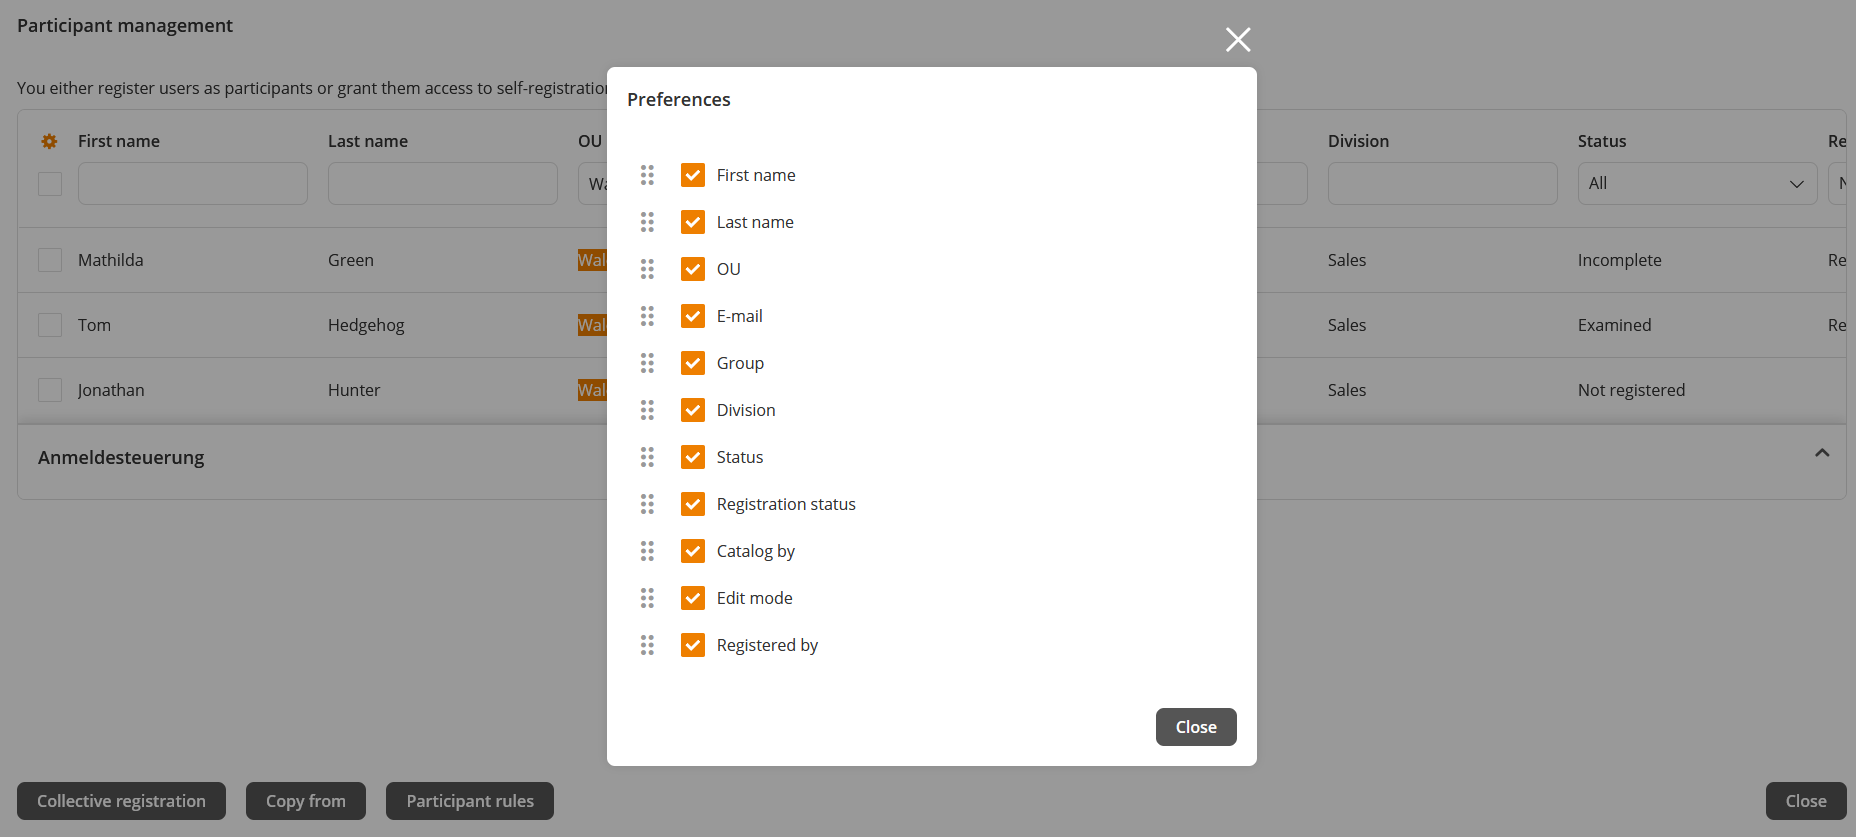
To define the column view and the order of the columns click on the gear wheel. You can define the columns or change the order of the following columns by clicking on the six points, holding the left mouse button and moving to the favored place in the opening dialog window (see screenshot):
Sorting in the participant management
If you click right beside the column header or on the column header the arrow down is shown and the participant list is sorted alphabetically in descending order. If you click once more on the arrow down the arrow up is shown and the participant list is sorted alphabetically in ascending order.
You can sort each column of the participant list alphabetically in descending and ascending order.
User selection in the participant management
- To select all listed users, click the check mark on the top. In this case you do not select all available users, but only all users, which are shown. This means, if you could register 100 users, but in the table are only shown 50, you only select these 50 users.
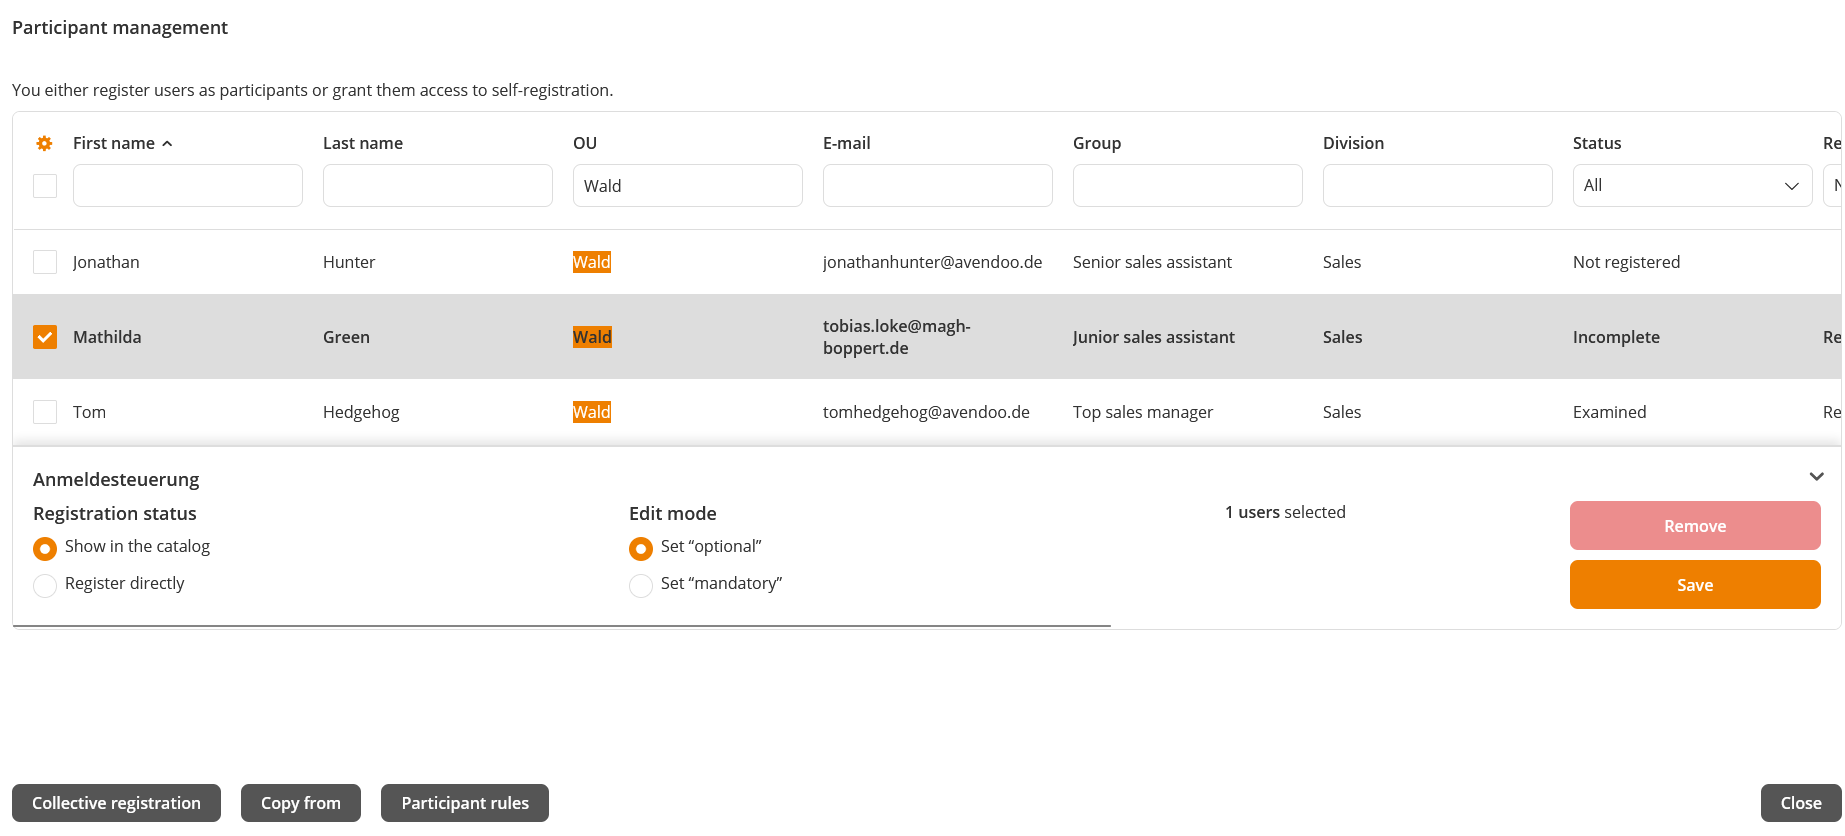
Otherwise you set the check mark of the favored user. The options regarding the registration status and the number of the selected users are shown (see first screenshot). If required you can select more users from the list. - Select Show in the catalog or Register directly. By the first option you enable the self-registration to the learners.
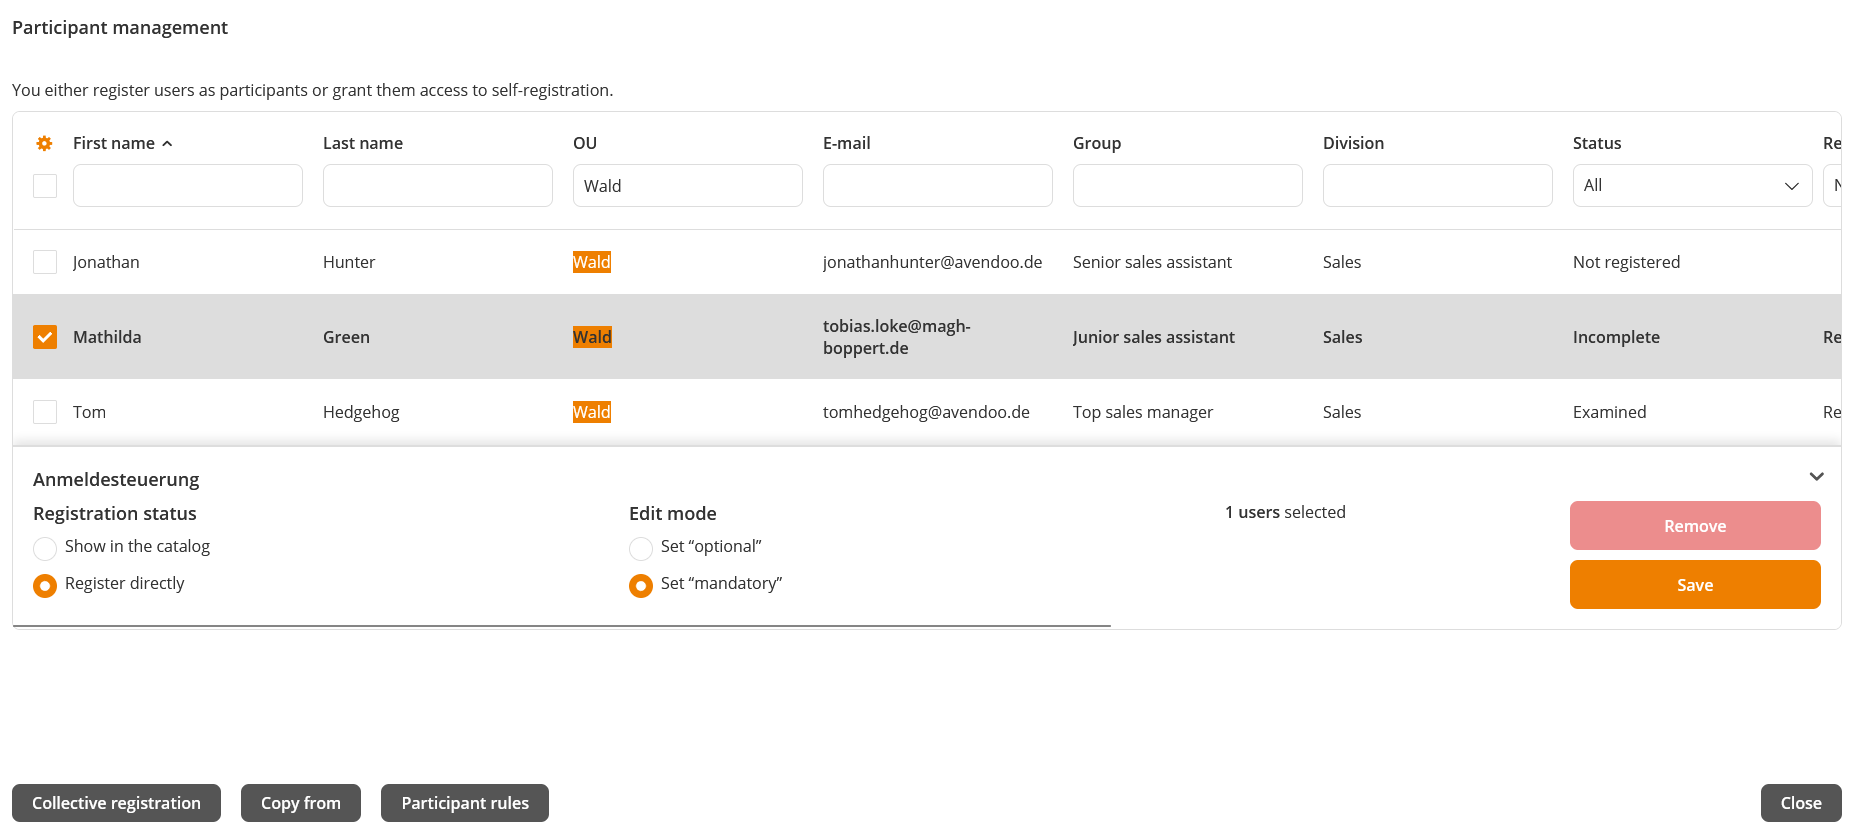
- If you’ve selected Register directly for the selected users, you can select between the two edit modes Set “optional” or Set “mandatory”. If the user should see this course activation on the sub tab Required on his/her learning place, select Set “mandatory”. If the user should see this course activation on the sub tab Optional on his/her learning place, select Set “optional”.
Furthermore all directly registered users see this learning unit in their catalog.
- You can deregister already registered users by setting the check mark in front of the user name and clicking the button Remove (see second screenshot). Furthermore the user can deregister him/herself via the context menu three points on the tile in the catalog or on his/her learning place.
Save
Click the button Save.
The registered and the users activated for self-registration are shown. Also it’s shown, who has registered these users or who has activated the self-registration. In the last case the Edit mode of the learning unit or course activation is Mandatory.
Result
Your own created content is shown as My content on the appropriate tile. Thus you recognize your content at once.
By clicking on the Pencil of the corresponding tile you can edit the learning unit. By clicking the Participant icon the dialog window Participant management opens.
View of the learning units (tiles)
Added to bookmarks
Shows the filled heart symbol if it was liked, this means added to bookmarks.
Teaser of the course
Is not shown via tile view.
Display of the learning progress
The orange status bar for the learning progress is shown above the preview image of the learning unit. If you move the pointe on the end of the status bar, the learning progress is shown in percent.
Shows the average assessment of the learning unit and the number of assessments.
Date of last editing
Shows the date (dd:mm:jjjj:) of last editing.
Registration required
This icon notes that the learning unit contains an event, to which you are not already registered.
Time expected to complete
Shows the time (h,min) expected to complete for the learning unit.
My calendar
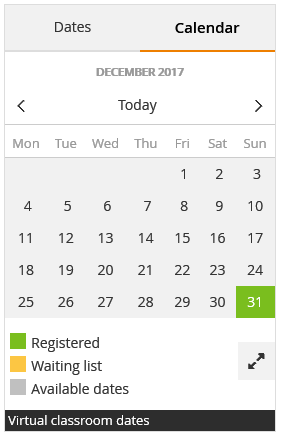
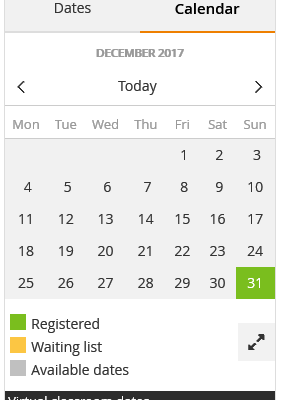
The event calendar gives a quick overview of your dates and your “free” dates (dates, to which you can register). Via the arrow buttons you can click forward and back from month to month in the calendar. If you click Today, the current month is shown. If you select a day or the little arrow at the bottom on the right side, you get into the detailed views of the event calendar.
If you click the title of an event date group or an event date on the tab “Dates”, you get to the tabs “Available dates” and “All dates”. You get the following information:
- if you are already registered
- the deregistration deadline
- you see via detail selection the details of the dates and the participant list and
- you can see via the colored entry, if it is an prior date, if you are registered to this date, if it is a waiting list date or if it is a cancelled date.
Further you can use the following functions:
- You can deregister, if allowed via the corresponding button.
- You can book overnight stays if applicable via the selection of the details, even before the event.
