Inhalte
- 1 Basics
- 2 Event manager
- 2.1 Overview
- 2.1.1 Add participant
- 2.1.2 Add participant directly
- 2.1.3 Advanced import
- 2.1.4 Cancel registration of all participants
- 2.1.5 Cancel registration of several participants
- 2.1.6 Change the event date status
- 2.1.7 Move several participants (alternative date)
- 2.1.8 Send announcement
- 2.1.9 Send invitation
- 2.1.10 Follow-up
- 2.1.11 Send copy of the participant invitation to speakers and coordinator
- 2.1.12 Thank you e-mail
- 2.1.13 Details and sub tabs
- 2.2 Overview of tasks
- 2.3 Lists of interested parties
- 2.4 Attendance list
- 2.5 E-mail history
- 2.6 History of community messages
- 2.1 Overview
Basics
Prequisites
You got the right Access to the event manager at minimum, but we recommend to got all rights under Event management via your author account or your permission group.
Use
You can manage the participants for face-to-face sessions in the context of your training opportunities via the Event manager. All starting and end times of the event date are shown in the time zone of the event date. When you have created events and have added on the learning path, the participants get access to the event via the course activation. Via clicking the tab Event management you get to the Event manager.
Furthermore, you can make an overview of Tasks in the event management.
You find more information about registration and deregistration of the user him/herself in chapter Catalog.
Functions
To get to the Event manager, choose Event management → Title of an event.
The Event manager opens.
The following functions are available:
Event manager
Overview
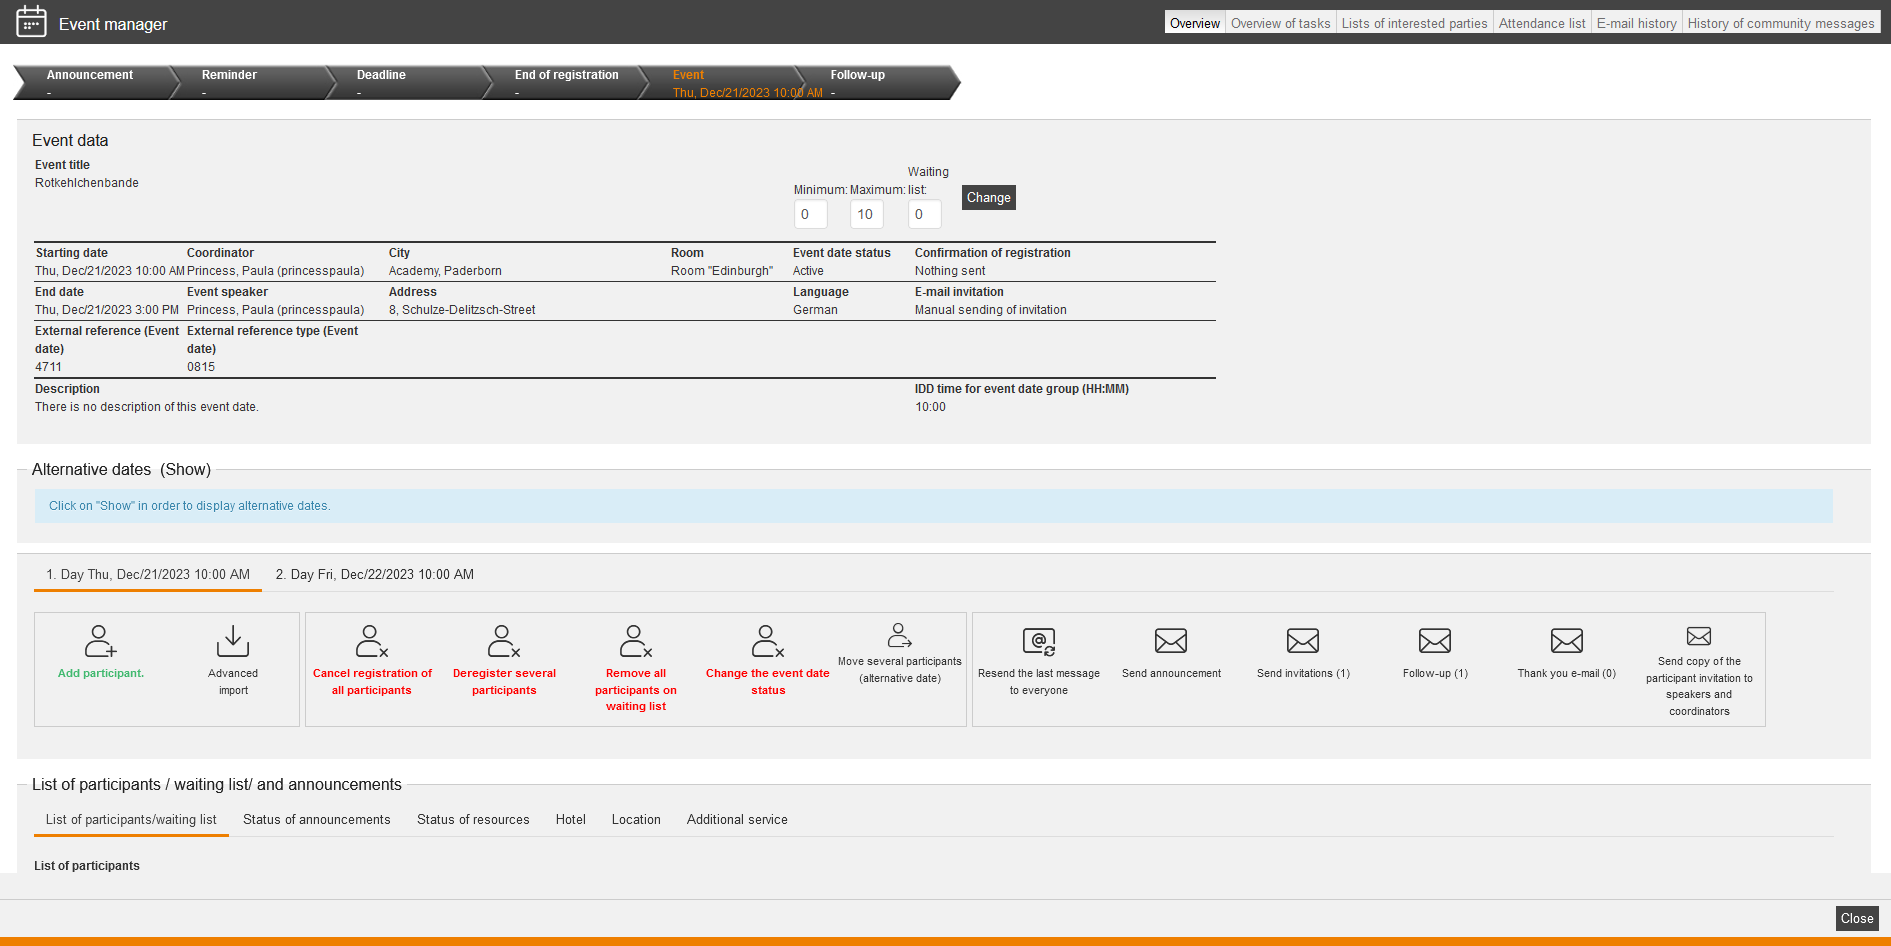
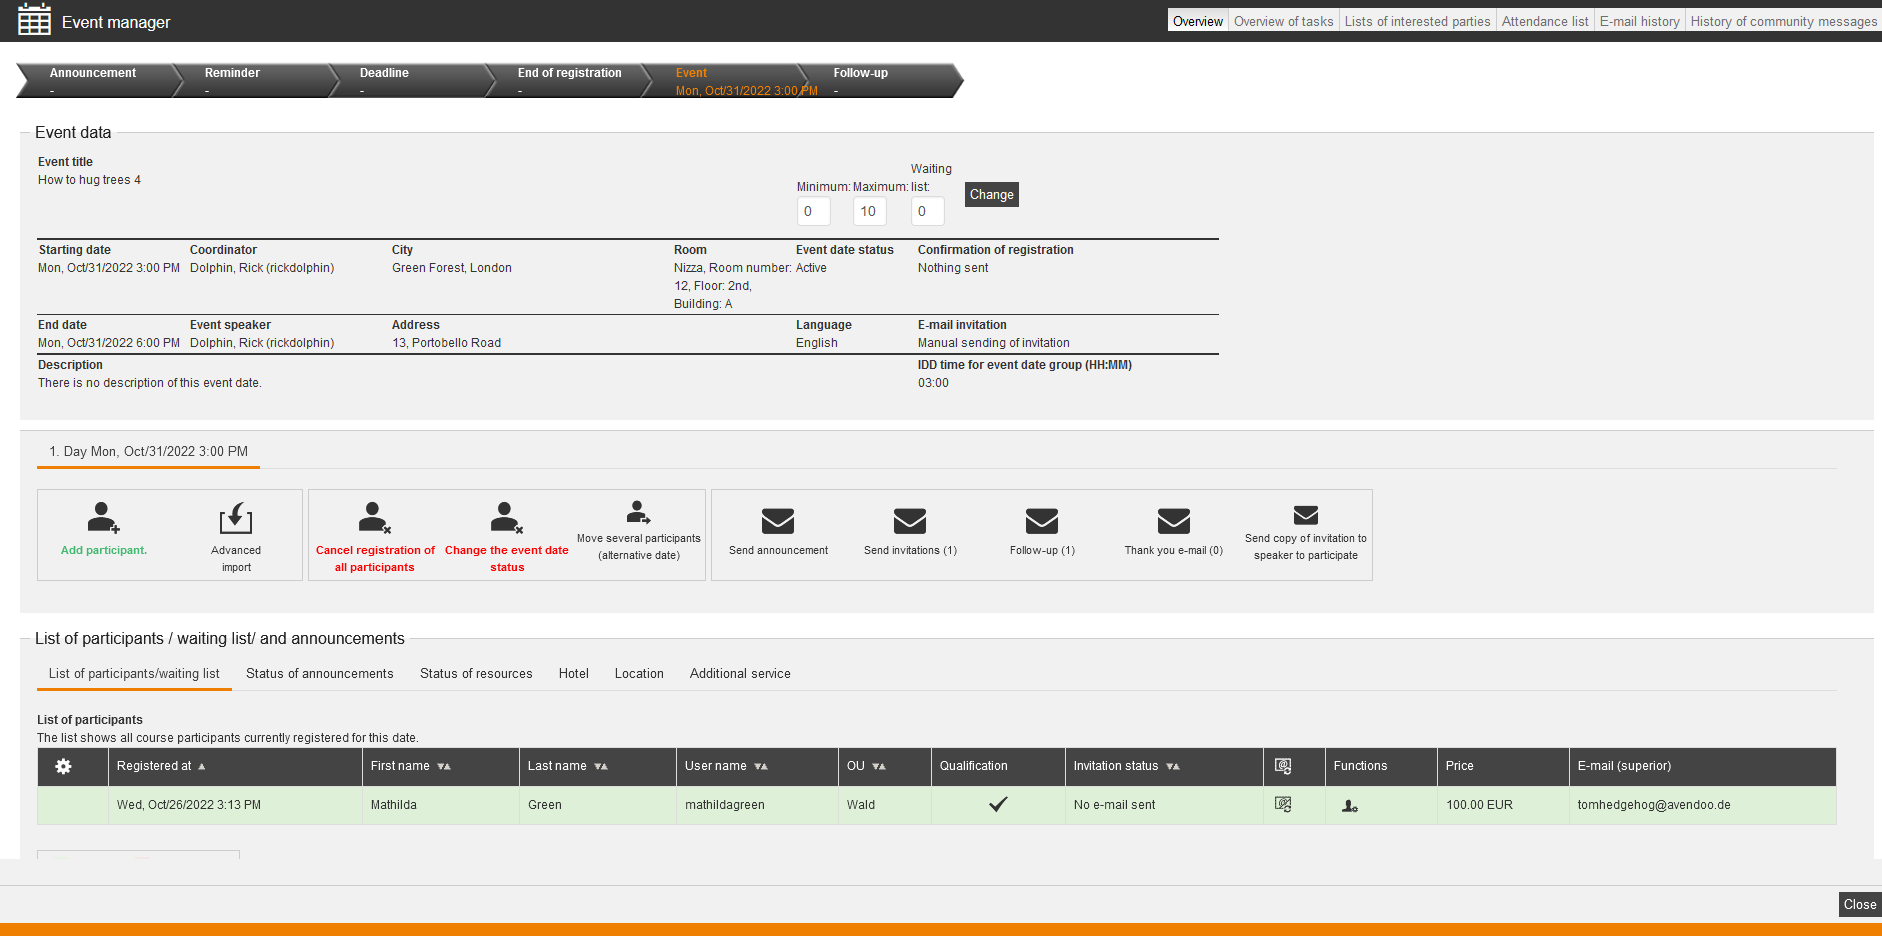
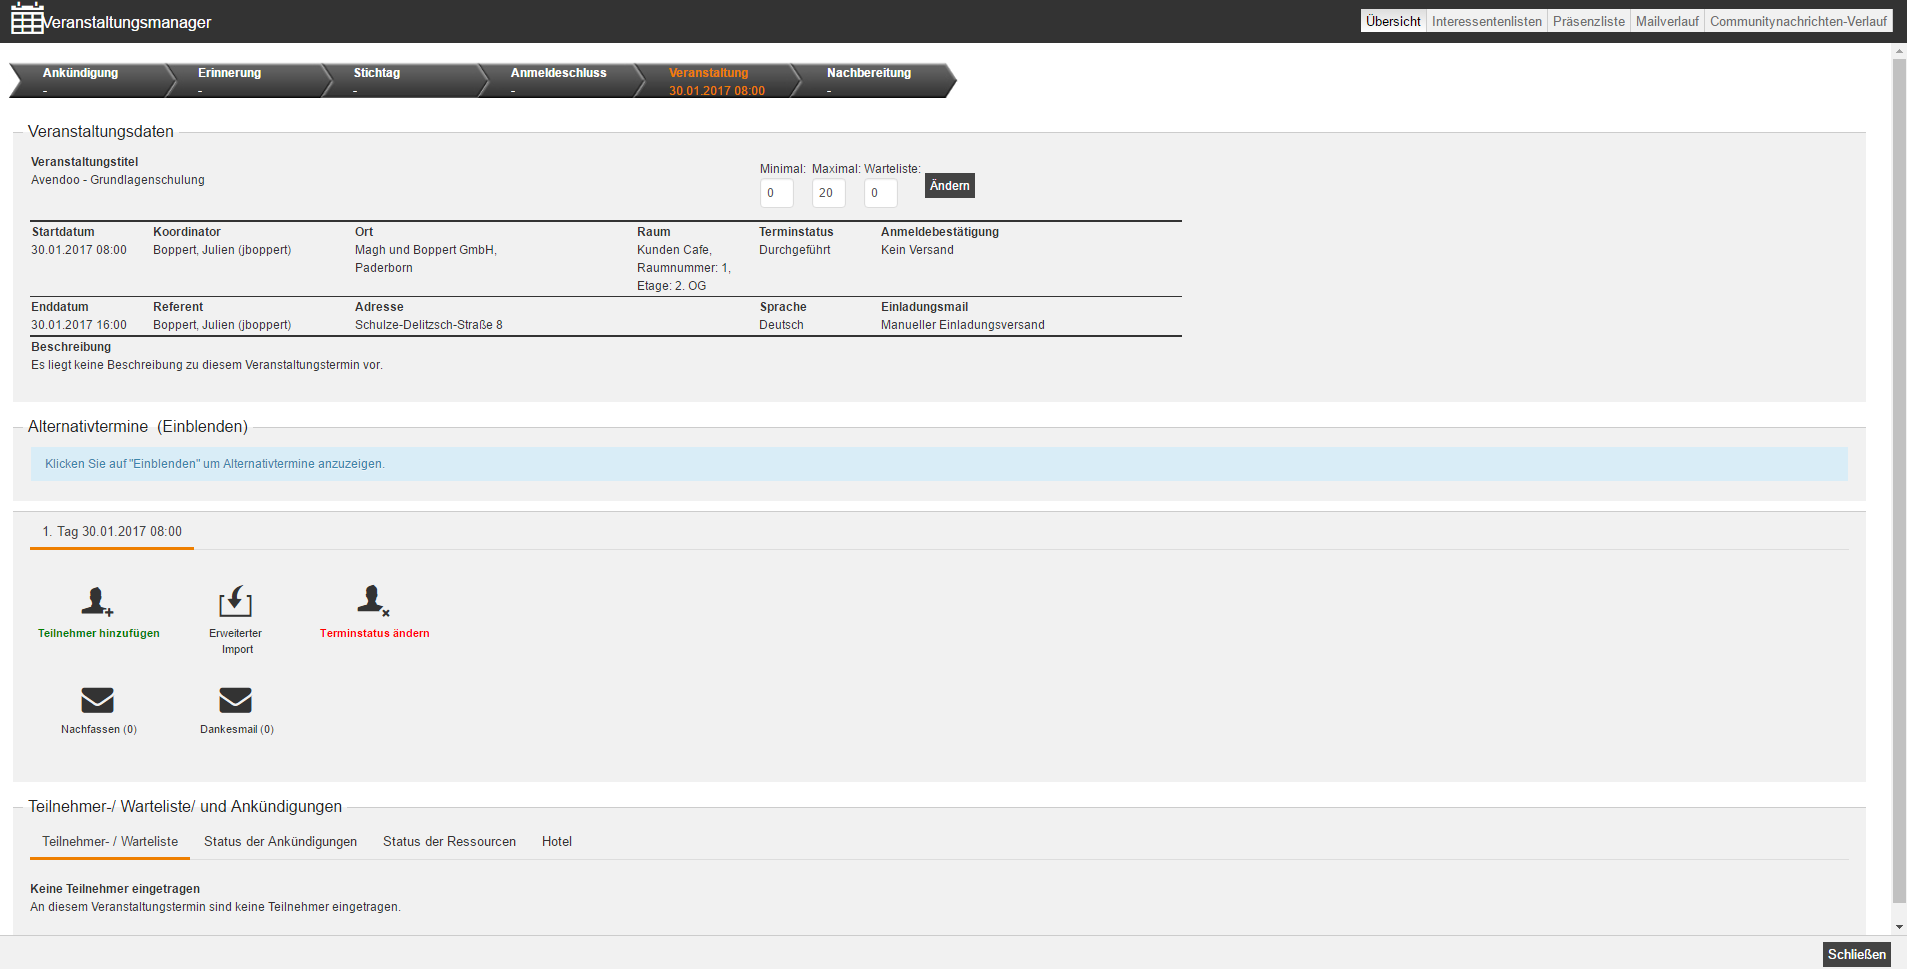
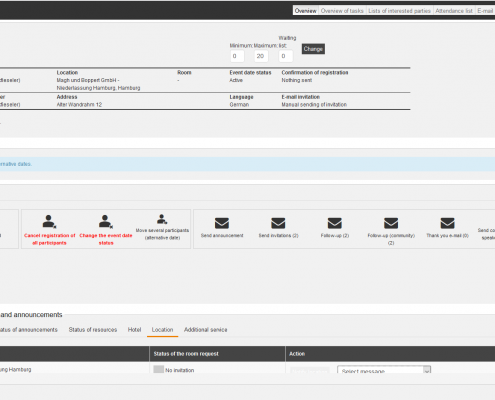
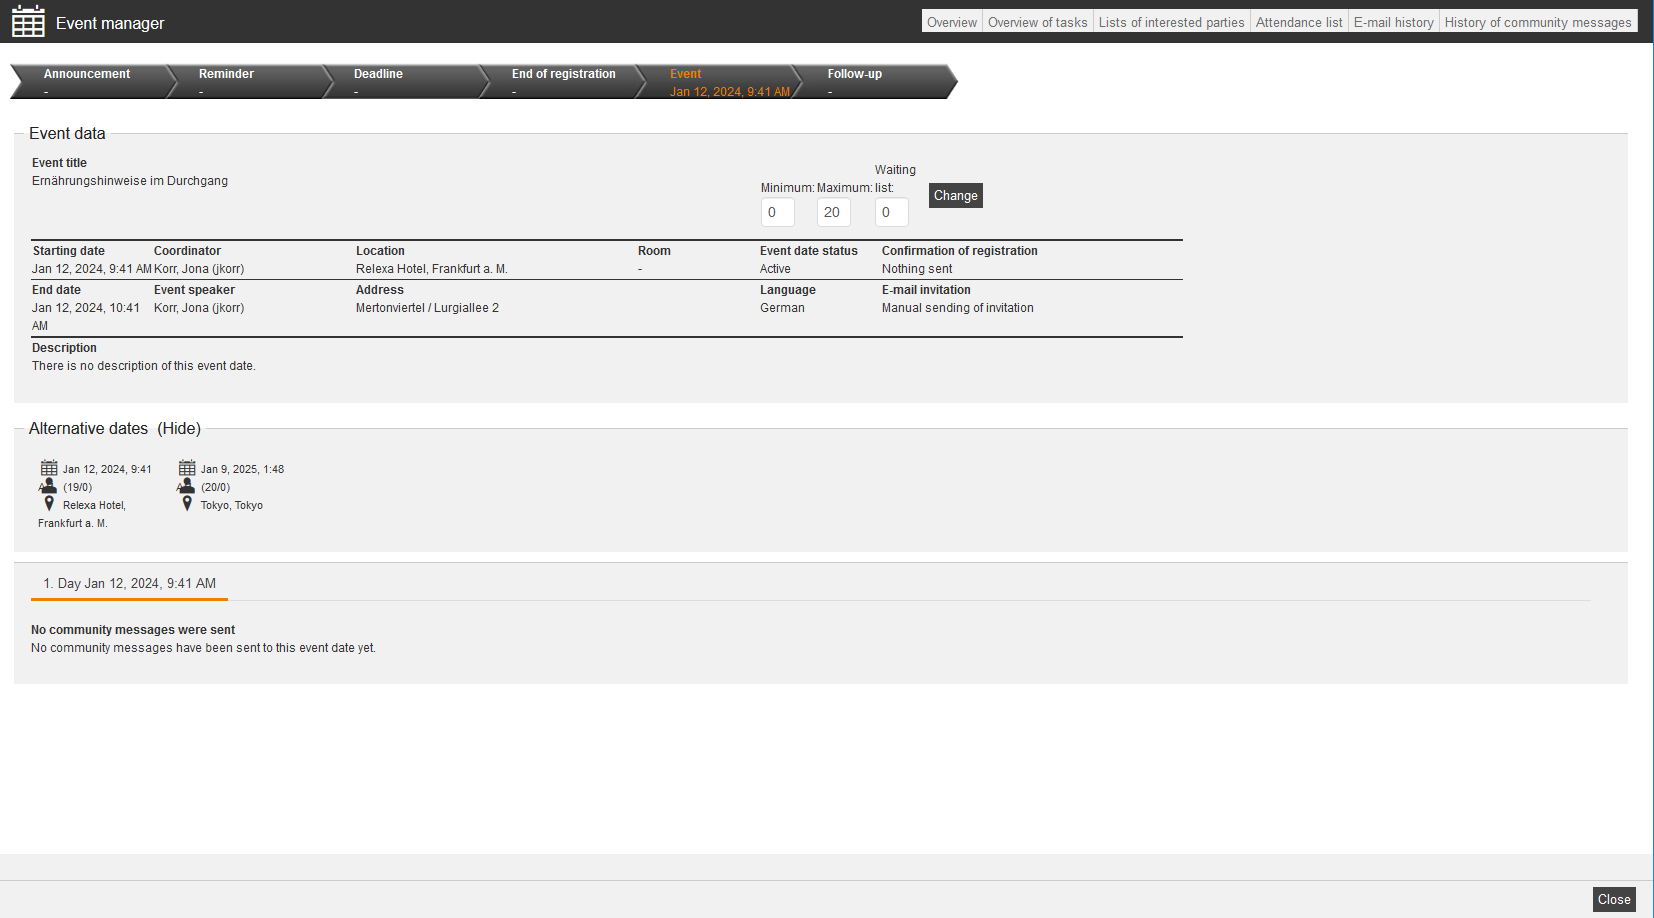
The Event manager gives you first an overview of the process of the selected event date. If you’ve defined the External Reference and the External Reference Type, these are shown in the header data.
You can can create new hotel bookings for selected participants via the button Add new hotel booking on the sub tab Hotel.
On the sub tab Location you can click the button Notify location and thus you can define locations for selected messages. Therefore there have to be a contact person at the hotel if it is notifying the hotel.
Further you can send the last follow-up e-mail again via the button Send last message again. But it depends on the last e-mail, which the user has received.
Add participant
To add participants for this event date, click on the button Add participant. A dialog window opens, in which you can select the favored participants. In this dialog window you can select the filter option User is already a course participant and/or Show registered users by setting a check mark. You see the same colums as in the User management, this means you can sort per ZIP code for example.
If you add greater groups of participants, a progress bar is shown.
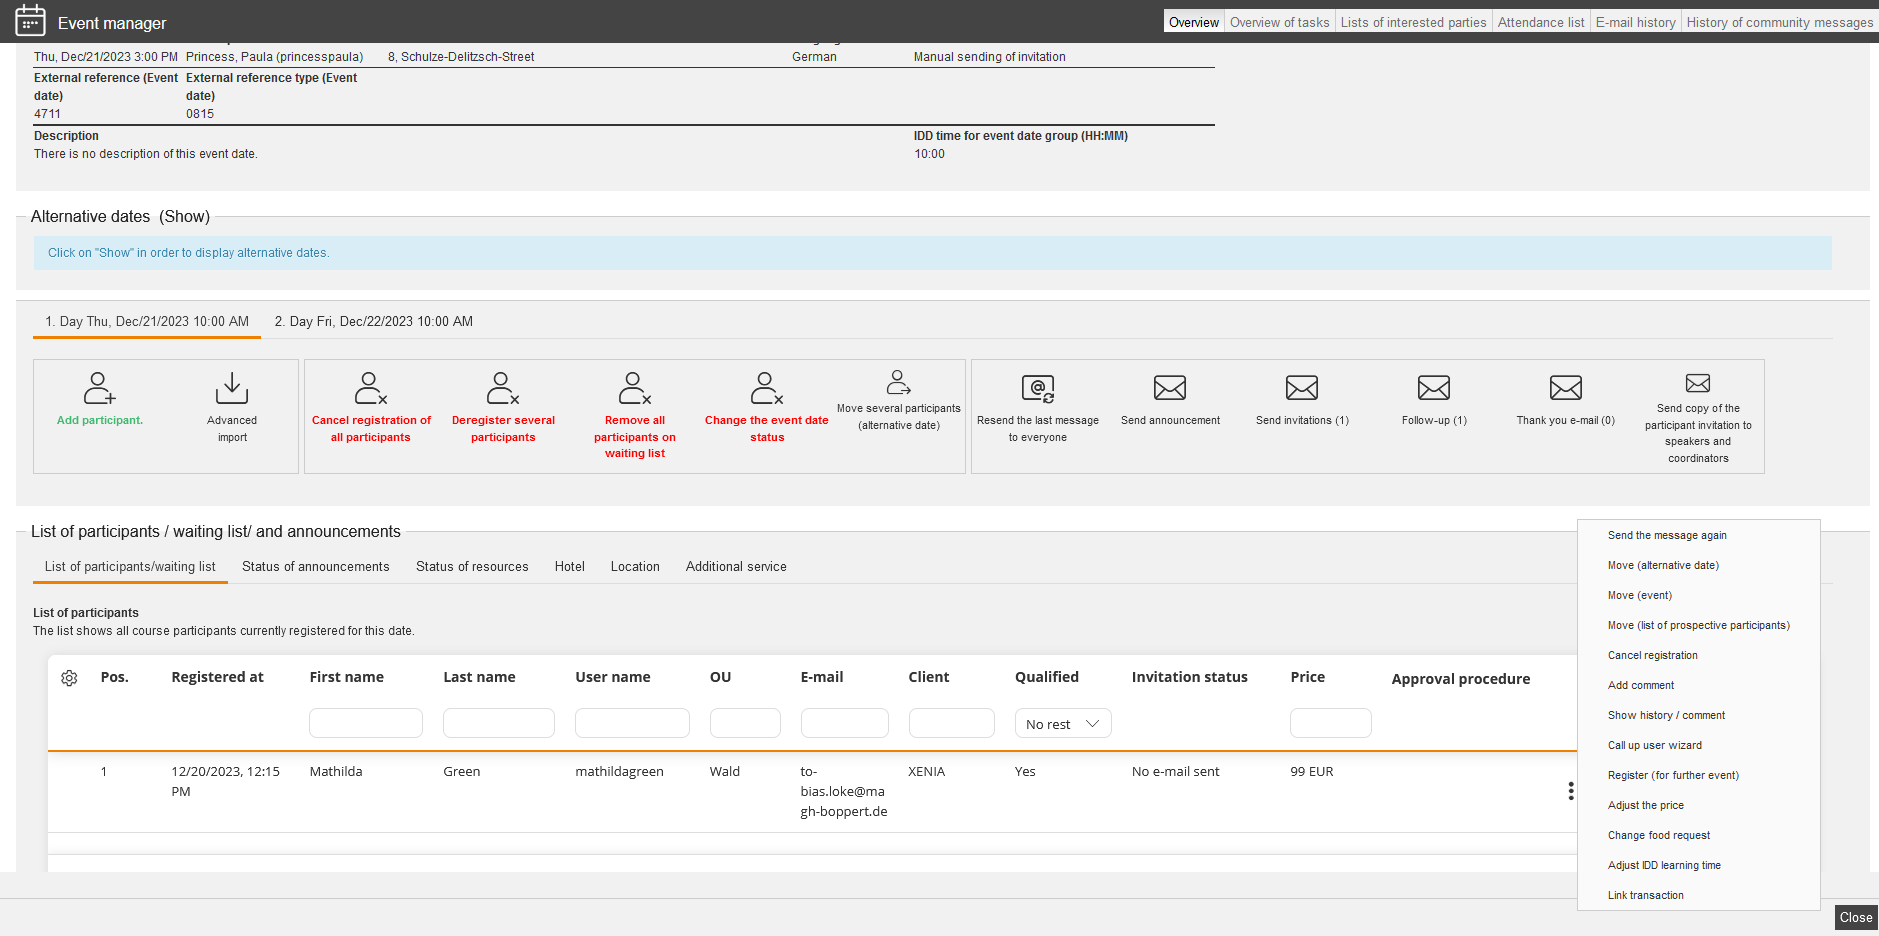
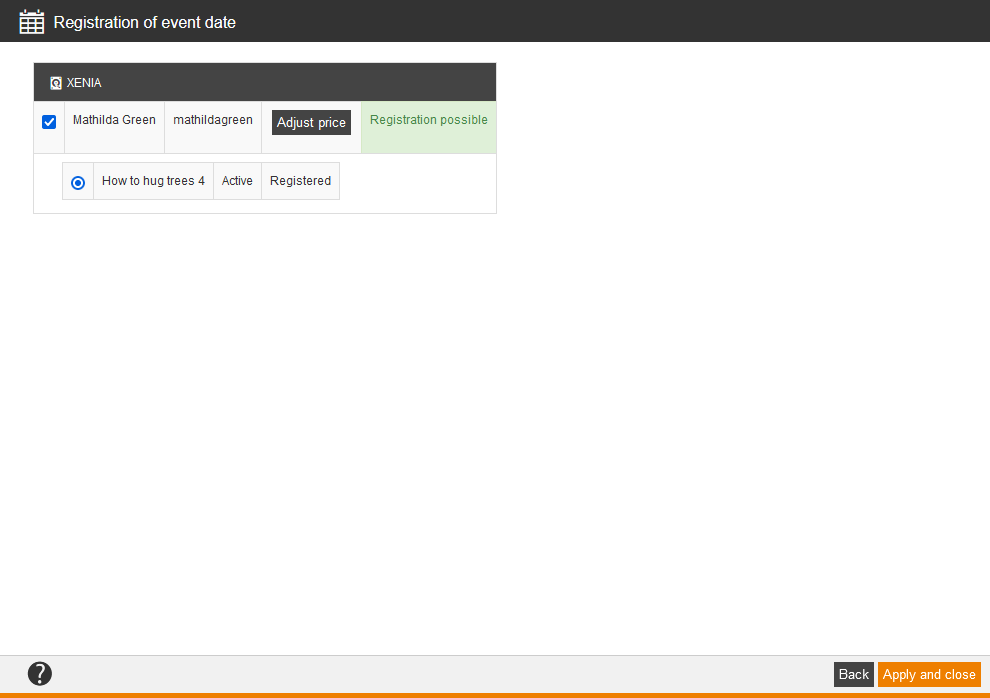
Then the dialog window Registration of event date opens (see first screenshot). Avendoo© shows for every participant, if a registration is possible and if there are scheduling conflicts. Additionally, it is shown, which course activation is used. Furthermore, you can click the button Adjust price per participant registration. Then a view opens for this participant registration on which you can Use standard price or you can enter an individual price (see second screenshot). Finally, you click the button Apply and close. Then the dialog window Event date registration closes and you see the new table entry on the sub tab Particpant/waiting list (see third screenshot). Via a left clicking the corresponding Participant icon in the column Functions you can adjust the price again or you can remove it if required.
Add participant directly
If you click this button, you can set participants in the case of full participant lists directly onto the participant list, without taking the detour via the waiting list.
You see the same columns as in the user management, this means you can sort the participant selection for example by ZIP code.
Advanced import
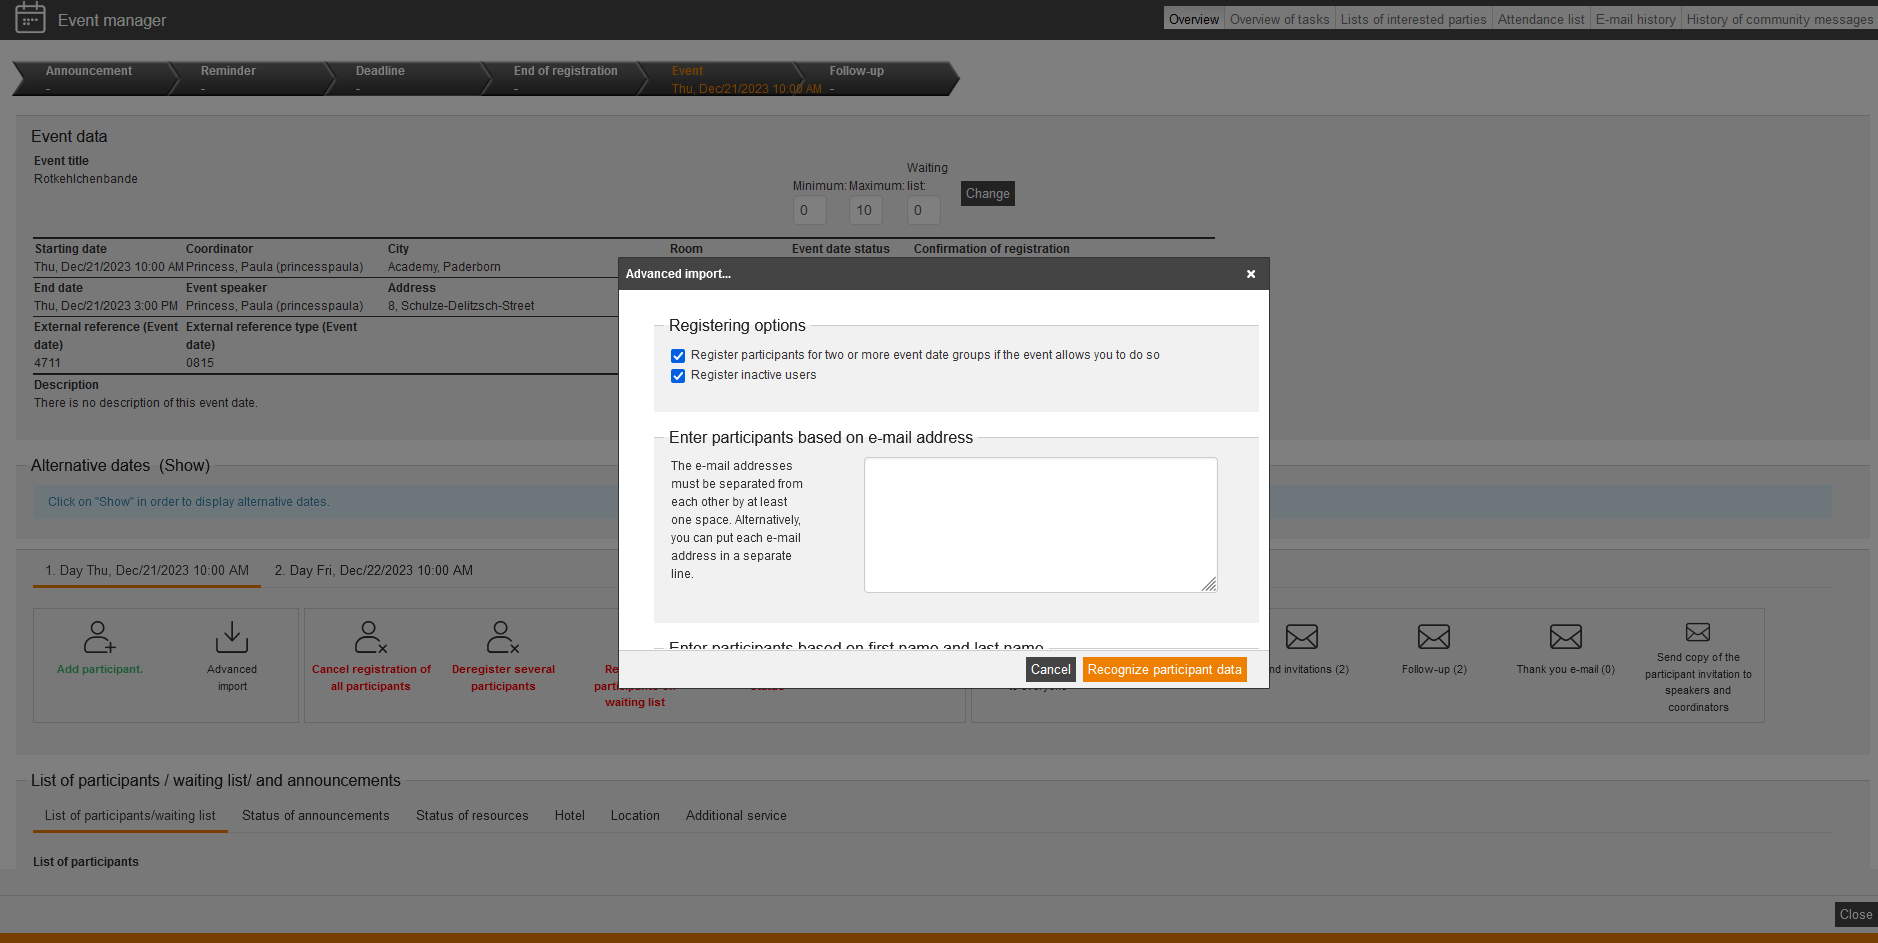
You can enter the participant via the e-mail address, the first and last name and the login in the Advanced Import and you can select between two registering options:
- Register participants for two or more event date groups if the event allows you to do so (this means, the participant is already registered to another event date of the event) and/or
- Register inactive users.
Via default these two registering options are selected.
Then you click the button Recognize participant data. If you do a mass registration, a progress bar is shown. If required you can click the button Cancel.
The Advanced Import can also overbook event dates.
Cancel registration of all participants
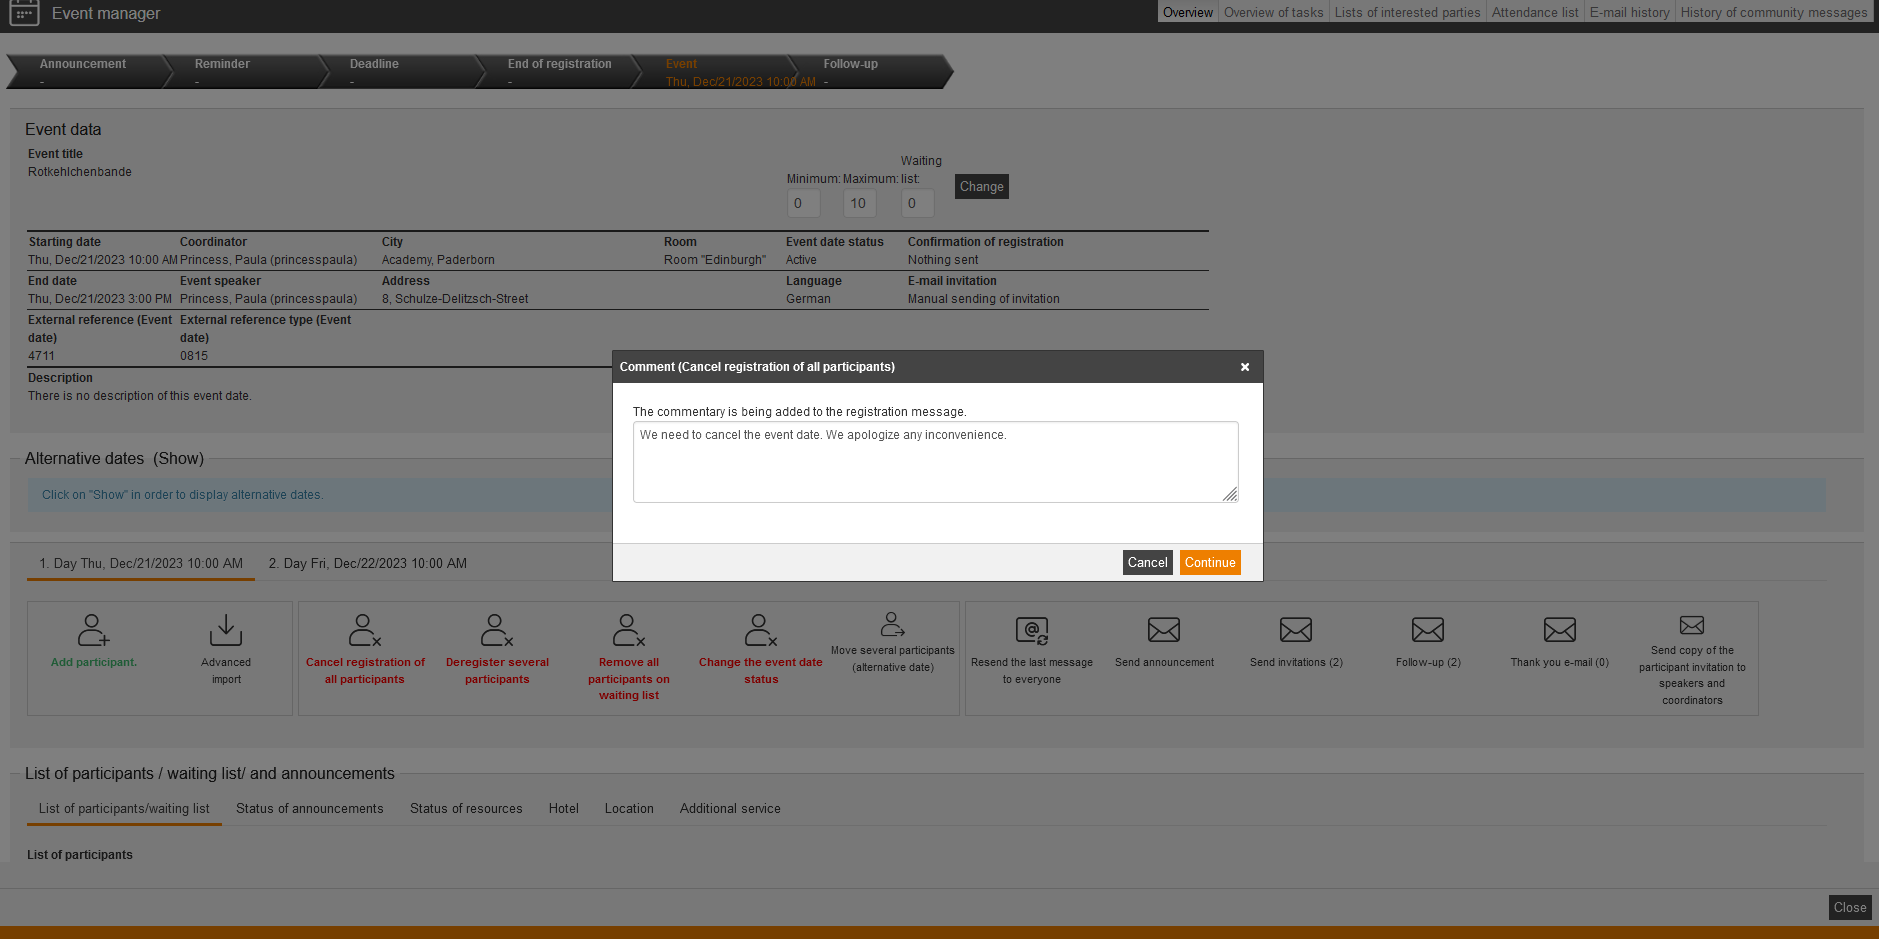
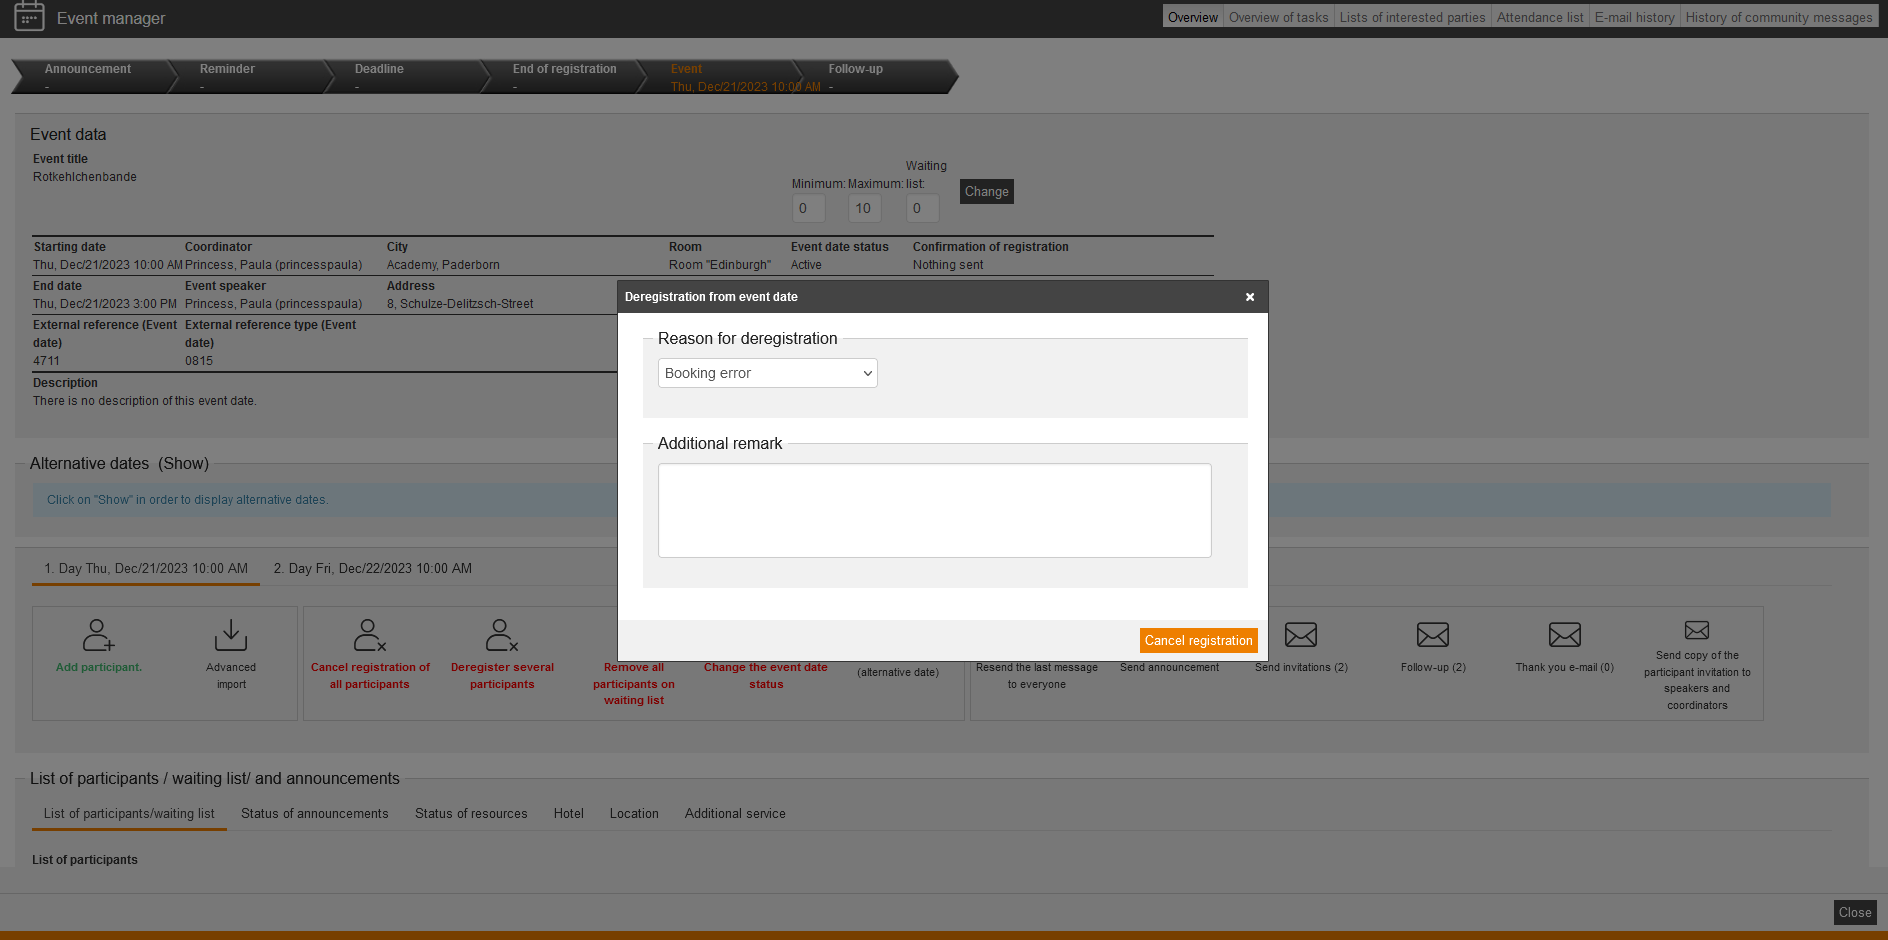
You can cancel the registration of all participants via this button. Additionally you can enter a comment for the cancelation message. Then you choose the reason for the deregistration, enter an additional remark if applicable and click the button Cancel registration.
Then all deregistration e-mails (iCal is possible) will be sent, and the e-mails of main and follow-up event dates are different. If you activate the option Send E-mail for event date group, there’s only one deregistration mail sent.
Cancel registration of several participants
Vai this button you can cancel the registration of several participants of a main event date.
- After clicking the button Cancel registration of several participants the dialog window for selecting participants open.
- You can filter with the same filters like adding participants, whereas the user name filter accepts also break separated user names and finds all these persons. Therefore click the + in the entry field of the user name (-> Add user -> (+) button in the entry field).
- Set the check mark in front of the favored participants and click the button Select.
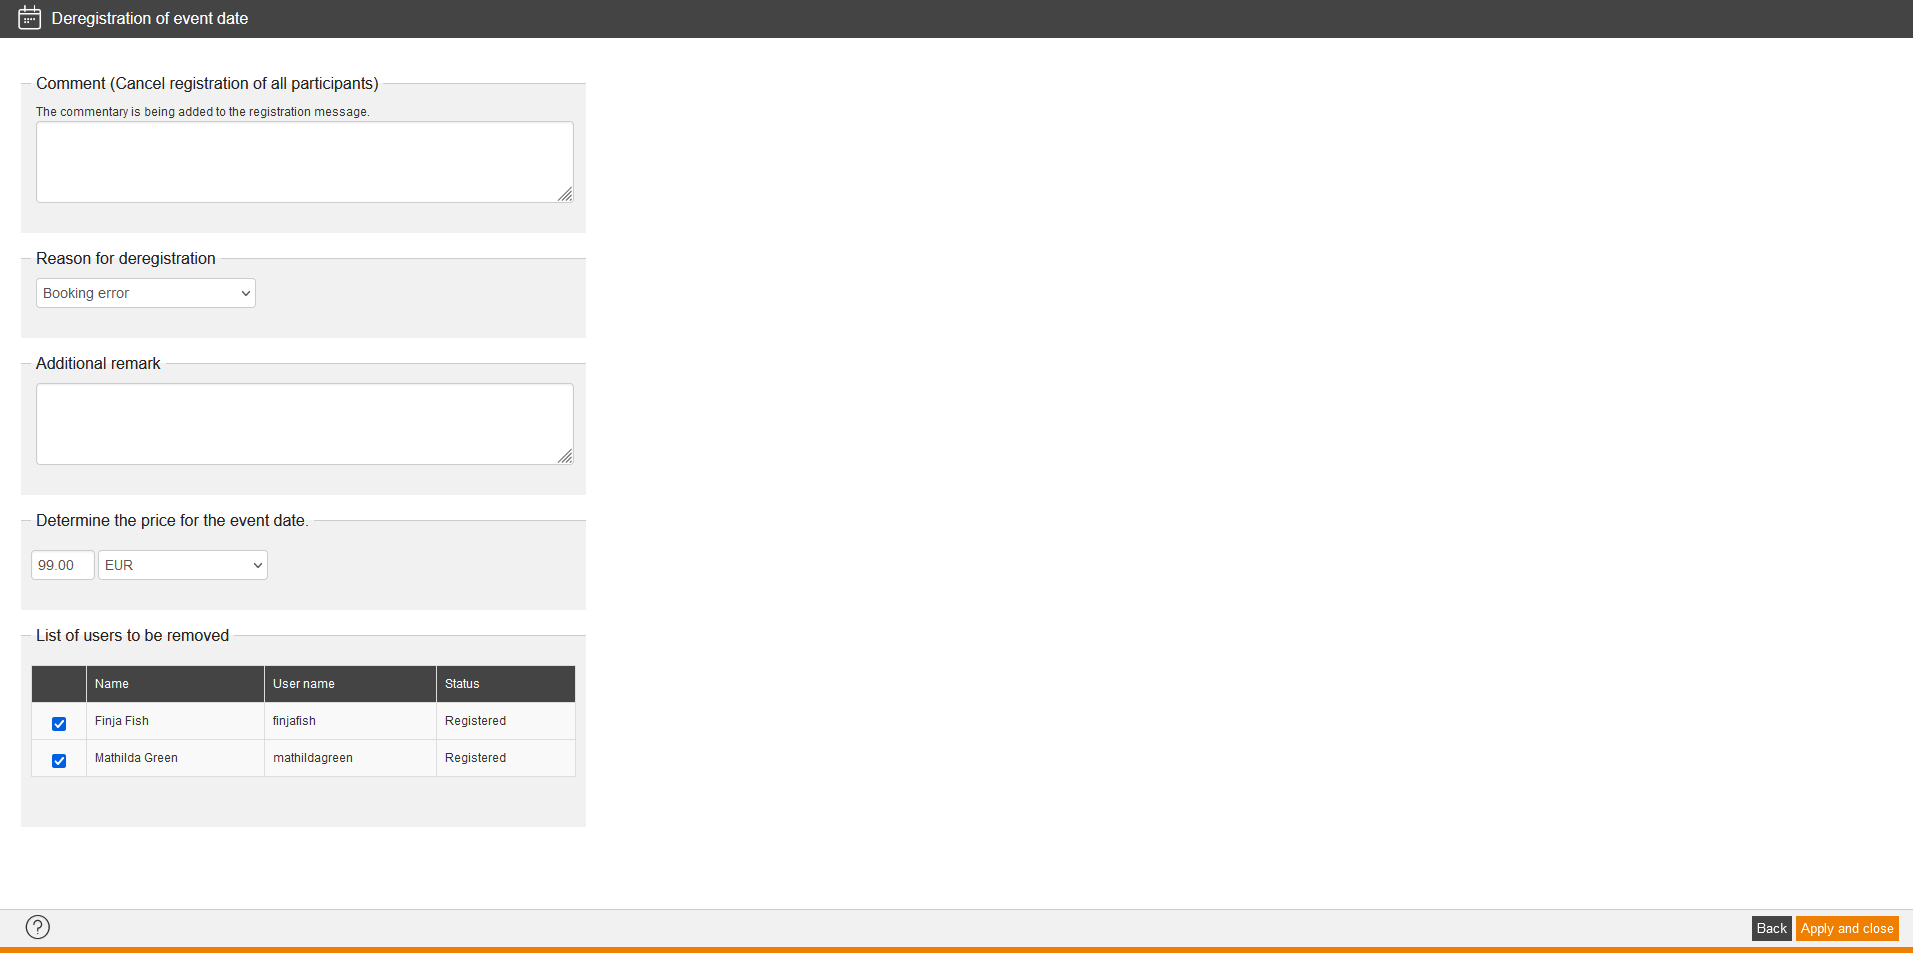
The dialog window Deregister from event date opens. - If you enter a comment als explanation for deregistering, this comment will be added to the notification.
- Choose a reason for deregistering, like “participation is nor more relevant”.
- Define if needed a price for the event date by entering an amount and selecting a currency.
- The check marks are already set in the List of the participants to remove. If required you deactivate the corresponding check marks. You also see in this list the user name and the status of the participant.
- Finally, you click the button Apply and close.
- Before the dialog window Deregister from event date closes, you see the progress of the deregistrations. Example: First 1 of 2, then 2 of 2.
Now you see the deregistered participants on the Participant/waiting list.
Change the event date status
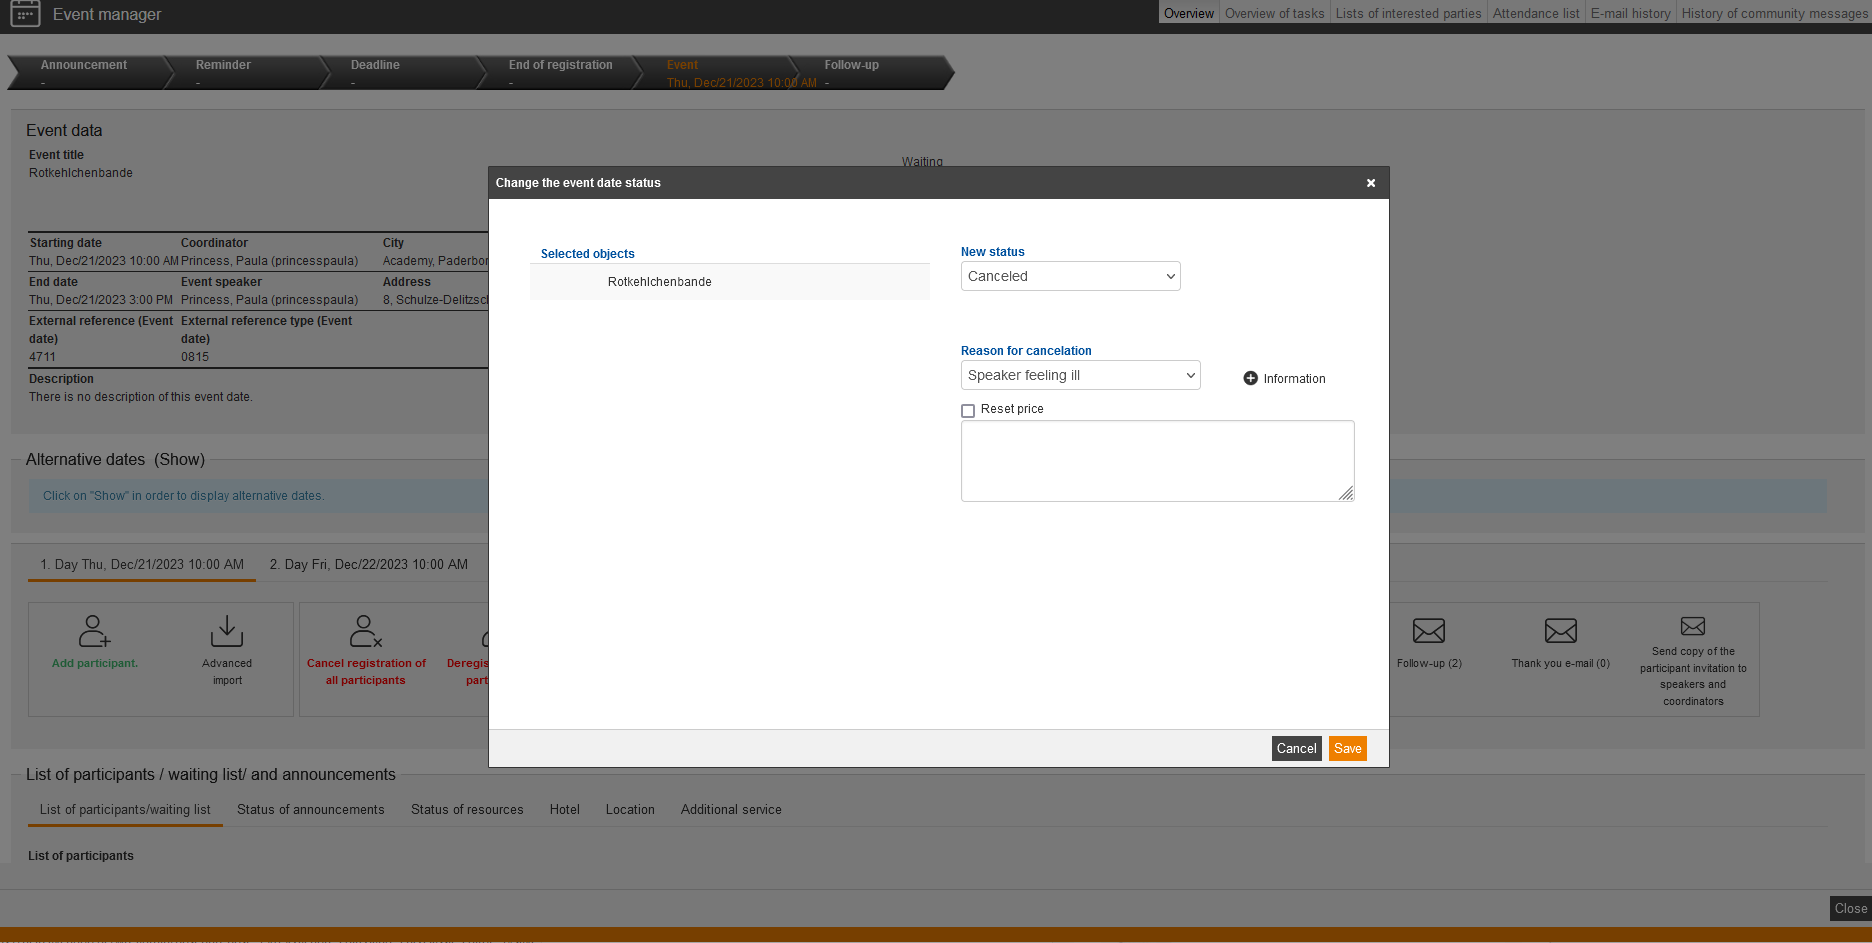
If you click this button, you can change the status for selected objects into Active, Initiated or Canceled. If you have chosen the status Canceled, you can enter some information. Then you click the button Save.
Move several participants (alternative date)
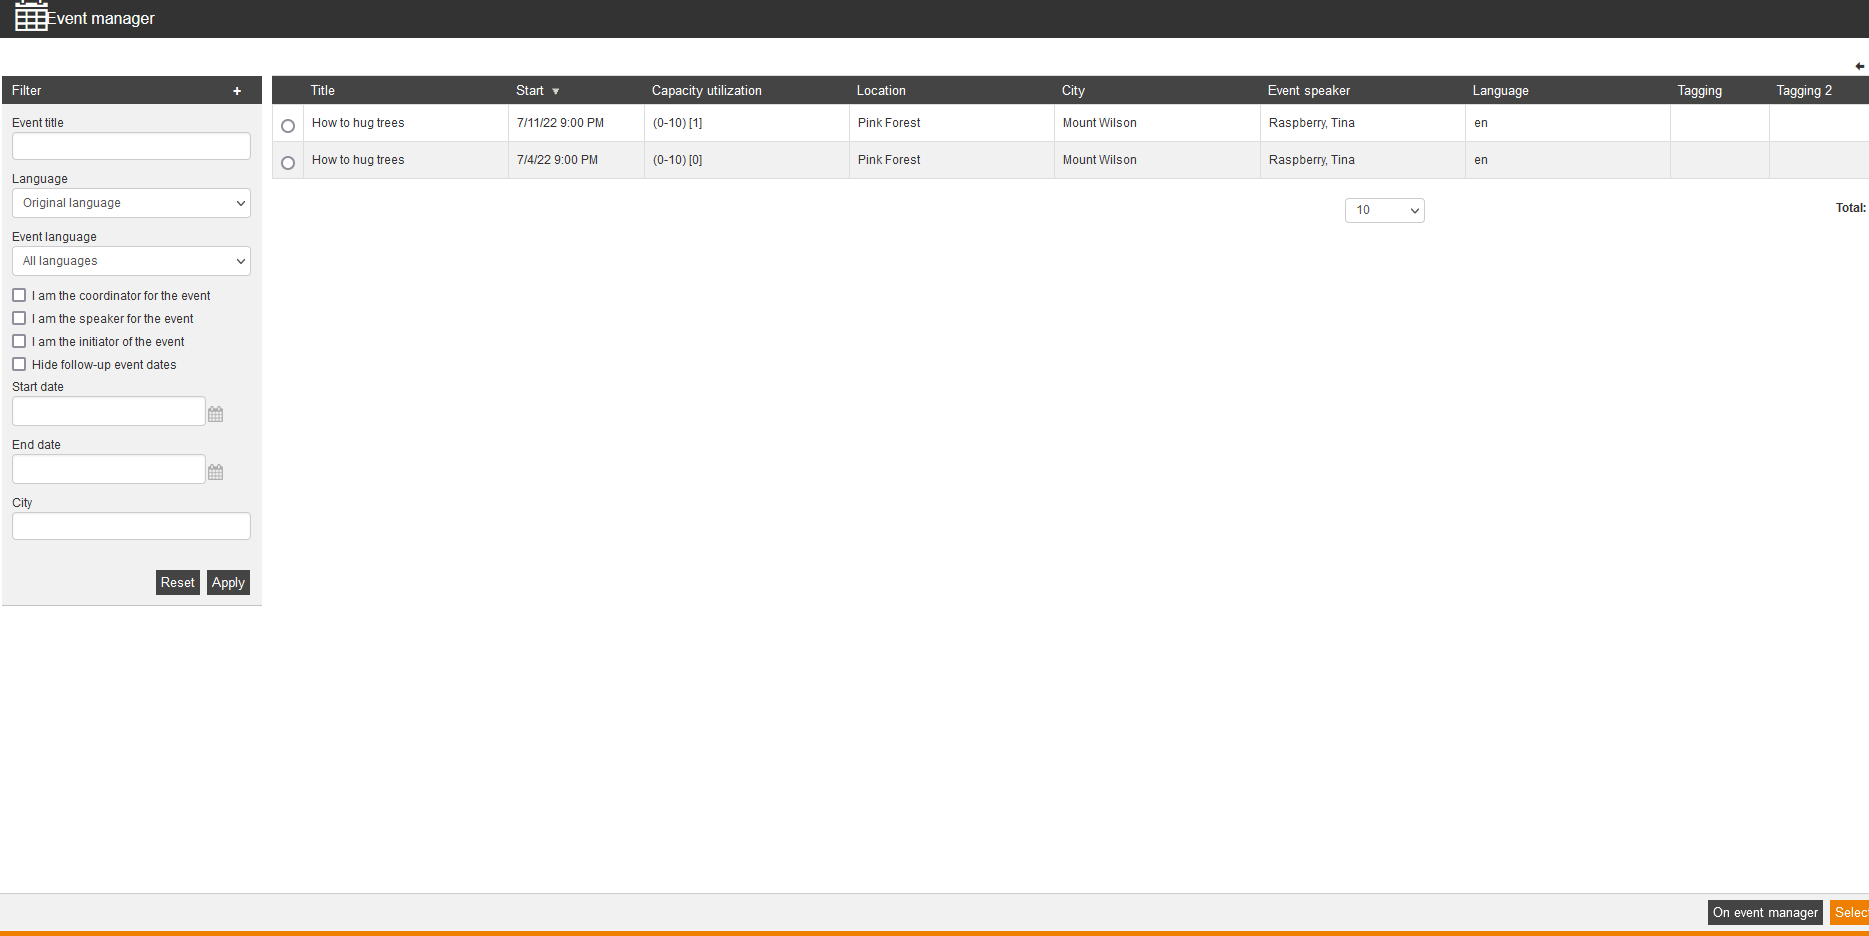
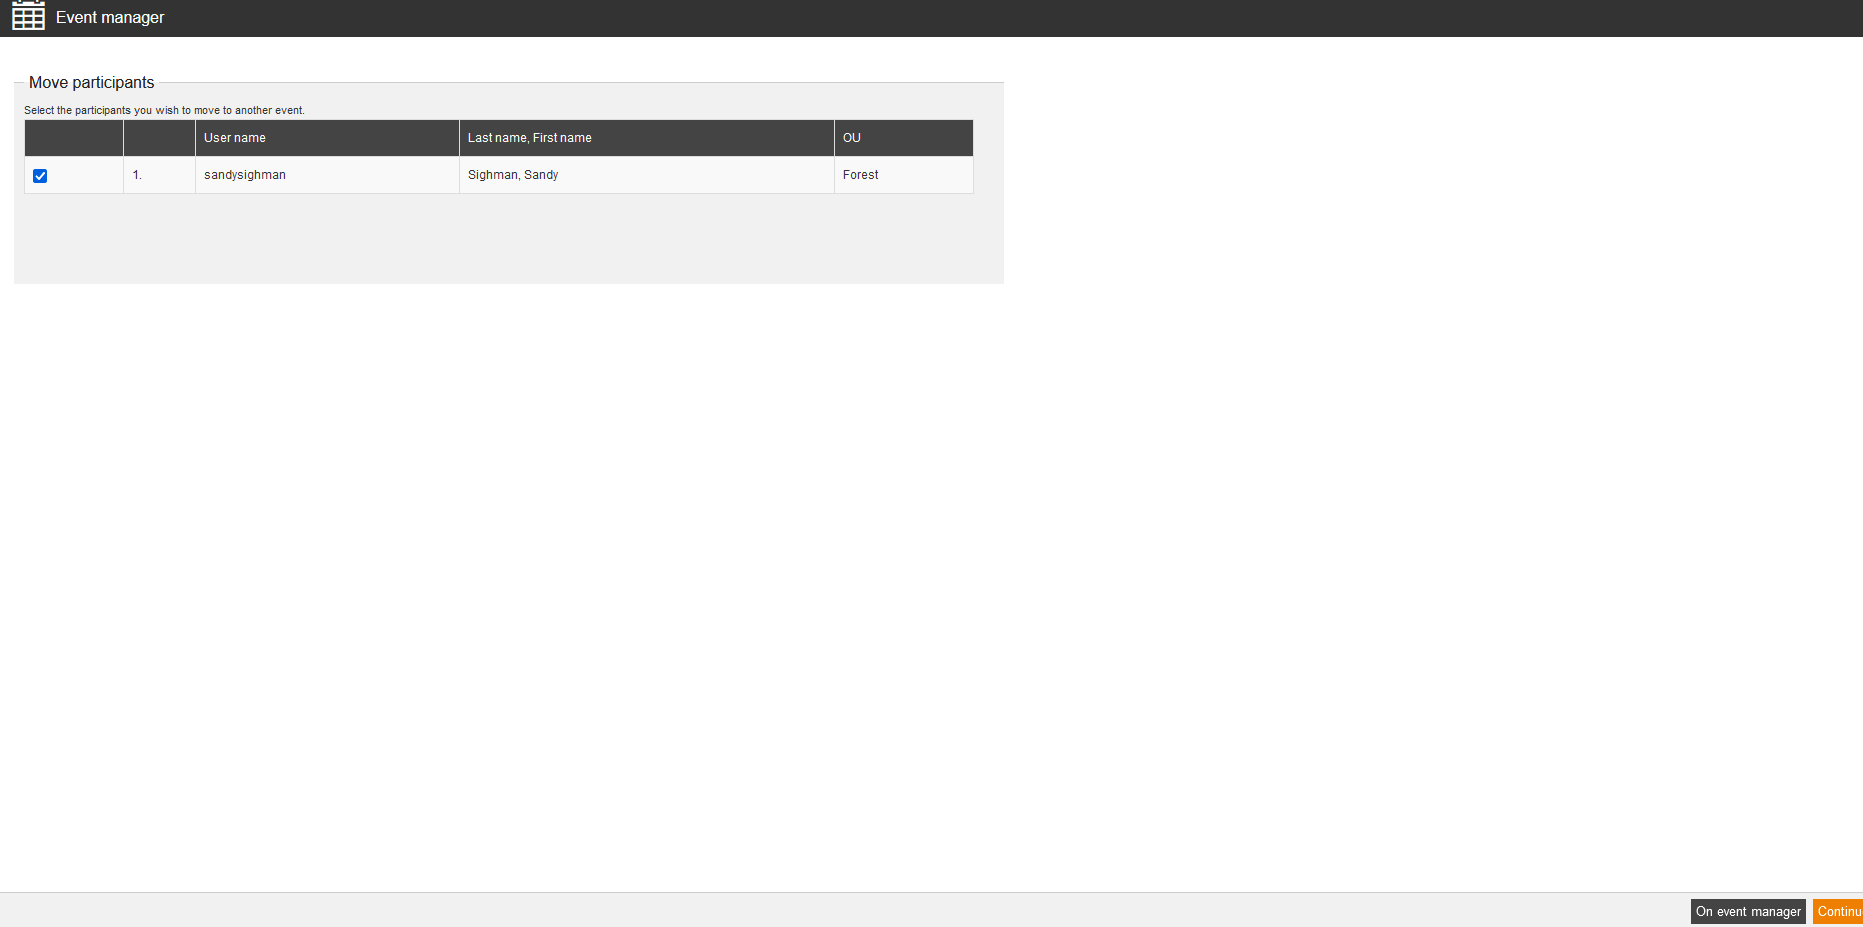
You can register participants to an alternative date via this function. Click this button and select the participants which you want to move. Click Next to select the alternative date. At the end you click the button Move in the wizard. You can move several participants also to initiated alternative dates.
If this button is gray, the registration to an alternative date wasn’t allowed. Then choose the tab Communication in the appropriate event. You can activate the registration to an alternative date in the options.
Send announcement
If you click this button, you can create announcements.
Send invitation
Sending invitations is managed via the individual notification “Sending of invitation e-mail“. You can make configurations in the Client and the Event wizard.
If the e-mail appendices or files are activated in the Event date wizard on the tab E-mail attachment by adding them to the Invitation mail and for a certain event date, you see these files under Available appendices. These files are available for download (see first screenshot). You execute the download by clicking the file name beneath the corresponding file.
Note that, if the coordinator for example has set a check mark for the e-mail attachment in the Event date wizard, this file is preselected. You can undo this preselection by clicking the check mark.
Under Notification template you can reset and select a new notification template.
To edit the notification, click the button Edit message, enter the required text and finally click the button Save as new notification.
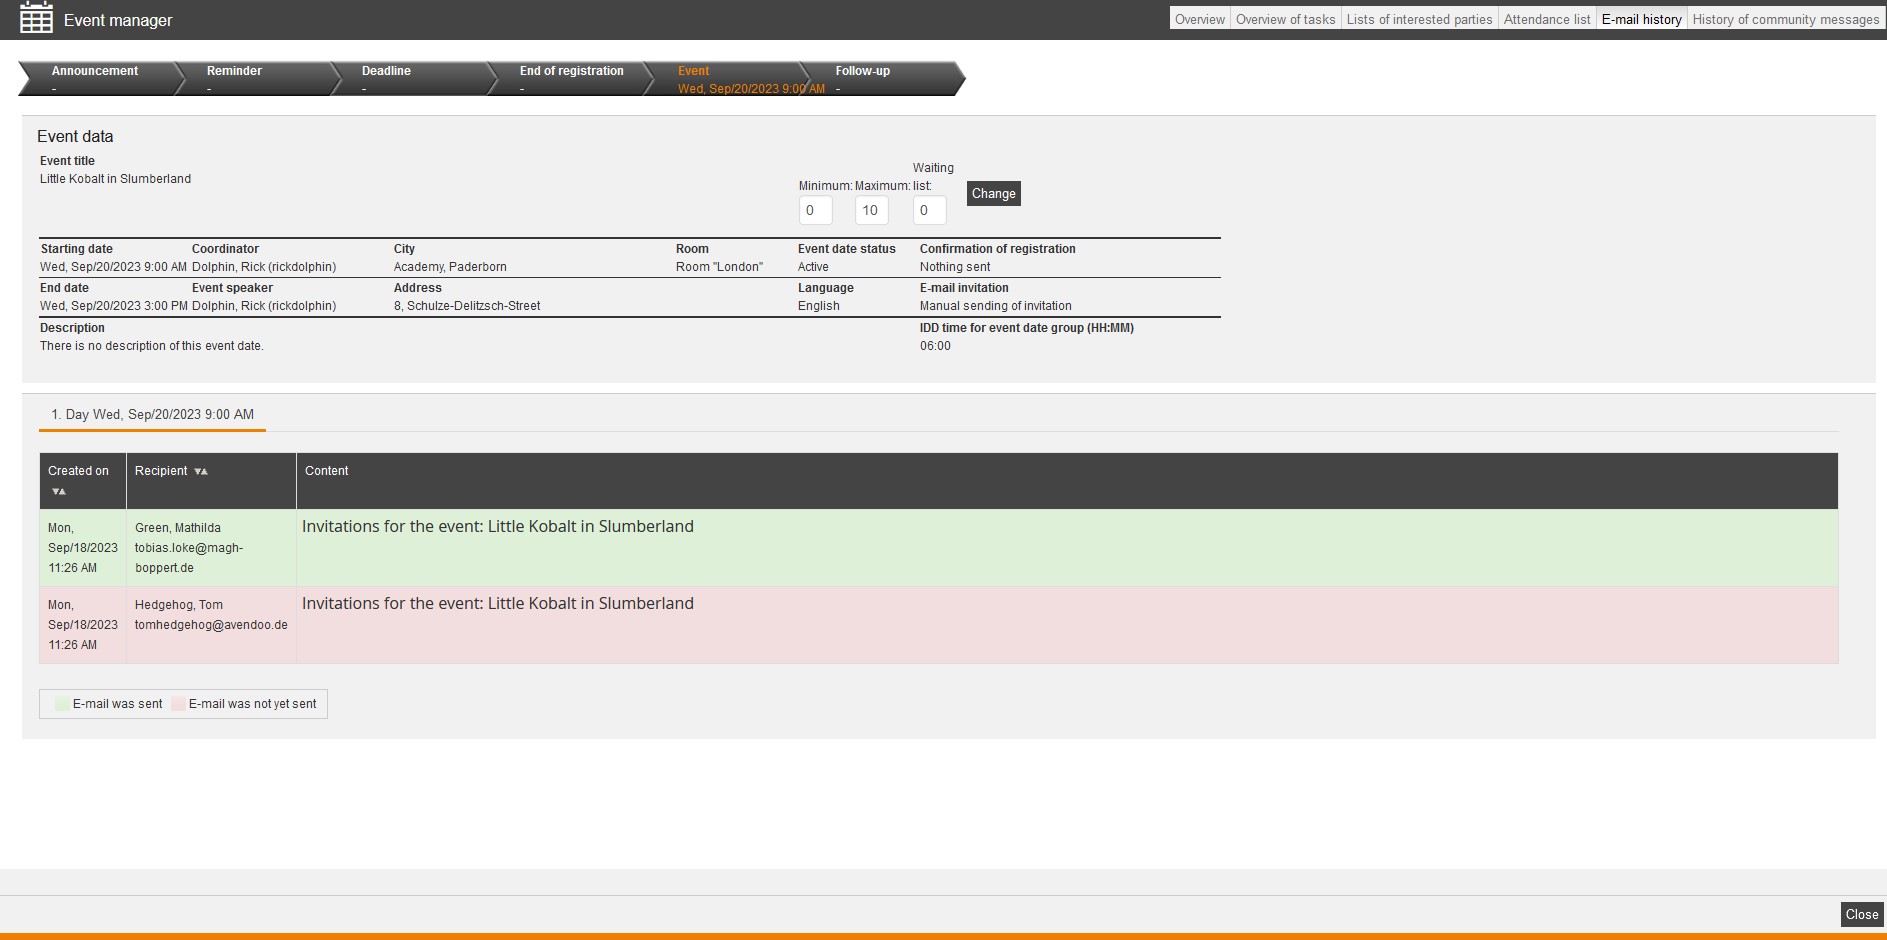
You can check the sent e-mails on tab E-mail history (see second screenshot).
Follow-up
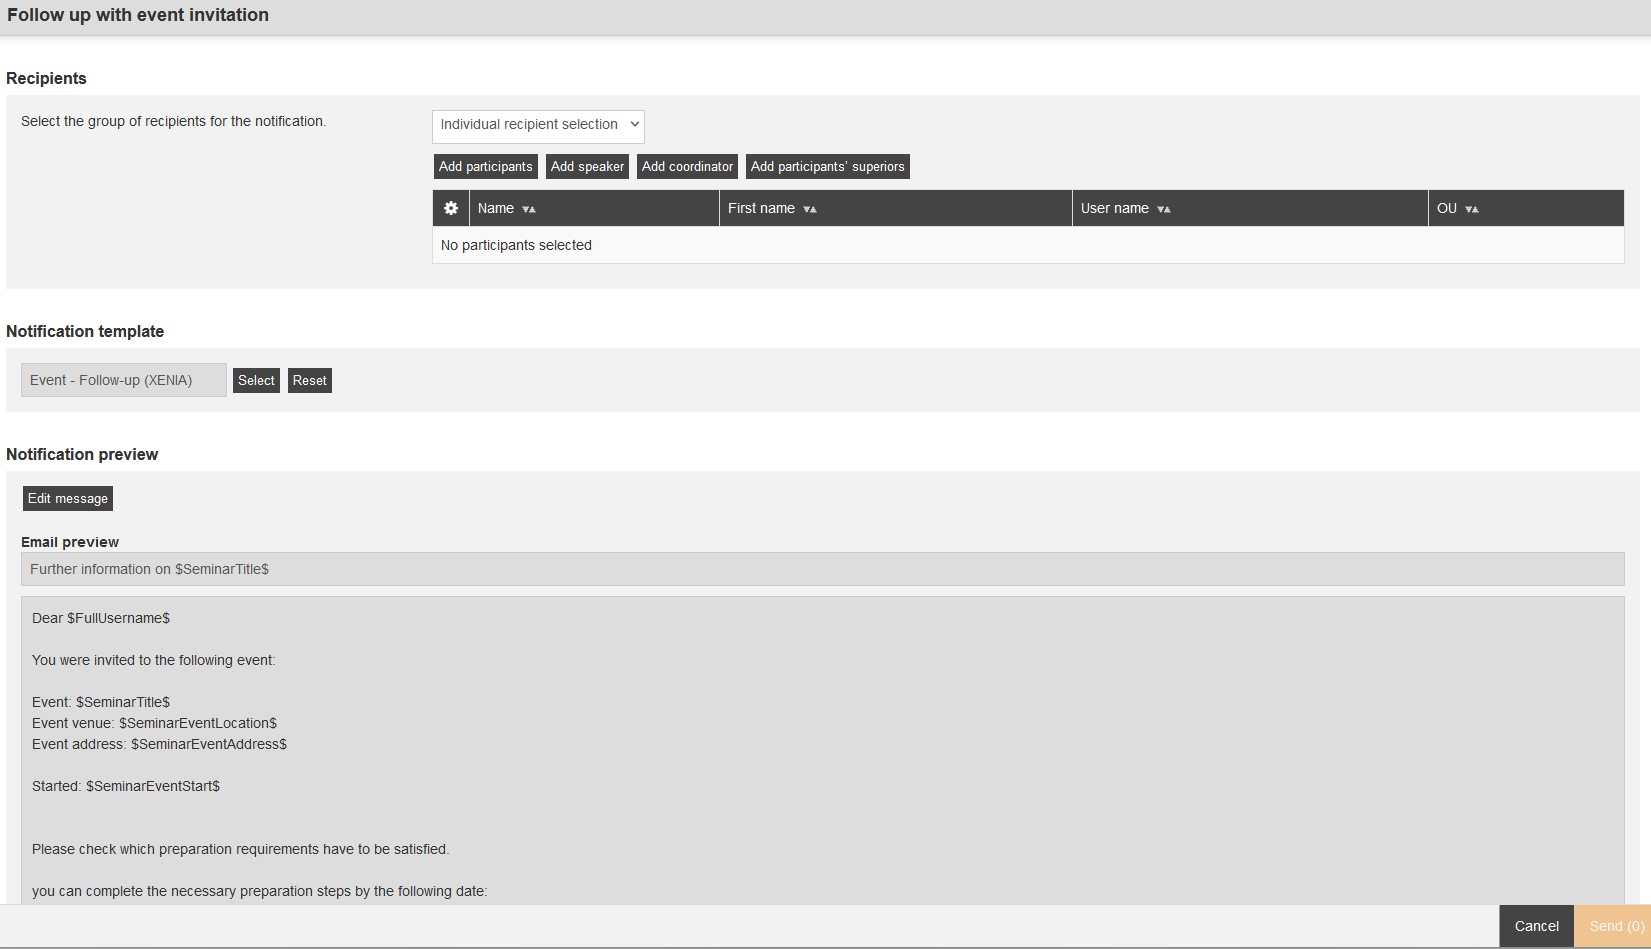
To remember the participants to this event date, click the button Follow-up.
- Recipients
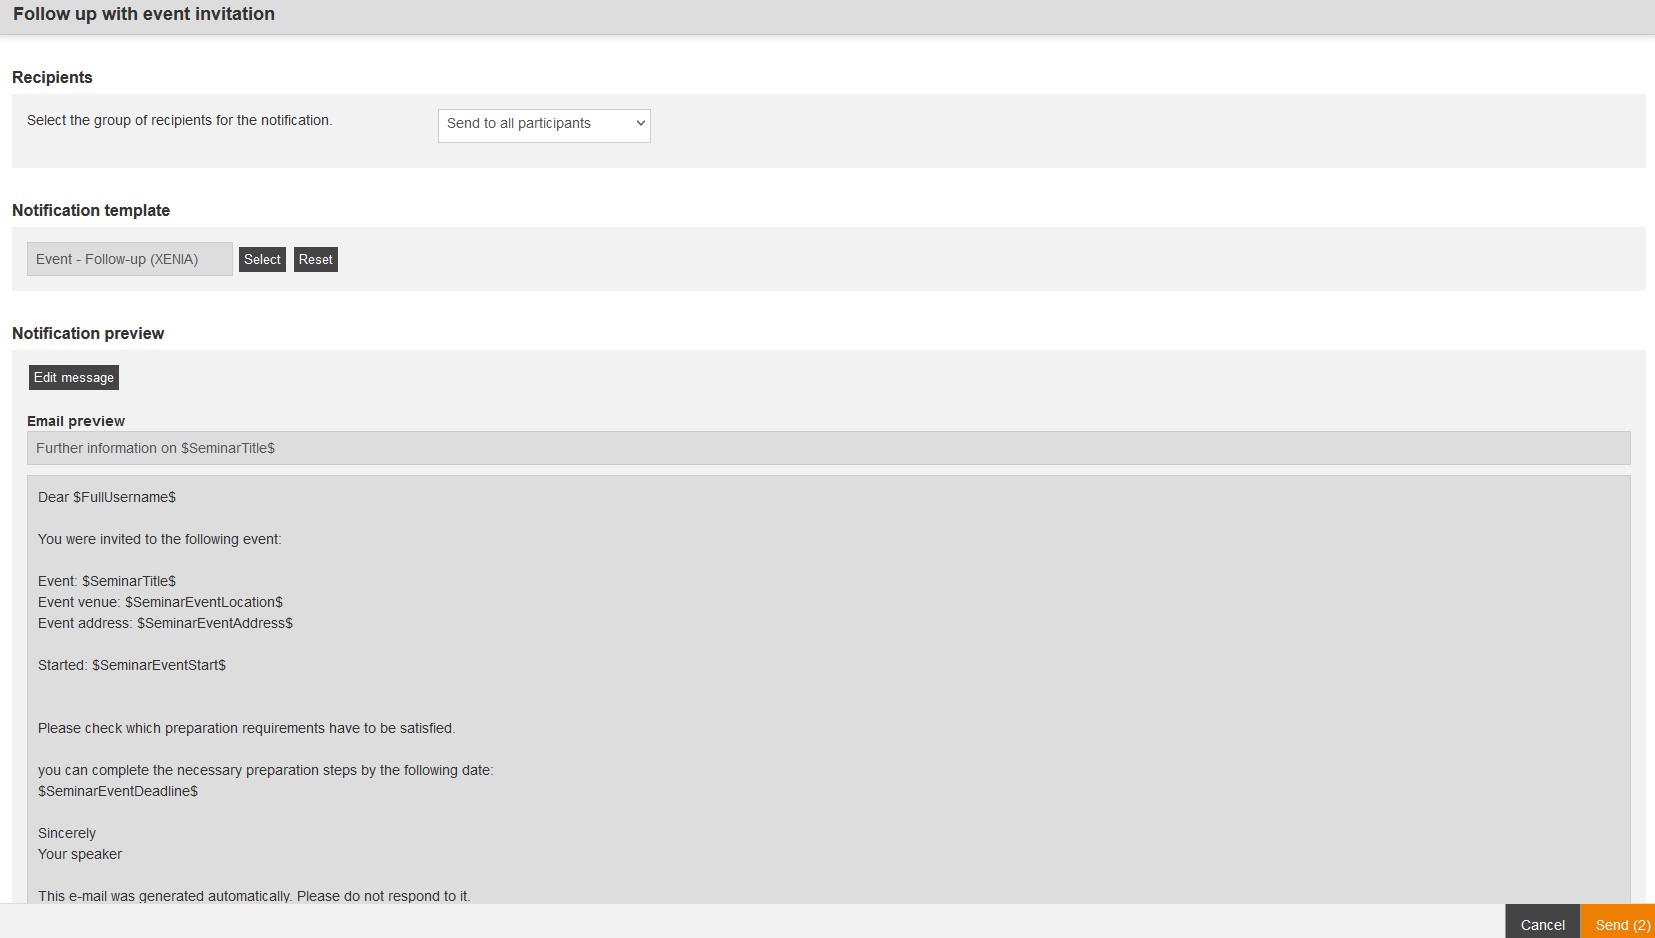
Select the participants, who you want to be the recipients of the follow-up e-mail:- Send to all participants (via drop-down menu)
- Individual recipient selection (via drop-down menu)
- Add participants (via button)
If you add participants, you can set the corresponding check marks in the dialog window of the task template, this means you set the check marks of the task status Not yet completed, Being carried out, Closed or/and Postponed for filtering.
- Add speaker (via button)
- Add coordinator (via button) and/or
- Add participants’ superiors )
If you’ve clicked on the button Add participants’ superiors, you can use the filter “Participant task for task template” if you select the superiors. Then you see only participants who belong to an open task.
- Add participants (via button)
- or by the status of the recipients (via drop-down menu)
- Not yet begun,
- Failed or
- Completed successfully.
-
- Send to all participants (via drop-down menu)
- Available appendices (see second screenshot)
If the e-mail appendices or files are activated in the Event date wizard on the tab E-mail attachment by adding them to the Invitation mail and for a certain event date, you see these files under Available appendices. These files are available for download (see screenshot). You execute the download by clicking the file name beneath the corresponding file.
Note that, if the coordinator for example has set a check mark for the e-mail attachment in the Event date wizard, this file is preselected. You can undo this preselection by clicking the check box. - Notification template
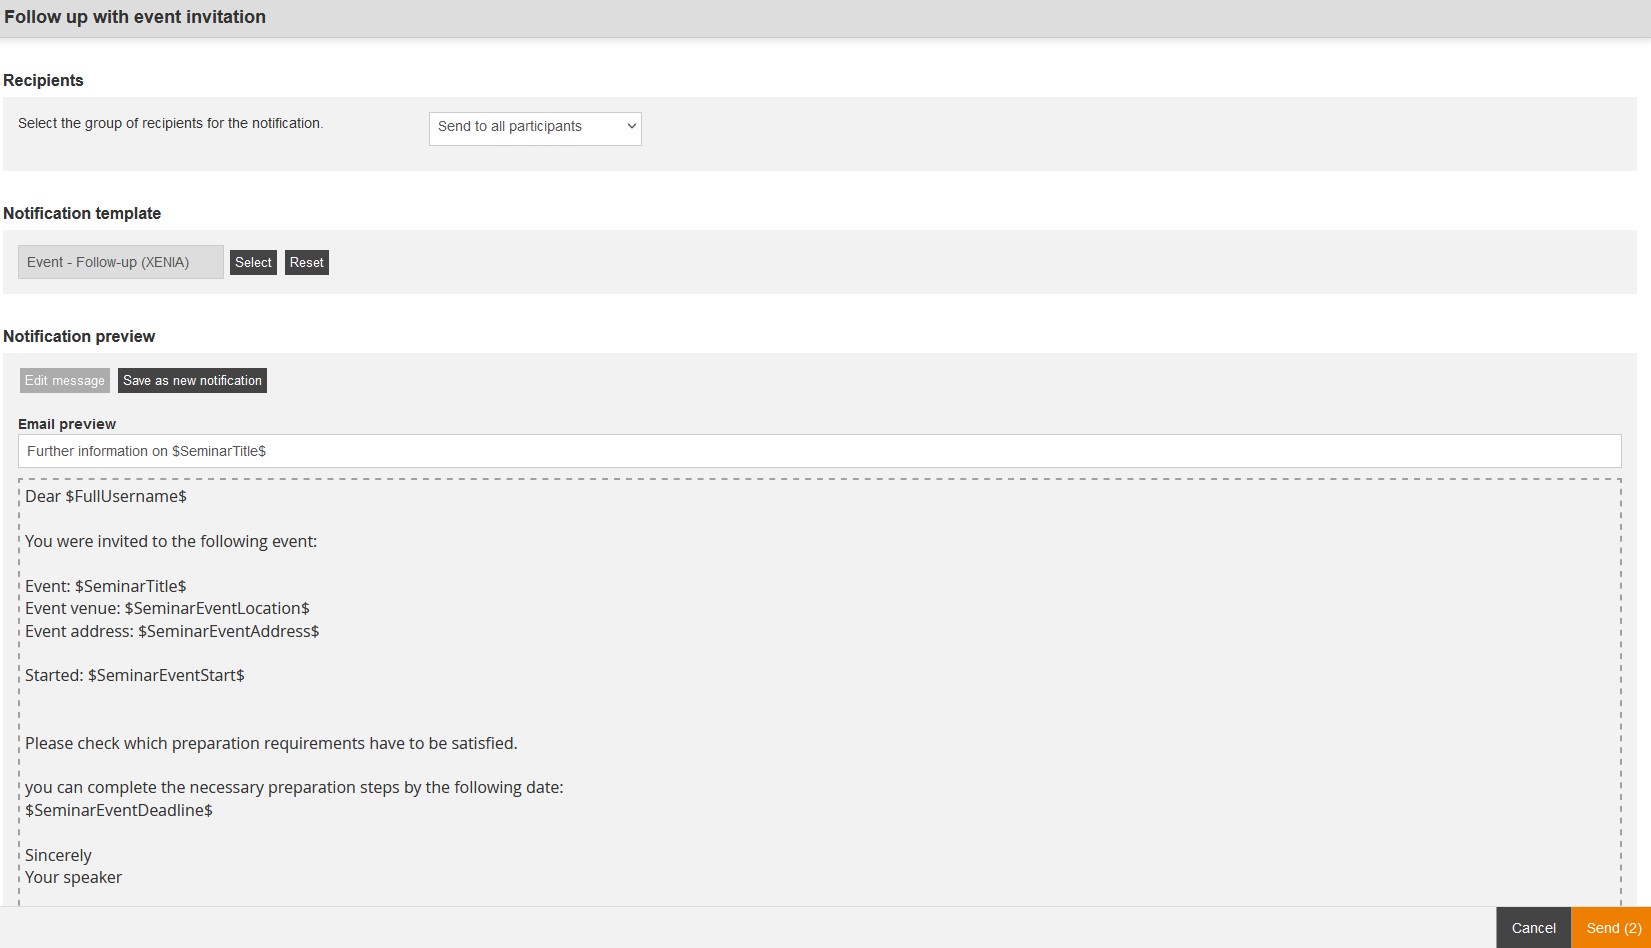
Here’s the notification template of the client defined this means the template of the event. To exchange it for this event date or event dates you click the button Select, select the favored notification template from the list and confirm your selection by clicking the button Select. If you click the button Reset you can reset your selection to standard. - Notification preview
Under E-mail preview and Community preview you see the text with variables from the notification template. If you want to change the text click the button Edit message and do the favored changes. If you click the button Save as new notification the current notification is transferred into a notification for using it in future.
Finally, click the button Send. You see the number of the follow-up e-mails, which will be sent, in brackets.
Further information about the community and system messages and the (individual) notifications you find here.
Send copy of the participant invitation to speakers and coordinator
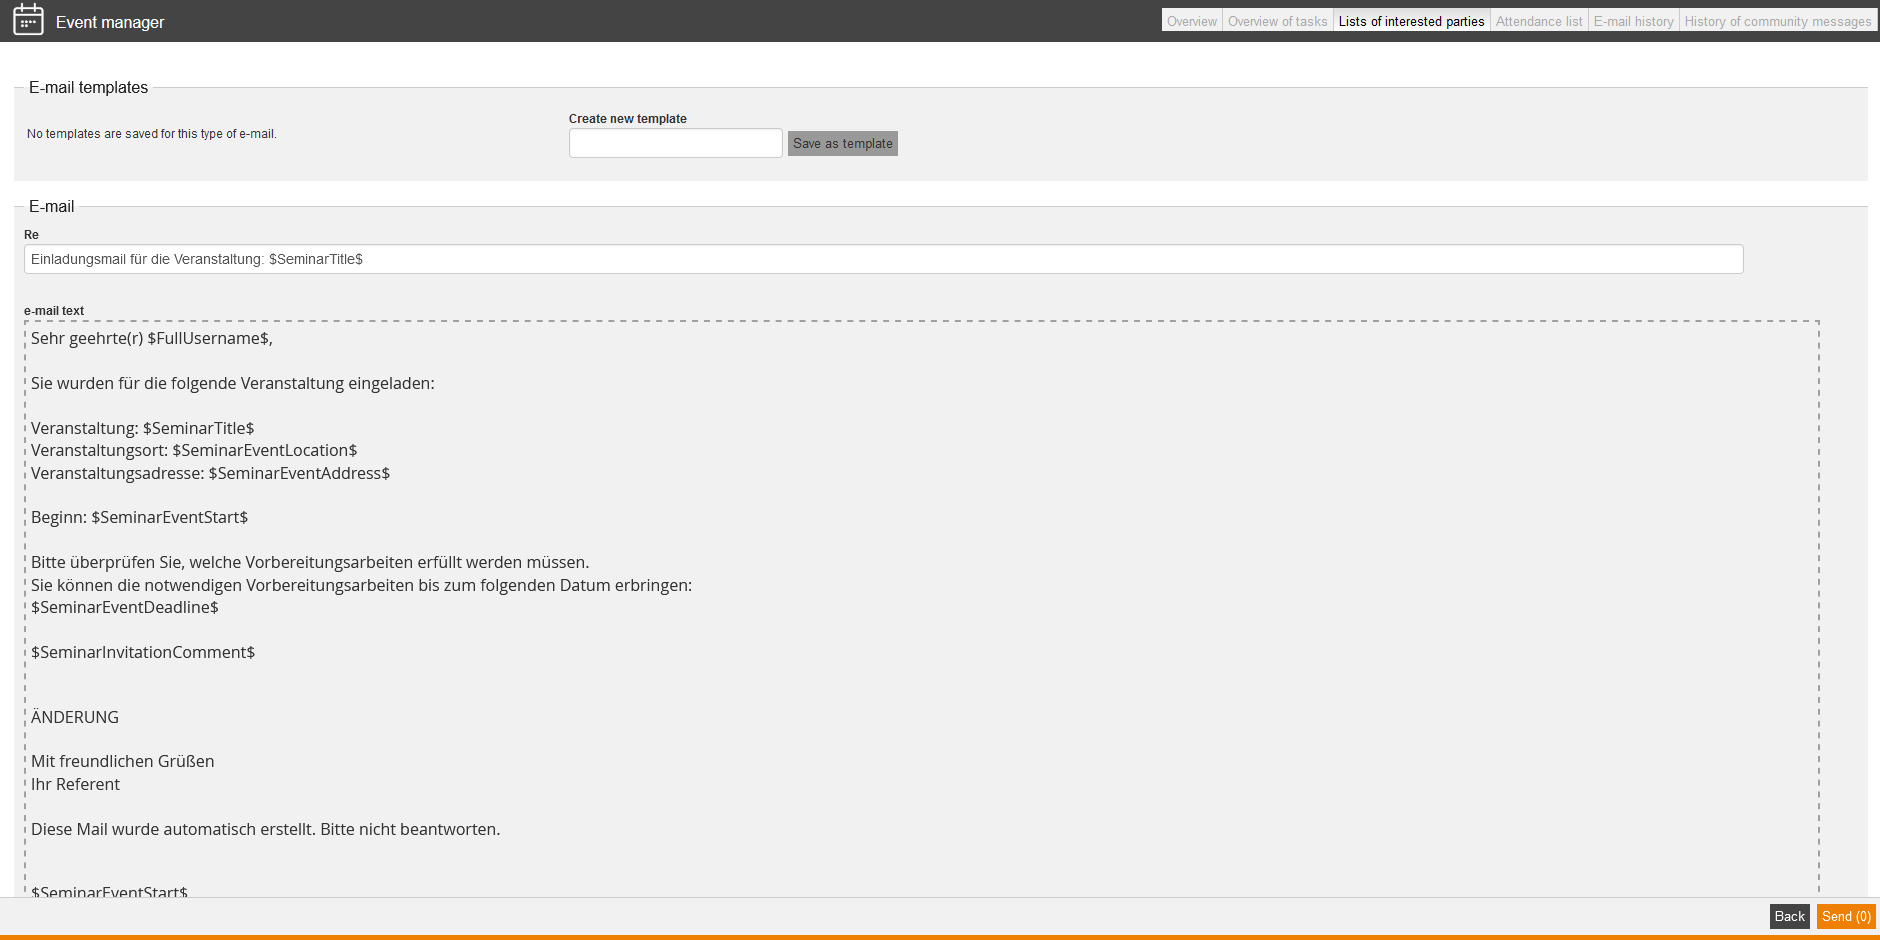
To send a copy of the participant invitation to the speakers and coordinator, you click this button.
You get to the page of the e-mail message. You can change the template or you can create a new template. Also you can change the Re or the e-mail text. Furthermore you can insert a link of this event into the e-mail text by clicking the button Link (this event). Finally you click on the button Send.
Thank you e-mail
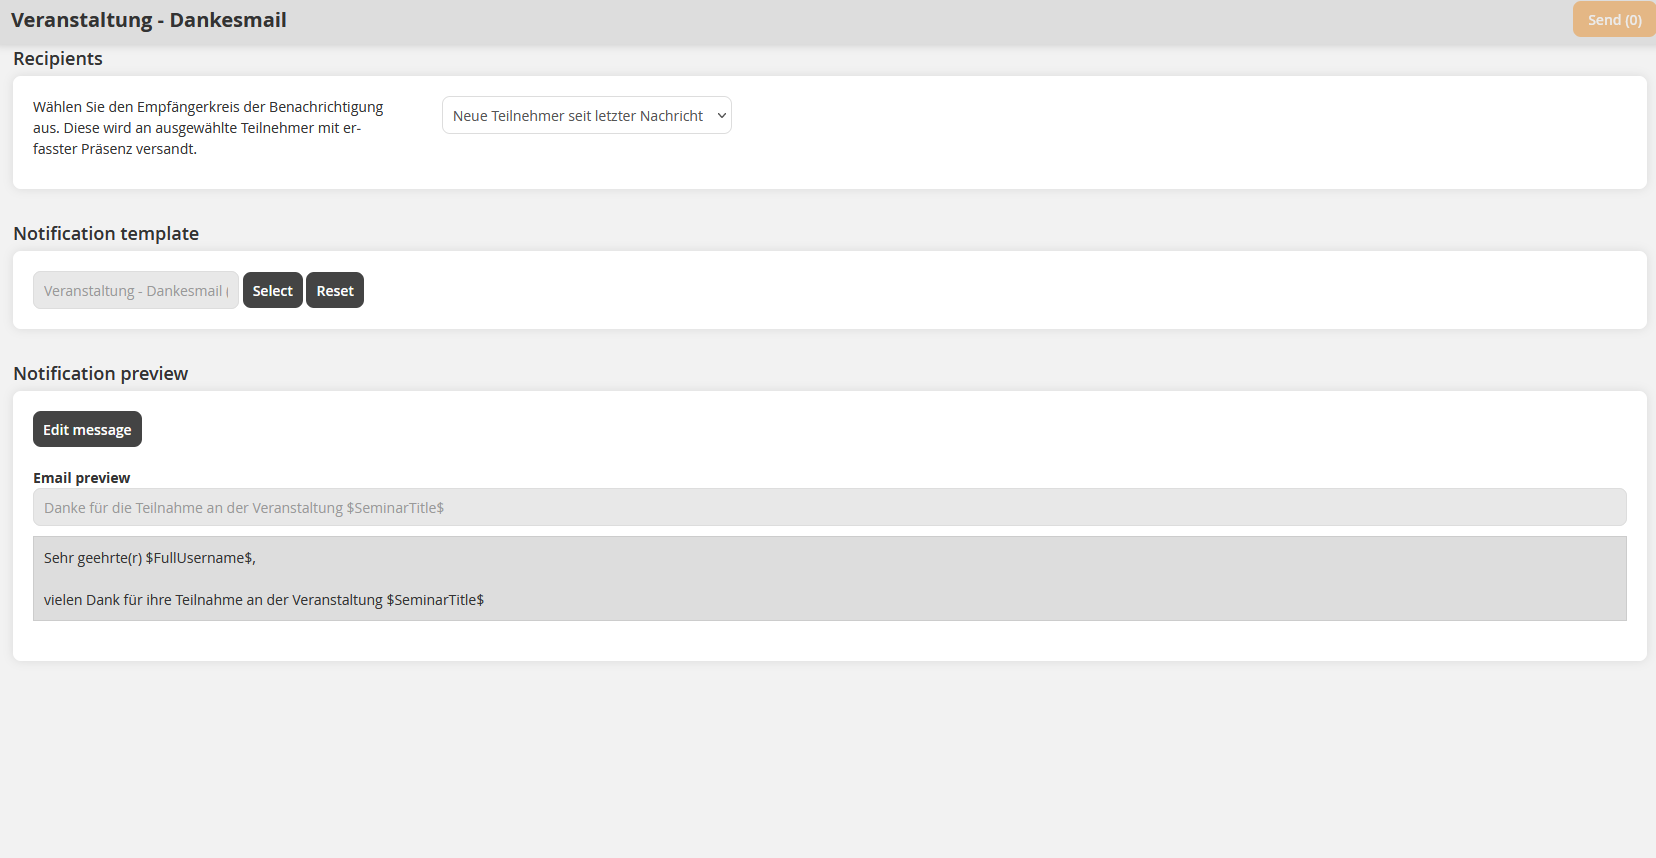
To send a thank-you e-mail, click the button Thank-you e-mail. You can select the option, if the thank-you e-mail will also be sent to people who have already received an e-mail. Further you can create new templates and finally you can configure the thank-you e-mail like you want.
If the e-mail appendices or files are activated in the Event date wizard on the tab E-mail attachment by adding them to the Invitation mail and for a certain event date, you see these files under Available appendices. These files are available for download (see screenshot). You execute the download by clicking the file name beneath the corresponding file.
Note that, if the coordinator for example has set a check mark for the e-mail attachment in the Event date wizard, this file is preselected. You can undo this preselection by clicking the check box.
Details and sub tabs
The following accordions explain further functions and options and their effects.
Process of the event
Announcement
Shows the date, on which an announcement mail was sent to all course participants. An announcement is sent to all persons, which are not already registerd to an event date of this event. Thus you can promote event dates in a special way.
Reminder
Shows the date, on which a reminder for processing pre-tasks was sent to all course participants.
Deadline
Represents the day, until all pre-tasks should be done.
End of registration
Shows the date, on which the registration turns to impossible.
Event
Shows the date of the event.
Follow-up
Shows the date, on which the follow-up e-mail was sent. Thus the event is marked as “Closed”.
Event data
Minimum/ Maximum
Shows the minimum and maximum number of participants.
Waiting list
Shows the number of the waiting persons on the waiting list for this event date. You can change the number of the participants via clicking the button Change.
Further data
- Event title
- Starting date
- End date
- Coordinator
- Speaker
- Location
- Address inclusive room
- Event date status
- Language
- Confirmation of registration (status)
- E-mail invitation (status)
- Description
Alternative dates (hide paste dates)
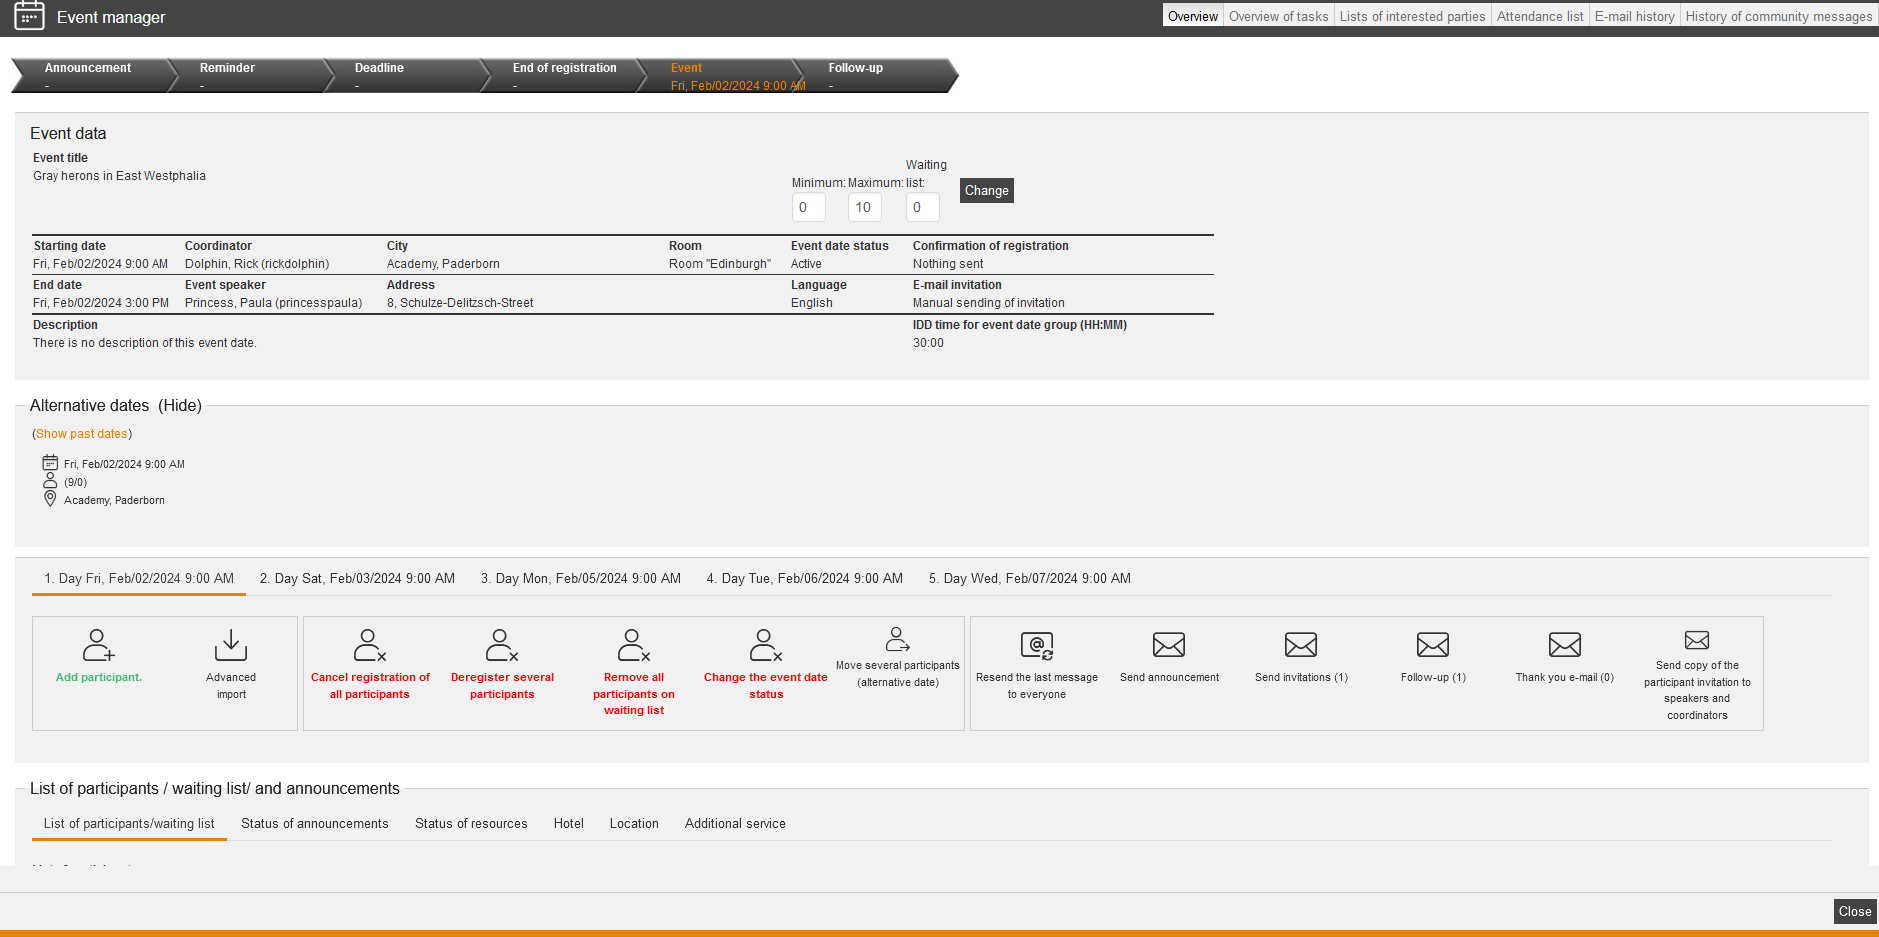
To show or hide past dates, click on Show of Alternative dates. You can edit paste dates via this function.
Register/cancel registration of participants and communication history
Add participant
To add participants for this event date, click on the button Add participant. Then select the favored participants or restrict the display via filter.
If several course activations are available for this event date, the dialog window Registration of event date opens by clicking Add participant. Avendoo® shows for every single participant, if a registration is possible and if there are scheduling conflicts.
Cancel registration of all participants
When you click on the button Cancel registration of all participants, you enter first a comment for deregistration, which will be added to the deregistration message, if there is an appropriate variable in the e-mail. Then you can select a deregistration reason and enter additionally a comment. In the next step the e-mail template of the deregistration of the event date is shown. You can do appropriate changes. Via click on the button Send the e-mail will be sent and all participants are deregistered from the event date.
You can change later the reason. Note that, this change will be done without confirmation.
Via this function you register participants at an
alternative date. You select the appropriate
participant by setting the check box before
the name. To select an alternative date, click
on Continue.
Send announcement
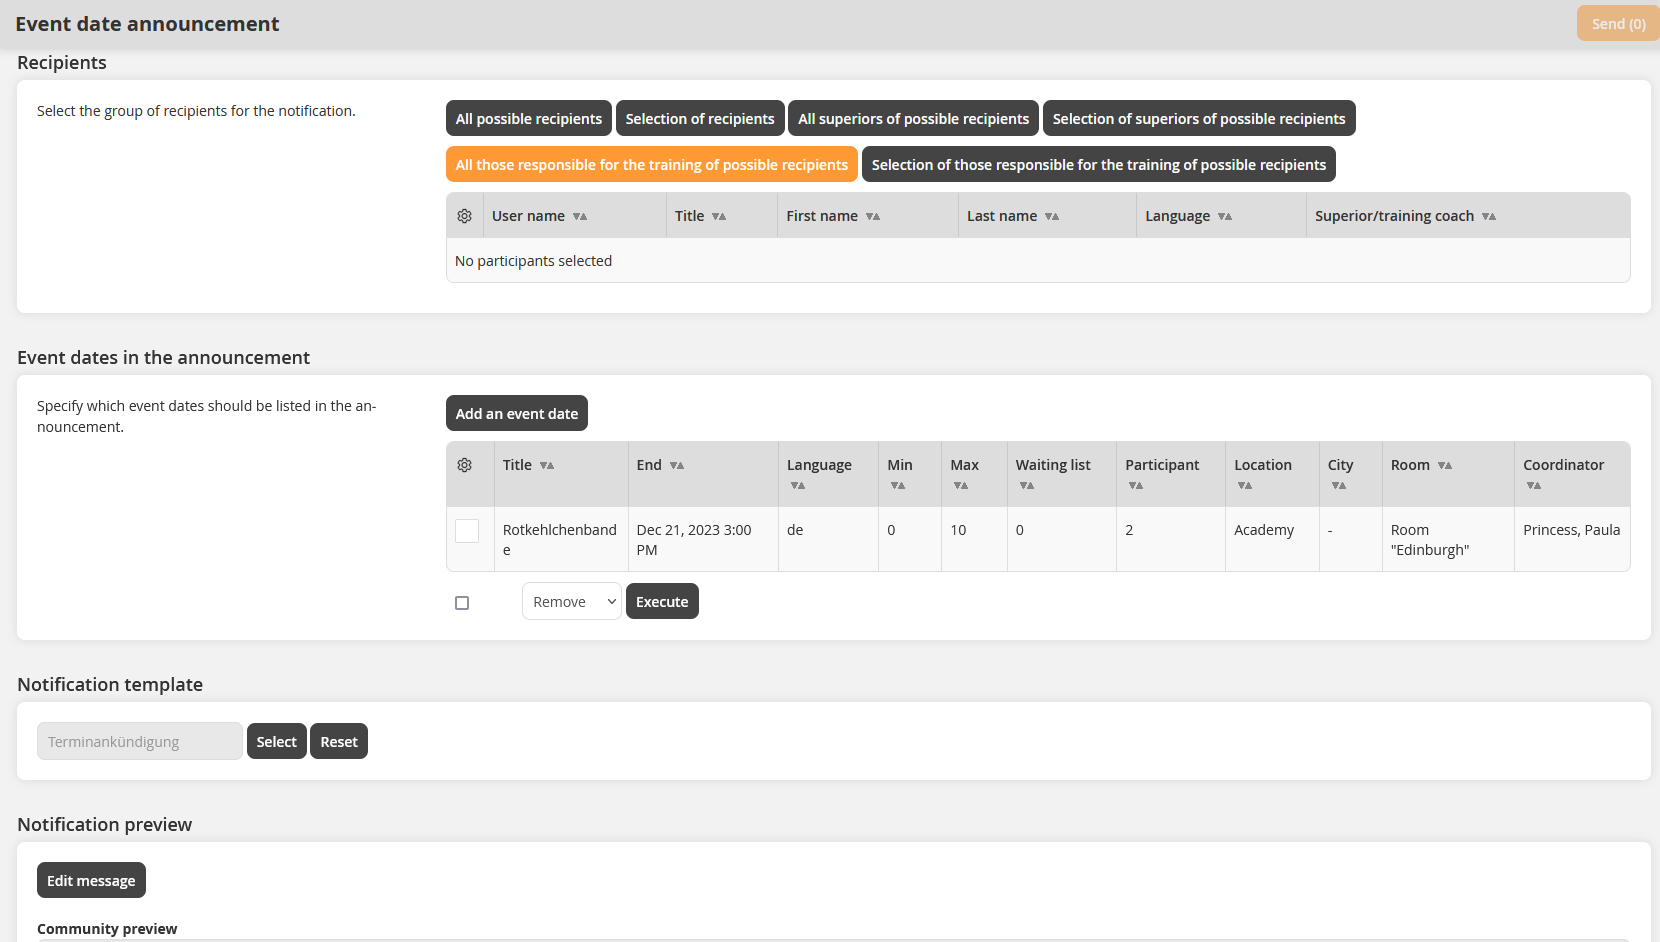
To open the Assistant for event date announcements, click on the button Send announcement. Click on the appropriate button for recipients. Define which event dates should be contained in the announcement and which recipients should be entered. Enter and configure the message on the tab Message.
Recipients of the announcement
Avendoo® shows you a list of all recipients of the announcement. Via the buttons All possible recipients, Selection of recipients, All superiors of possible recipients, Selection of superiors of possible recipients, All those responsible for the training of possible recipients and Selection of those responsible for the training of possible recipients you make a purposeful selection of the recipients.
Event dates in the announcement
Avendoo® shows all created event dates in the announcement. To make a further event date entry in the list, click on the button Add event date.
Send invitations
To send an invitation e-mail to all participants of this event date, click on this button. Select a created e-mail template or create a new one.
Follow-up
To remember participants to this event date again, click on the button Follow-up.
Send text message
Via this text message function you can inform participants via text message. If you want send a message only to participants, who are marked as present in the attendance list, set the check box Only to participants who were present.
If the event date is in the past, you can cancel the event date and you can send a thank-you mail.
List of participants/waiting list and announcements
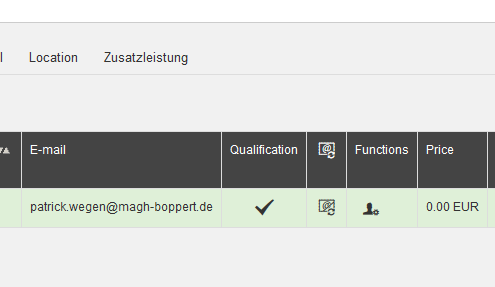
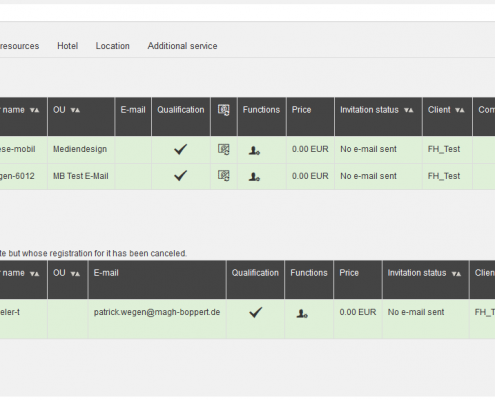
The list shows all currently to this event date registered course participants. If the participant is colored green, he/she is qualified for this event. If the participant is colored red , he/she isn’t qualified for this event. A participant can qualifiy for an event in this way: If mandatory elements are before a hurdle on the learning path, the participant has to complete all mandantory elements before the hurdle for qualifying for the event.
Configure column view
Via clicking the icon you can configure the view of the attendance list. You can display the following data in the list:
| First name | Group |
| Last name | Division |
| User name | Telephone |
| OU | Mobile number (business) |
| Personnel number | |
| Qualified | Registered at |
| Invitation stauts | Change date |
| Functions | Expiration date |
| Cost center | Discount |
| Client | Certifications |
| Company name | |
| Region | Town |
| Resend the last message to everyone | Actions |
| Price | Invitation status |
| First name (superior) | Last name (superior) |
| User name (superior) | Cell phone number (superior) |
| Defines 10 (superior) | E-mail (superior) |
| User ID | Dealer ID |
| Tool ID | External reference |
| External reference type | Run |
| Reason for deregistration | Comment on deregistration |
| Food requests | IDD time |
Functions
Via click on this icon you can do the following actions in the list of participants:
- Move (List of participants)
The selected participant will be moved from the waiting list to the list of participants and will be registered to the main event date and the follow-up dates. - Move (alternative date)
You can register the selected participant to an alternative date. - Move (event)
You can register the participant to another event. - Move (list of prospective participants)
You can move the appropriate participant from a waiting list to a list of prospective participants for example, but also you can move registered and deregistered participants to the list of prospective participants. There will be sent a registration and deregistration mail by default. - Cancel registration
You can choose the menu Cancel registration, choose a reason for canceling the registration via drop down menu and enter additionally a remark. An e-mail will be sent when you cancel this registration. You can maintain additional reasons for cancellation in the system setting “changed.bundles.xml“. - Further accompanying person
You can add a further accompanying person via this function in a dialog window by entering the required data and clicking the button Add.
If you have created a registration code of the type Accompanying persons you have stored it on the user client, the accompanying person is added after menu selection and entering the data and clicking the button Add. Thus the username is generated like the configurations in the Registration code wizard on tab Configurations under Generate automatically username.
You select already existing accompanying persons in a dropdown menu. They are updated when you add them. - Add comment
Enter a comment in the history log. A comment can be information about rebooking of individual participants for example. - Show history/comment
Shows the history log for the registration of the participant. - Call up user wizard
You get directly to the User wizard of the participant. - Register (to further event)
Register the participant to a further event. A new dialog window opens and you can add event dates, to which you can register the participant. - Change price
You can adjust the price, which you have entered on the tab Parameters in the Event date wizard, individually per participant via this function. - Change food request
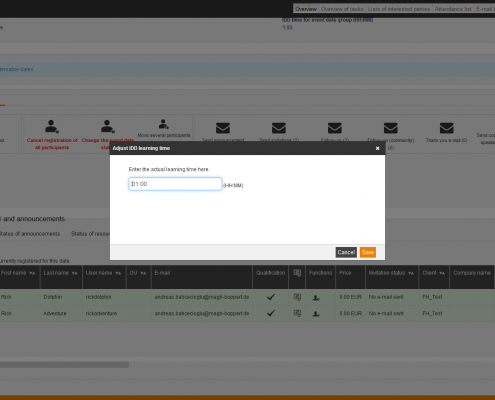
You can change a food request per participant independent of the system property “enableNutritionNotes” in the system setting “seminar.configuration”. - Adjust IDD learning time
You can select this option only at the main event date, because the adjustment relates to the whole event date group.
- Show certificates
You can download certificates via a dialog window. - Resend the last message
You see in this dialog window, if a sending is possible. Then you can resend the last message. - Link booking
You can link the reported need of a frontend user or participant with a booking.
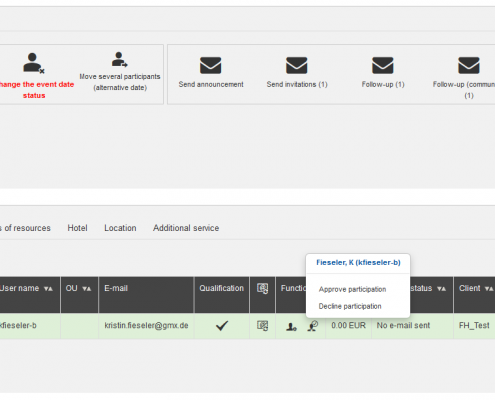
Approve participation
Prerequisites: You have activated the approval procedure for this event date in the Course activation wizard and the participant has registered to the event date.
This icon is primarily an information, which participant is still waiting for the feedback of the team leader. Via click on this icon you can do the following actions in the list of participants and therefore you can act on the approval procedure of the team leader:
- Approve participation
- Decline participation
If you have declined the participation for the appropriate participant, this particpant will be automatically listed in the list of canceled participants.
Functions
Via click on this icon you can do the following actions in the list of canceled participants:
- History
You can show registrations and deregistration with information about date, done by, status, if qualified, notification status, if present, if begun and price. - Re-register
You can re-register the appropriate participant if allowed. - Adjust the price
You can determine the price for the event date. - Change food request
You can stipulate a food request for the participant. - Change comment of deregistration
You can enter a comment of deregistration for the participant.
Via this function you send the last notification, which you’ve assigned to the event, again to all participants. In this function is no indivual adjustment considered.
Basically, you define the copy to selected recipients via the option Send copy on the sub tab Parameters of the tab Master data in the Event date wizard.
Which notifications are sent, you can see on tab E-mail history.
There still wasn’t sent a message to the participant.
This symbol behind the last name of the participant represents further remarks. It is shown, independent of the participant status “Registered”, “Deregistered” or “Waiting list”.
Status of announcements
This tab is only viewable at the main event date. Avendoo® shows all announcements of the event.
Event date announcements:
Avendoo® lists the event date announcements with the recipients for this event.
Announcements:
No answer received.
Status of resources
Invitations to speakers:
In this list you see the main speaker and the co-speakers of the selected event date and the notification status of the meeting request. After canceling and sending the deregistration to the speaker you get the notification status Deregistration sent in this list.
Hotel
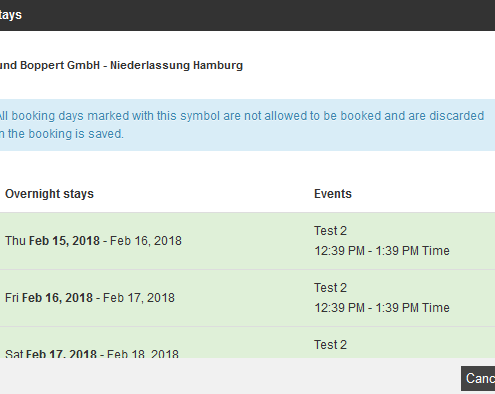
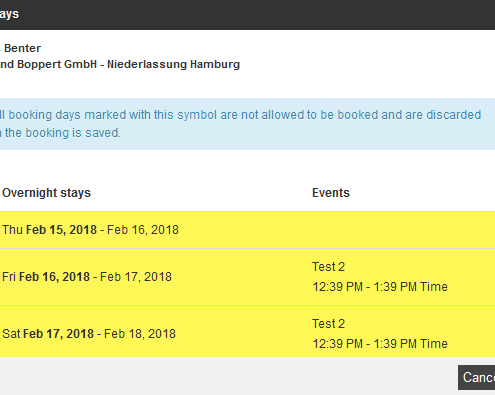
On this sub tab you see the hotel booking of this event date. If you click on the title of the hotel, the preview of the location opens.
You can create new hotel booking for selected participants by clicking the button Add new hotel booking. Also you create new individual hotel booking for any user in the system by clicking the button Add new indivual hotel booking.
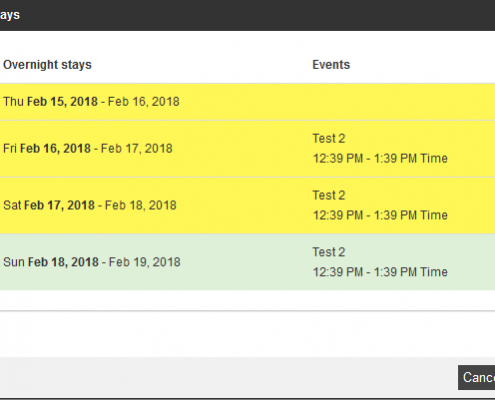
If there are further days before or after the first or last booking, these are hidden, if they are not booked. Via a button (“Previous” or “Show next”) authors can show the booking days again. Booking days, on which it is an event date, are not hidden generally. This is valid since three days before or after.
Location
On this sub tab you can define locations for selected messages (selected overnight stays per hotel and catering details for event venues).
Via the button Notify location you can notify the appropriate event venue. Prerequisite is that you have added the appropriate message on the tab Configuration in the Event wizard.
Furthermore you see on this tab the status of the appropriate room request per location. There are four status: Invited, Rejected, Accepted and No invitation. Further information about saving the e-mail address you find here.
Additional service
If you’ve added a resource with its capacity (room with defined quota), you see the additional service on this tab.
As soon a participant is registered to the event date or event date group, you can click the Pencil and add additional service.
Overview of tasks
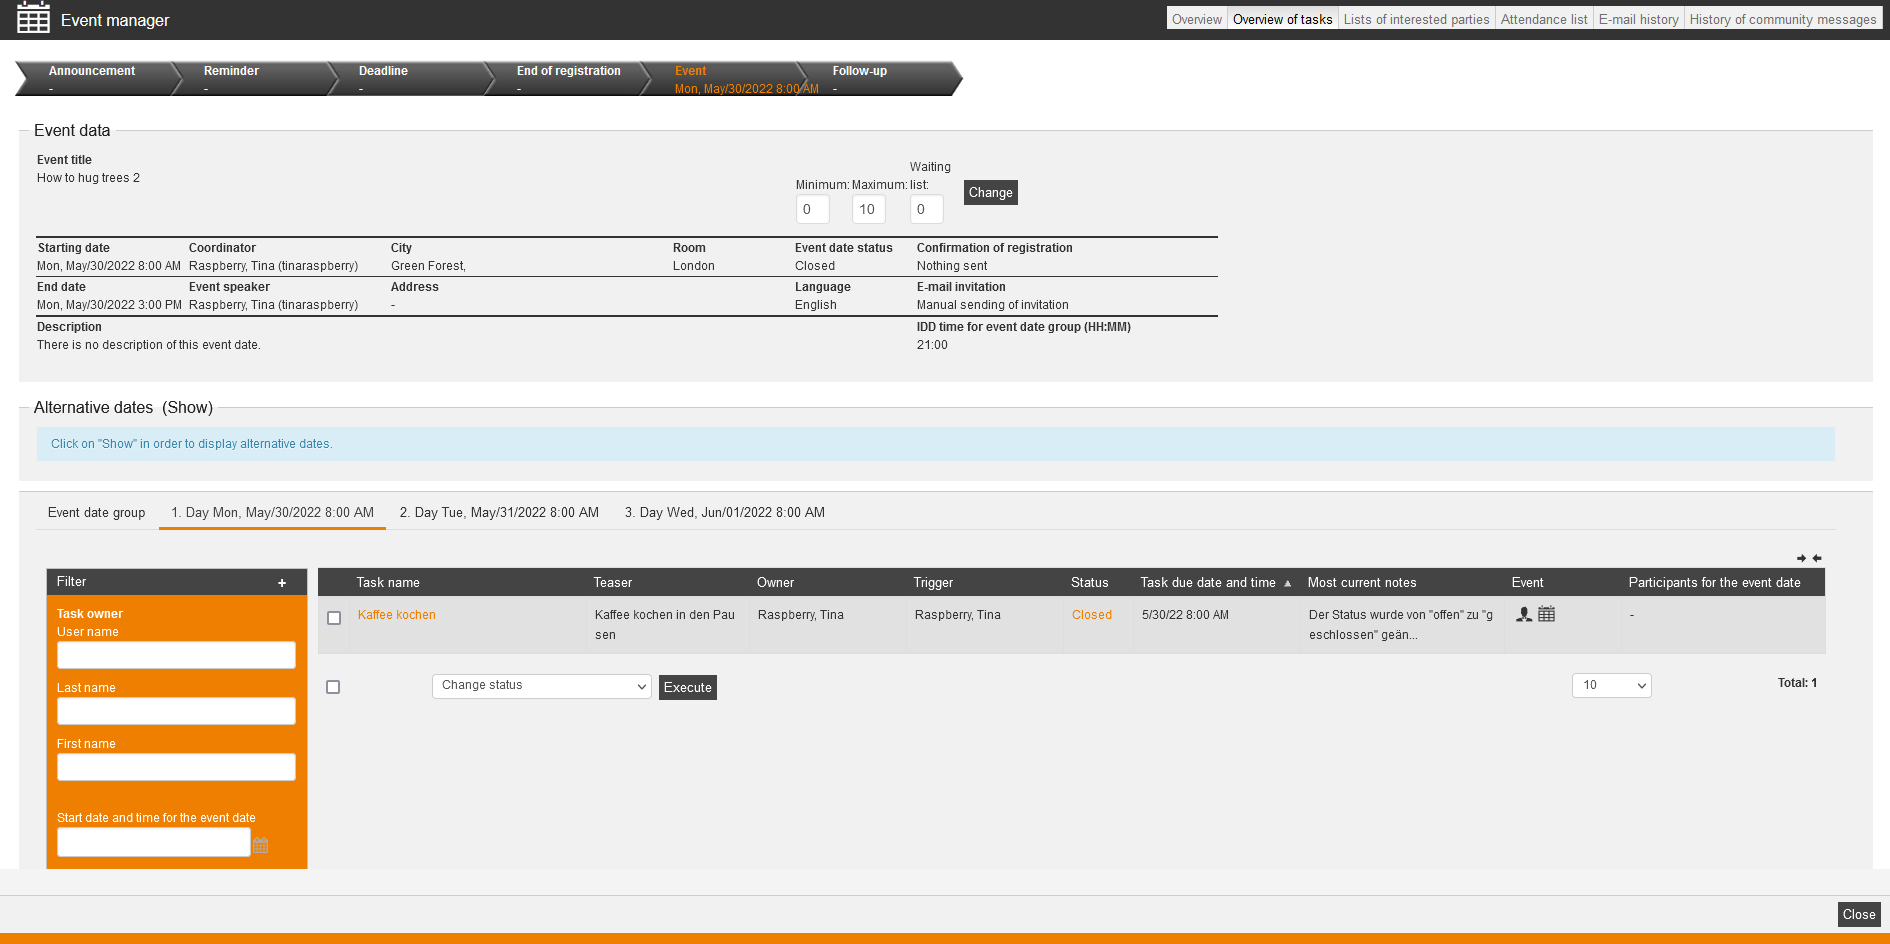
In the overview (Event manager → Overview of tasks) you see all already existing tasks, listed by task name, teaser, owner, trigger, status, due date, current notes, event and event date participants. If you want to add or remove columns or change their order you do a right click on the table header and choose Edit display of columns and order.
To edit the task click on the title of the task. The dialog window Task opens (see second screenshot).
To change the status from Not yet completed to Closed or reverse, click on the corresponding status.
To open the corresponding event click in the column Event on the Event icon.
To open the corresponding event dates click in the column Event on the Table icon.
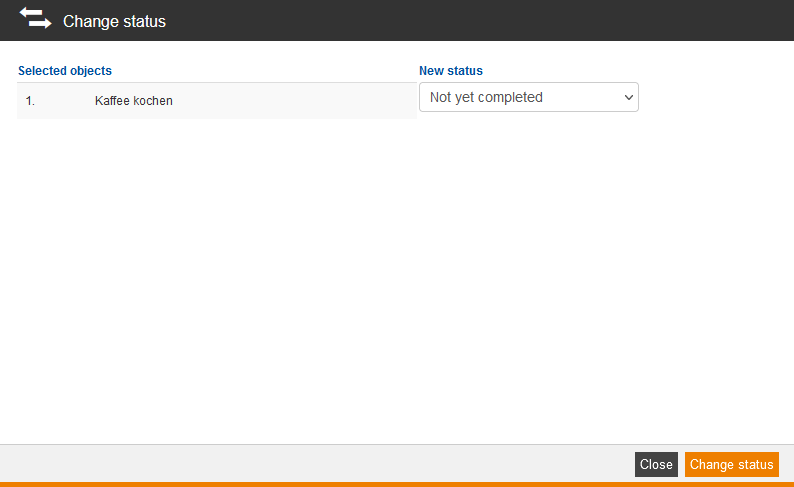
To use the mass processing function Change status set a check mark in front of the favored tasks and click on the button Execute besides Change status. Now the dialog window Change status opens (see third screenshot) and you can select between the following status: Not yet completed, Being carried out, Closed or Postponed. Choose the favored new status and then click on the button Change status.
You can plan events, but not publish events via lists of interested parties (preliminary event dates).
You can create event dates preliminary and you can register participants already. Also user can do a self-registration. You get a preliminary event date shown as list of interested parties (See > Catalog).
To edit the list of interested parties, click on Functions.
There are the sub tab Event date group and sub tabs of the single event dates available.
Furthermore you can filter by the following criteria: task title, teaser, task owner (user name, last name and first name), trigger (user name, last name and first name), participants for the event date (user name, last name and first name), Start date of the event date, due date, My tasks and task status (Not yet completed, Being carried out, Closed and Postponed).
Lists of interested parties
You can plan events, but not publish events via lists of interested parties (preliminary event dates).
You can create event dates preliminary and you can register participants already. Also user can do a self-registration. You get a preliminary event date shown as list of interested parties (See > Catalog).
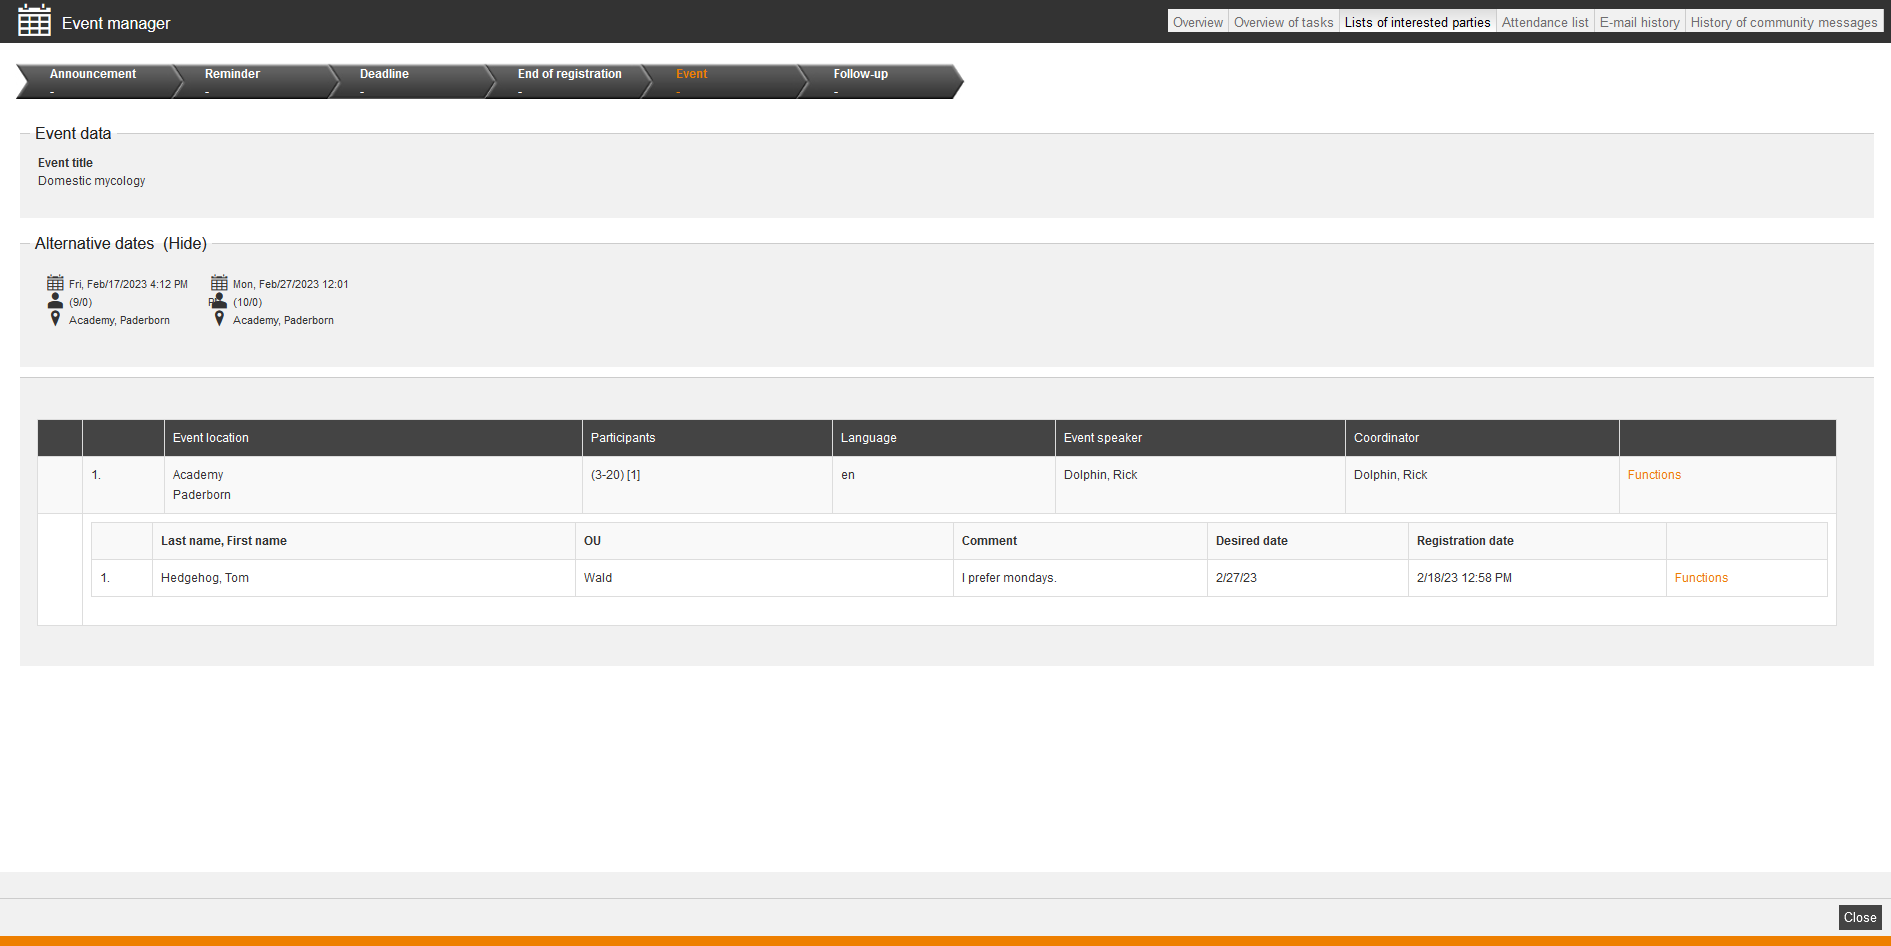
You see the data so far, also of the registered users, on this tab per list of interested parties. (see first screenshot).
You can click the link Link Show under Alternative dates and thus the alternative dates regarding the list of interested parties are shown (see second screenshot). If you click one of these suggested event dates, you get to the tab Overview in the Event manager of this event date and you can add participants regarding the list of interested parties and their comments. Note that these alternative dates are based on an event date of the status Initiated or Active. Only in these cases there are possible alternative dates shown.
To edit the list of interested parties, click Functions.
Existing registrations of a list of interested parties
When participants register to a list of interested parties, they get listed below the appropriate event date. The user can enter a desired date or a comment when they register. Also these dates are shown.
You can use the following functions per list of interested parties or/and per user:
- Add participant
- Double-register participant
- Cancel registration
You can cancel the registration of the participant, if the desired date isn’t available and there is no alternative date for example. - Move several participants (alternative date)
Register the user to an alternative date. Therefore a dialog window opens, on which all possible alternative dates are listed. Set the check box in the first column of the selected event date and confirm the registration via the button Move. Even if the registration deadline is achieved, you can move a participant to an alternative date. - Follow-up
You can create a follow-up e-mail from created template or you can create a new template. - Add comment
You can enter a comment regarding the list of interested parties. If the user has already entered a comment regarding the list of interested parties, this one will be overwritten.
Attendance list
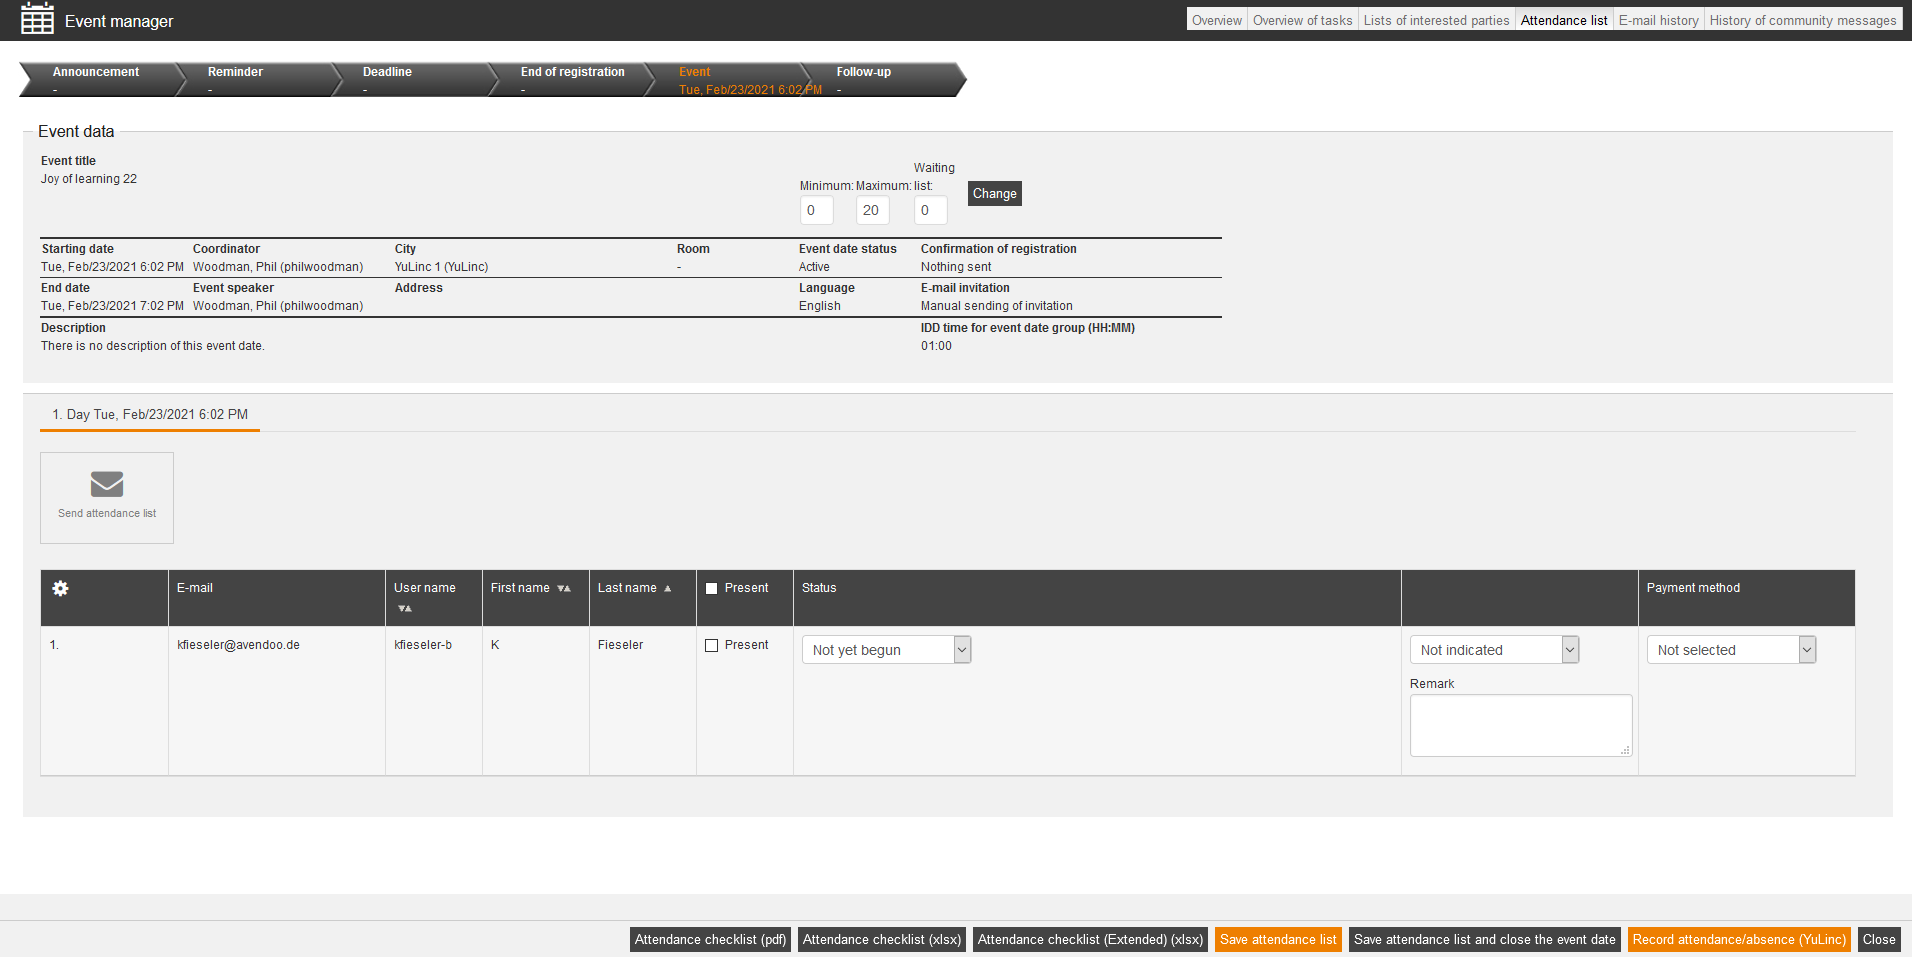
The participants of an event are recorded via the attendance list (this is valid for event dates and follow-up event dates). Avendoo® sorts the participants in ascending order via the last name. You record the participant data during of after the event for all invited participants. If you recorded the attendance in the attendance list, the event date of the participant is “visited”. If it is an event date without follow-up event dates, the event status in the course of participant changes to Completed and a training inventory for event participation of the user is written.
If you don’t have marked the participant as Present and the event date is closed, this means the editing of the attendance list or the recording of the attendance is completed, Avendoo® shows the absence for example in reports.
You can do the following actions for the appropriate attendance list for each event date:
- Send attendance list (prerequisite: configured recipients in the Event date wizard tab Master data sub tab Parameters) via button
- Save attendance list via button
- Save attendance list and close the event date via button and/or
- Record attendance/absence (YuLinc), if YuLinc is defined as virtual location.
The limit for passing is defined in this formula: User attendance as time in the session/total time of the event * 100.
Furthermore you can record the attendance list for an event date group. It’s possible that participants can receive a certificate when they don’t attend some event dates. Thus you can leave out the check mark Present on the corresponding event dates but select the status Completed successfully for the event date group. When all event dates are mandatory you select the status Not yet begun or Failed and the participant receives no certificate.
You can do configurations according the sending of the attendance list on the sub tab How the event will proceed of the tab Notifications in the Event wizard. Further information you find here. Also you can do configurations under Parameters in the Event date wizard on the tab Master data, this means information about deactivating of the automatic sending of the attendance list you find here.
Below Event data all important information about the event is shown.
On the tab Event date group you can record the attendance for all days and you can edit them. This tab viewable, if an event date group exists. If event dates of several days with the option “Summarize invitations” are existing, Avendoo® opens this tab.
Important: You can fill out the attendance list only if the starting date of an event is achieved.
The automatically sent attendance list is the Dynamic attendance list (contains the personal number) in the language of the event.
If the access right Substitute certification file from the Author wizard or from the Permission groups wizard is assigned and a certificate is attached, you are shown in the column Certifications the button Substitute certification file.
Example for replacing a certification file
The event “How to hug trees 2” is completed and the certificates are available. The participant Harry Plotter needs a PDF certificate instead of a SVG certificate and the participant Mary King has married and now is called Mary Queen. Her SVG certificate should be replaced by a jpg file.
The responsible author with the author right Replace a certification file looks in the line of Harry Plotter on the tab Attendance list and clicks on the button Substitute certification file. The author replaces the existing SVG file by the PDF file. Then he/she looks for Mary King and replaces the SVG file by the jpg file. Finally he/she changes the last name to Queen on the tab Master data in the User wizard.
Event date status: Carried out/ Close event date
When you record the attendance you complete the event finally.
Configure column view
To configure the view of the attendance list and see further details, click on this icon .
Present
Mark the participant by setting a check box, if the participants were present. If you set the check box in the header, all participants are selected as Present.
If deactivate the check box Present, the training inventory entry of the appropriate user is set to “Deleted”. This means a certification is no longer shown under Certifications and users can delete it via training inventory.
Status
Define the status of the individual participants of the event date:
- Not yet begun
- Failed
- Completed successfully
Remark
Furthermore choose some remarks regarding the attendance of the participants:
- Present
- Arrived punctually
- Arrived late
- Left too early
- Absent
- Excused absence
- Unexcused absence
- Participant canceled registration
- Superior canceled registration
Remark
You can enter individual remarks regarding the participation of a person.
Attendance checklist
Open the attendance list as PDF or (advanced) Excel file.
The attendance list or attendance check list contains a list of all speakers of an event date group.
Link to a feedback
If there is a dependancy between the event and a feedback (more information), you see a note (see picture on the right). After recording the attendance and after saving the done configurations, the author decides, if a notification with the corresponding feedback should be sent to the user. Then a new dialog window opens: “If you change the attendance to Present, an e-mail for informing about a following feedback will be sent to the user.” A feedback community notification will be sent at the same time as the feedback mail is created in Avendoo®.
Delete incorrectly recorded attendance
To delete incorrectly recorded attendance, you have to delete the attendance at the event date first. Only in this case it is ensured that assessments and calculations of the course status are correct.
Therefore click on the title of the appropriate event, choose the tab Attendance list and delete the check box Present in the favored line of the table. Click on the button Save.
Then go to the User management. Open the User wizard for the user, for which you want to delete the attendance and switch to the site Qualifications. Choose the tab Training inventory and delete the appropriate entry.
Note: Community entries are not deleted again for superiors if the attendance is newly recorded.
E-mail history
You see an overview of the whole e-mail history of the event. You see for example which participants were informed in which way. If a user sends a response to a registration confirmation for example, you do not see this in the e-mail history.
If you do some changes, for example a new location, Avendoo® sends automatically an update mail to the participants. Note that if a hotel changes, the participants don’t get an update mail. This e-mail has the appendix “Update” in the subject line. The participants receive an update mail for the e-mail, which you have received at last, for example confirmation of registration, invitation e-mail. If the event speaker has received an invitation e-mail, he gets also an update mail.
You cannot create and edit a mail template for the update mail. The update mail is basically generated automatically, but when you change the event, for example the starting time the update mail will be generated manually.
If you also change the (individual) notifications Sending of invitation e-mail, Event – Send registration confirmation and/or Event – Send registration confirmation (waiting list), there are automatically sent update mails with the prefix “Update” in these notifications to the participants and a copy to selected recipients.
As Avendoo® has been sent an event mail, you find a code in the subject of the event mail. This code is only used for the internal assignment in Avendoo®. This means, the event mail can be assigned to the event and the participant by this code, but the event mail cannot be read. If the author has defined it in the event, some persons (for example the coordinator) can be informed about unallowed answers.
History of community messages
You see an overview of the history of community messages of the event date. You see when (date and time) the community message were created, who was the recipient and the content.
