In the area Achievements you get an overview of your learning successes.
Search
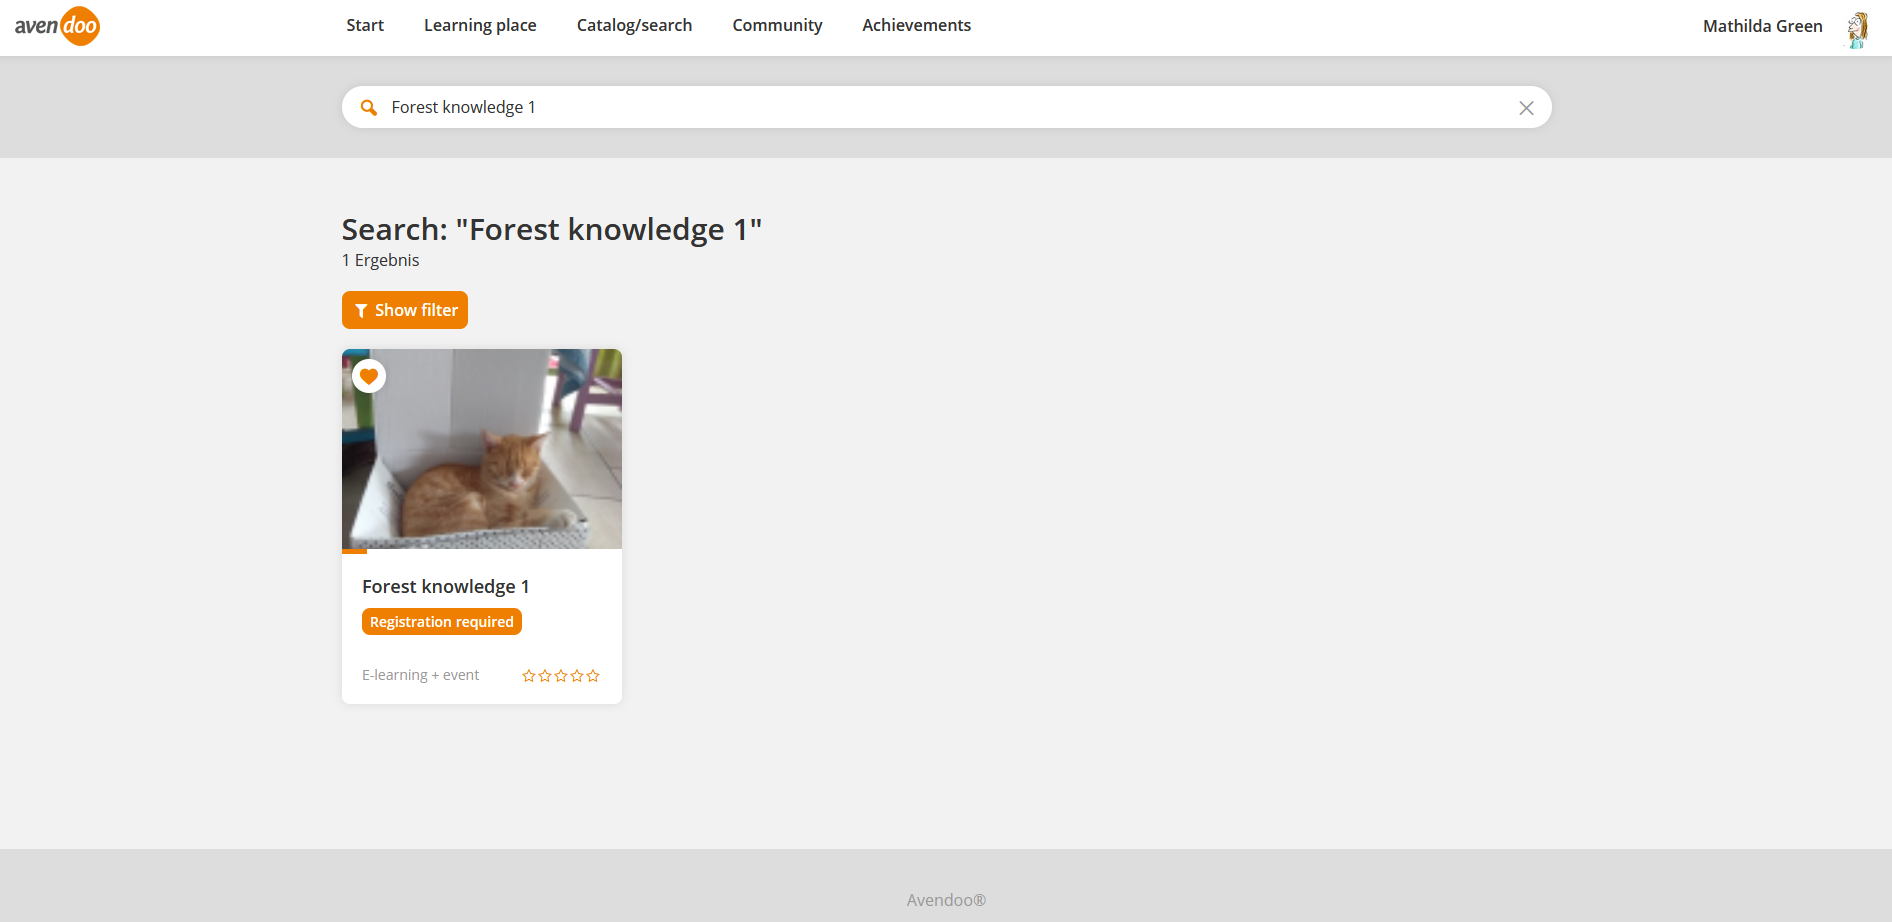
You can search in the whole user and team leader area for learning units in Search. By entering a search topic you set a filter. The appropriate learning units will be shown as result. You can open the learning units via click.
If the searching term consists only of figures, the phonetic search, which performs for similiar-sounding or written words, will be deactivated.
Show filter
If you click on the button Show filter, on the left hand filters are shown, which you can select. You see in brackets the existing learning units regarding the filter. You close the filters by clicking the X.
You can set the following filters:
- Title
Via this filter you can search for title and teaser of learning units.
- At the lastest, dates in:
- 2 weeks
- 1 month
- 2 months
- 6 months
- Relevant to IDD
- Only relevant courses
- Learning format
- Event
- E-learning
- Training plan
- E-learning + event
- Time period
- Starting date
- End date
- Status
- At my learning place
- Not at my learning place
- Classification
- Approval
- Approval requested
- Approval not required
- Language
- Minimum rating
- Certification
Training history
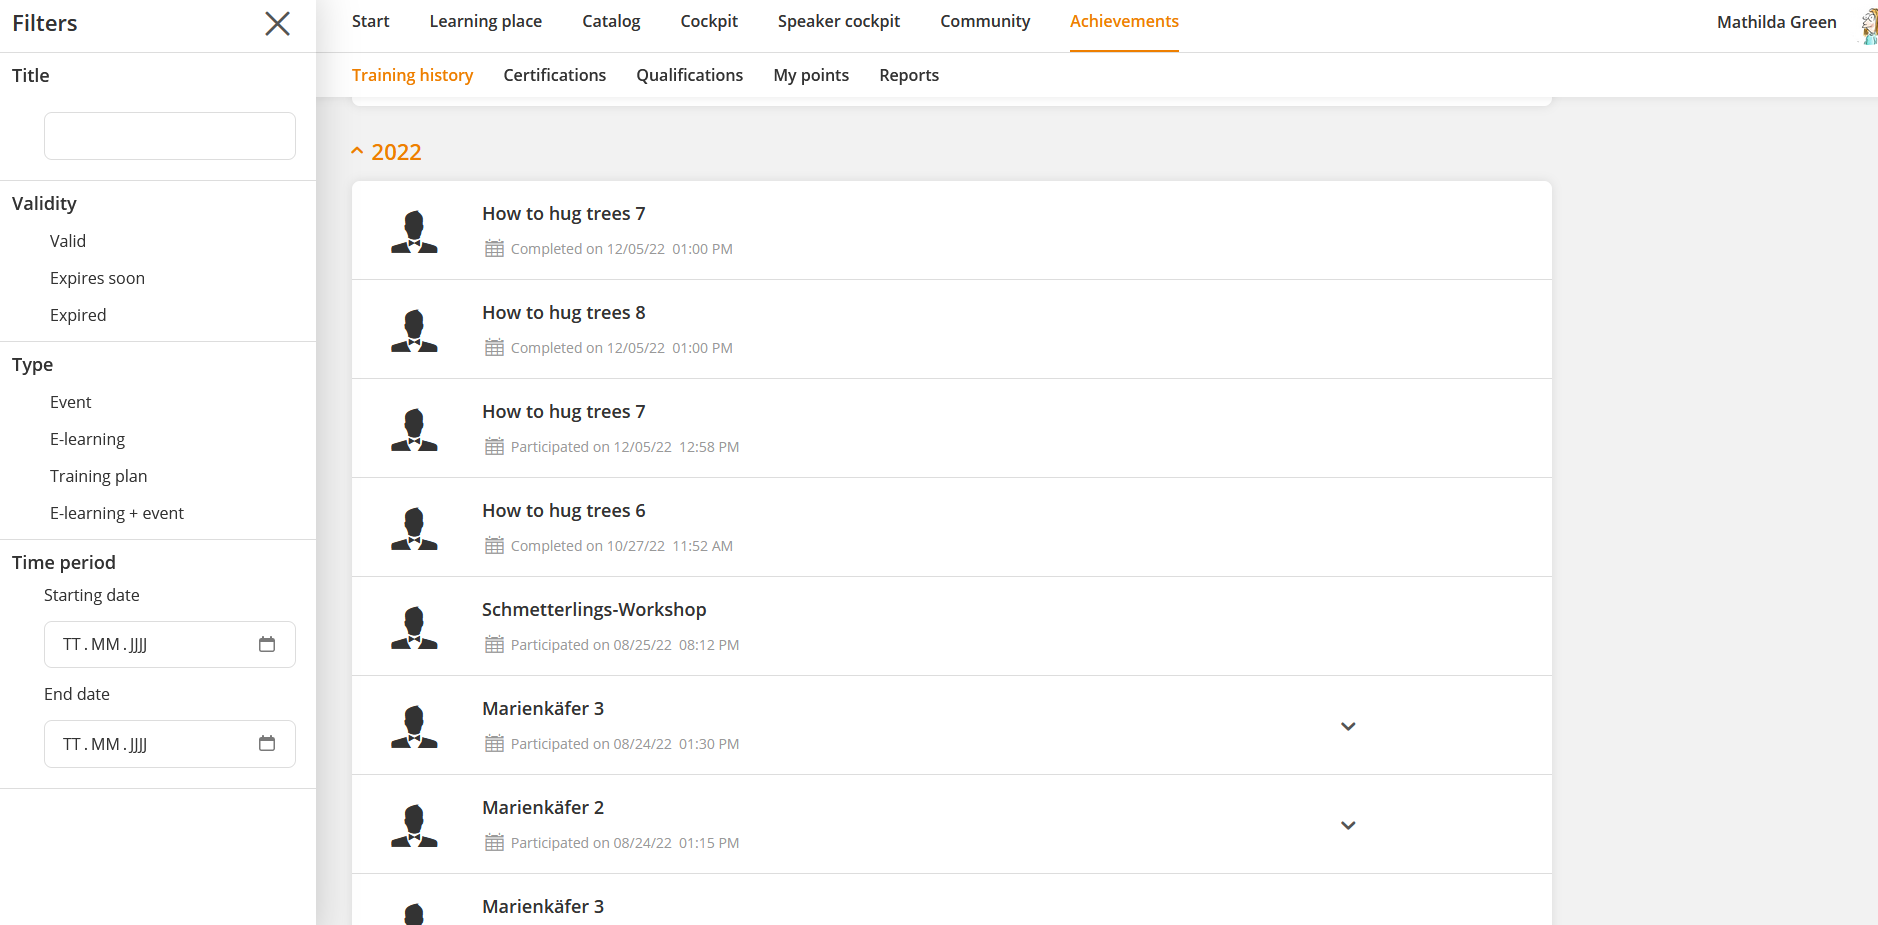
On this tab you get an overview of events, certifications, courses, training plans and qualifications, sorted by time or title. Via clicking the button Show filter you can do a filter search by type (Event, E-learning, Training plan and E-learning+event) or Validity (Valid, Expires soon or Expired). Via clicking the corresponding line you activate the filter, via click on X you deactivate it.
In the standard you see the training history like shown in the first screenshot.
As user you the IDD training time as graphic can be shown additionally (see second screenshot). As user you see, how many hours are completed, in progress and total. Beneath this graphic the history is shown as bar chart, sorted by years and display in hours and minutes.
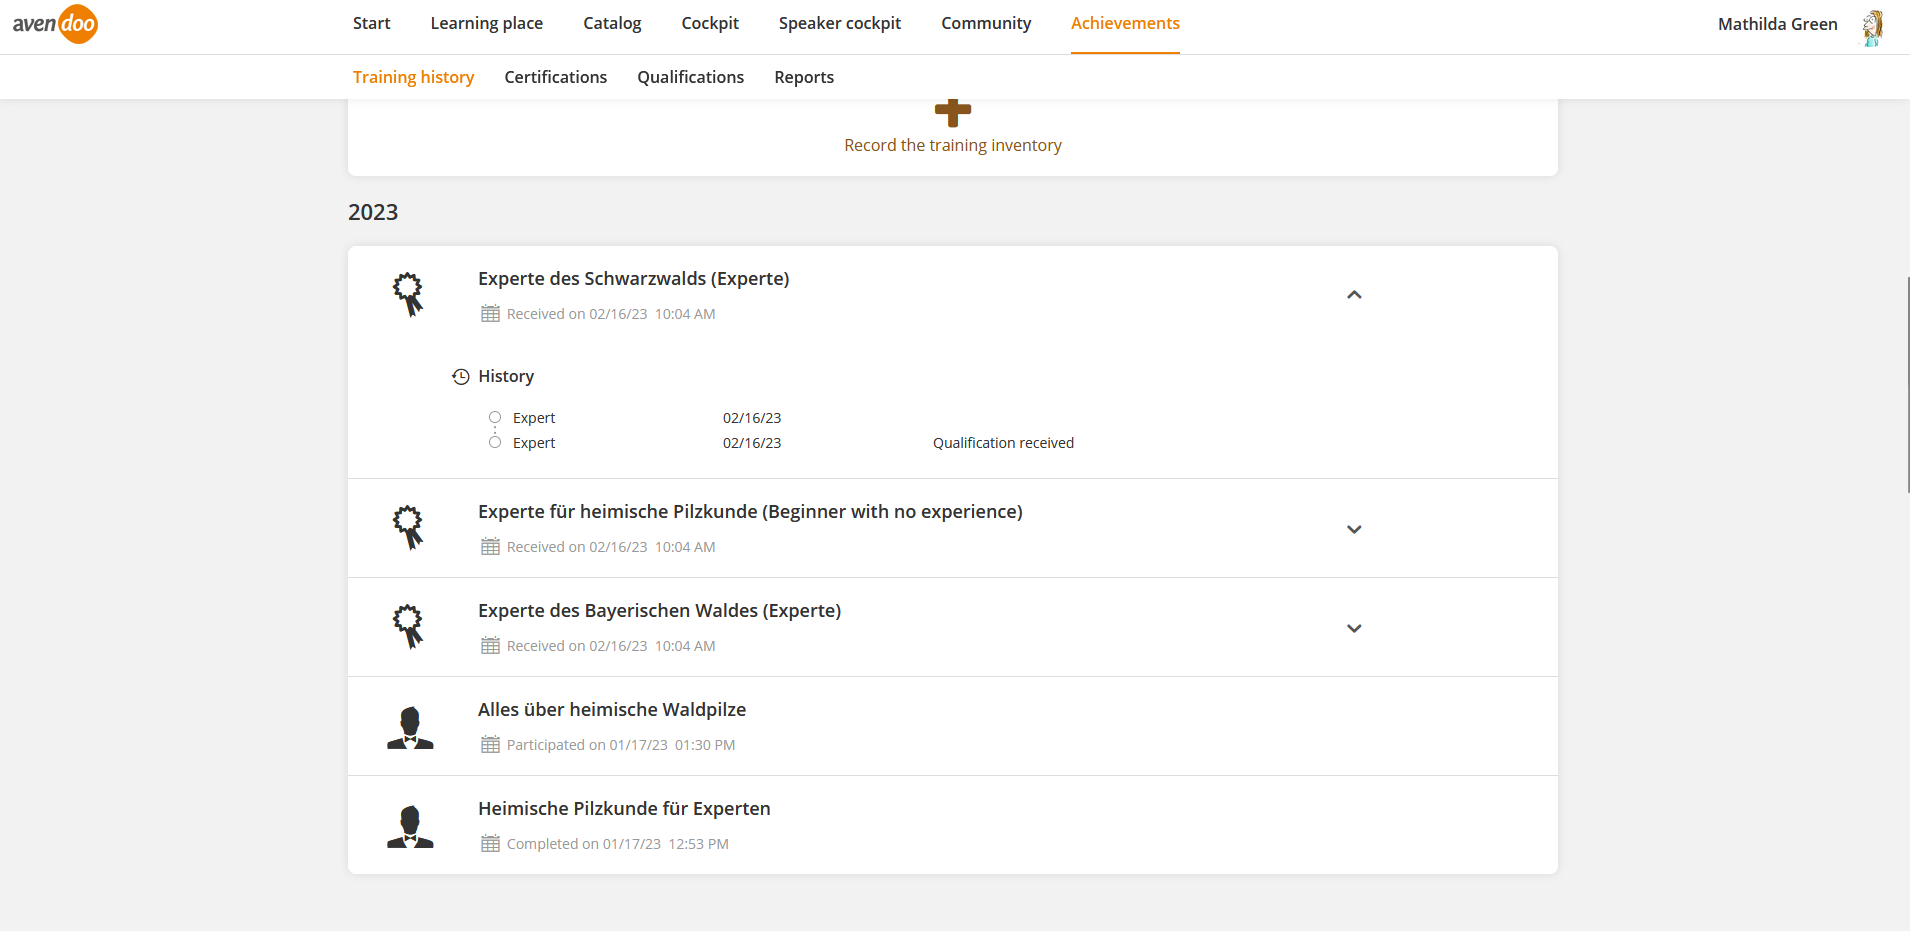
Since version 17.44 you see on this tab the training inventory entries of qualifications with downgrading history (see third screenshot). Also the current scale value of your qualification is shown. You can see the details and the history of the downgrading, which the author has configured, on the tab Qualifications. Your superior (team leader) can also edit or delete your qualification in the Employees view of the cockpit.
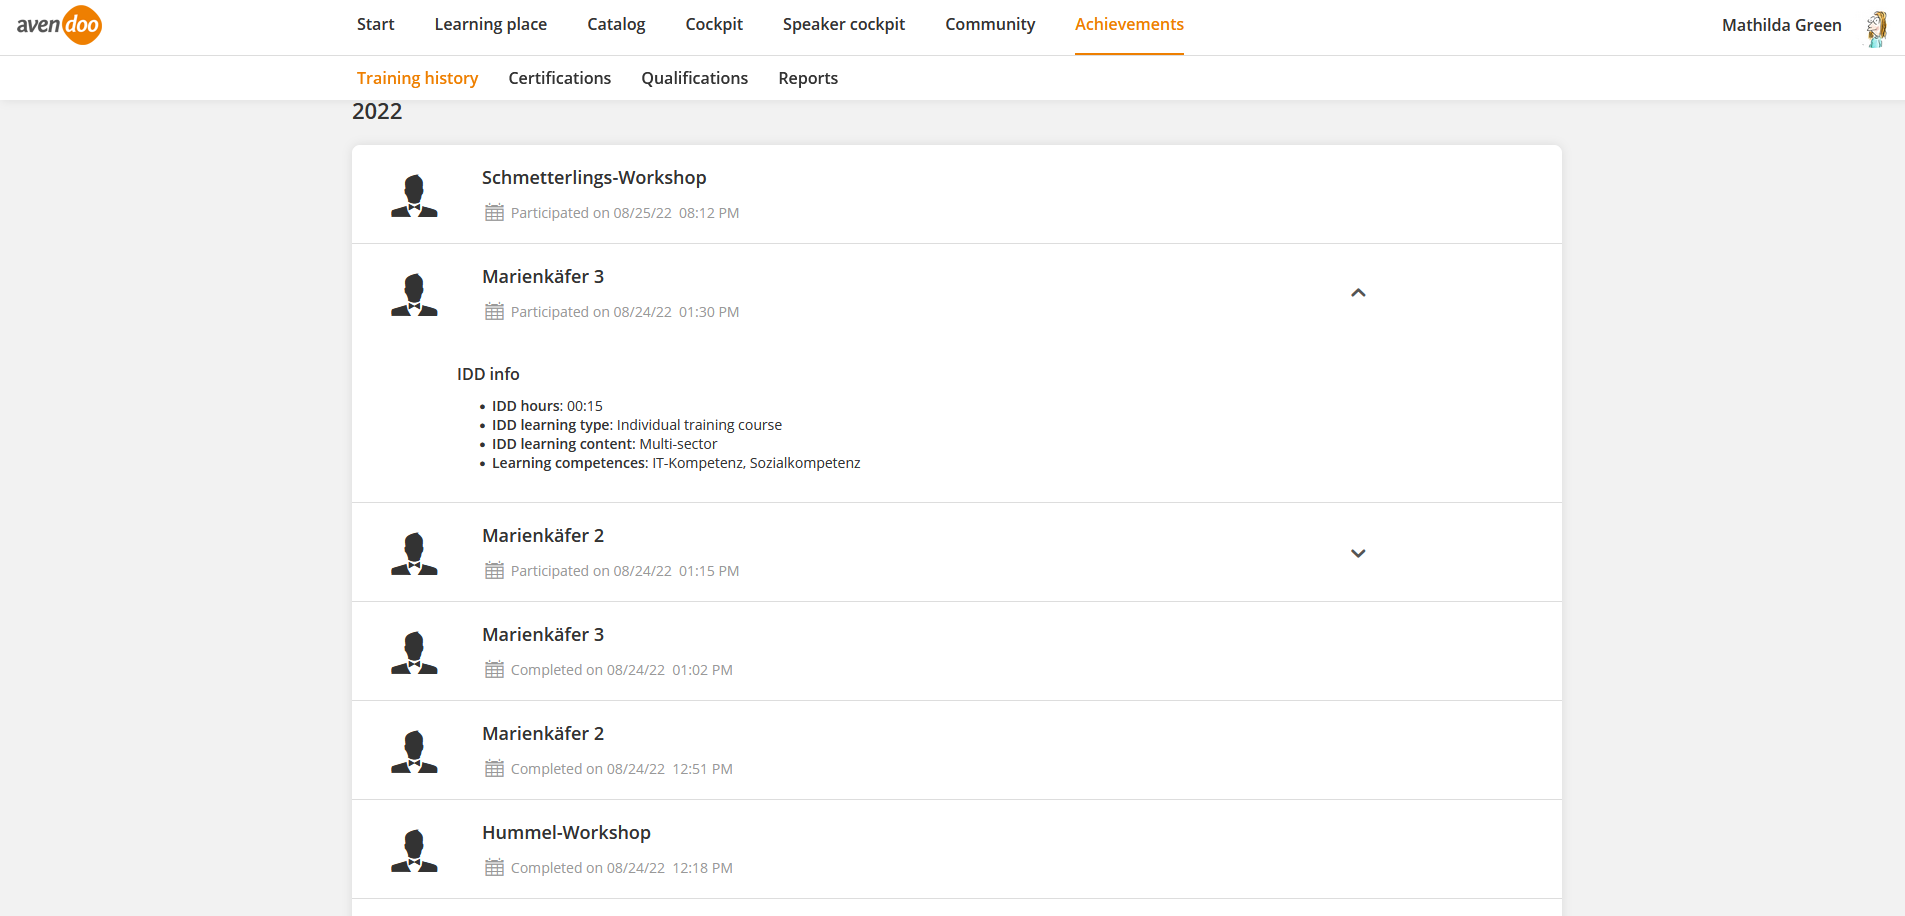
If the author has maintained the IDD parameters in the corresponding event or the corresponding course you see since version 17.35 on this tab the IDD hours, the IDD learning type (single training for example), the IDD learning content (Multi-sector for example) and the learning competences (IT competence for example). Several learning competences like IT competence and social competence are possible per entry (see fourth screenshot).
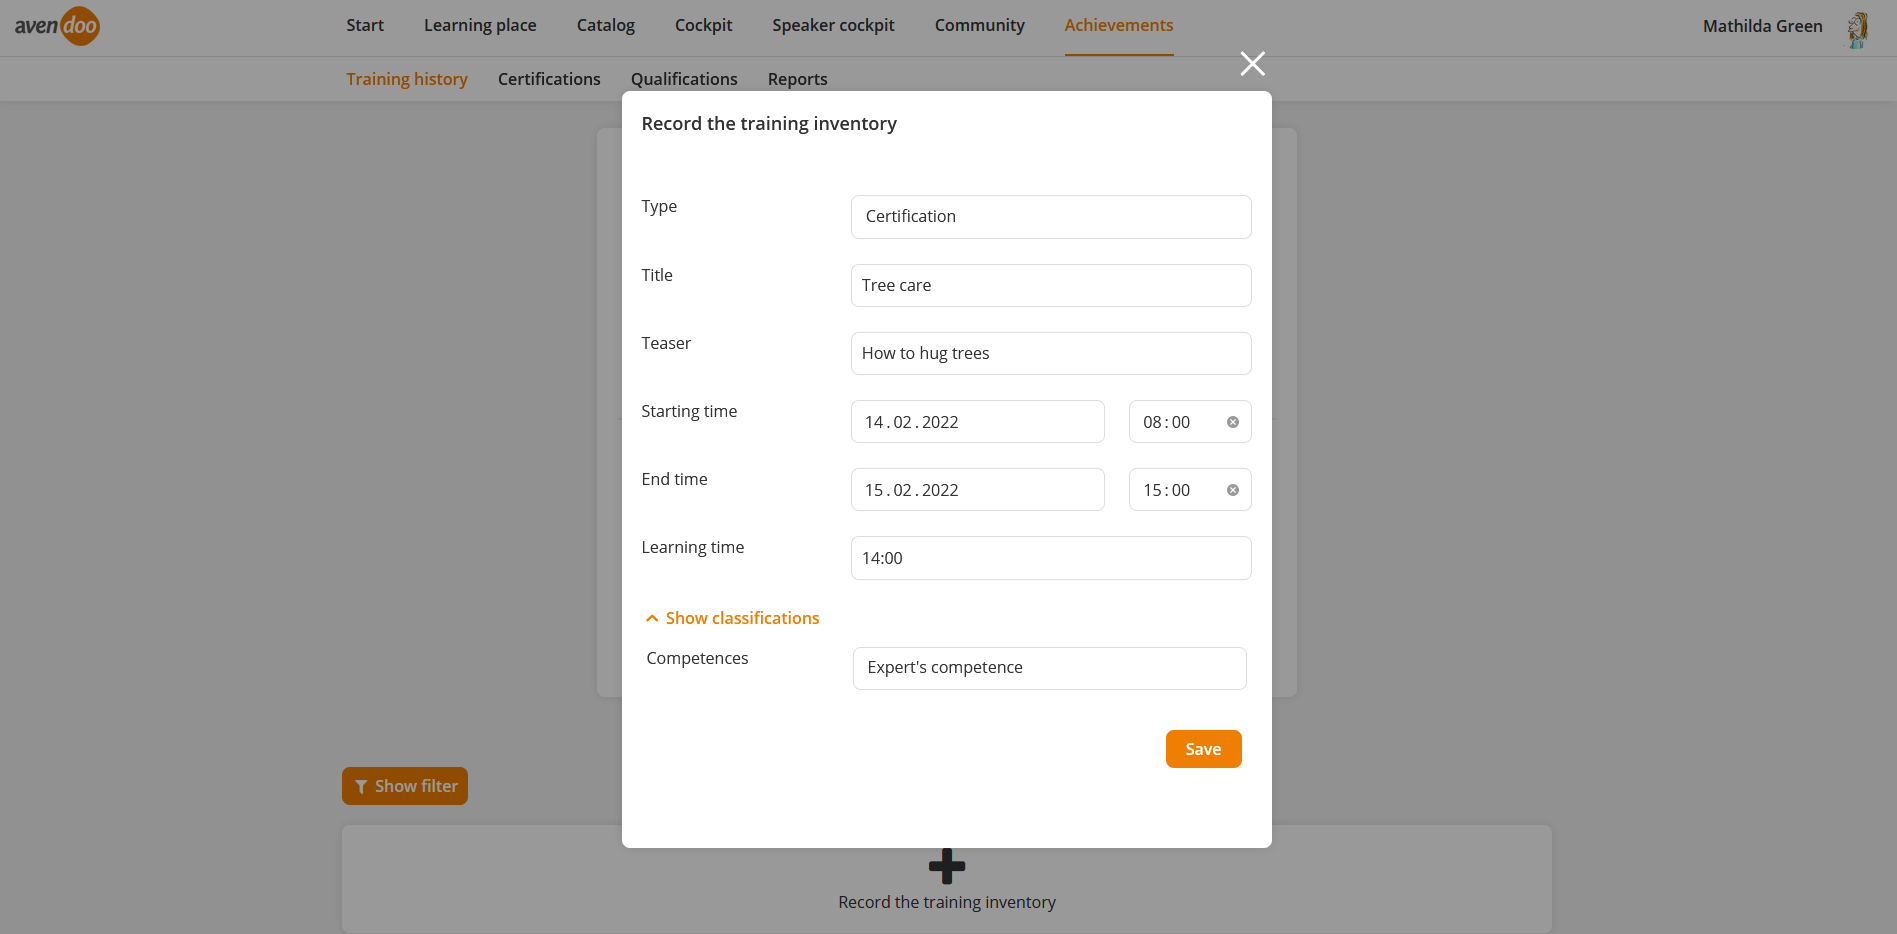
To create training inventory (type Event, Certification or Qualification), click on +Record the training inventory. Enter a title and a teaser, select a starting time and end time and enter optionally a learning time. Furthermore you can Show classifications and you can select them. Finally you click on the button Save. Then the created training inventory will be shown, which you can delete if applicable.
Regarding the training inventory the following rights are relevant for learners:
Furthermore there are the following rights relevant for team leaders regarding the training inventory:
- Create training inventory entreies for employees,
- Create a certificate and
- Record certification.
Furthermore you can create a certification to the typ Event. You can create a certification or you can upload a pdf file or/and an image. Therefore enter a certification title, select the language and enter the validity. Prerequisite is, that the author has selected a certification template in the Client wizard.
The time of the certification is always 00:00, except in context with an event the starting time of the certification is the end time of the event.
If you select the type Certification, you can enter under Advanced options the certification serial number, the provider, the provider URL, a comment and/or a result. These data will be shown to the author on the sub tab Certifications of the tab Accomplishments in the User wizard of the corresponding user.
Click Show classifications to enter the classifications.
Finally you click the button Save.
You can delete self-recorded entries.
Certifications
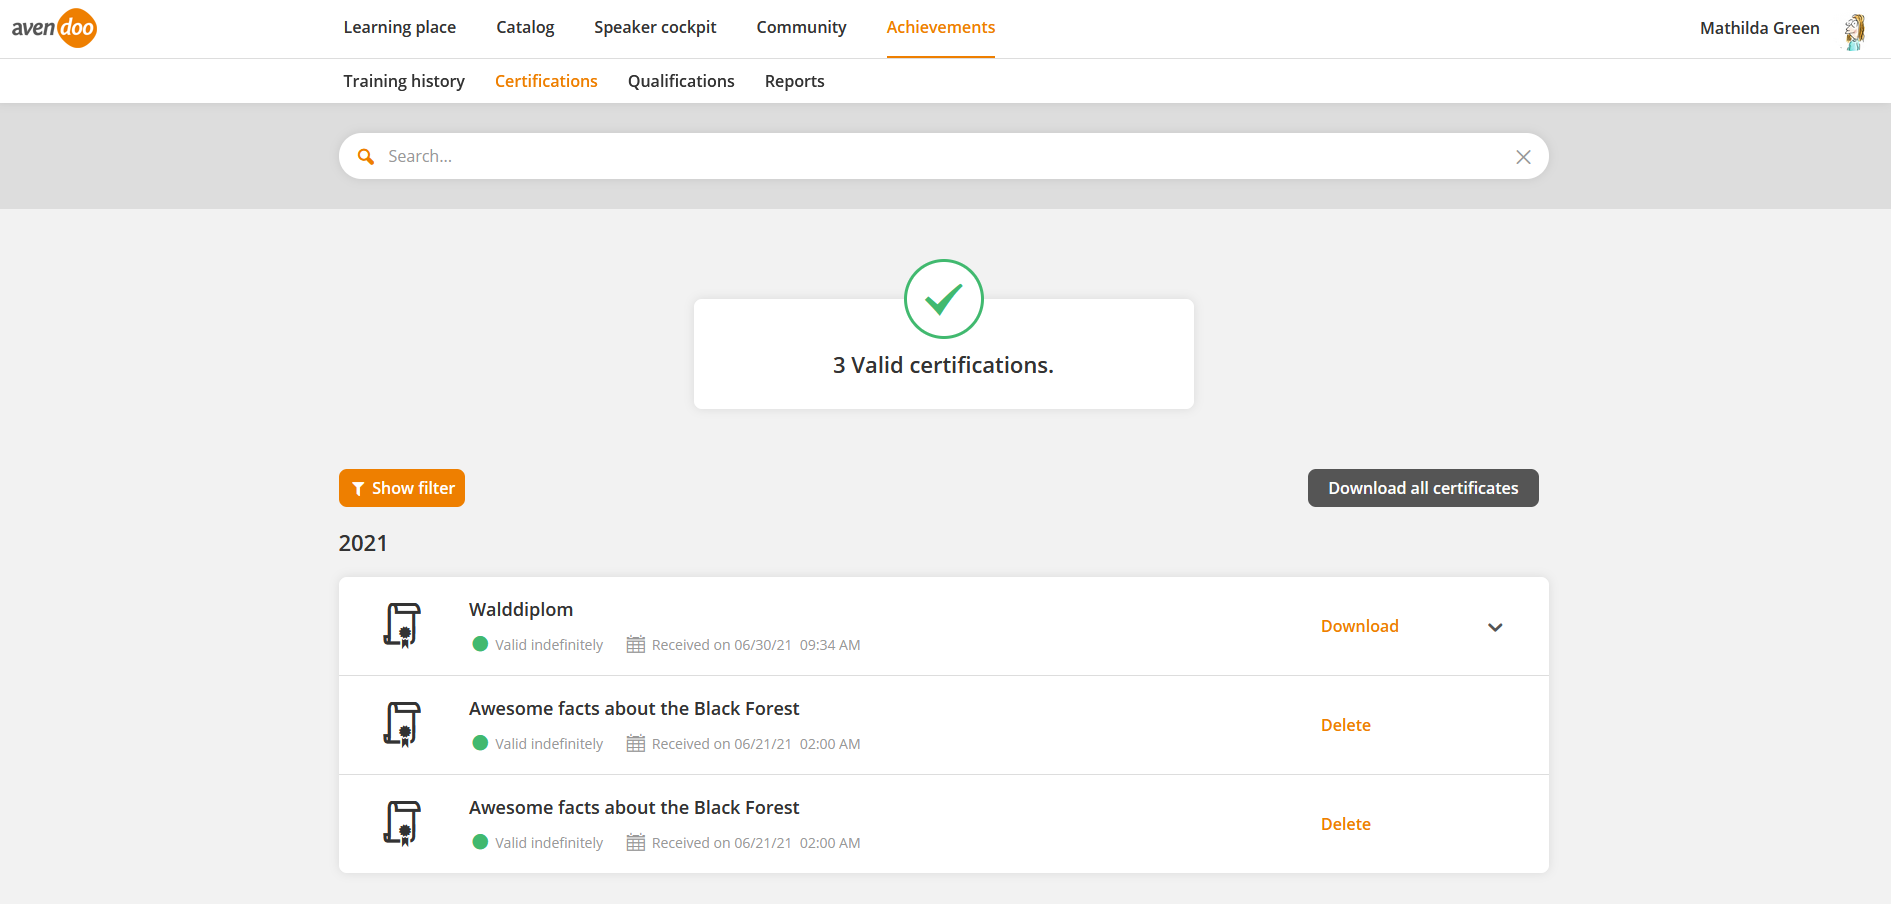
As soon as you have achieved certifications, these are listed under Certifications.
You can hide or show the year date via clicking the arrow on the left side of the year date.
The certifications on this page can have the following colored markings:
- Green: this means they are always valid,
- Red: this means they are invalid or
- Orange: this means the expiration of the validity should be shown x days before.
If you click the button Show filter, you will see the filters Title, Validity (Valid, Expires soon and Expired) and Time period (Start and End date). Via clicking the appropriate line you select the filter, which can remove via click on X. You close the filter list via click on X.
Furthermore you can Download filtered certifications or Download all certifications. Also you can upload or substitute a file per certification. To upload or substitute a certification file click first the arrow besides Download and then the button Upload file.
If certifications are no more valid, you can re-certificate them via the link Renew certification. If this re-certifications has be done, you see when clicking the arrow of the single certification. If there are no possibilities for re-certification, you will see this.
Examples for uploading a file
If you want to replace a certification file, because your own data has to be updated (you got married and your last name has changed for example), you can do this via the button Upload file. This button is only shown under the certification, if the author has assigned you the user right Replace own certification file. If you click on this button, the dialog window of the explorer opens and you can replace the certification file. Furthermore you can replace an existing certification file with an original certificate of an external provider. Note that the function Replace an own certifcation file is only relevant since the new frontend. Also it’s important, that the author has activated the toggle Manually recordable on the tab Parameters in the Certificate wizard.
Qualifications
As soon as qualifications are created, you see them listed on this tab.
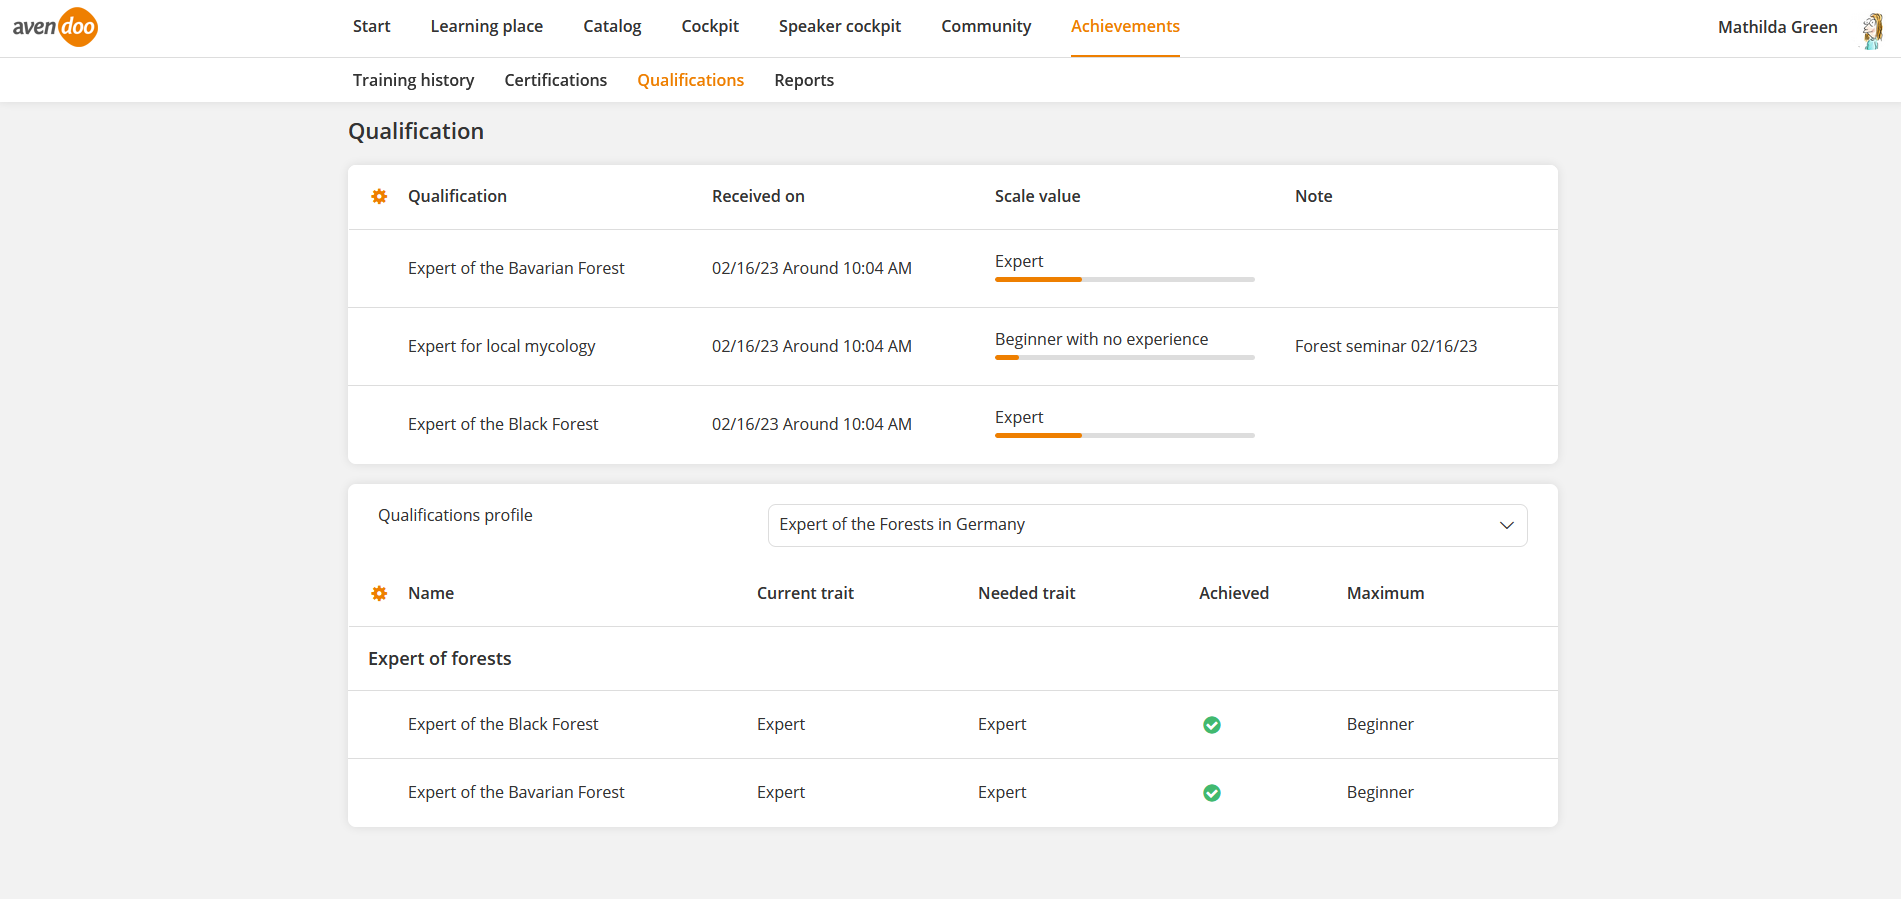
On this tab you get an overview of qualifications regarding title, Scale value and note.
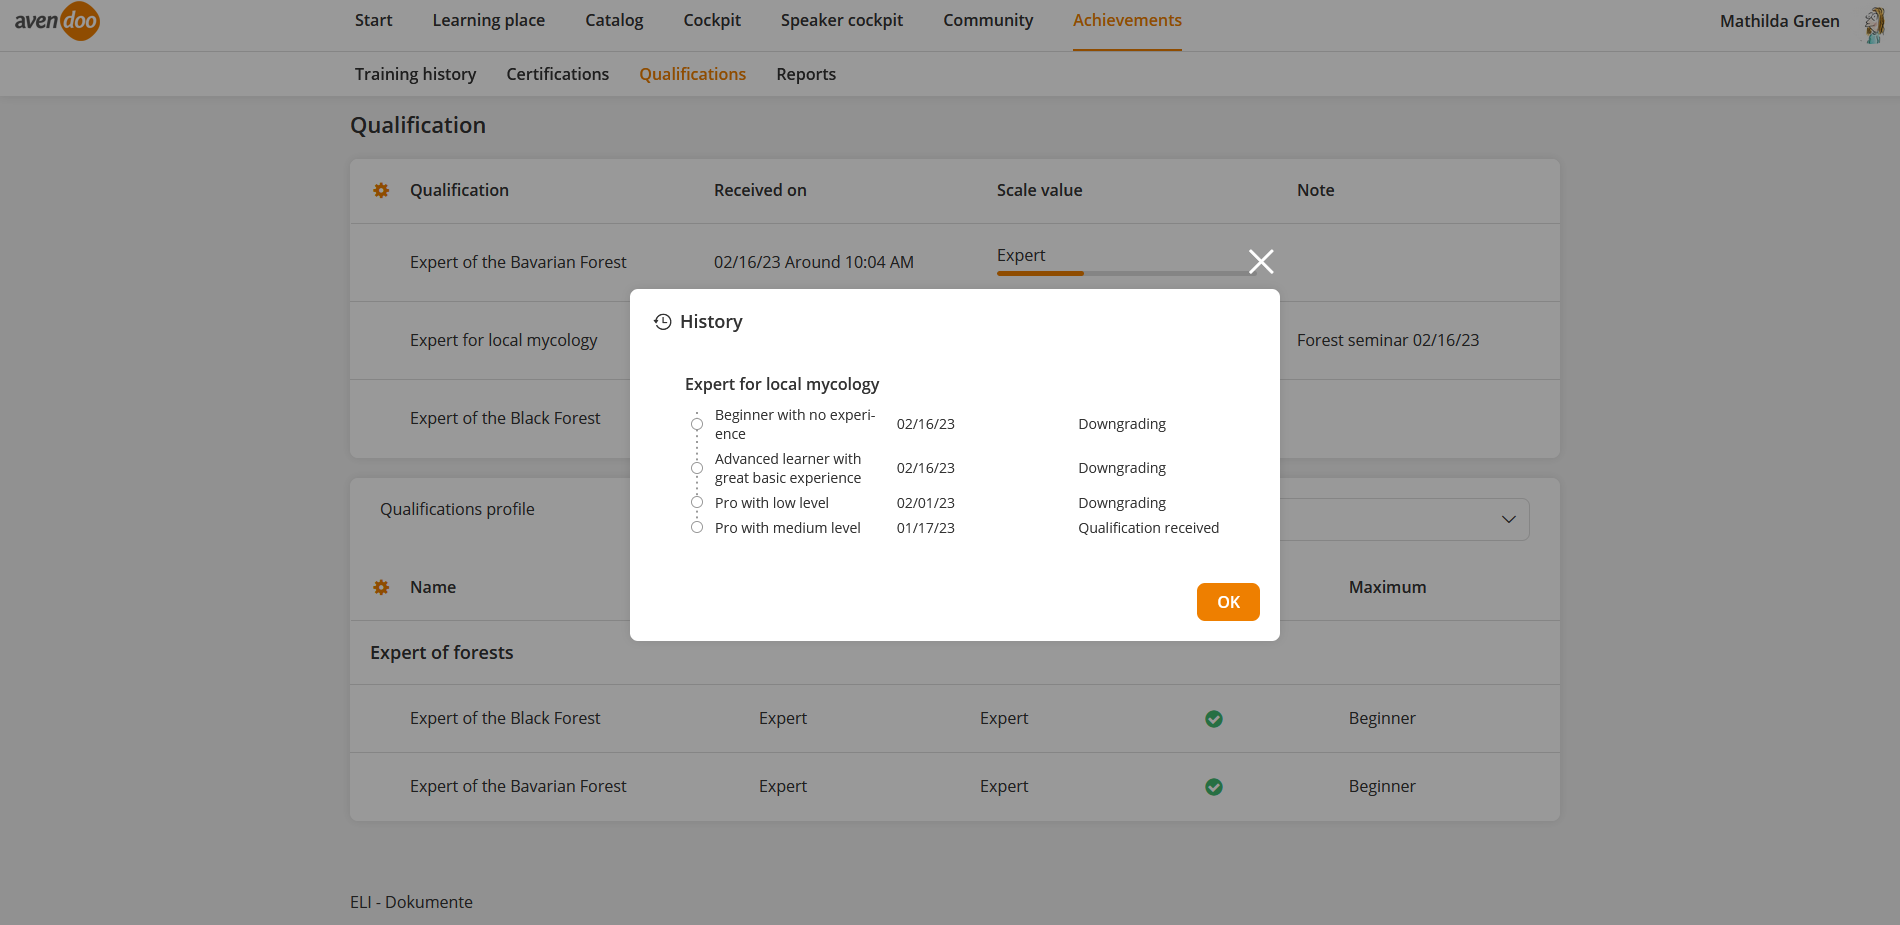
Since version 17.44 you see, if the author has configured a downgrading for your qualification (see first screenshot) and when the next downgrading will happen. When you click the corresponding qualification with downgrading, you see the downgrading history (see second screenshot). There are also training inventory entries generated, you can see on the tab Training history. Your superior can also edit or delete your qualification in the Employees view of the cockpit.
Example:
You have received the qualification on 02/16/23 and the next downgrading is on 03/02/23. This means, the author hat configured a 14 days rhythm for the downgrading process. The downgrading will happen as long as the lowest scale value or level will be reached. If “Expert with medium knowledge” is the highest scale, you will get on 03/02/23 the next lower scale, this means “Expert with lower knowledge”. This downgrading process will happen each 14 days, until the lowest scale “Beginner with low knowledge” will be reached.
Via drop down fields you can filter by Qualifications profile and Comparison profile. You can click the corresponding qualifications in the qualification profile and then you see all course activations activated for you and with them you can close a “qualification gap”.
To add a qualification, select a qualifications profile (the selection is corresponding to the assigned roles of the appropriate employee) and click on the button Add qualification. Then you select the Qualification and the Scale value and you enter a note regarding your decision and click on the button Confirm. If needed you can Cancel entering the data. You can edit or delete the added qualifications. Now you see in the overview of the qualifications, if a qualification with the needed scale value is achieved.
Via the selection Comparison profile you can show a comparison profile, which are available in the client.
The author with administrative rights can define the columns of the qualification table and the qualifications profile table. Further information you find on the page System settings.
The “Current trait” is hidden in the qualifications profile table in the second screenshot for example.
My points
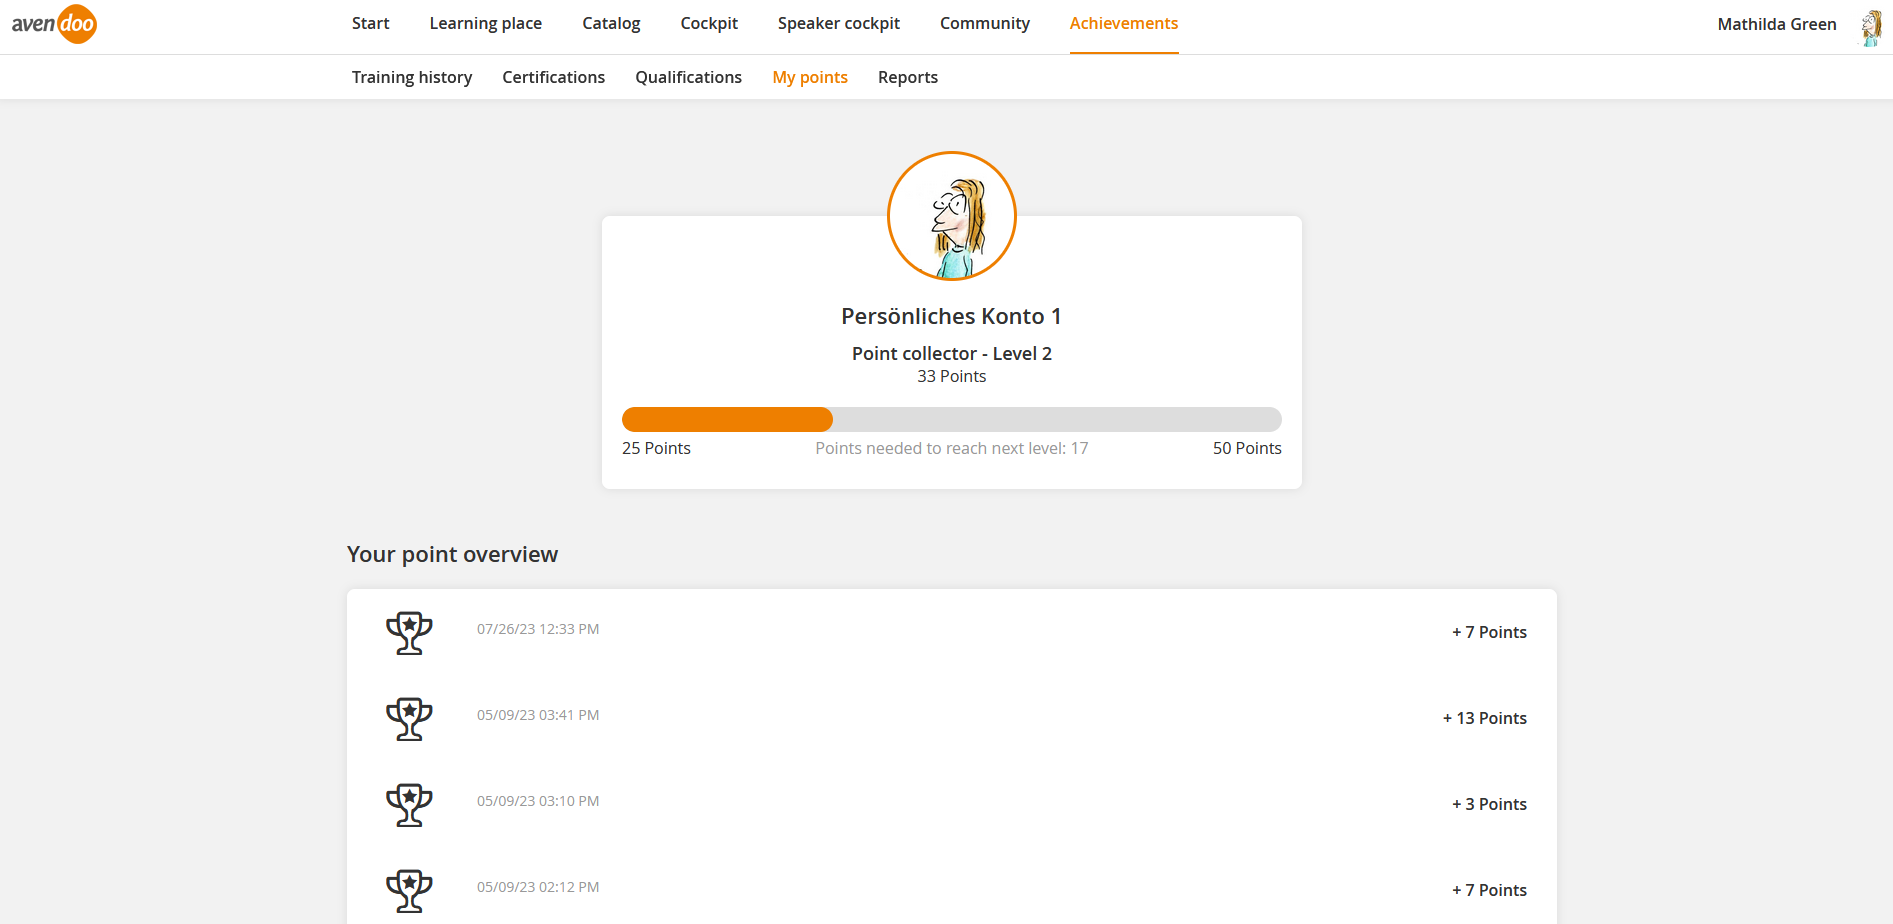
If the author has created a gamification element and has assigned to a course activation and has registered the corresponding user to the course activation, you see, as soon as the course activation is successfully completed, under My Points your Level, your total sum and a status of your already achieved points in courses, to which you are already registered and you see how much points you need for achieving the next level. Furthermore you can show Your Overview of Points (see first screenshot) to show the listed learning units with total sum and the date, on which you have achieved your points.
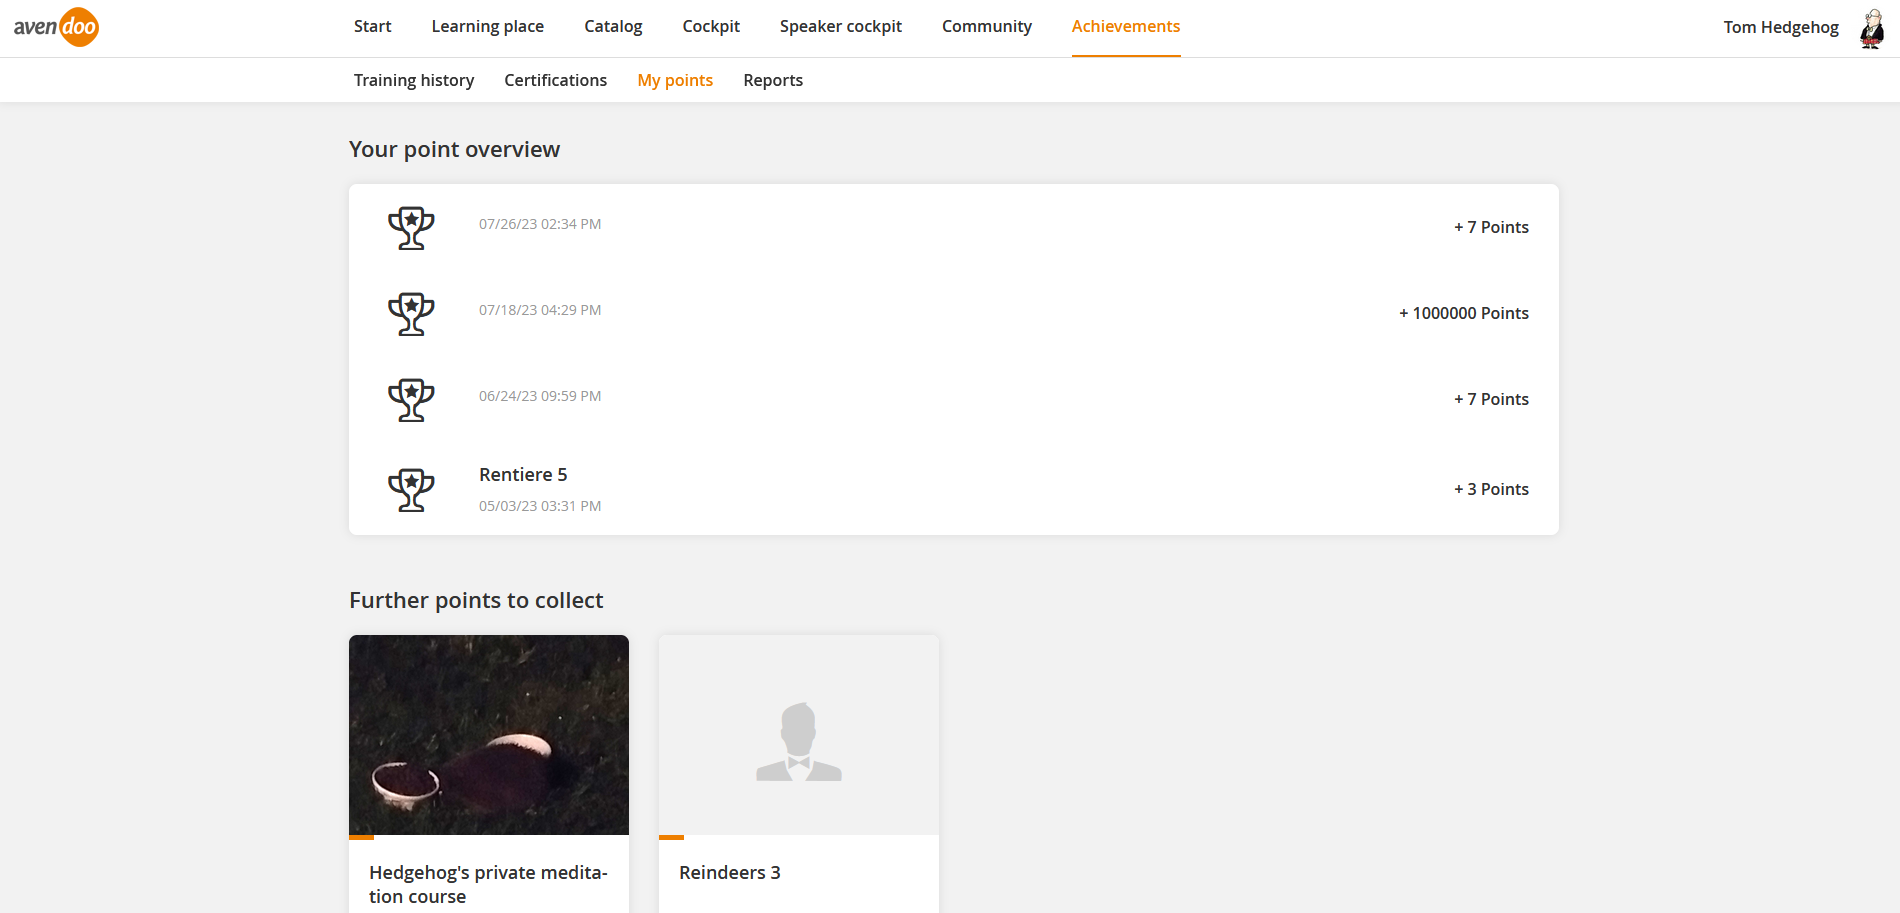
Also you can show Further points to collect (see second screenshot) to show the list with the learning units (linked to the course main page) and the points for getting the next level for example.
The display is also depending on configuration of the level structure in the system setting gamification.configuration.
Reports
As the author has assigned you report templates, the tab is shown and these report templates are listed.
On this tab you get an overview of reports regarding the report category, sub category and report. Via right click on the gear wheel you can configure the table view.
Via click on the appropriate line of the report the Report wizard of the appropriate report opens. Now you can configure the report regarding filter, report columns and sorting as well as creating and managing favorites and subscriptions.
