![]() If you have created an event date in the Event date wizard and then selected it, the function Duplicate is available.Via click on the icon you can duplicate the selected event date by a certain pattern. Thus you can create quick and easy further event dates.
If you have created an event date in the Event date wizard and then selected it, the function Duplicate is available.Via click on the icon you can duplicate the selected event date by a certain pattern. Thus you can create quick and easy further event dates.
Master data
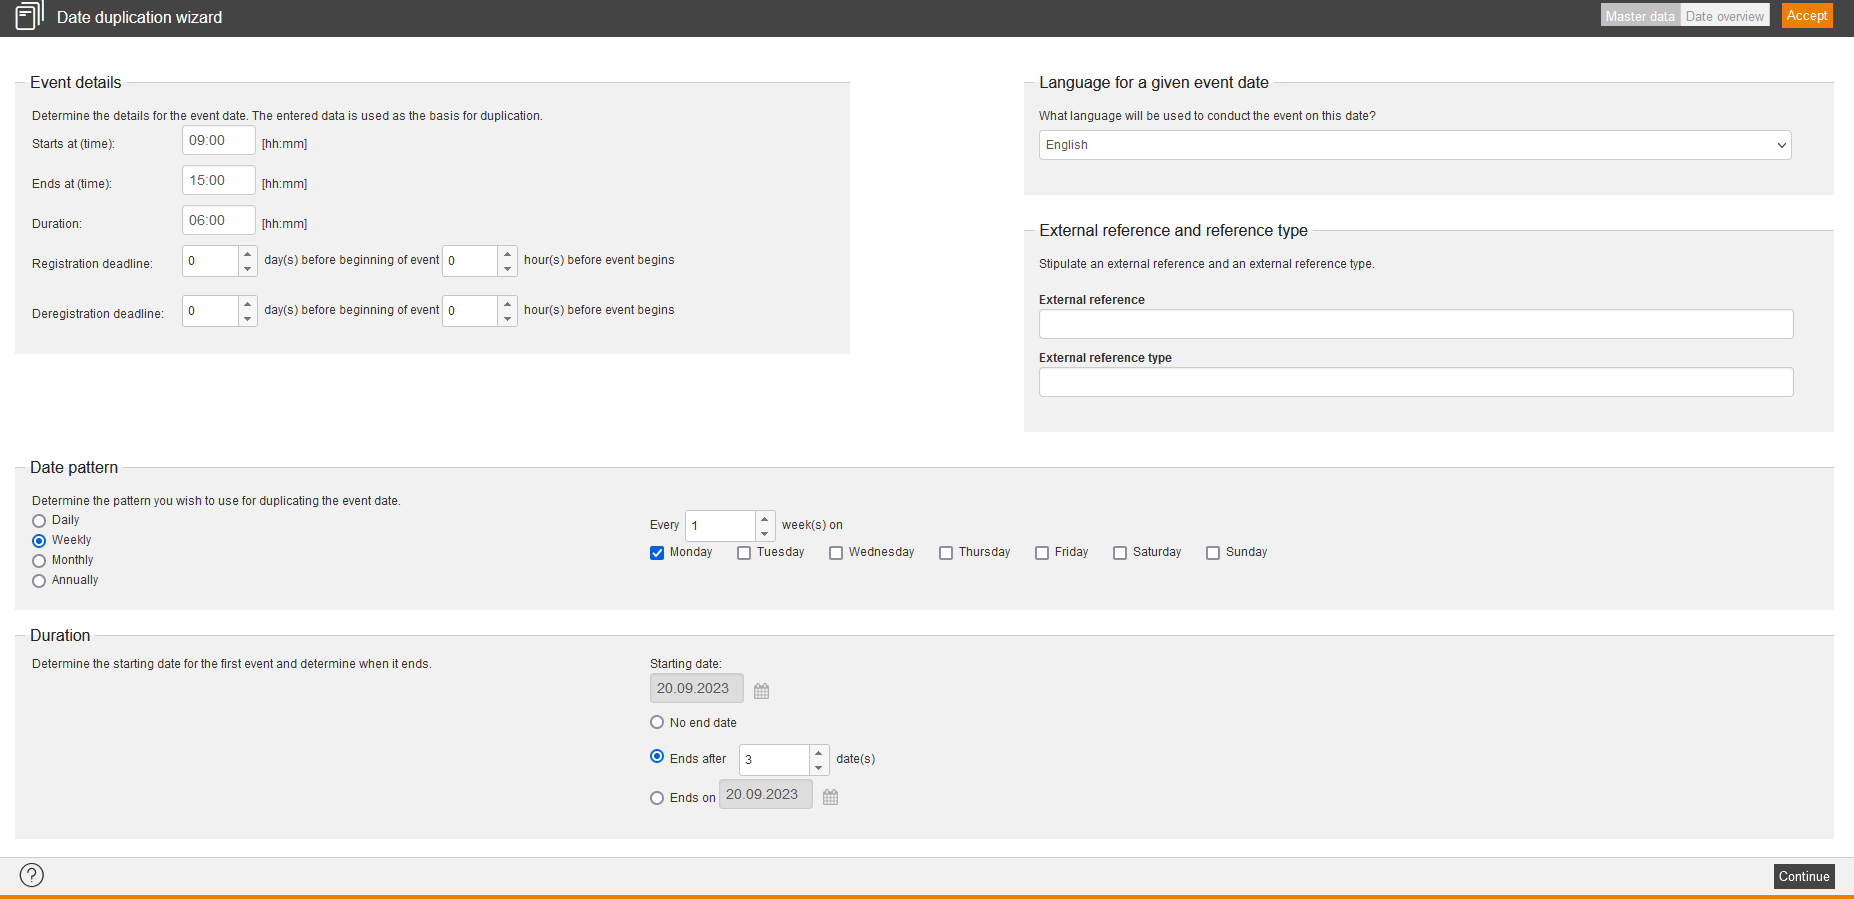
Event details
Determine the details for the event date. The entered data is used as the basis for duplication. Thus define Starts at and Ends at in days and hours regarding the duration and the registration deadline.
Language for a given event date
Choose the language, in which the event will be conducted.
External reference and reference type
Enter an external reference and an external reference type for the event date.
External references are used for organizing and for linking to other systems. This you can use for manual assignments and on using interfaces, for example: REST API. You can search for external reference in the advanced filter function.
The external reference represents a reference value like ID, serial number or name. The external reference type describes which reference it is and how to understand the reference value. This is very important, if there are different sources or types of references, which use the same reference values.
Examples:
Reference type SAP customer number with the external reference 100234
Reference type SAP user ID with the external reference 000004
Date pattern
- Every day(s)
- Every workday (Monday to Friday)
Duration
Define the starting date for the first event date and define an end date.
- No end date
- Ends after ____ date(s)
- Ends on ____
Event location
Define, if you want to use an existing location or if you want to enter a new location. Otherwise you can select Virtual classroom, iLinc or Cisco Webex.
Click on the button Select location. A new dialog window opens and shows you all available locations of your client. Select the favored room of the location and click on the button Select. Via Preview you can display the details of the location or room.
Status
Define the current status of the event. If you set the status directly to Active, users can register immediately to this event date, if the further settings enable it. An initiated event date won’t be available for users to do selfregistration. The reason is that you can edit the event dates for a whole year for example and you set them only quarterly to Active for restricting the date selection for the user. If you have the status Initiated you can automatically change this status on a fixed date to Active.
Participants & Quotas
Define a minimum and maximum of number of participants. Further you can enter the number of slots on the waiting list.
If the maximum number of participants is achieved, the coordinator receives automatically an e-mail.
Price
Enter here the price, which will be calculated on participation of this event.
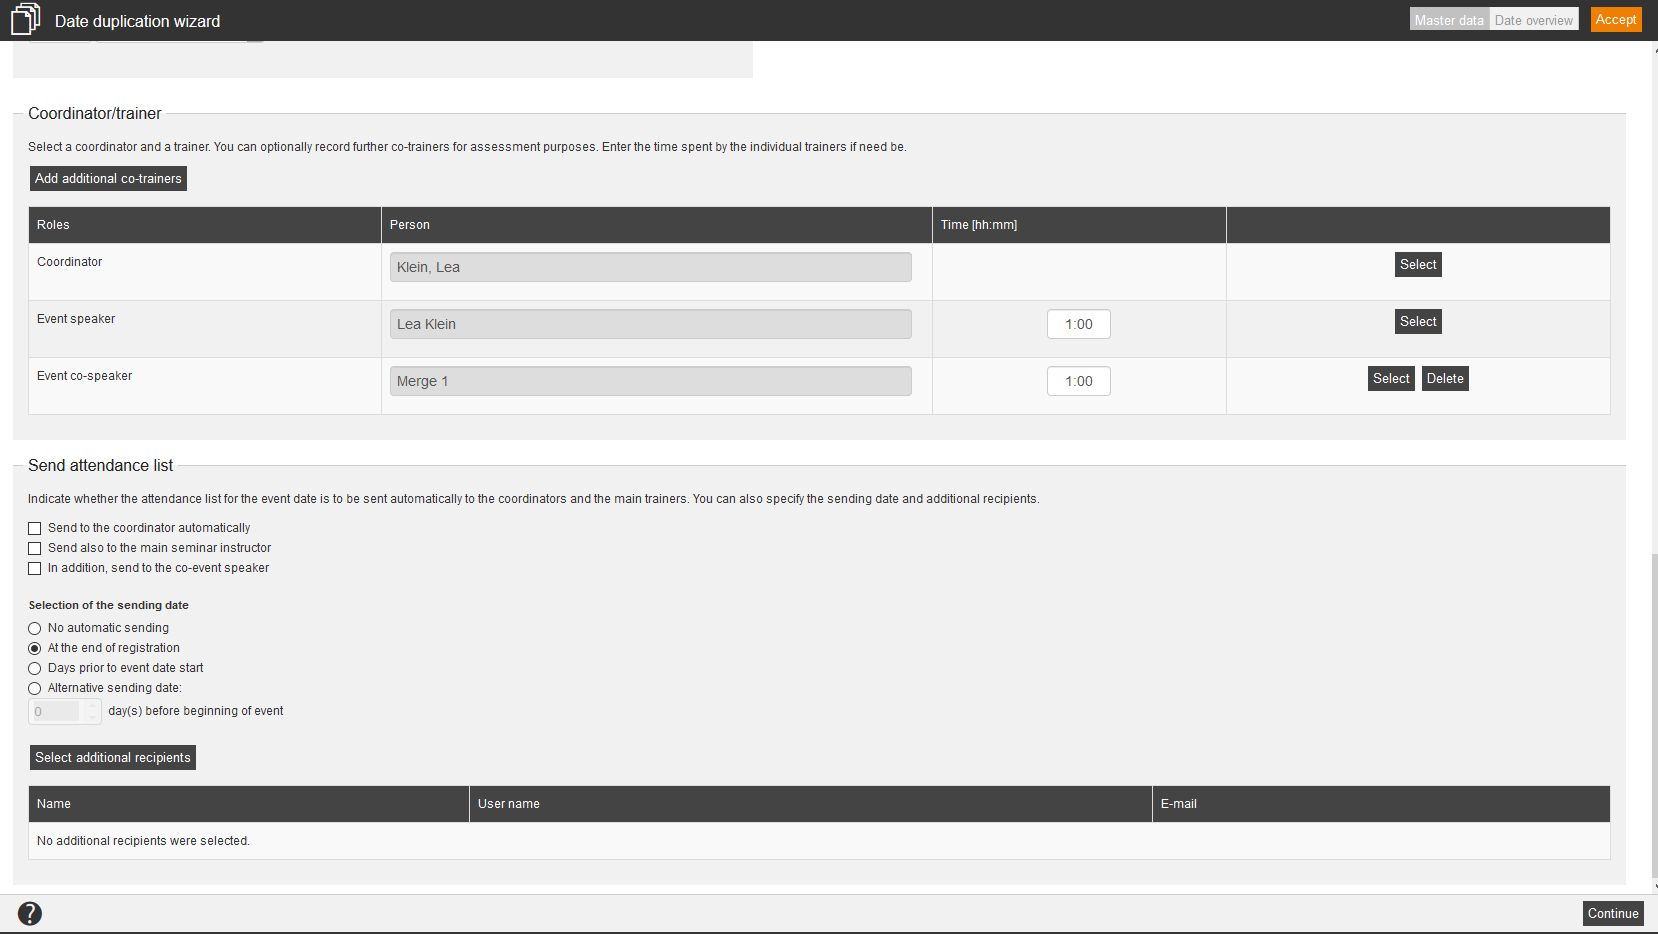
Coordinator/trainer
Select an event speaker. You can record further event co-speakers for evaluation. Enter if applicable the expenditure of time of the single event speakers. To select a person, click on the button Select. Via the inquiry function you can send an e-mail with the event date to the event speaker or the coordinator.
Send attendance list
Define, if the attendance list of the event date should be sent automatically to the coordinators, the main event speaker and the co-speaker. Also you can define the sending date (At the end of registration or Days prior to event date start or Alternative sending date) and additional recipients. You can also select No automatic sending.
Which fields are shown on this tab, depends on what the author with the administration rights Read user-defined fields and Edit user-defined fields has created. This author also selects the field type (text field, object selection or dropdown) and in which wizard the user-defined field shall be shown, this means if in the Event wizard, Event date wizard, Course activation wizard or UCG wizard for learning units .
You find further information on the page “User-defined fields“.
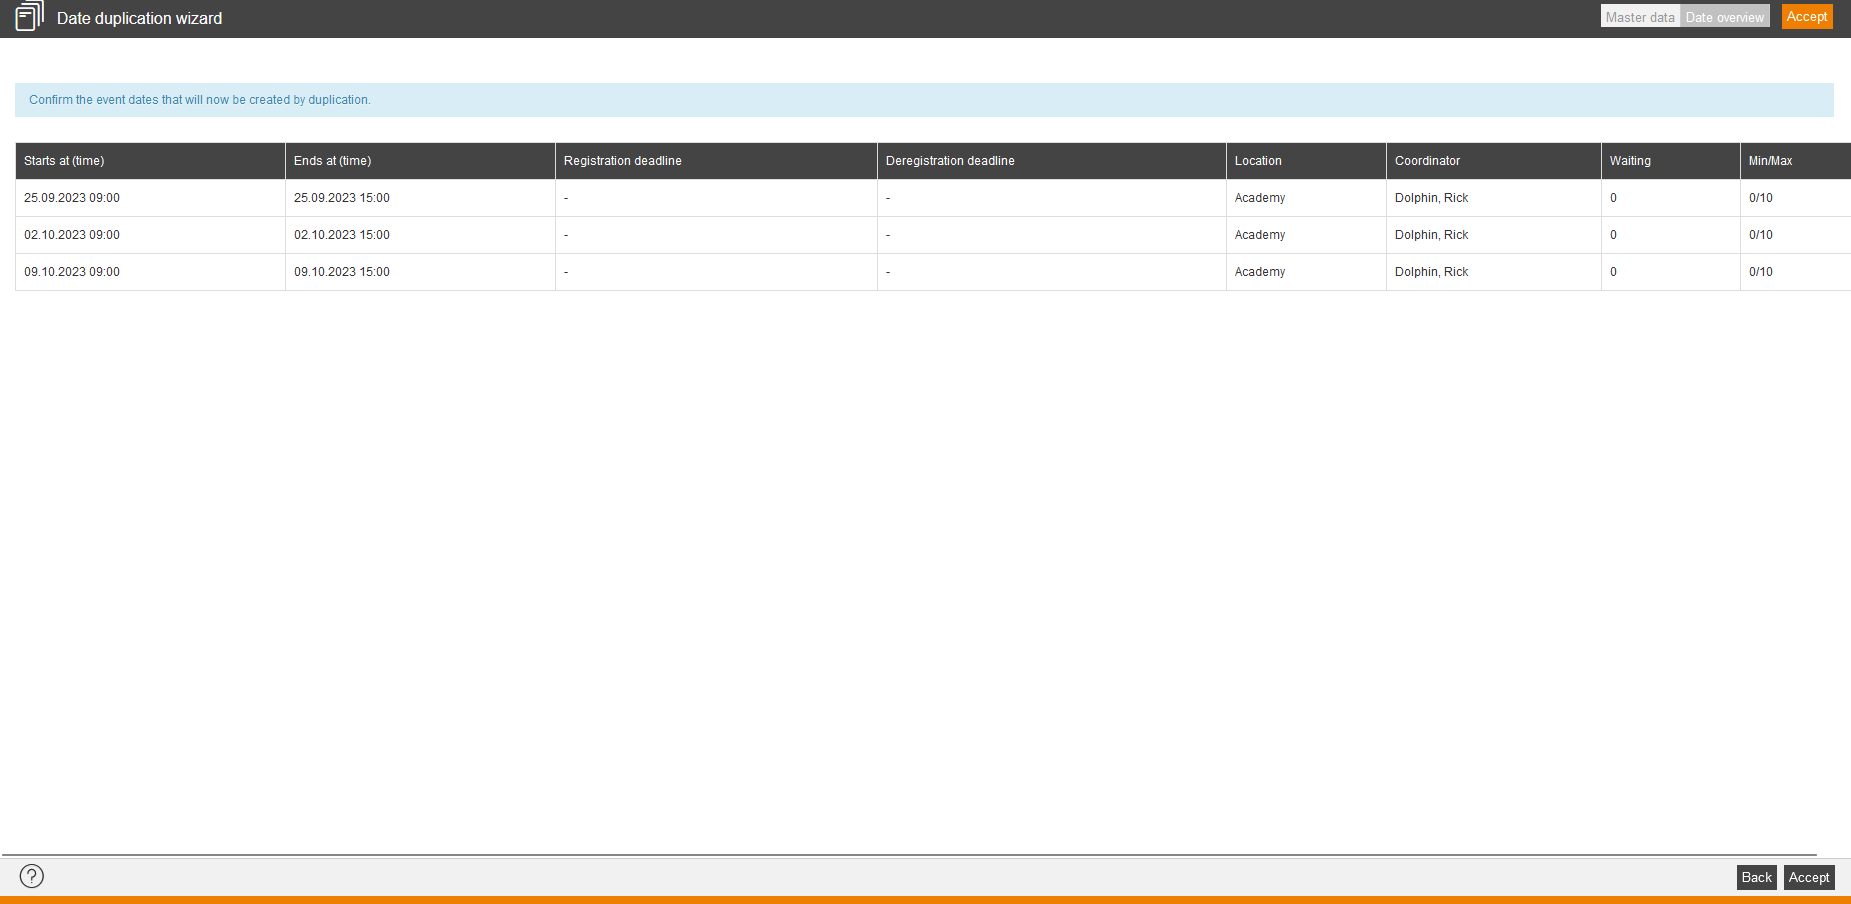
Date overview
On this view you see the new event dates, which are generated by the selected duplication. If your settings are correct and complete, click the button Accept. Thus the event dates will be generated. If you want to do some changes in the settings, click the button Back to change the settings on the previous tab Master data.


