Basics
Prerequisites
You got the right Read, select, Change, create, Delete (object permission) and Change external content via your author account (User management (objects) → Permission groups).
Use
Via the permission groups you define, which team leader rights, author rights and user rights are assigned to the members and dependent on the user type which available reports are assigned to. Example for an assigned report: A team leader has access to the report “Training inventory entries“, which he can show and open on his page Successes.
Functions
Besides these assigned rights you define via a selection of clients, for which user and authors the permission group is available. Finally, you can choose the roles, which are assigned to the members of the group.
Additionally, you can use the mass processing functions Copy and Delete for processing multiple permission groups. More information about these functions you find under Permission groups: Mass processing functions.
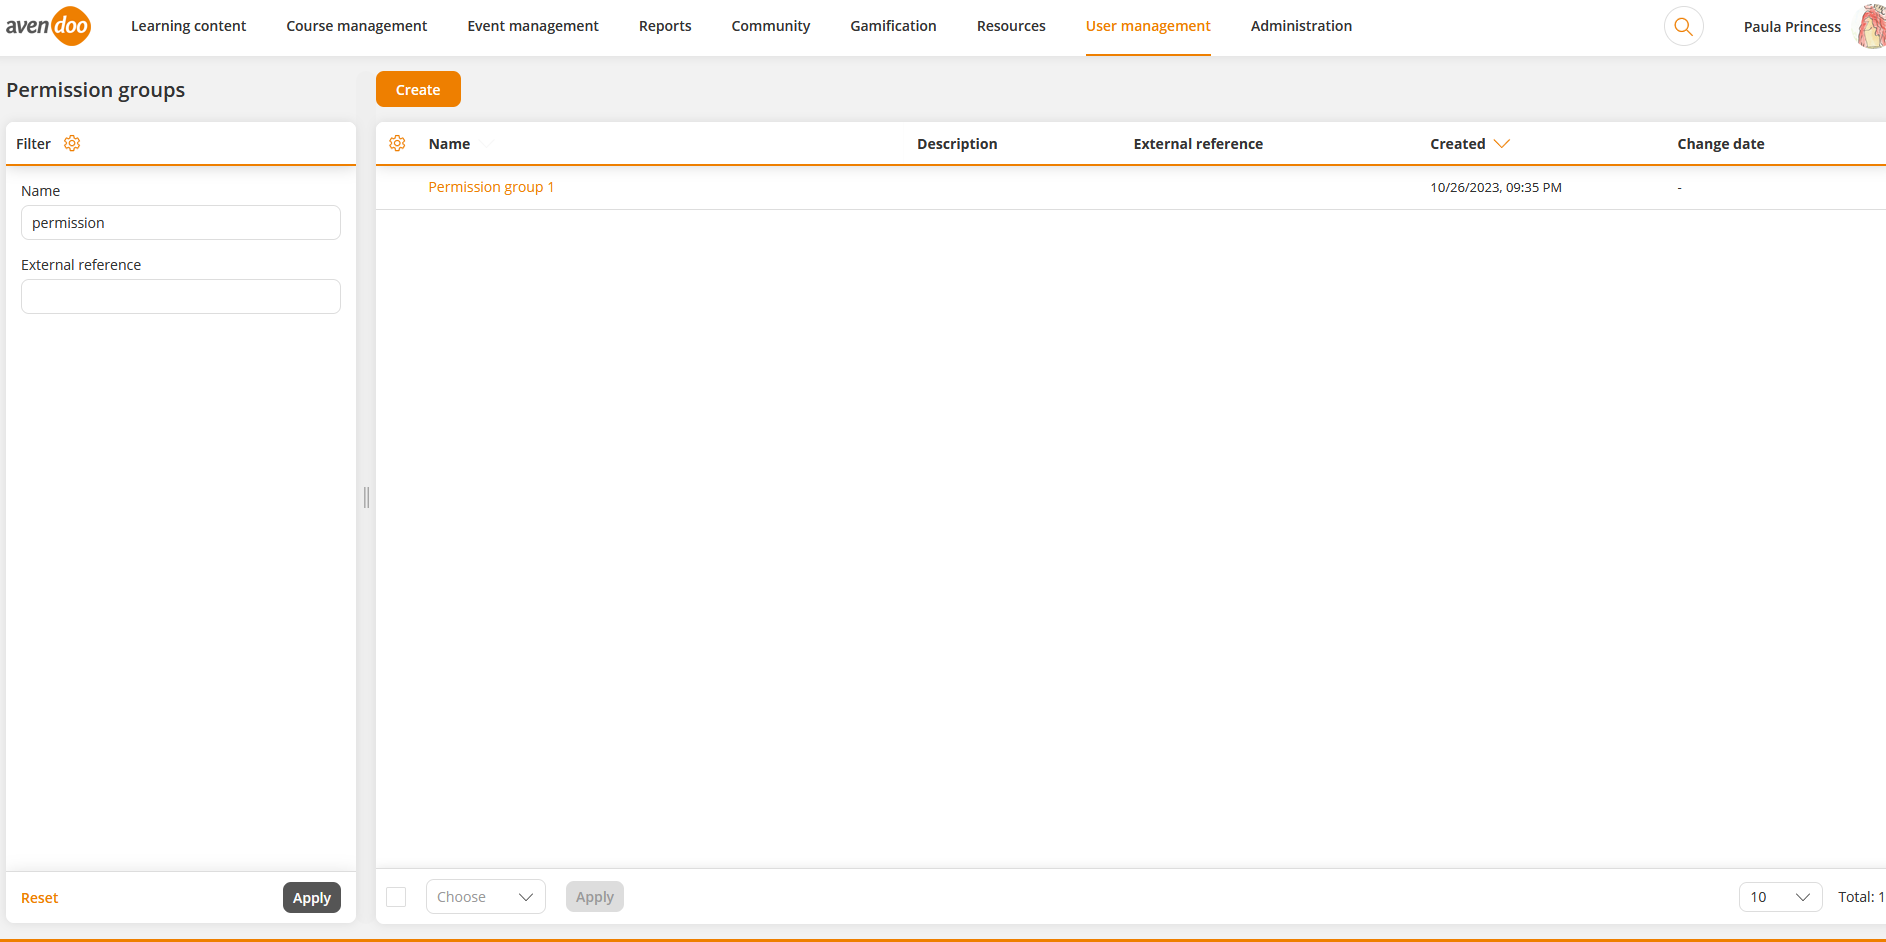
The following functions are available via the context menu of the corresponding permission group title.
Create new permission group
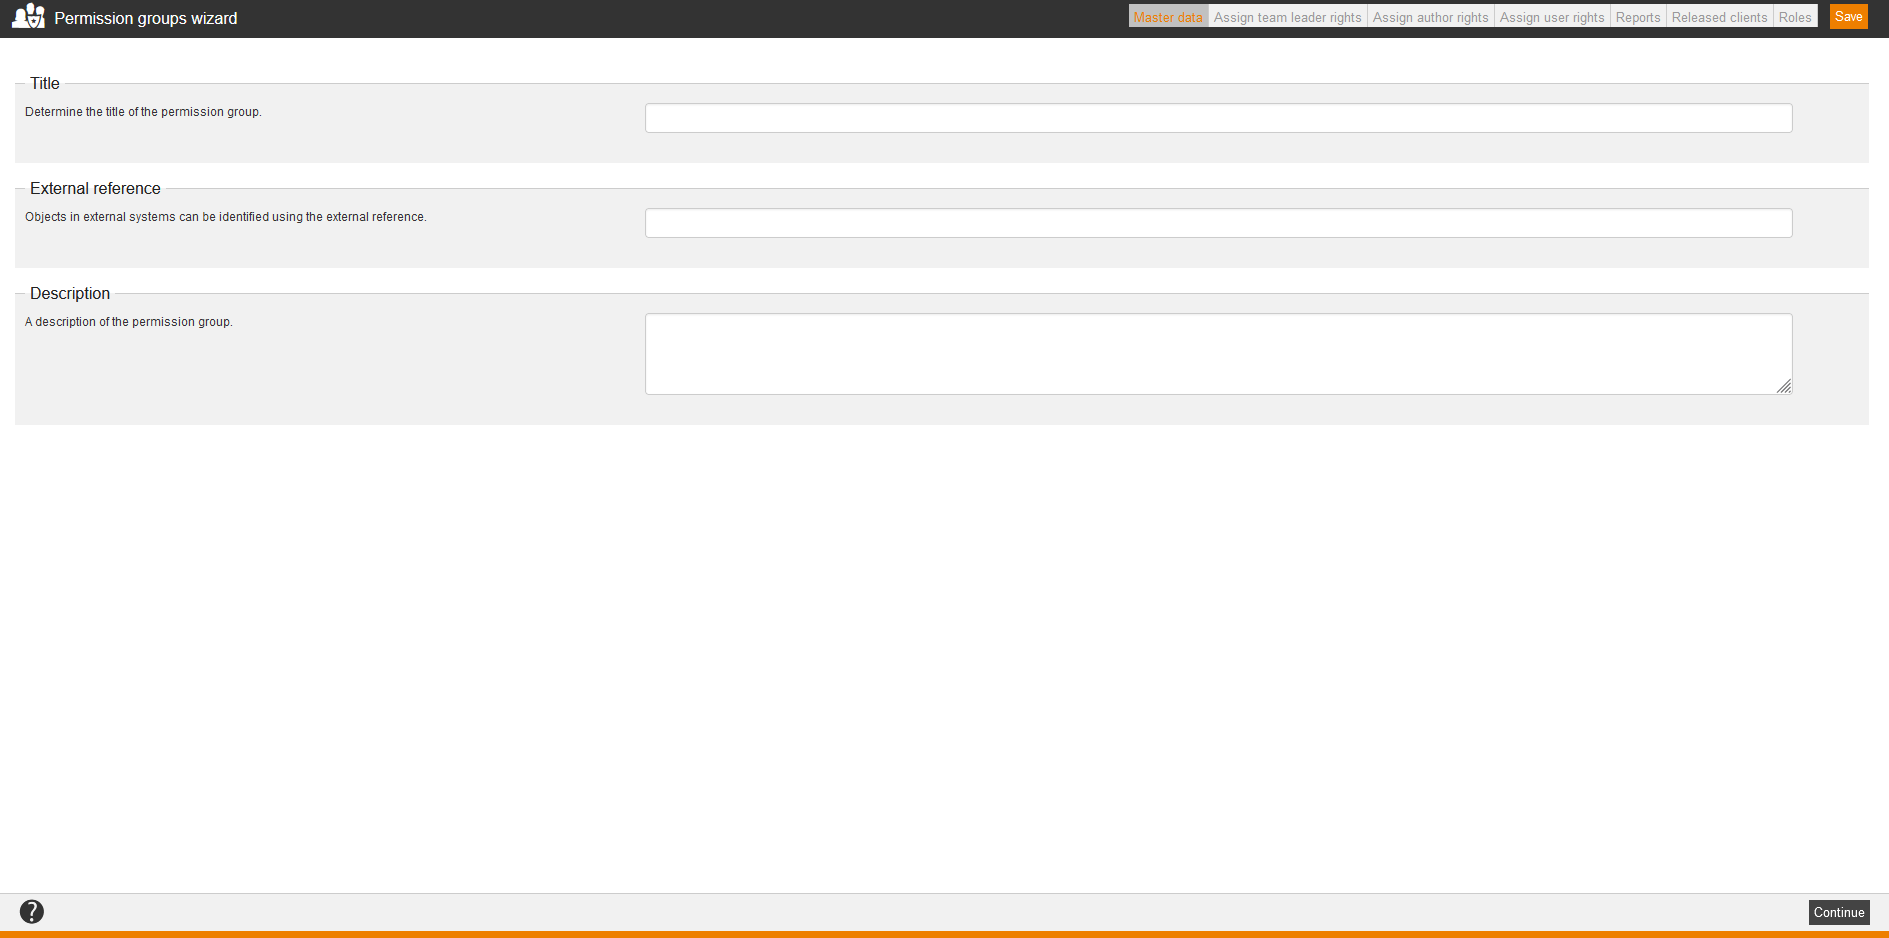
Master data
Title
Enter a title for the permission group.
External reference
Enter an external reference. Objects in external systems can be identified using the external reference.
Description
Enter a description of the permission group.
Assign team leader rights
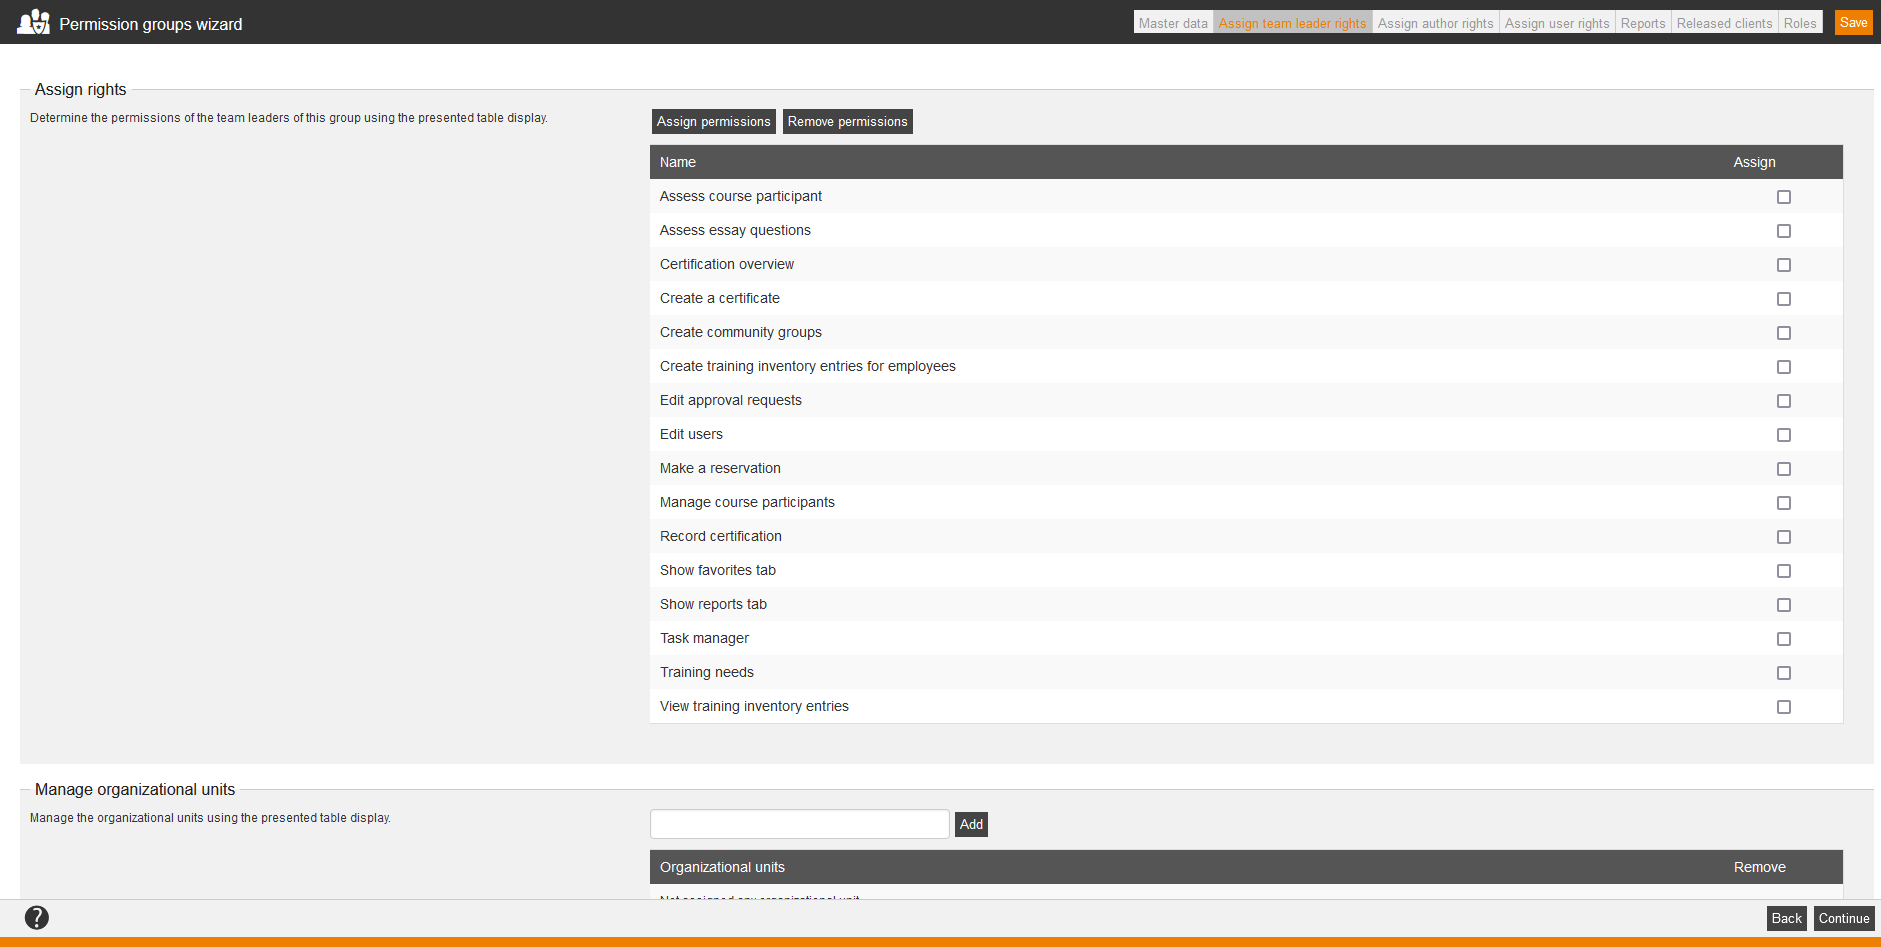
Assign rights
Define the single permissions of the team leaders via setting the check box. Via the button “Assign permissions” Avendoo® sets a check box at all permissions. If you want to remove the permissions, click on the button “Remove permissions”.
You can assign the following team leader rights:
- Assess course participant
- Assess essay questions
- Certification overview
- Create a certificate
- Create community groups
- Create training inventory entries for employees
- Edit approval requests
- Make a reservation
- Edit users
- Manage course participants
- Record certification
- Show favorites tab
- Show reports tab
- Task manager
- Training needs
- View training inventory entries
Manage organizational units
To manage organizational units, click into the field of the organizational units and choose one of the existing OUs or enter a text for the OU. You finish by clicking the button Add. Entries with % as wild card for any character are allowed. If the group is assigned to a user or an author, who wasn’t team leader before, he will be team leader. Via clicking the icon you delete the added OUs.
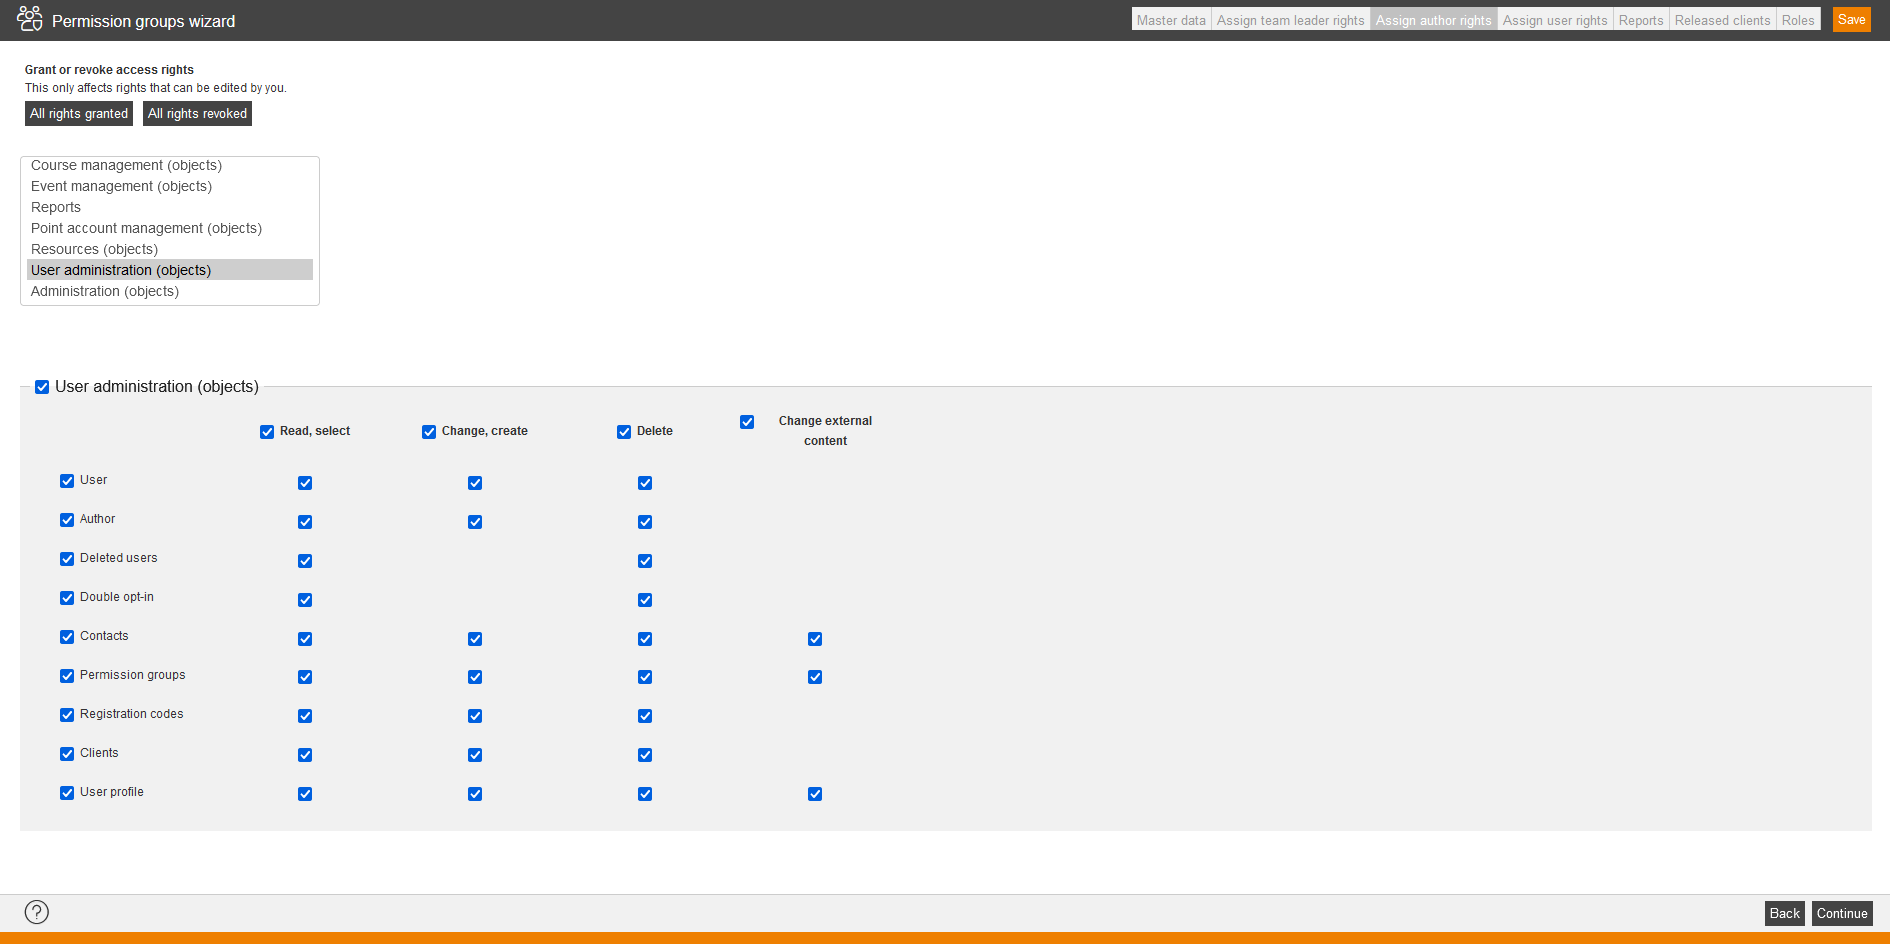
Assign rights
Define the permissions of this permission group via the displayed table by choosing the appropriate permission area and assign or remove the appropriate permissions.
Further information on the author rights you find in the chapter New author.
You can assign the following author rights:
- Activations
- Course activations
- Training plans
- Remote content activations
- Administration
- Administration (objects)
- Custom pages
- Request management
- Campaign
- Media for use everywhere
- SSO and import configuration
- System settings
- Moves
- Move templates
- PKCS#12 certificates
- User import events
- User-defined fields
- Community
- Course management (objects)
- Event management
- Access to the event manager
- All dates: Show event dates
- All dates: Do deregistrations and registrations
- All dates: Send invitation
- All dates: Send a follow-up e-mail and a thank-you e-mail
- All dates: Record attendances
- Own event dates: Show event dates
- Own event dates: Do deregistrations and registrations
- Own event dates: Send invitation
- Own event dates: Send a follow-up e-mail and a thank-you e-mail
- Own event dates: Record attendances
- Event management (objects)
- General
- Import/export
- Import objects
- Export objects
- Import users
- Across import
- Migration import
- Import event dates
- Learning content
- Courses
- Media
- Instructional material
- Knowledge test questions
- Knowledge tests
- Events
- Feedback questions
- Feedback forms
- Assessments
- Remote content
- Web-based training offers
- Forums
- E-payments
- Flashcards
- Flashcard files
- Learning content (general)
- Feedback: Create overarching questions and designate feedback items template
- Show and edit questions CSS
- Organizational rights
- Point account management (objects)
- Reports
- Resources
- Resources (objects)
- Certificates
- Locations
- Materials
- Design templates
- Number ranges
- Grade key
- Qualifications
- Task templates
- Calendars
- Classifications
- Individual notifications
- Notifications
- Content connector
- Support
- Support
- Manage updates
The support author can assign you this access right. When you got this right, you got the functions of the automatic update and the display of the update steps on the tab Support.
- User administration (objects)
- User management
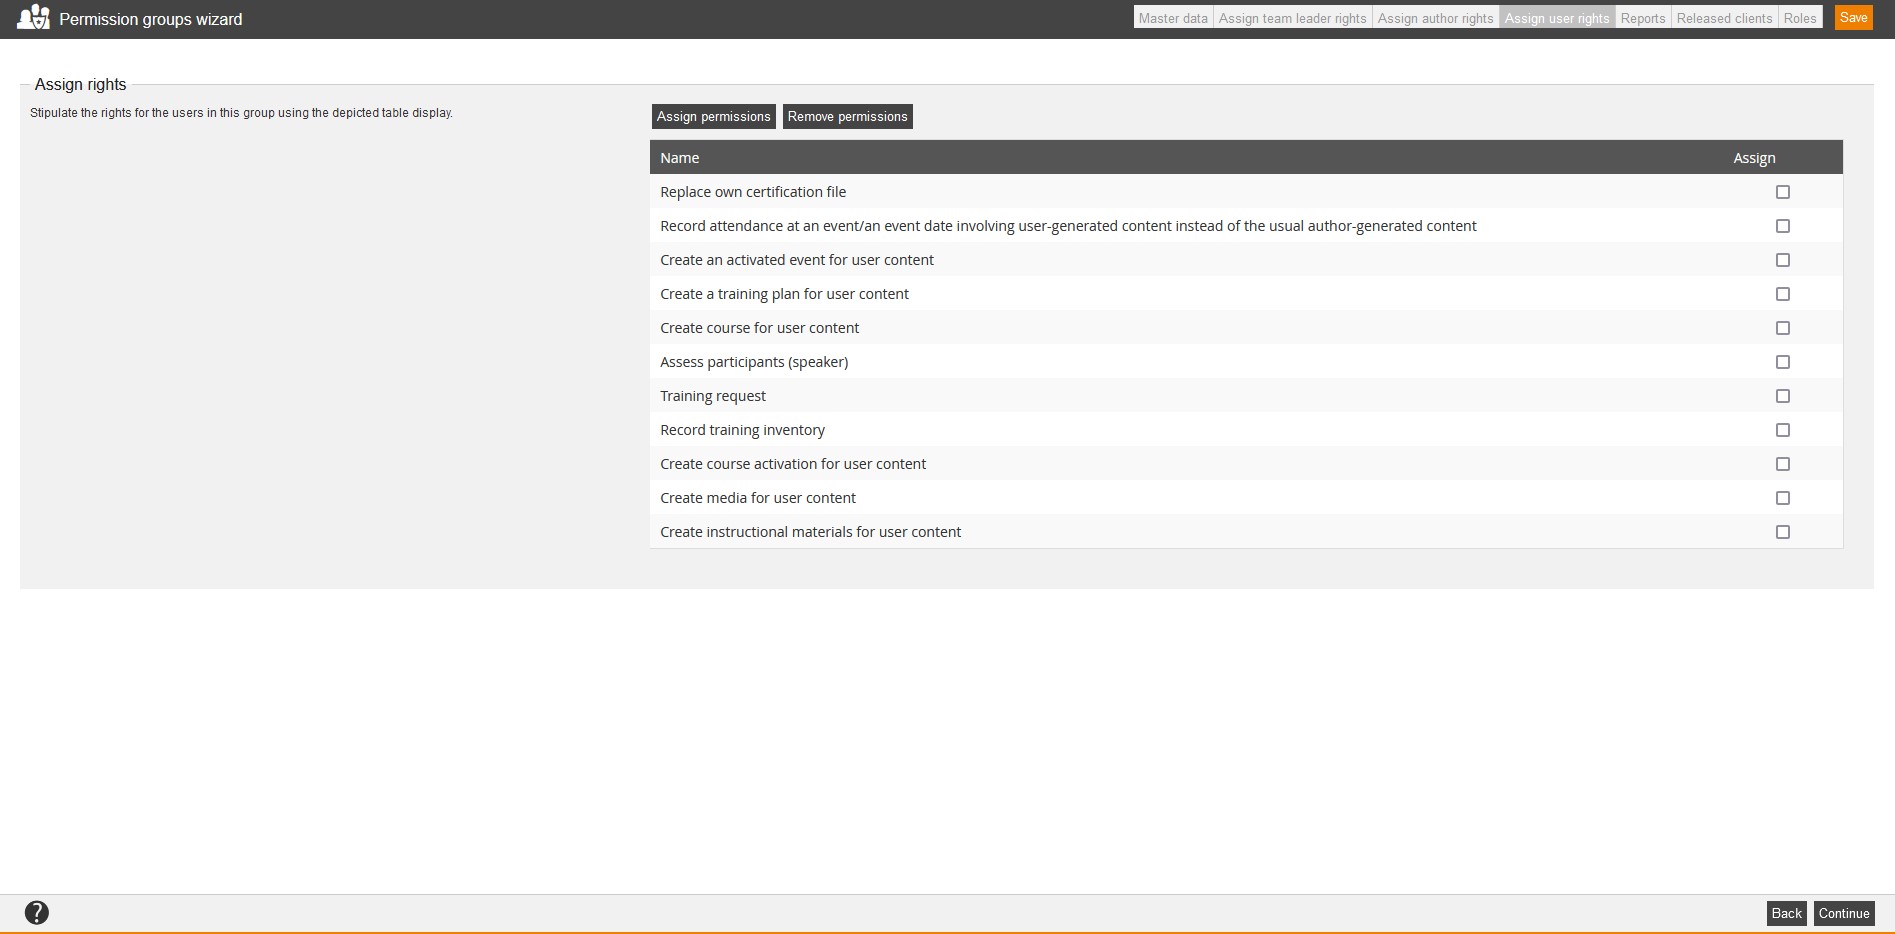
Assign user rights
Assign rights
Define the permissions of this permission group via the displayed table by choosing the corresponding permission area and assign or remove the corresponding permissions.
You can assign the following user rights:
- Replace own certification file (applied in the new frontend)
- Record attendance at an event/an event date involving user-generated content instead of the usual author-generated content
- Create an activated event for user content
- Create a training plan for user content
- Create course for user content
- Assess participants (speaker)
- Record training inventory
- Create course activation for user content
- Create media for user content
- Create instructional material for user content
- Training request
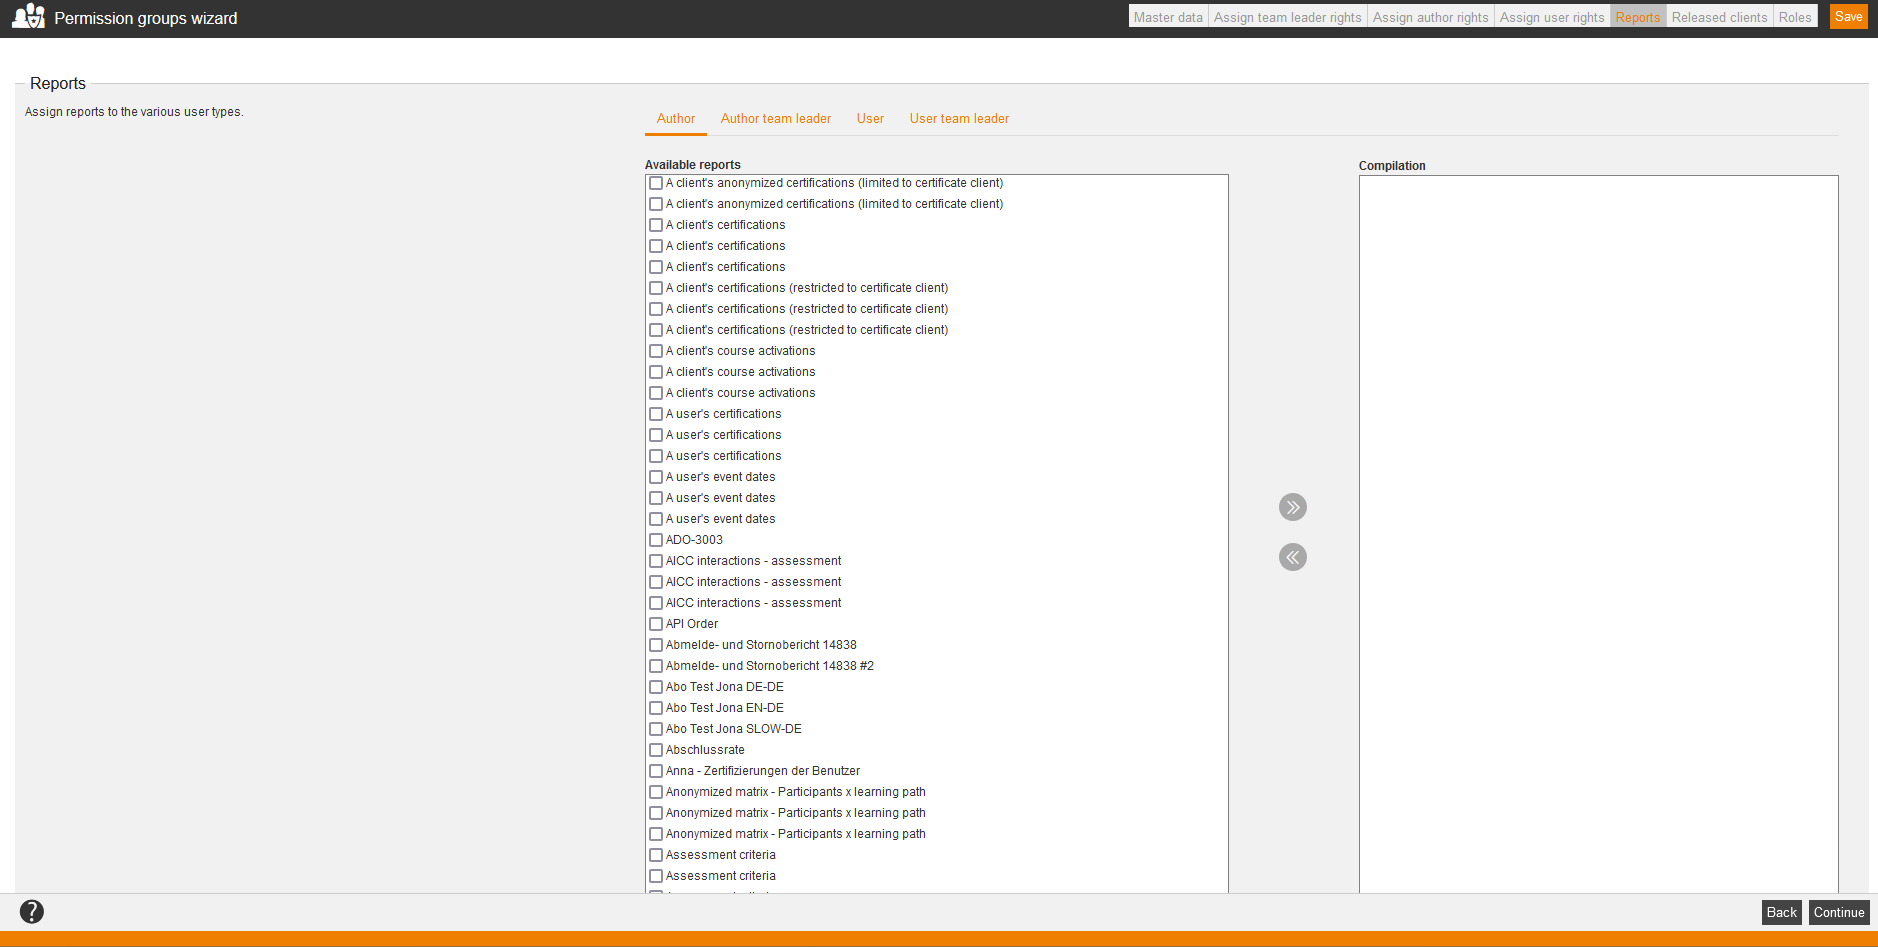
Reports
Assign reports to the various user types.
Author
Select the reports under “Available reports” via setting a check box or assign them all via the double arrow icon. The assigned reports will be shown under “Compilation”.
Author team leader
Select the reports under “Available reports” via setting a check box or assign them all via the icon
.
The assigned reports will be shown under “Compilation”.
Select the reports under “Available reports” via setting a check box or assign them all via the double arrow icon. The assigned reports will be shown under “Compilation”.
Select the reports under “Available reports” via setting a check box or assign them all via the double arrow icon. The assigned reports will be shown under “Compilation”.
Released clients
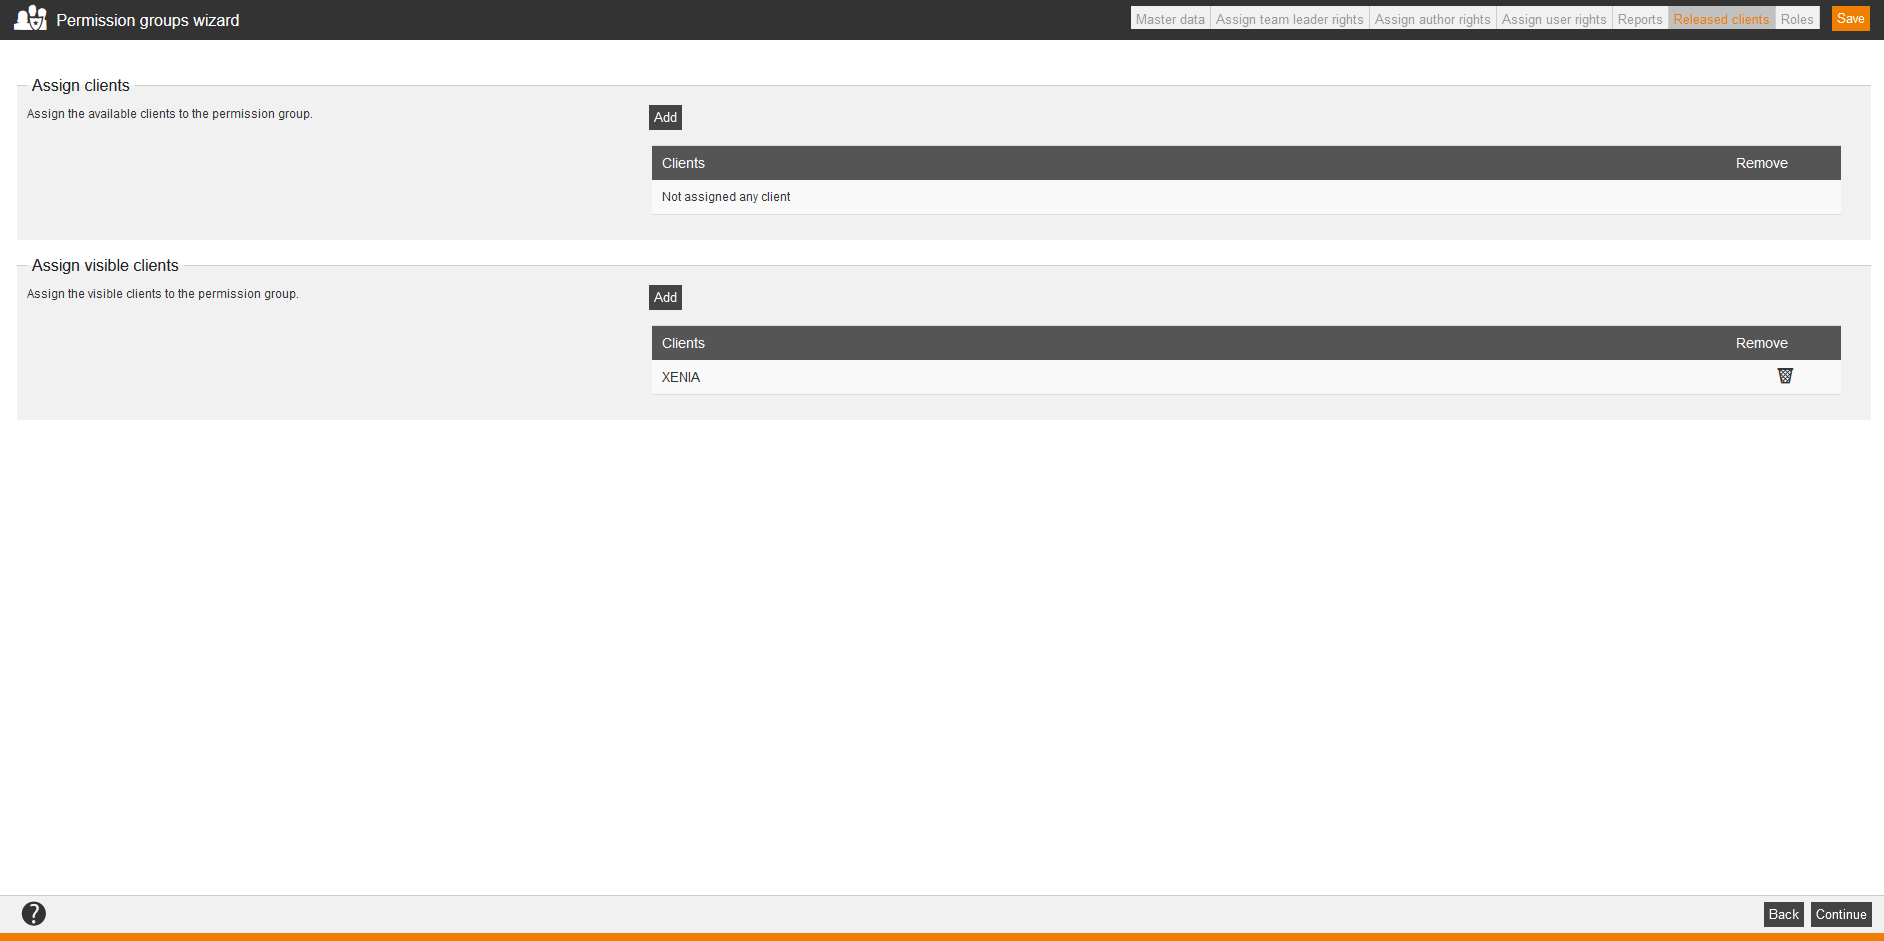
Allocate clients
Define via a selection of main clients, for which users and authors the permission group is available. For this purpose click on “Add” and select in the opening dialog window one or more clients.
Example:
If you have selected client A in a permission group, you can assign this permission group to these, which are created in client A (= main client). This doesn’t mean that the permission group gives view to content or users of this client. You define the visibility of content and users via the client assignment of the user (Author assistant) and you can limit it via a teamleader function. Further information about you find under User management → New author → Clients.
Allocate visible clients
Allocate the visible clients to the appropriate permission group via the button Add. The visible clients are those clients which the user gets as visible clients when the permission group is allocated to him/her. The available clients (see above) are those clients in which you can use the permission group.
If applicable you can remove the visible clients via the button Remove.
Roles
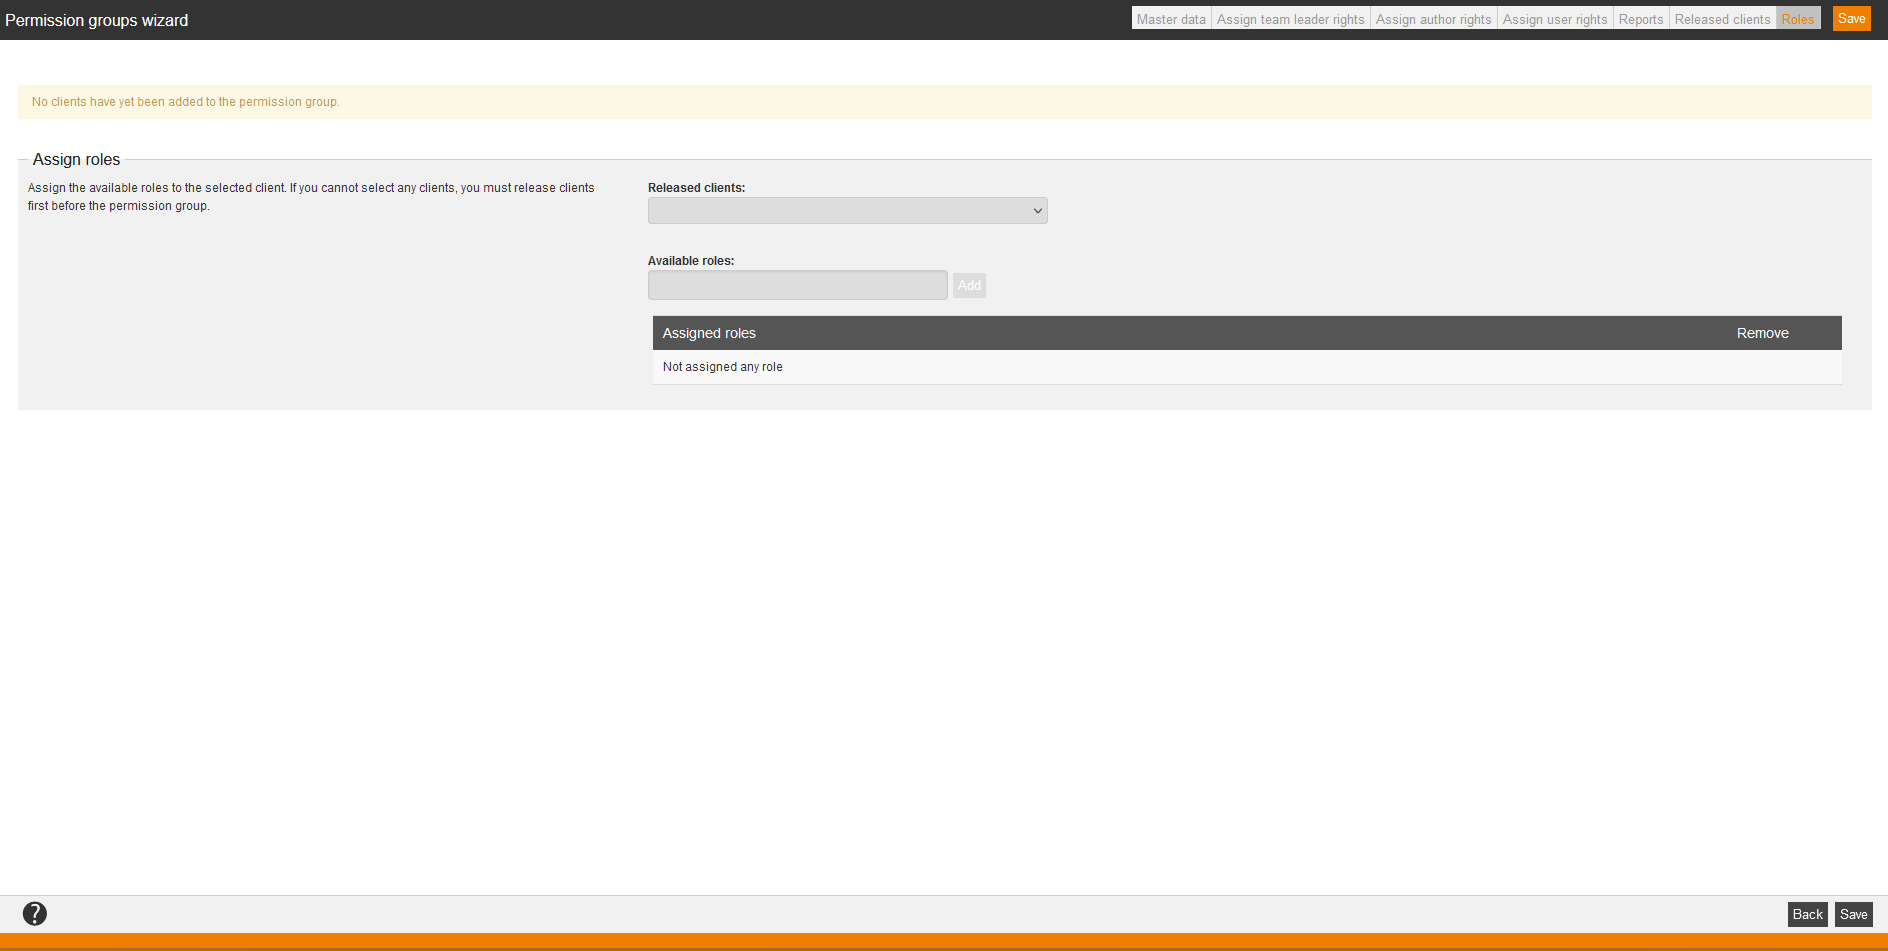
Assign roles
Define which roles the members of the group should get. There are all roles of the released clients available. Therefore choose one client, then a favored role and then click on the button “Add”.
If there no roles created for the chosen client or all available roles already assigned to the client, there will be shown no available roles. You manage the roles in the client wizard.
Practical example
A user is member of multiple permission groups, which contain a various selection of team leader rights and a various selection of team leader OUs.
The user is then team leader for the OUs of all groups and has for all OUs the same rights. This means the rights are summed up from all groups.
API
You can create, edit and delete permission groups via API.
For further questions please contact our support team.
