Prerequisite
To show and edit the notifications, you have under Resources (objects) the access rights Read, Select and Change, Create on your author account. Otherwise the menu item Notifications in the menu Resources is hidden.
Notifications in Avendoo® can have three different communication channels, which the author defines with a message text in a notification:
- Community message (visible in the Avendoo® Community or in the Avendoo® Progressive Web App (PWA))
- Push messages directly to the Avendoo® PWA (not for iOs mobile devices)
The author has to do this setting at different places per communication channel without notifications (in the menu Resources). Furthermore there were also messages, which could be used only via one communication channel.
To close a gap on old, single mail texts and community message, existing e-mail texts or community messages are transferred into notifications (in the menu Resources) step by step. The Approval for course activation registration was for example only available as community notification, but not as e-mail. The new notification Approval for course activation registration now provides the possibility to send an e-mail for the approval request. Regarding message types like Registration to course activation (new notification type Notification on registration for course activation) there was often only a client specific text, which was identic for all messages of this type and one client. Via the individual notifications the author can create now several different variants and can assign them to the appropriate objects.
The step-by-step transfer of the old e-mail messages from events into new notifications (menu Resources) arranges also for a synchronization of the translated message texts. Without notifications (in the menu Resources) there are only mail templates, which the author can create per language of the event and can select. Further information you find under Mail templates.
The notifications (in the menu Resources) are cross-client standard texts, which have no client or category for storage. There is only one notification per message type, for example Event – Registration confirmation. The author cannot create the notifications by himself, but they are automatically created by installation or by updates (when a new message type is added). The author can only change the content, create or adjust translations.
The author can use the notifications (in the menu Resources) in the client for different message types, but not directly in the objects like events, course activations or certificates. But the author can select the option Use client setting for different message types in events, course activations or certificates. Then this option uses the systemwide notification.
The cross-client notifications give you an overview of the system standards for each notification type. Per message type there is one notification. The notifications are automatically provided via an installation or updates.
You can create various variants of notifications for all message types via the Individual notifications.
You see the notifications in the overview table, listed by Title, Translation area, Preview, Change date and Notification type. Via a right click on the table header you can Edit the display of columns and order.
Via click on the symbol of the translation area you get into the translation management of the appropriate notification. Via click on the national flag you can show the preview of the appropriate notification (e-mail and community message).
You can filter by the following criteria: Title, Language and Notification type (multi-select filter).
The following functions are available via the context menu of the appropriate notification title.
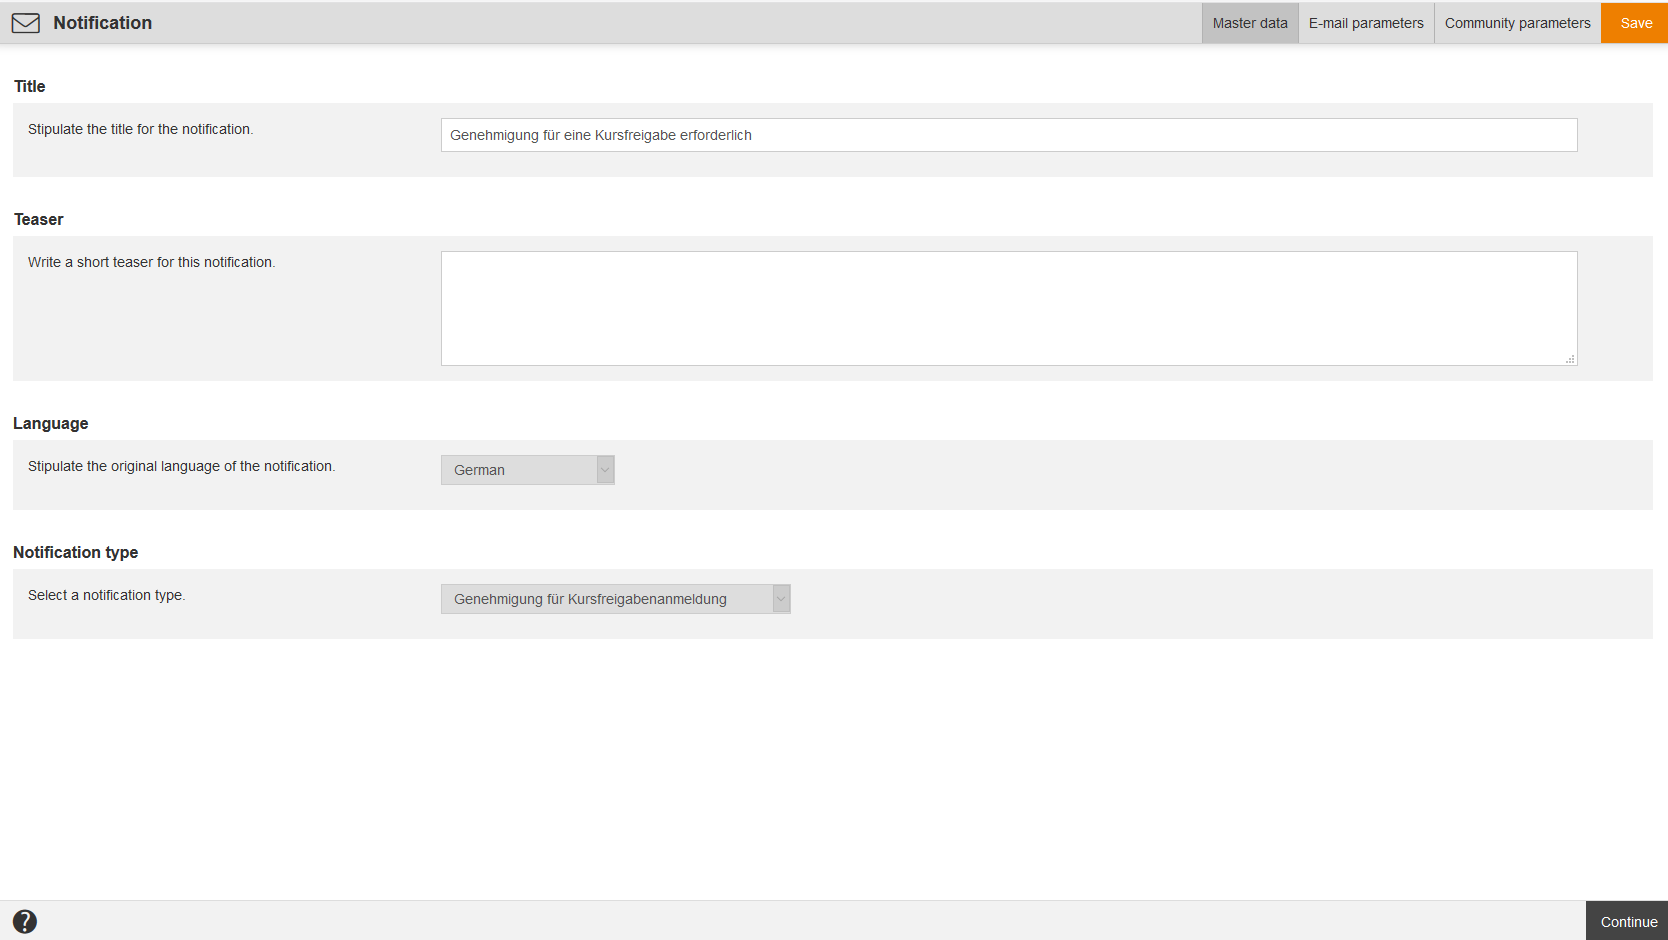
Master data
Enter a title and teaser for the appropriate notification. The language and the notification type is already defined.
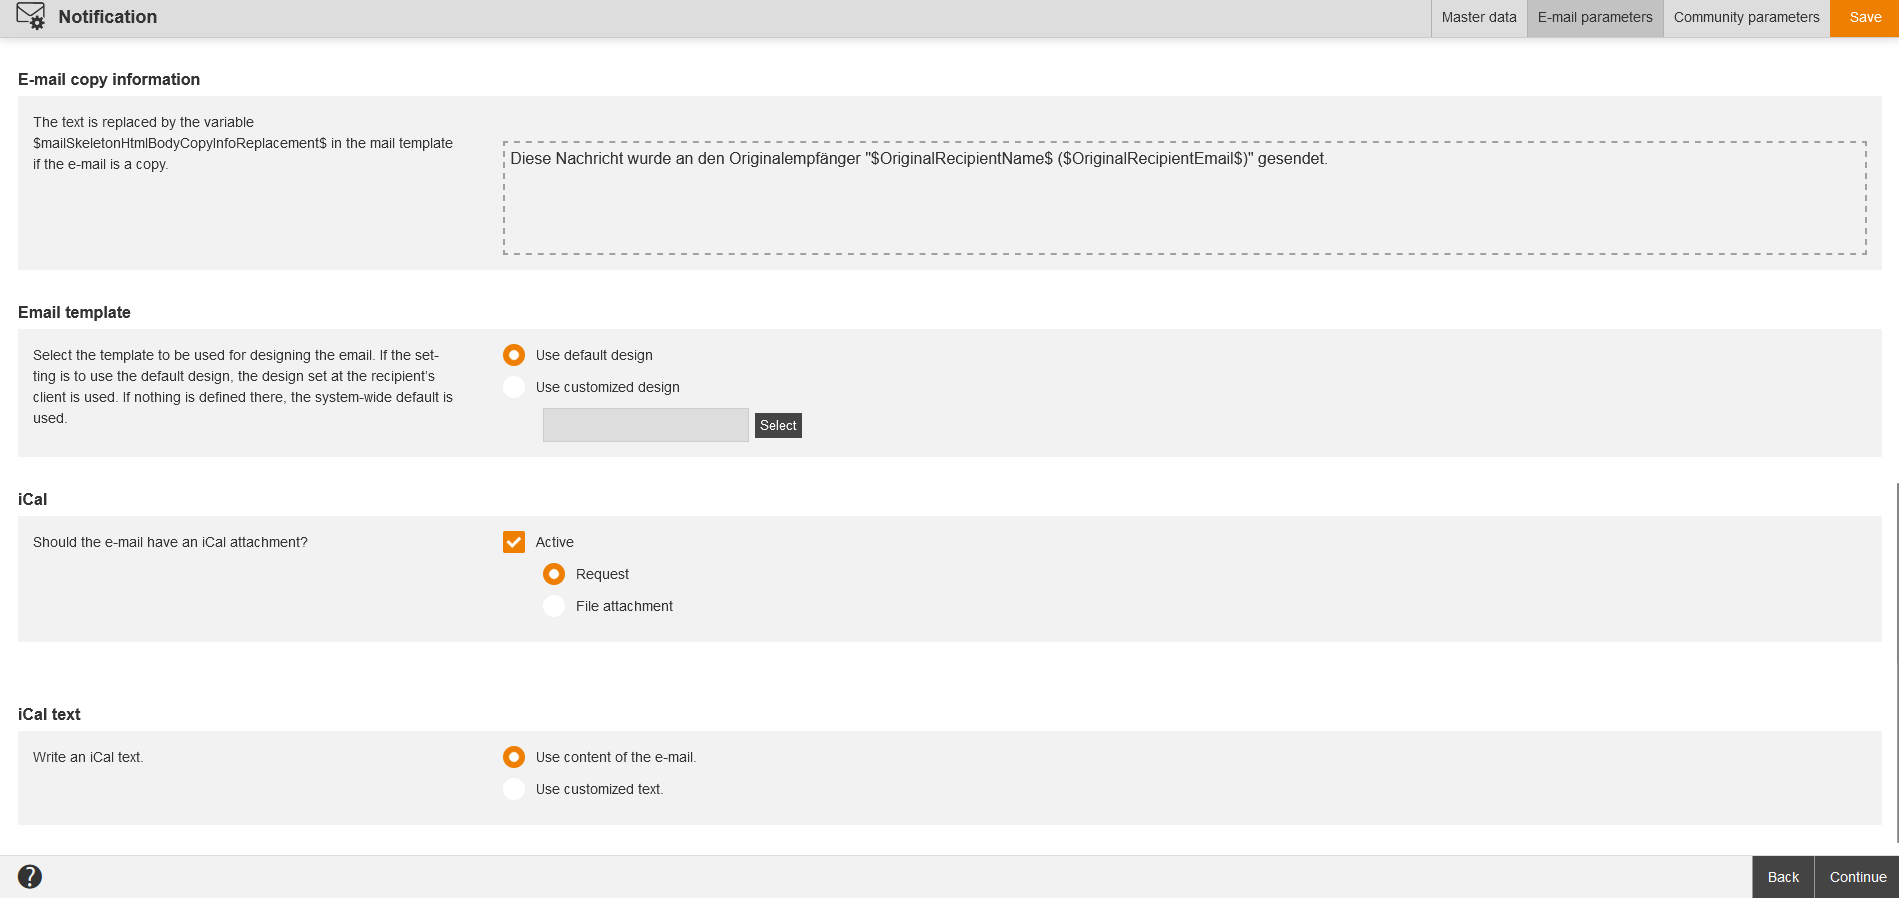
E-mail parameters
Send the notification as an e-mail
If you want to send this notification as an e-mail, set the check mark Active.
Subject of the e-mail (only shown if the first check mark Active is set)
Write a subject for the e-mail in the subject line.
E-mail subject – prefix for copy
The prefix is inserted before the e-mail subject if the e-mail is a copy. You can adjust the subject line.
Content of the e-mail (only shown if the first check mark Active is set)
Write the e-mail via the Editor.
The following variables are available depending on the notification type :
-
$Address$
- $ActivityBookings$
-
$ApproverTitle$
-
$ApproverSecondTitle$
-
$ApproverFirstname$
-
$ApproverLastname$
-
$ApproverSex$
-
$ApproverOe$
-
$ApproverRegion$
-
$ApproverGroup$
-
$ApproverDivision$
-
$ApproverCountry$
- $AssignmentDeeplink$
- $AssignmentDuration$
- $AssignmentDurationReminder$
- $AssignmentElearningPrice$
- $AssignmentId$
- $AssignmentIdOnly$ (Shows only the course activation ID in the notifications Task reminder (participants and summary), Escalation (participants and summary) and Registration confirmation)
- $AssignmentPrice$”
- $AssignmentSeminarPrice$
- $AssignmentTitleLink$
- $BillingAddress$
-
$BillingCompany$
-
$BillingStreet$
-
$BillingFirstname$
-
$BillingLastname$
-
$BillingPostcode$
-
$BillingLocation$
-
$BillingEMail$
-
$BookedHotel$
-
$BookingState$
-
$CertificateUser$
-
$Certificate$
-
$CertificateExpiryDate$
- $Company$
- $CourseTitle$
- $Firstname$
-
$LastBooking$
- $Location$
- $Login$
-
$NewBooking$
- $Oe$
- $OptInLink$
-
$Participant$
-
$ParticipantLogin$
-
$ParticipantOe$
-
$ParticipantEmail$
-
$ParticipantPhone$
-
$ParticipantPhoneMobile$
-
$ParticipantTitle$
-
$ParticipantSecondTitle$
-
$ParticipantCostCenter$
-
$ParticipantAddress$
-
$ParticipantBillingAddress$
-
$PlaceTitle$
-
$PlaceStreet$
-
$PlacePostalCode$
-
$PlaceCity$
-
$PlaceRegion$
-
$PlaceCountry$
-
$PlaceLongitude$
-
$PlaceLatitude$
-
$PlacePhoneNumber$
-
$PlaceFax$
-
$PlaceEmail$
-
$PlaceUrl$
-
$PlaceContactPerson$
-
$PlaceTimeZone$
-
$PlaceTimeZoneId$
-
$PlaceDescription$
-
$PlaceAlternativeDescription$
-
$PlaceRoomTitle$
-
$PlaceRoomNumber$
-
$PlaceRoomFloor$
-
$PlaceRoomBuilding$
-
$PlaceRoomCapacity$
-
$PlaceRoomContactPerson$
-
$PlaceRoomInformation$
- $RegisteringUserFullName$
-
$RoomBookingNotificationCoordinator$
-
$RoomBookingNotificationMainSpeaker$
-
$RoomBookingNotificationAllSpeakers$
- $SelfCheckIn$
- $SeminarEscortName$
- $SeminarEventInformation$
-
$SeminarEventLocation$
-
$SeminarEventTimeZoneId$
-
$SeminarEventRoom$
-
$SeminarEventAddress$
-
$SeminarEventStart$
-
$SeminarEventEnd$
-
$SeminarEventGroupStart$
-
$SeminarEventGroupEnd$
-
$SeminarEventDeadline$
-
$SeminarEventClosing$
-
$SeminarEventDescription$
-
$SeminarEventGroupDescription$
-
$SeminarEventUser$
-
$SeminarEventCoordinator$
-
$SeminarEventUserPhone$
-
$SeminarEventTrainers$
-
$SeminarEventStatus$
-
$SeminarDeeplink$
-
$SeminarEventHotelBookDays$
- $SeminarEventHotelStreet$
-
$SeminarEventHotelPostalCode$
-
$SeminarEventHotelCity$
-
$SeminarEventHotelRegion$
-
$SeminarEventHotelCountry$
-
$SeminarEventHotelLongitude$
-
$SeminarEventHotelLatitude$
-
$SeminarEventHotelPhoneNumber$
-
$SeminarEventHotelFax$
-
$SeminarEventHotelEmail$
-
$SeminarEventHotelUrl$
-
$SeminarEventHotelContactPerson$
-
$SeminarEventHotelTimeZone$
-
$SeminarEventHotelTimeZoneId$
-
$SeminarEventHotelDescription$
-
$SeminarEventHotelAlternativeDescription$
- $SeminarEventParticipantPrice$
- $SeminarInvitationComment$
- $SeminarPrice$
Note: This variable is substituted by $SeminarEventParticipantPrice$. If you already use this variable, there will be the correct display. - $SeminarPriceSource$
- $SecondTitle$
- $SeminarTitleWithDateAndTime$
- $Street$
- $Surname$
- $SystemPath$
- $TaskDueDate$
-
$TaskAffectedObjectType$
-
$TaskAffectedObjectName$
-
$TaskEventExternalReference$
-
$TaskEventExternalReferenceType$
- $TaskName$
-
$TaskOwner$
-
$TaskStatus$
- $TaskTeaser$
- $TaskTrigger$
-
$TaskTriggerType$
-
$TaskTriggerUser$
- $Title$
- $UnsubscribeDate$
- $UpdateReason$
-
$UserFirstname$
-
$UserLastname$
-
$UserSex$
-
$UserOe$
-
$UserRegion$
-
$UserGroup$
-
$UserDivision$
-
$UserCountry$
-
$RegisteringUserFullName$
-
$FullUsername$
-
$UserTitle$
-
$UserSecondTitle$
-
$UserSso$
You can send a test mail via clicking the button Send test e-mail.
E-mail copy information (only shown in the following e-mails: Task reminder (participants), Escalation (participants), Event – Send registration confirmation, Event – Send registration confirmation (waiting list), Automatic event date deregistration, Sending of invitation e-mail, Event – Move from waiting list to event place and Move from waiting list to event place (invitation))
The text is replaced by the variable $mailSkeletonHtmlBodyCopyInfoReplacement$ in the mail template if the e-mail is a copy.
E-mail template
Select the template to be used for designing the e-mail by selecting Use customized design and confirm the selected custom page.
If the setting is to use default design, the design set at the recipient’s client is used. If nothing is defined there, the system-wide default is used.
iCal (only shown if iCal is possible)
If the the e-mail should have an iCal attachment, set the check mark Active.
Then you select, if the iCal attachment should be a request or if it should be sent as file attachment.
iCal text (only shown if the check mark Active is set)
Write an iCal text.
Select, if the content of the e-mail should be sent or if you want to write an individual text.
If you’ve selected Use customized text, you can enter the iCal text. Therefore you can use the editor via the functions Cut, Copy, Paste as plain text, Undo, Redo and Insert variables.
You see a list of all sent notifications in the Participant management of the course activation.
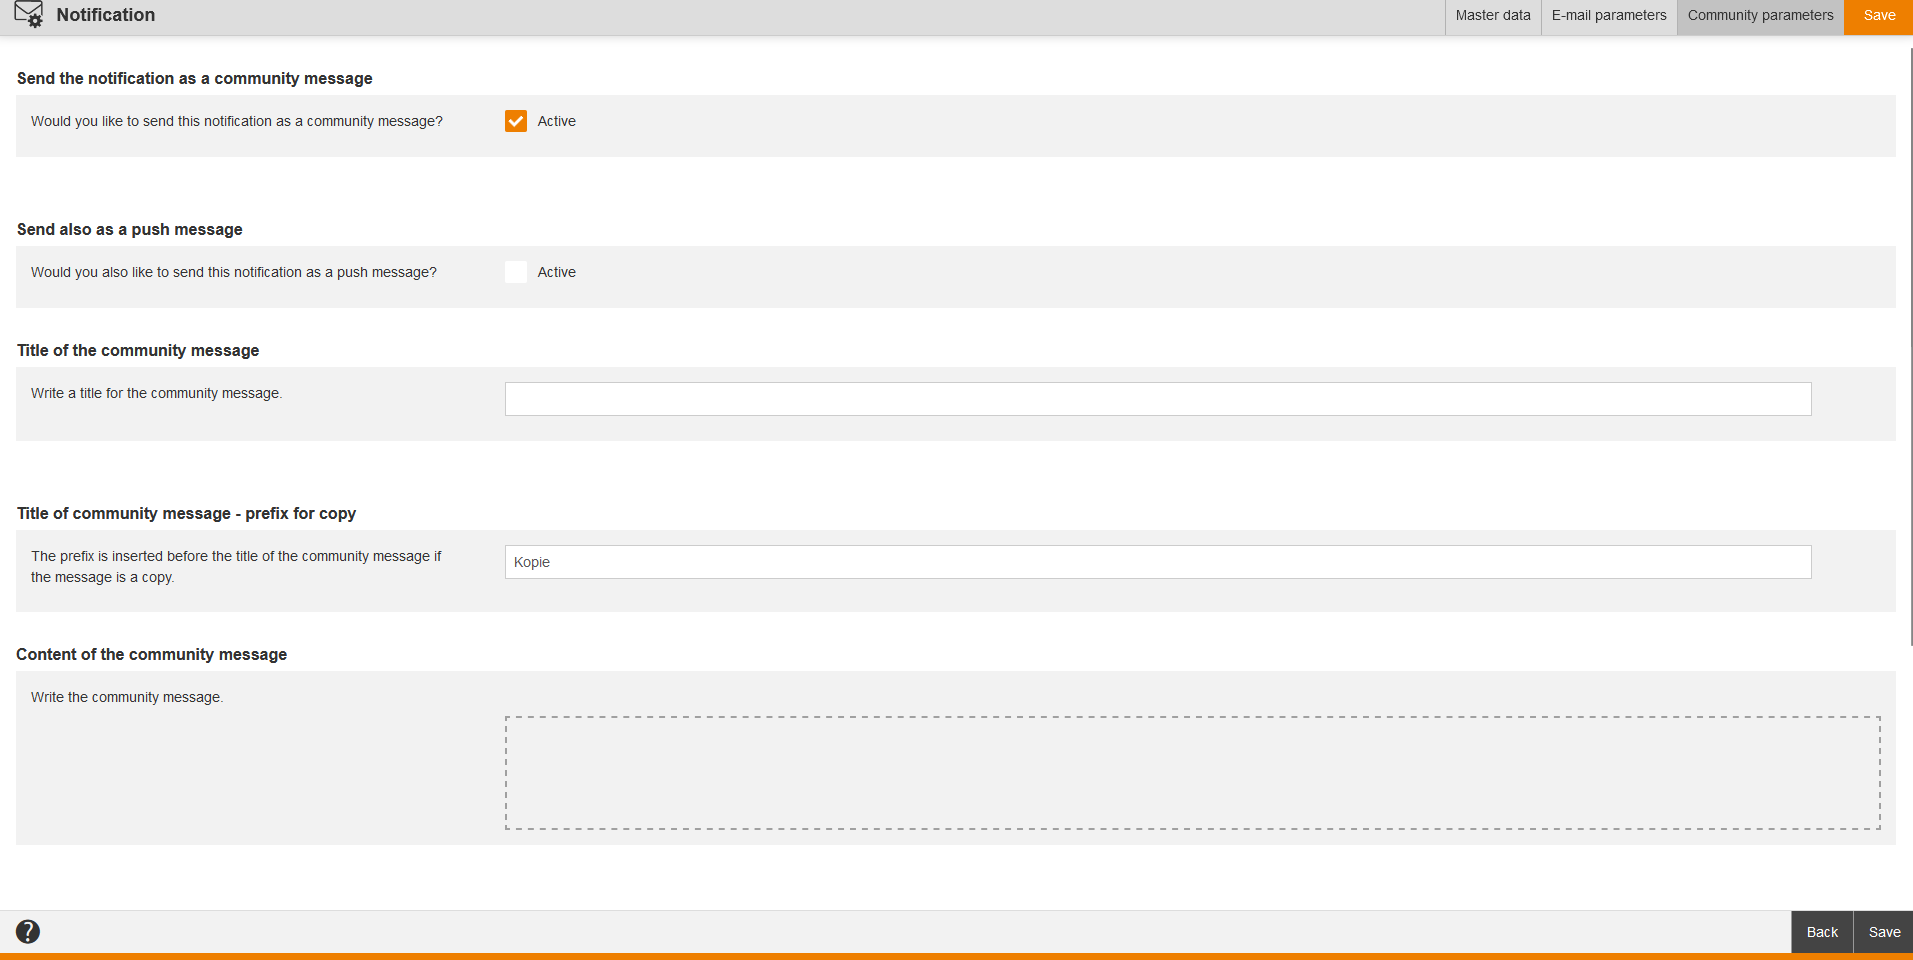
Community parameters
Send the notification as a community message
If you would like to send this notification as a community message, set the check mark Active.
Send also as a push message (only shown if the check mark Active is set)
If you would like to send this notification as a push message, set the check mark Active.
Title of the community message (only shown if the check mark Active is set)
Write a title for the community message.
Title of community message – prefix for copy
The prefix is inserted before the title of the community message if the message is a copy. Adjust this subject line if required.
Content of the community message (only shown if the check mark Active is set)
Write the community message.
The following variables are available, depending on the notification type:
-
$ApproverTitle$
-
$ApproverSecondTitle$
-
$ApproverFirstname$
-
$ApproverLastname$
-
$ApproverSex$
-
$ApproverOe$
-
$ApproverRegion$
-
$ApproverGroup$
-
$ApproverDivision$
-
$ApproverCountry$
- $BookedHotel$
-
$CertificateUser$
-
$Certificate$
-
$CertificateExpiryDate$
-
$CourseTitle$
- $Login$
- $OptInLink$
- $SecondTitle$
- $SeminarEventInformation$
-
$SeminarEventHotelBookDays$
- $SeminarEventHotelStreet$
-
$SeminarEventHotelPostalCode$
-
$SeminarEventHotelCity$
-
$SeminarEventHotelRegion$
-
$SeminarEventHotelCountry$
-
$SeminarEventHotelLongitude$
-
$SeminarEventHotelLatitude$
-
$SeminarEventHotelPhoneNumber$
-
$SeminarEventHotelFax$
-
$SeminarEventHotelEmail$
-
$SeminarEventHotelUrl$
-
$SeminarEventHotelContactPerson$
-
$SeminarEventHotelTimeZone$
-
$SeminarEventHotelTimeZoneId$
-
$SeminarEventHotelDescription$
-
$SeminarEventHotelAlternativeDescription$
- $SeminarTitleWithDateAndTime$
- $SystemPath$
- $TaskDueDate$
-
$TaskAffectedObjectType$
-
$TaskAffectedObjectName$
-
$TaskEventExternalReference$
-
$TaskEventExternalReferenceType$
- $TaskName$
-
$TaskOwner$
-
$TaskStatus$
- $TaskTeaser$
- $TaskTrigger$
-
$TaskTriggerType$
-
$TaskTriggerUser$
- $Title$
-
$AssignmentTitleLink$
- $AssignmentDeeplink$
- $AssignmentId$
-
$UserFirstname$
-
$UserLastname$
-
$UserSex$
-
$UserOe$
-
$UserRegion$
-
$UserGroup$
-
$UserDivision$
-
$UserCountry$
- $UserSso$
-
$RegisteringUserFullName$
-
$FullUsername$
-
$UserTitle$
-
$UserSecondTitle$
-
$AssignmentDuration$
-
$AssignmentDurationReminder$
Community message copy information
The text is inserted before the community message if this message is a copy.
iCal (only shown if iCal is possible)
If the the community message have an iCal attachment, set the check mark Active.
Then you select, if the iCal attachment should be a request or if it should be sent as file attachment.
iCal text (only shown if the check mark Active is set)
Write an iCal text.
Select, if the content of the community message should be sent or if you want to write an individual text.
If you’ve selected Use customized text, you can enter the iCal text. Therefore you can use the editor via the functions Cut, Copy, Paste as plain text, Undo, Redo and Insert variables.
You see a list of all sent notifications in the Participant management of the course activation.


