There are 9 streams available in Avendoo® on the Start page in the user’s frontend:
- My event dates (these are all event dates through which you can browse)
- New releases (these are the ten newest course activations and their order is like in the catalog),
- Continue the task (these are courses, which are not already completed by the user)
- Hotel booking (these are courses, to which the user has already to register to a hotel)
- Event date booking (these are courses, to which the user still can register to an event date)
- Recommendations (these are courses, which are similiar to the former completed courses and which are new)
- Not confirmed event participations (these are course activations with event dates, which were carried out and the recording of the attendance wasn’t still done. This is only relevant, if the user has waited often longer to recording of attendance to continue processing the course caused by hurdles after events.)
- Training requests (=courses which the author or user team leader has recorded via a request tool stored in the activation client. On course tile the number of reservations and the status are shown.)
- Review (= course activations which status the author has set to Decision and thus they are activated for giving feedback by the frontend user.)
You can activate or deactivate these standard or pre-defined streams on the tab Options in the Client wizard of the Activation client. You see new course activations and course activations in editing status as standard streams. This also valid for individual streams but via the filter “Editing status → Closed “ you can show also closed course activations on individual streams.
You can emphasize learning units (this means course activations, training plans and remote content), which fulfill some filter criteria for the catalog, with individual streams at the start page. Examples are streams, which filter via a keyword in the title or the teaser or via a classification value. Basically, you can use all types of catalog filters in the streams. Even on individual streams you define these per activation client.
You can show the teaser of the corresponding course per CSS. Per default the teaser is hidden. Furthermore you show learning format, Expected Processing time, the date, course assessments, language and points per CSS. You get further information if you contact our support team.
Individual streams offer also to show an IDD overview tile. This tile is ideal in combination with a stream for IDD relevant content.
The preview images of streams got the size of 280 x 200 px.
Furthermore you can show a summary tile, which isn’t shown per default, if the content is empty.
Integration
The function of individual stream is integrated into the new frontend.
Prerequisites
You have to use the new frontend.
Recommendations for using streams
We recommend to activate the following standard streams:
- Continue the task
- New releases
- The learner sees at first view all course activations, which are newly assigned to him, independent from catalog or already being registered. The learner notices new learning offers immediately and he can use them if required.
Optionally, the following standard streams are worthwhile:
- My event dates:
- The learner gets an overview of his event dates next time with information about event title, time, time period and location. This is only meaningful, if not all learner in Avendoo® have access to an electronic calendar and an own e-mail inbox.
If this streams is activated in the client, you see the event dates additionally to the learning place already at the start page.
- The learner gets an overview of his event dates next time with information about event title, time, time period and location. This is only meaningful, if not all learner in Avendoo® have access to an electronic calendar and an own e-mail inbox.
All further standard streams are only meaningful to use for, if the proper pre-conditions (like Black edition for hotel booking) or requirements are fulfilled. Generally, we recommend to use 3 up to 4 streams at maximum at the start page, because you will loose the overview.
We recommend for individual streams:
- Select one up to three emphasis themes, which you want to directly emphasize at the start page.
- The learner gets new inspiration by creating new streams for a certain time period. So you can change streams all three months for example, if there are new emphasis themes for the new quarter.
If you define too much streams at the start page, this
Instruction
Filter selection after catalog search
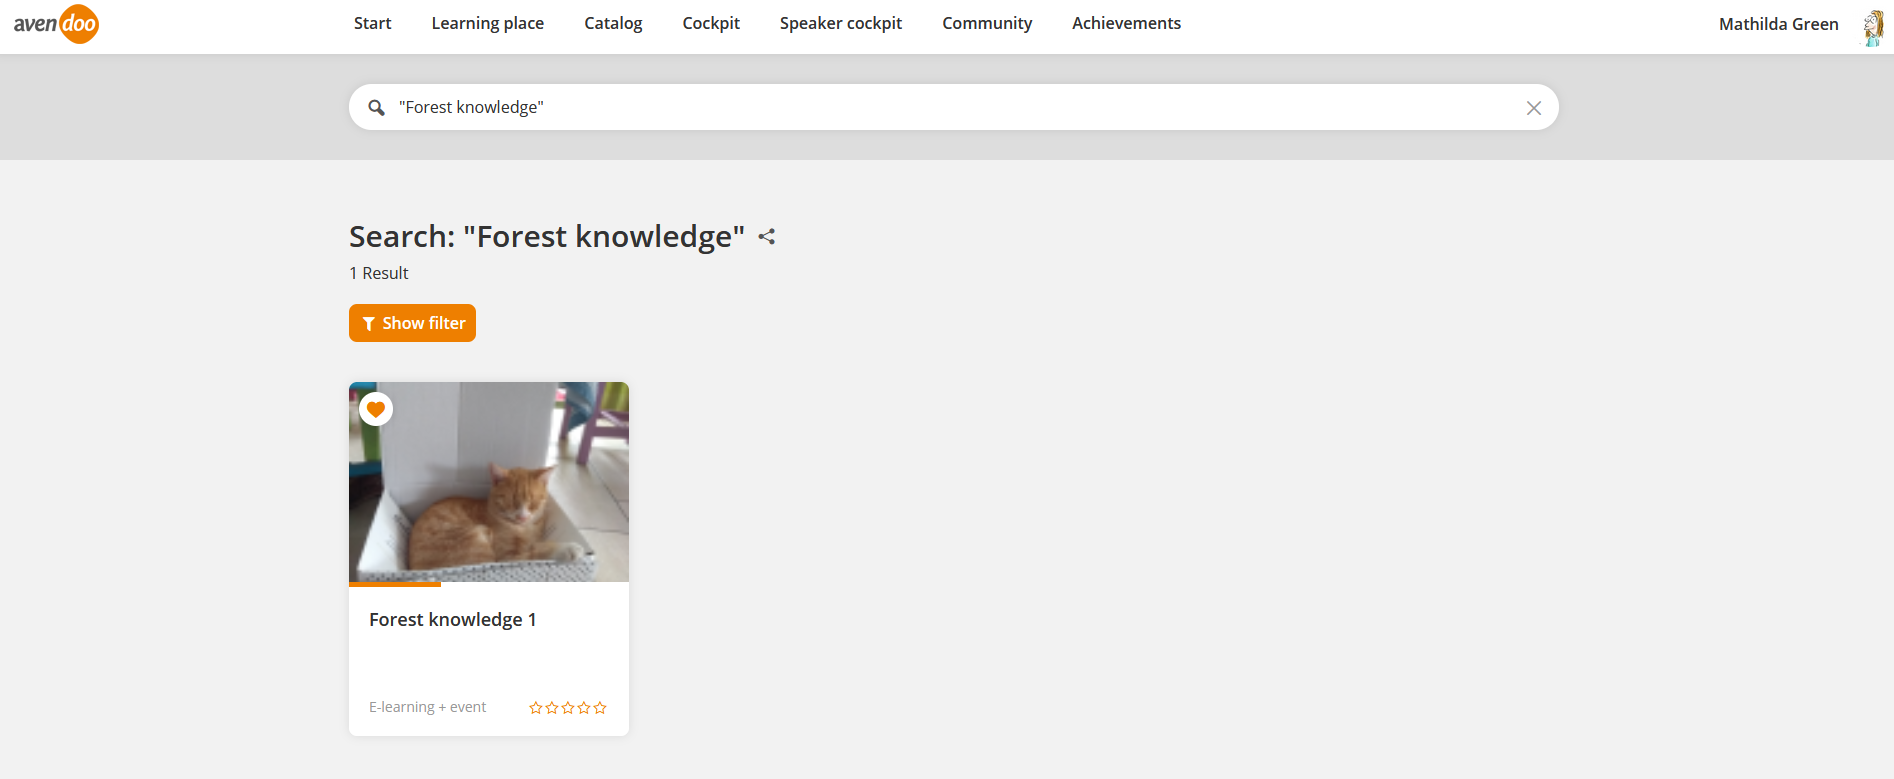
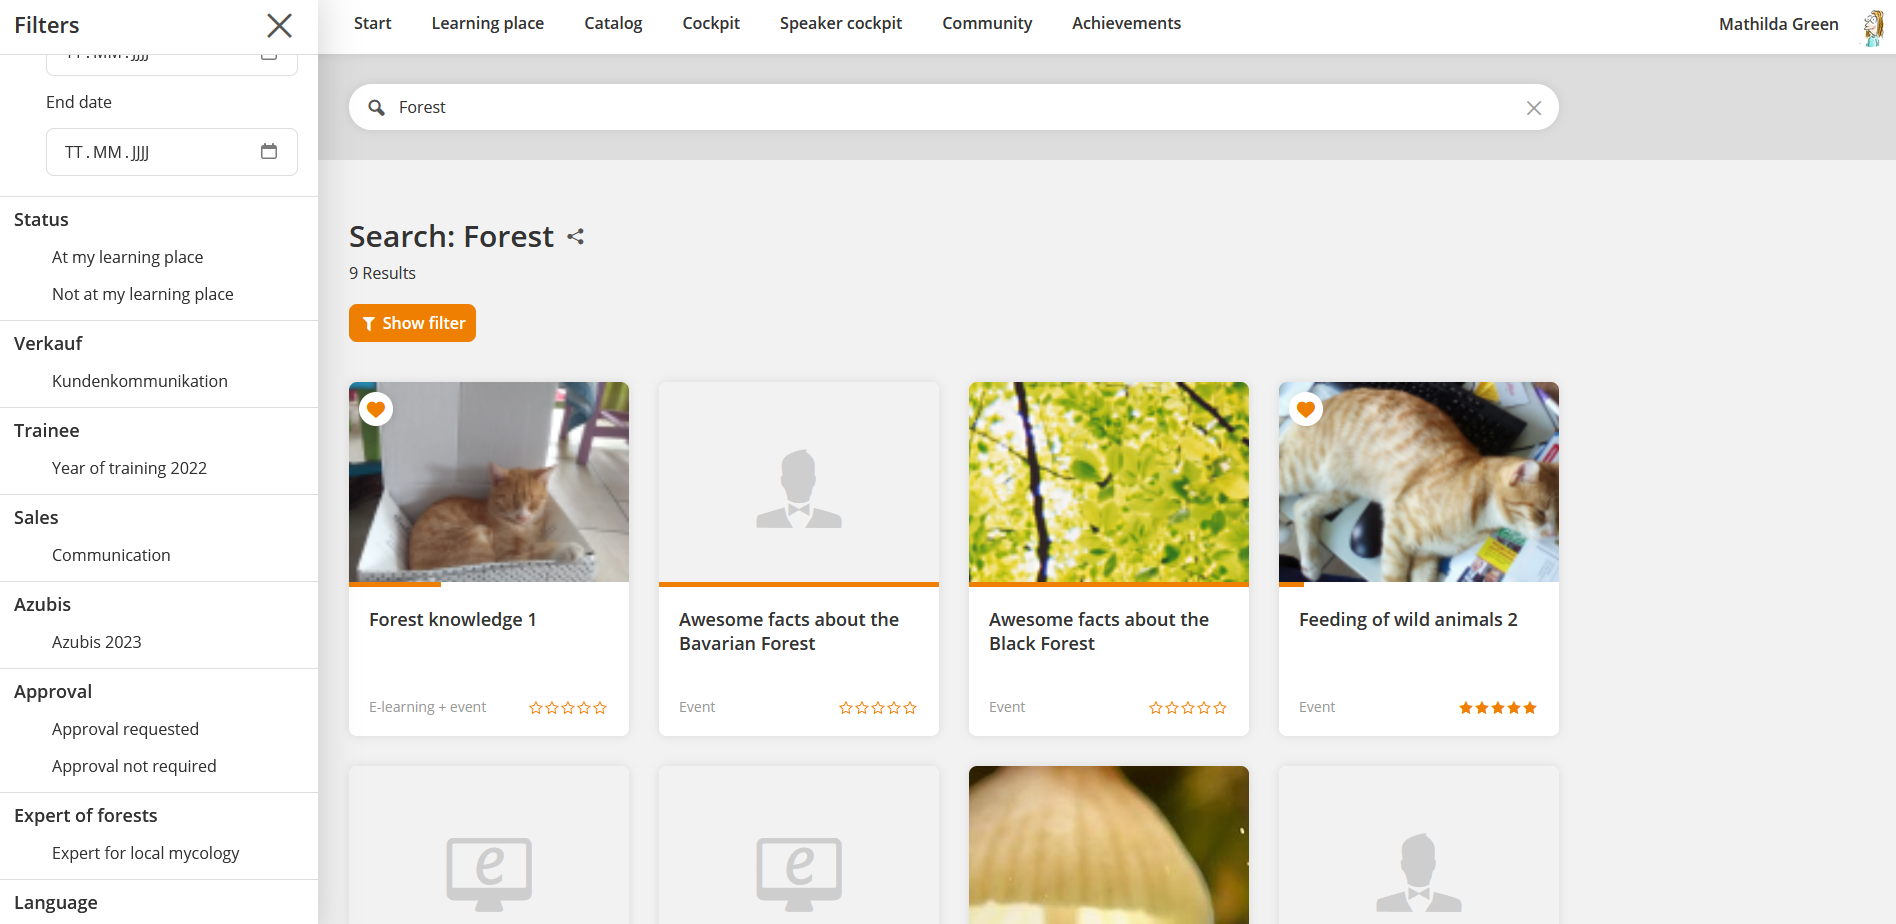
You get an exact filter search result, if you set double quotes for title and/or teaser (“sales training” or “young academics” for example). This means: the term which got double quotes before and after has to contain completely this search term in title or teaser to get found.
Without double quotes there has the term contain only one term or a part of the term (see second screenshot). Thus a simple filter by sales training without double quotes finds all learning units, in which the partly term training is included. Also the order of the filtered content on exact search is listed by newest first.
If you filter simply without double quotes, the hits are listed by highest match. The order on highest match changes nearly never, and also the learning units with low match are shown, this means only aa part of the filter term is included.
Select filter for the stream
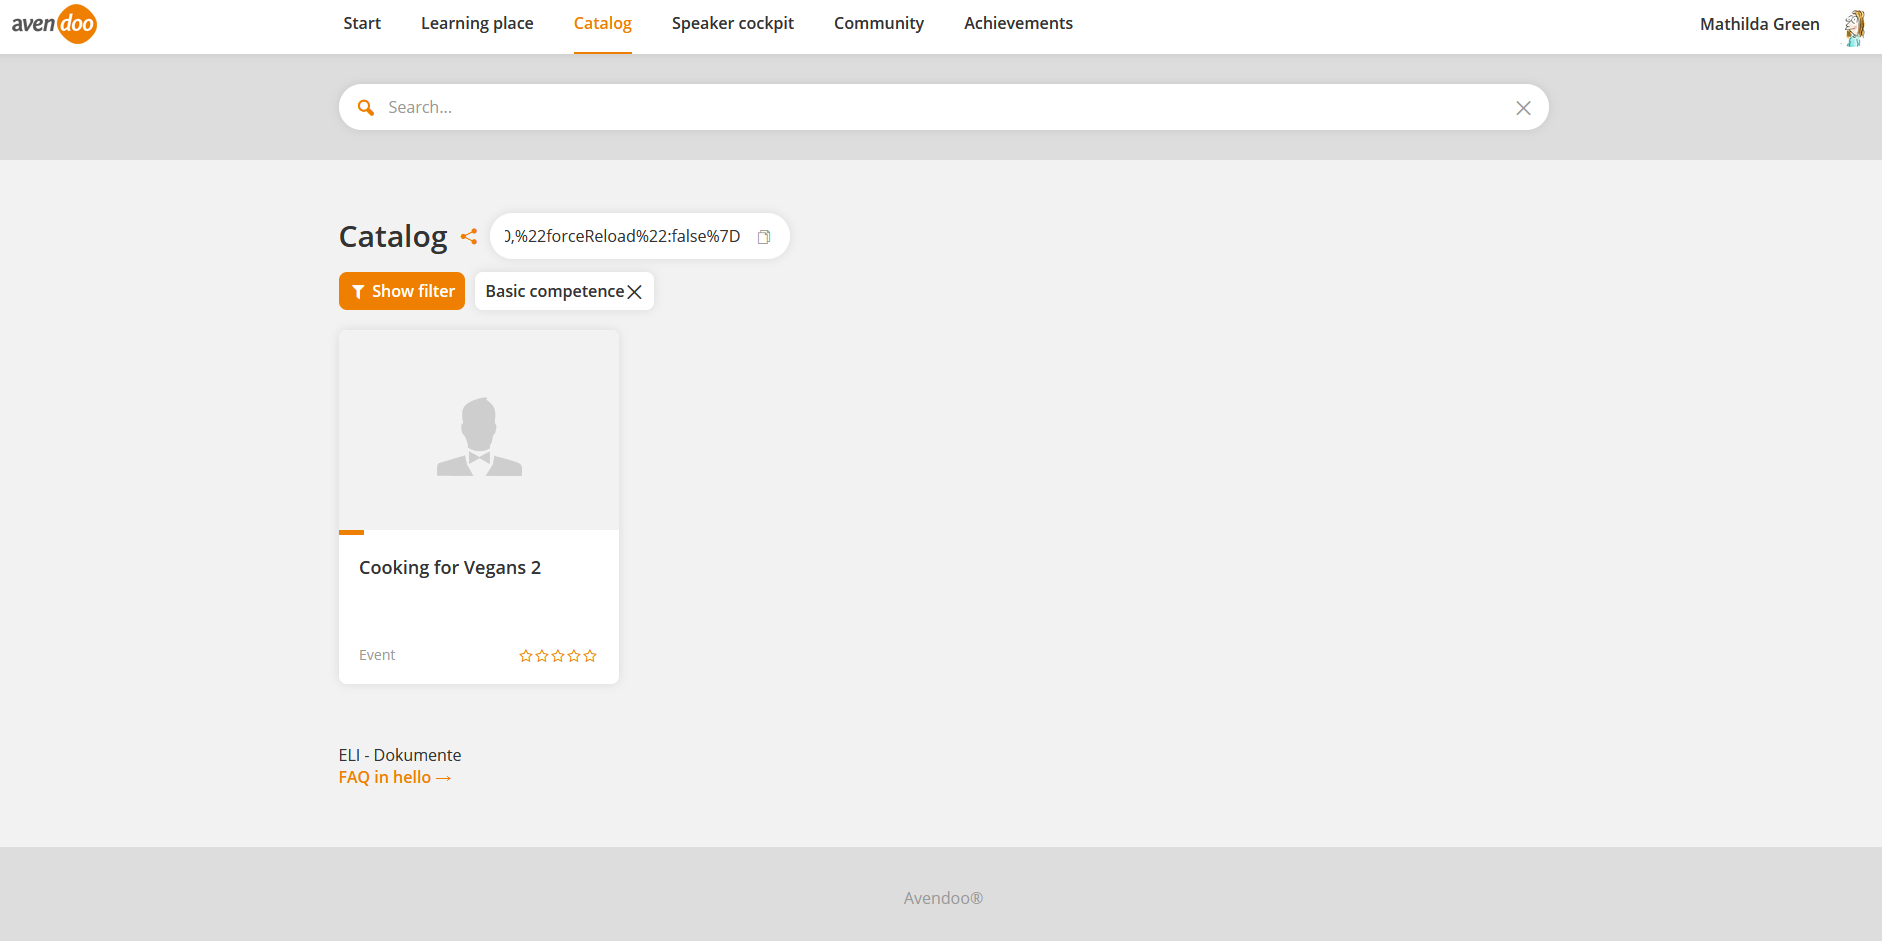
The user clicks the filter for the stream. This can be a classification value.
You can also use Multiselect fields which are user-defined fields.
The filter is shown besides the button Show filter (see screenshot).
Copy generated link
The user clicks the button Share and then Copy link.
The generated link is copied.
To define the identifier and the filter of the individual stream and to define options like a summary tile, the author does the following steps:
-
- The author chooses User management → Clients.
- The author clicks the title of the favored Activation client.
The Client wizard opens. - The author chooses the tab Options.
- The author scrolls to Start page – Settings.
- The author clicks the button Add.
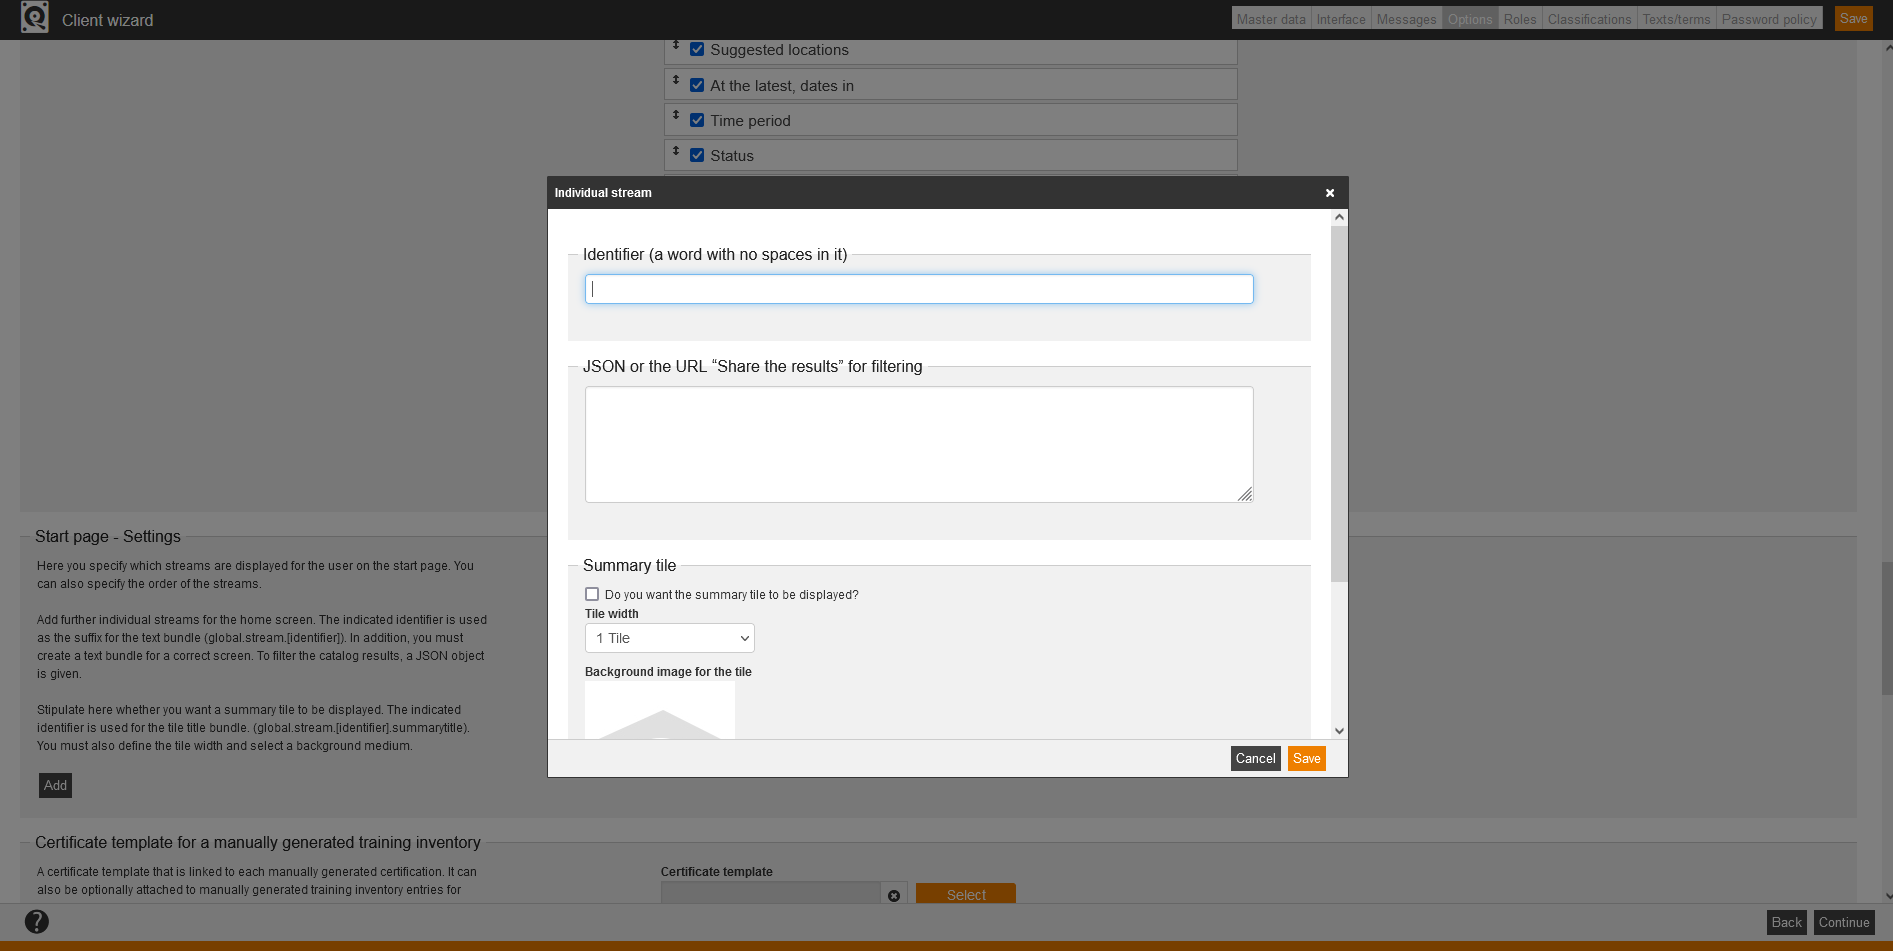
The dialog window Individual Stream opens. - The author enters a bundle name in the field Identifier.
Note that the entered identifier (manual) is later used as suffix for the text bundle (global.stream.[Identifier]) or for the tile title bundle (global.stream.[Identifier].summarytitle).
Examples: “global.stream.manual” and “global.stream.manual.summarytitle”.
The author enters under “Identifier” a term (only one word without space), “manual” for example. - The author inserts the copied link in the field JSON and filter. The inserted link is shown after saving like on the screenshot.
- If the summary tile should be shown, the author sets the corresponding check mark and selects the favored width and the background image of the tile. We recommend a width of one to two tiles, because then there are on to two learning unit tiles are shown besides this tile. If you have set this check mark, the summary tile is also shown when the content is empty.
An individual stream can show besides the stream name also a picture via the summary tile. Additionally to the title of the individual stream a text can be shown on the summary tile via “global.stream.manual.summary.title”.
The user see later this tile on the start page at the beginning of the individual stream, this means on the left side and in front of the tiles for the learning units (course activations, training plans, remote content). A further emphasis is possible via a background image and an additional summary text.
Example
You can define an individual stream for all course activations of a certain product group. Then the author can place an icon or an image of the product group at the summary tile. - If the IDD tile should be shown in this stream, the author sets the check mark “Should the IDD tile be shown?”. This option is only relevant for customers, which are insurance companies and work with the Insurance Distribution Directive (IDD).
If the author activates this option, the IDD tile appears at the beginning of the stream (after the summary tile, if shown). This IDD tile displays information about IDD hours, completed or in process.
- If the the author has set the check mark for Permanently display special tiles (since version 17.47), the user sees the individual streams only, if learning units are in his catalog, which fulfill the filter requirements of the individual stream. Furthermore the individual stream is always seen. Exactly, for all users of the client, even there are no matching learning units.
We recommend to set this check mark only, if a summary tile (with extra image and text) or a IDD tile is activated. Otherwise only the title of the individual stream is shown without content. - The author clicks the button Save.
Save.
Create title for individual stream and additional text for the summary tile
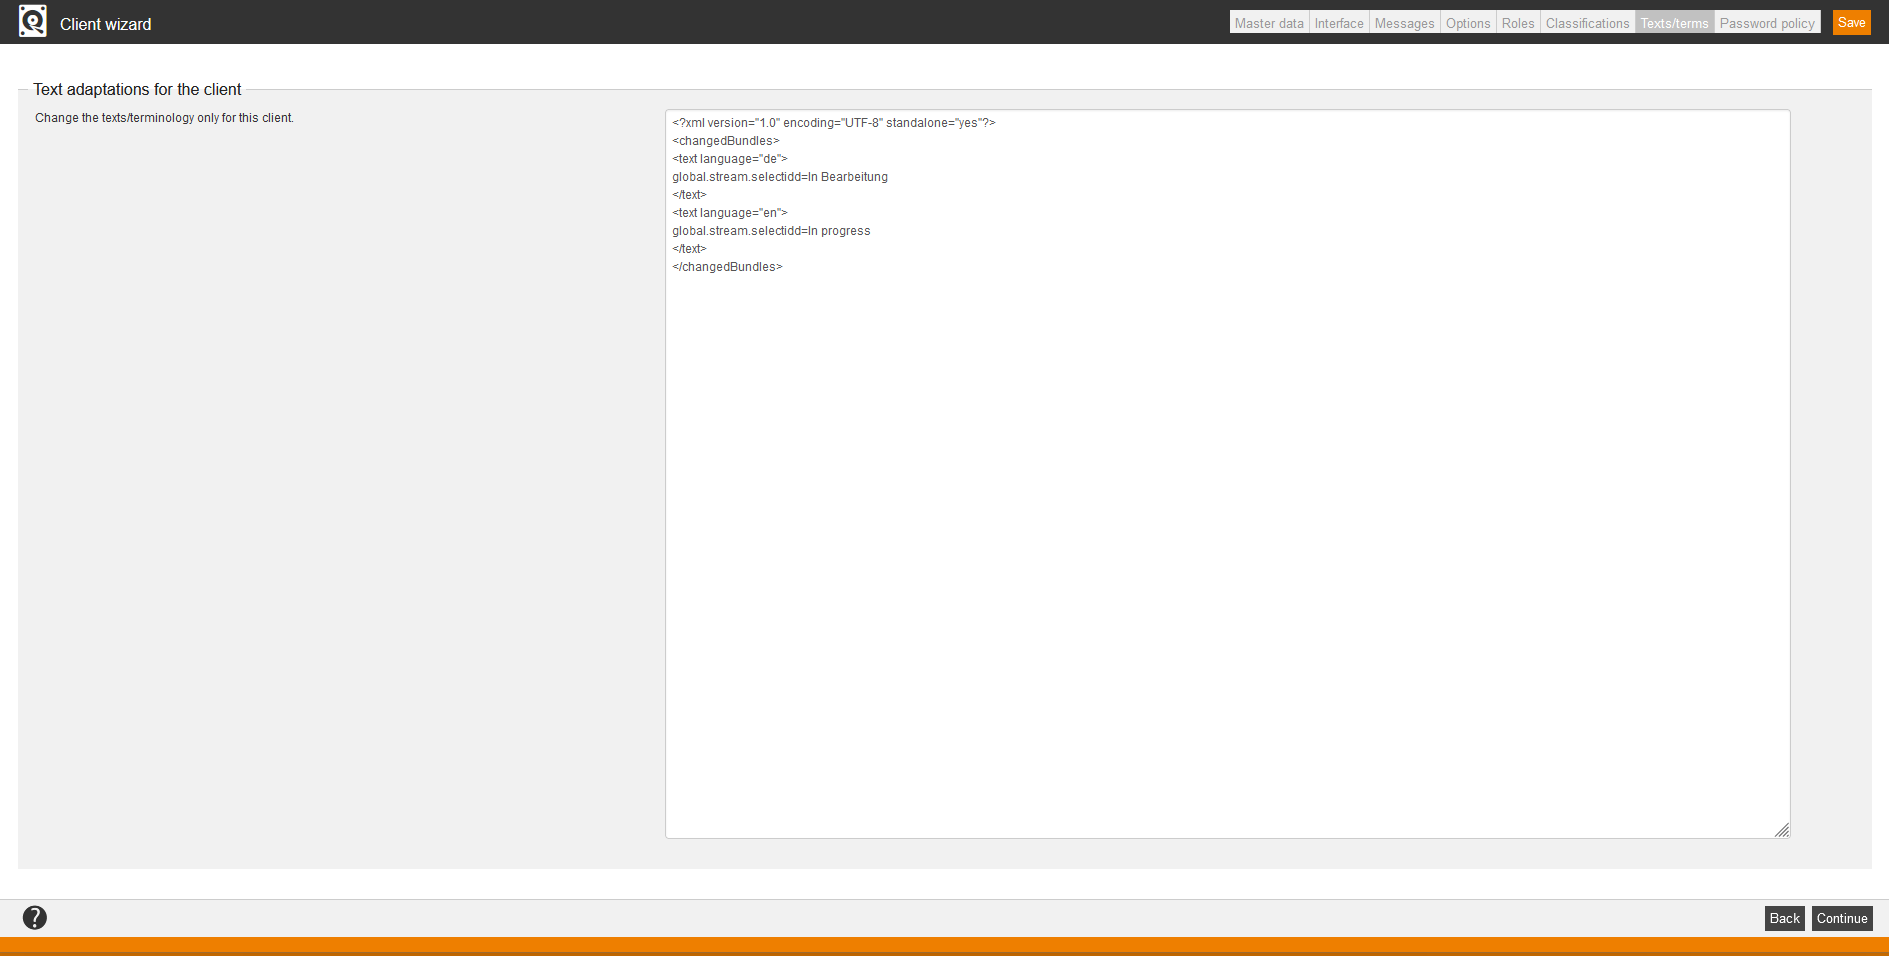
The author defines the title of an individual stream via a text or term bundle entry. The author can configure this text or term bundle entry for the title of the individual stream under the Text adaptions for the client (on the tab Texts/terms in the Client wizard per client). If the author wants to configure the same individual stream globally in several clients, he does this in the system setting “changed.bundles.xml” by doing the appropriate entries, because this system setting is valid for all clients. Basically, this is valid for the structure of the bundle for this title of an individual stream: global.stream.[Identifier of the individual stream]=Title of the individual stream
To create the title of the individual stream (languages DE and EN in the example) and the additional text of the summary tile, the author does the following steps:
- The author switches to the tab Texts/terms.
- The author enters the translation in the field Text adaptions for the client.
In this field he enters “global.stream.manual=Manual themes and examples”, as behind the equals the title or stream name is placed, this means the later shown name for the individual stream on the start page in the user’s frontend.
- The author clicks the button Save.
IDD relevant content
For IDD relevant content you got the following configuration for the step “Store JSON or copied link” for example:
{"titleFilter":"","filter":{"iddRelevant":"IDD_RELEVANT;"},"limit":8,"offset":0,"forceReload":false}
Further information about the IDD configuration you find on the page “Start”.
Following activities
Per default the check mark of the newly created, individual stream is set and thus the individual stream is activated on the start page in the user’s frontend.
The author can deactivate the individual stream via removing the check mark on the tab Options in the Client wizard. Also the author can edit the individual stream via clicking the Pencil or he can remove the individual stream via click on the recycle bin.
The user can click the summary tile, if activated, on the start page (see first screenshot). He gets to the catalog view (see second screenshot), which is filtered regarding the filter criteria of the individual stream and offers a much more comfortable overview.
If you have any questions, please contact our Support Team.
