You can see and create providers under Course management → Provider like the other activations (course activations and training plans). Thus Avendoo® supports the activation of course activations via LTI 1.3 to other systems.
You find more information about LTI on the page “FAQs”.
Prerequisite for this function is an extra Avendoo® license.
For further questions please contact our support team.
The table got the columns Title, Type, Author, Created and Change date. If you click on the table header, you can edit the column view and their order. You can use the following filters: Title and Include subcategories.
There are the mass processing functions Move, Delete and Change owner for providers. More information about these functions you find under Providers: Mass processing functions.
The following functions are available via the context menu of the corresponding provider title.
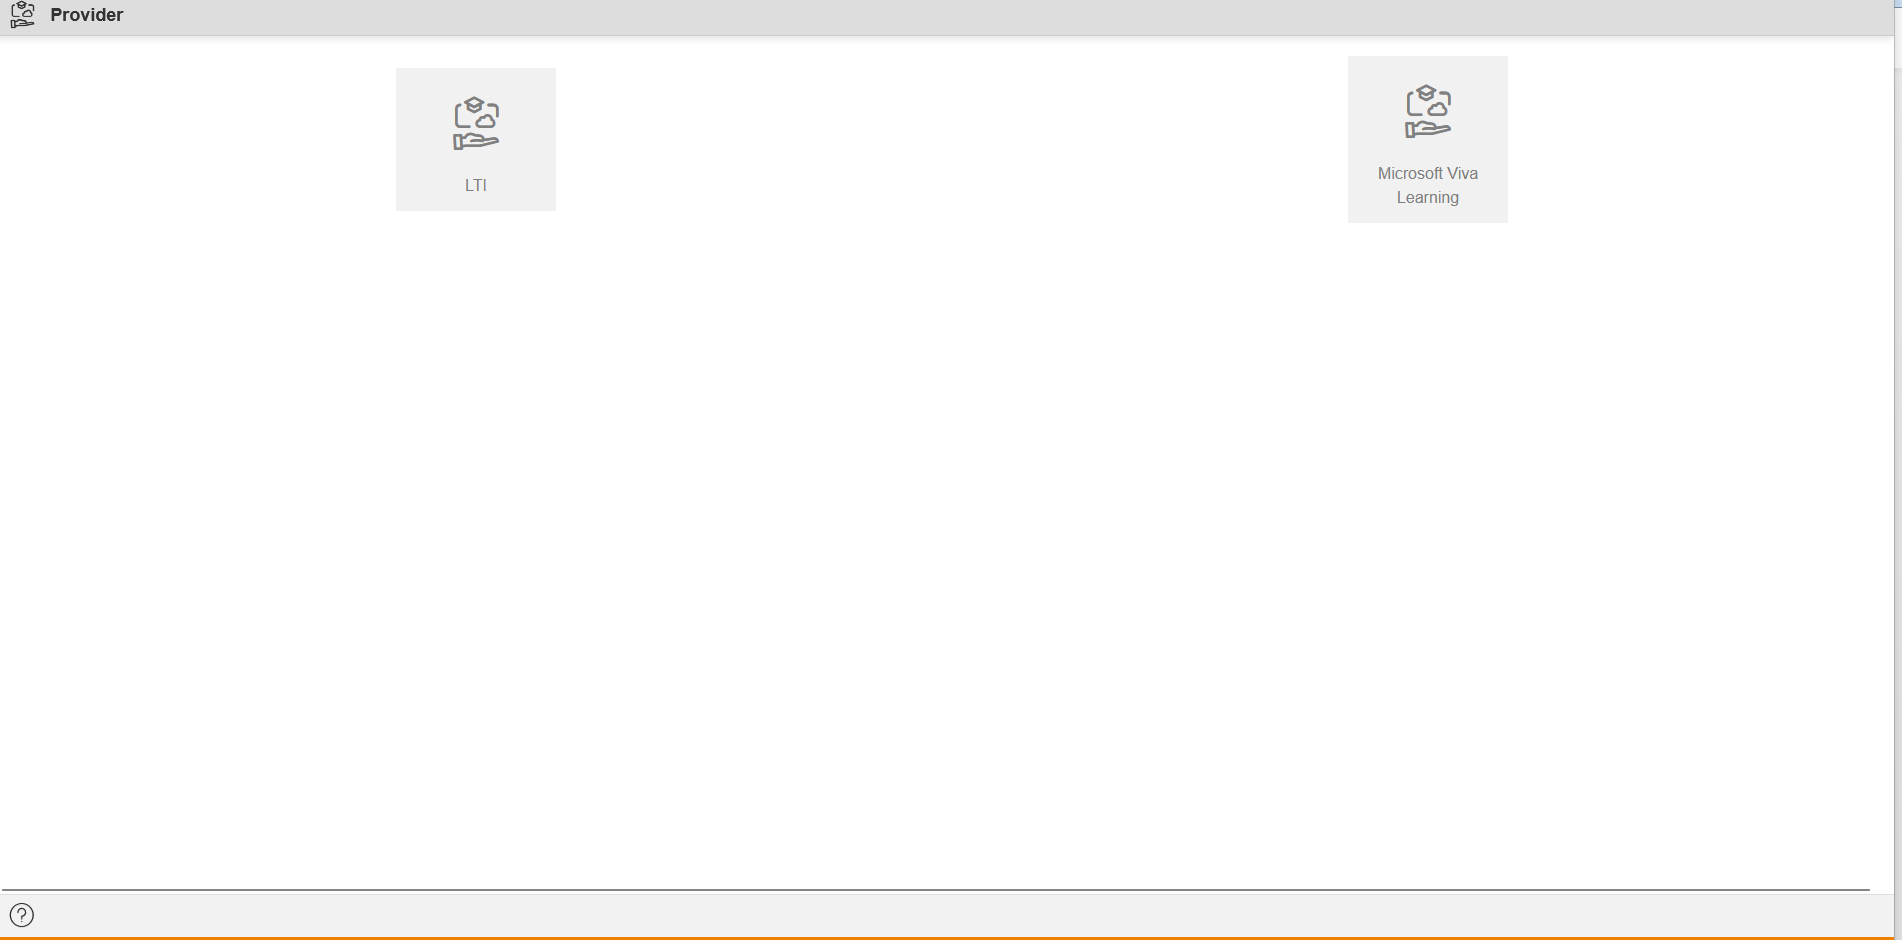
First, the introduction dialog window of the Provider wizard opens. You can select between the following options:
- LTI or
- Microsoft Viva Learning
This enables you to publish content in the corresponding Microsoft Viva Learning environment.
LTI
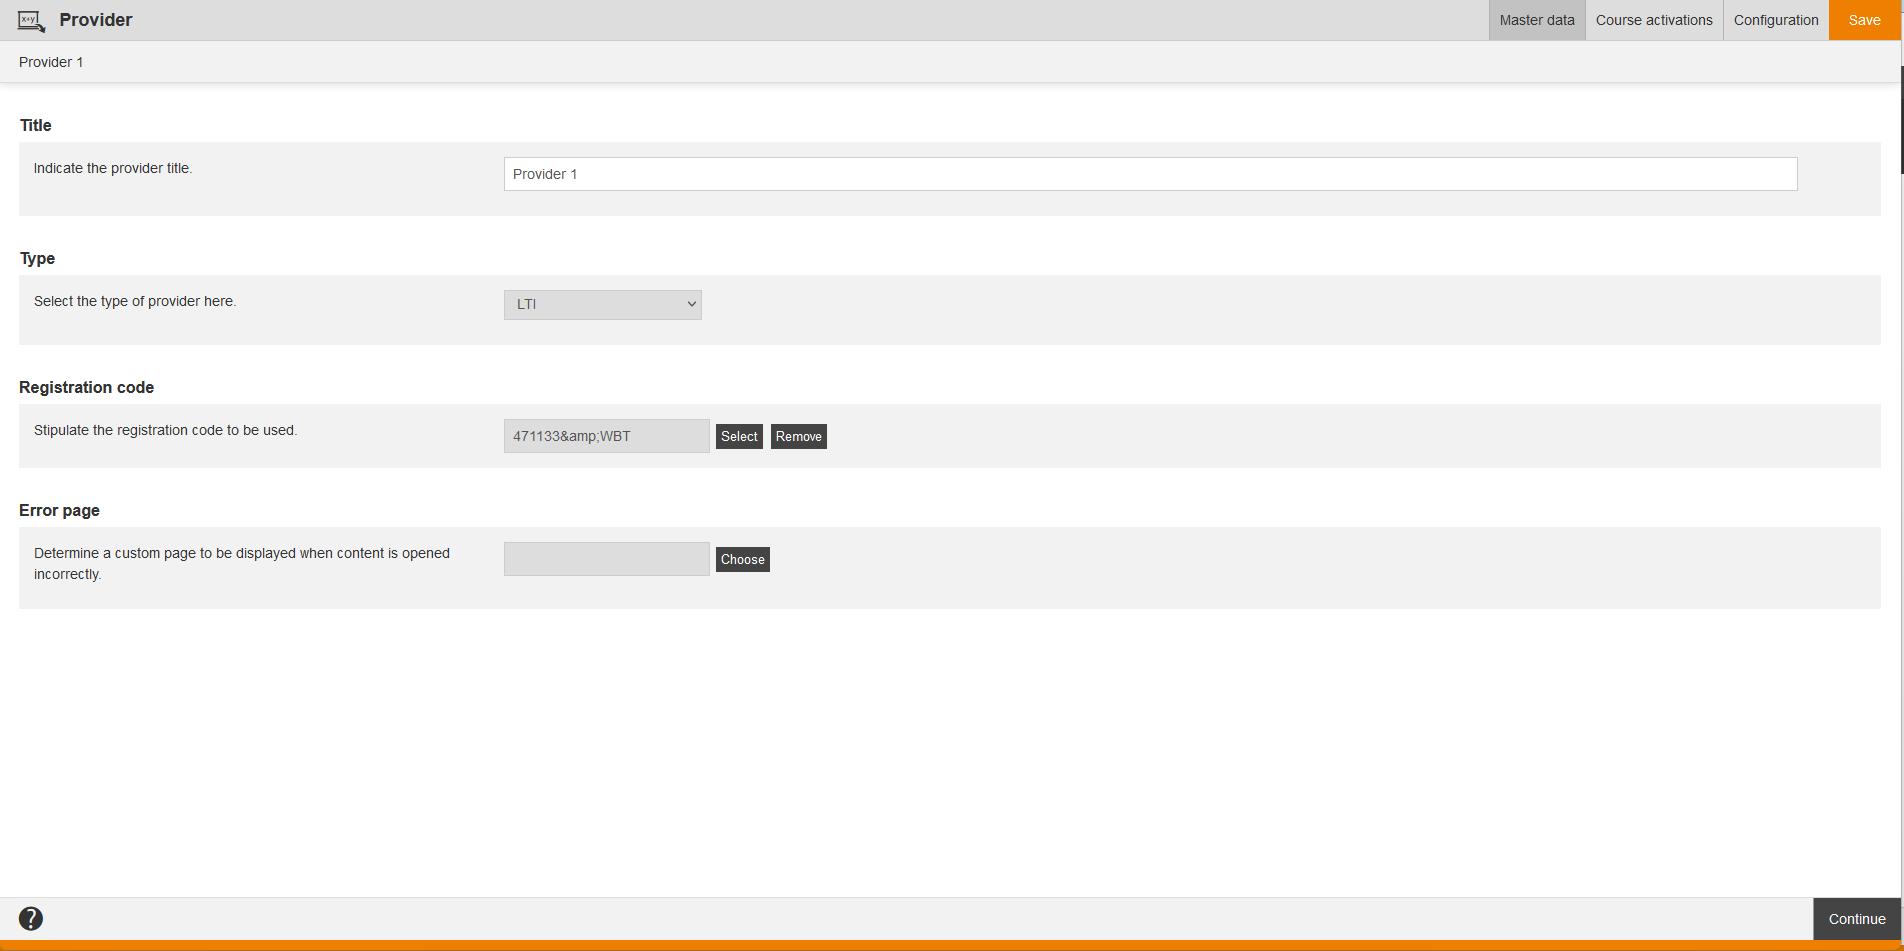
Master data
Title
Indicate the provider title.
Type
Select the type of provider here. At this moment only the type LTI is selectable.
Registration code
To define the registration code to be used, click the button Select and confirm your selection. If required you can remove the registration code again.
Error page
Determine a custom page of the type “Content error page” to be displayed when content is opened incorrectly. This page can be displayed if the maximum number of registrations on a LTI lauch regarding the provider system has been reached.
To choose the custom page, click the button Choose, choose the favored content error page and confirm your selection with the button Select. If required you can remove the selection via the button Remove.
Course activations
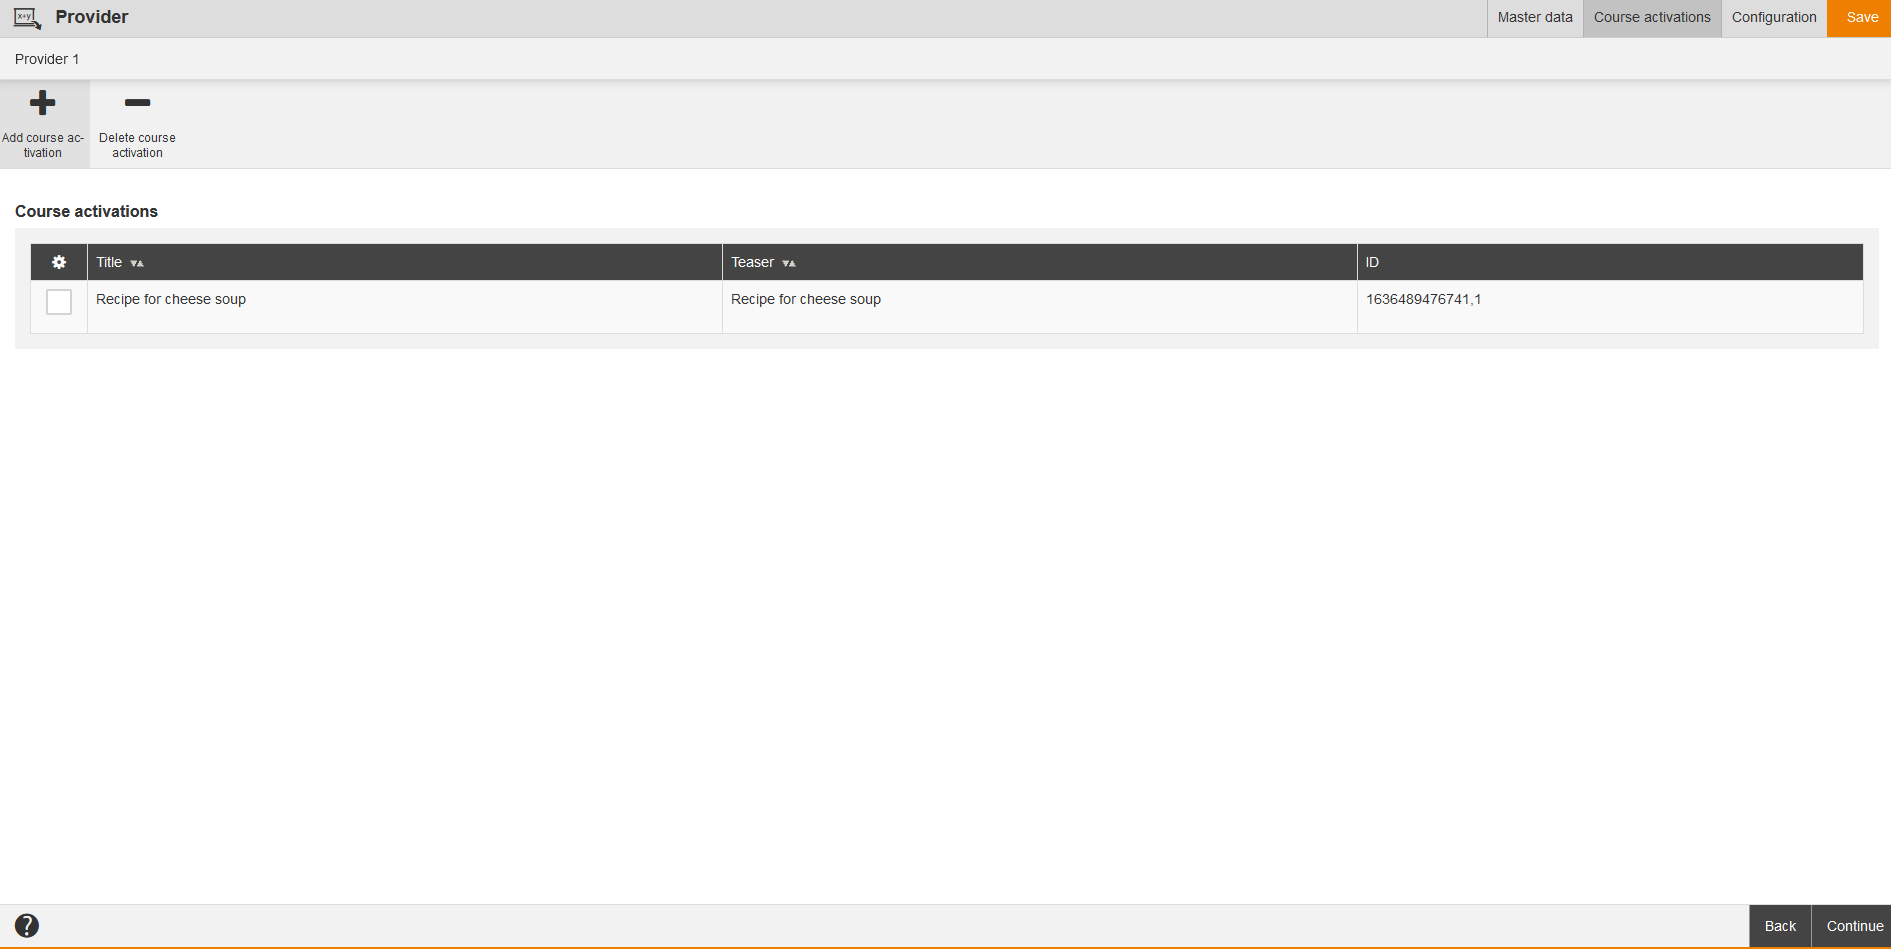
On this list you see the already added course activations, which should be activated via LTI 1.3 to other systems via the appropriate provider. The added course activations are listed in a table with the columns Title, Teaser and ID, which you can configure via right clicking the gear wheel. The ID is generated automatically.
Add course activation
To add the favored course activation click the button Add course activation. Then a dialog window opens and you can select the favored category in the category tree and the favored filter. To use the filter, click the button Apply.
To select one or more course activations set the corresponding check marks and click the button Select.
Then these course activations will be listed on this tab.
If required you can remove the added course activations via the button Remove.
Delete course activation
To delete the favored course activation, set a check in front of the course activation and click the button Delete course activation. Then this course activation is no more listed.
Configuration
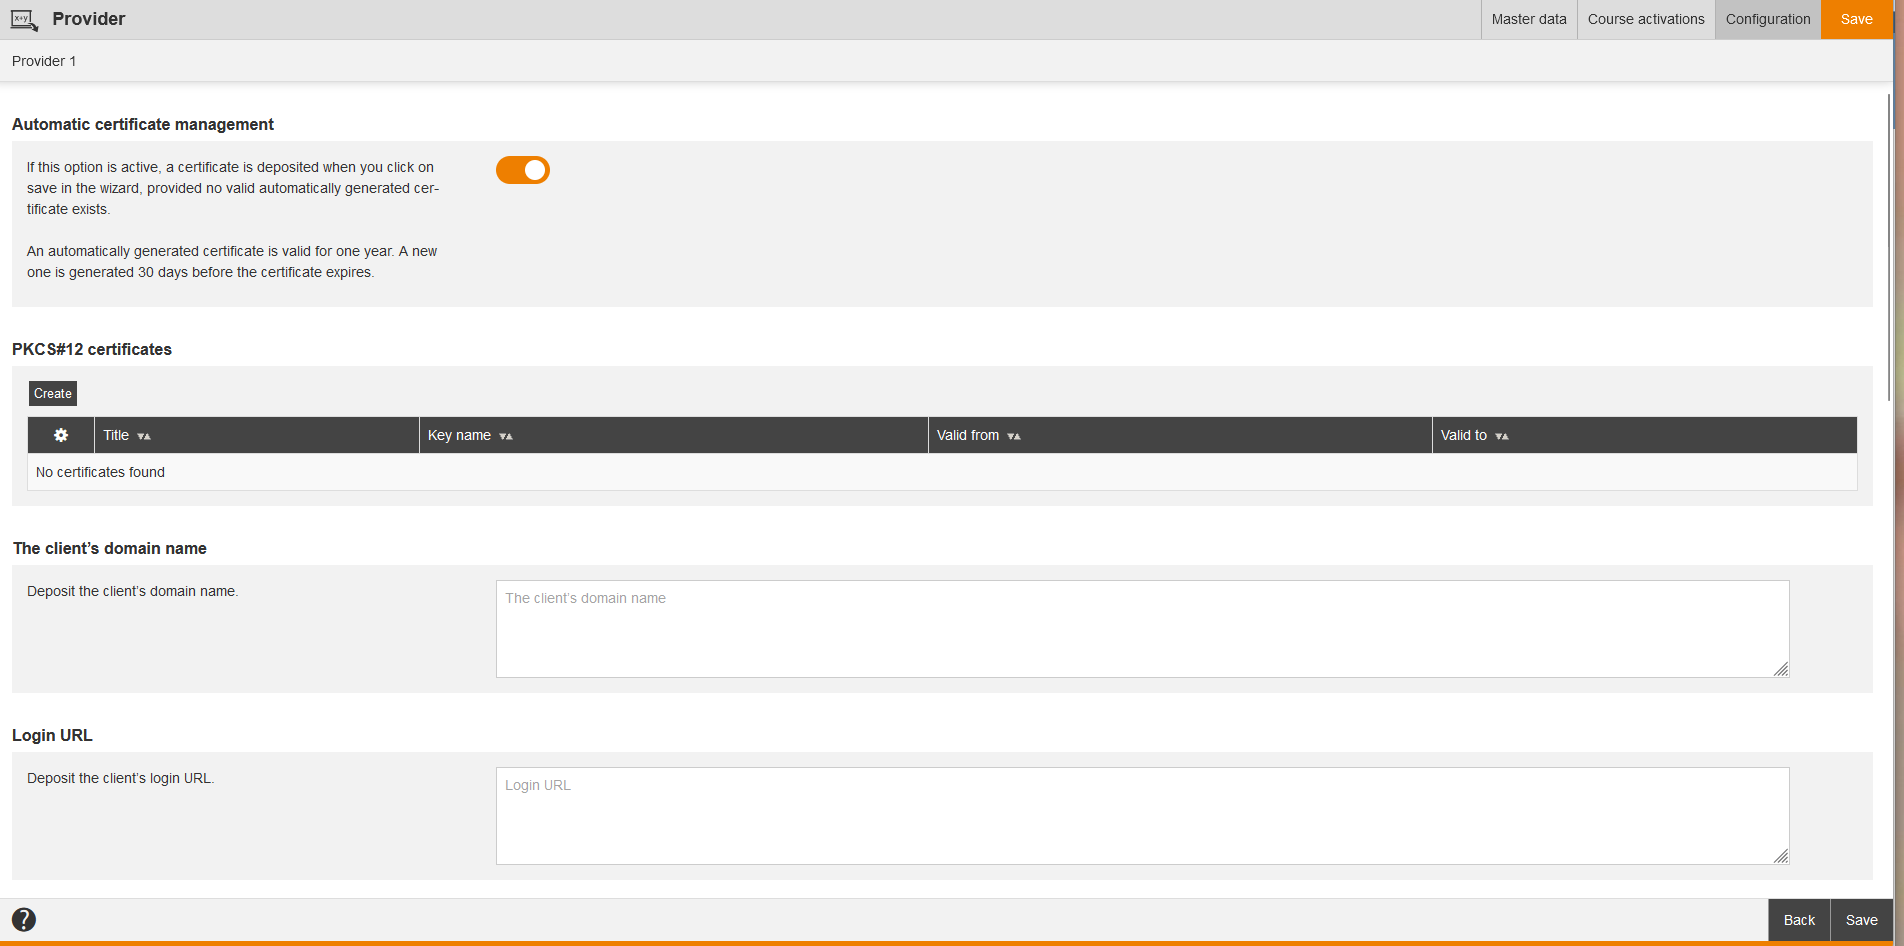
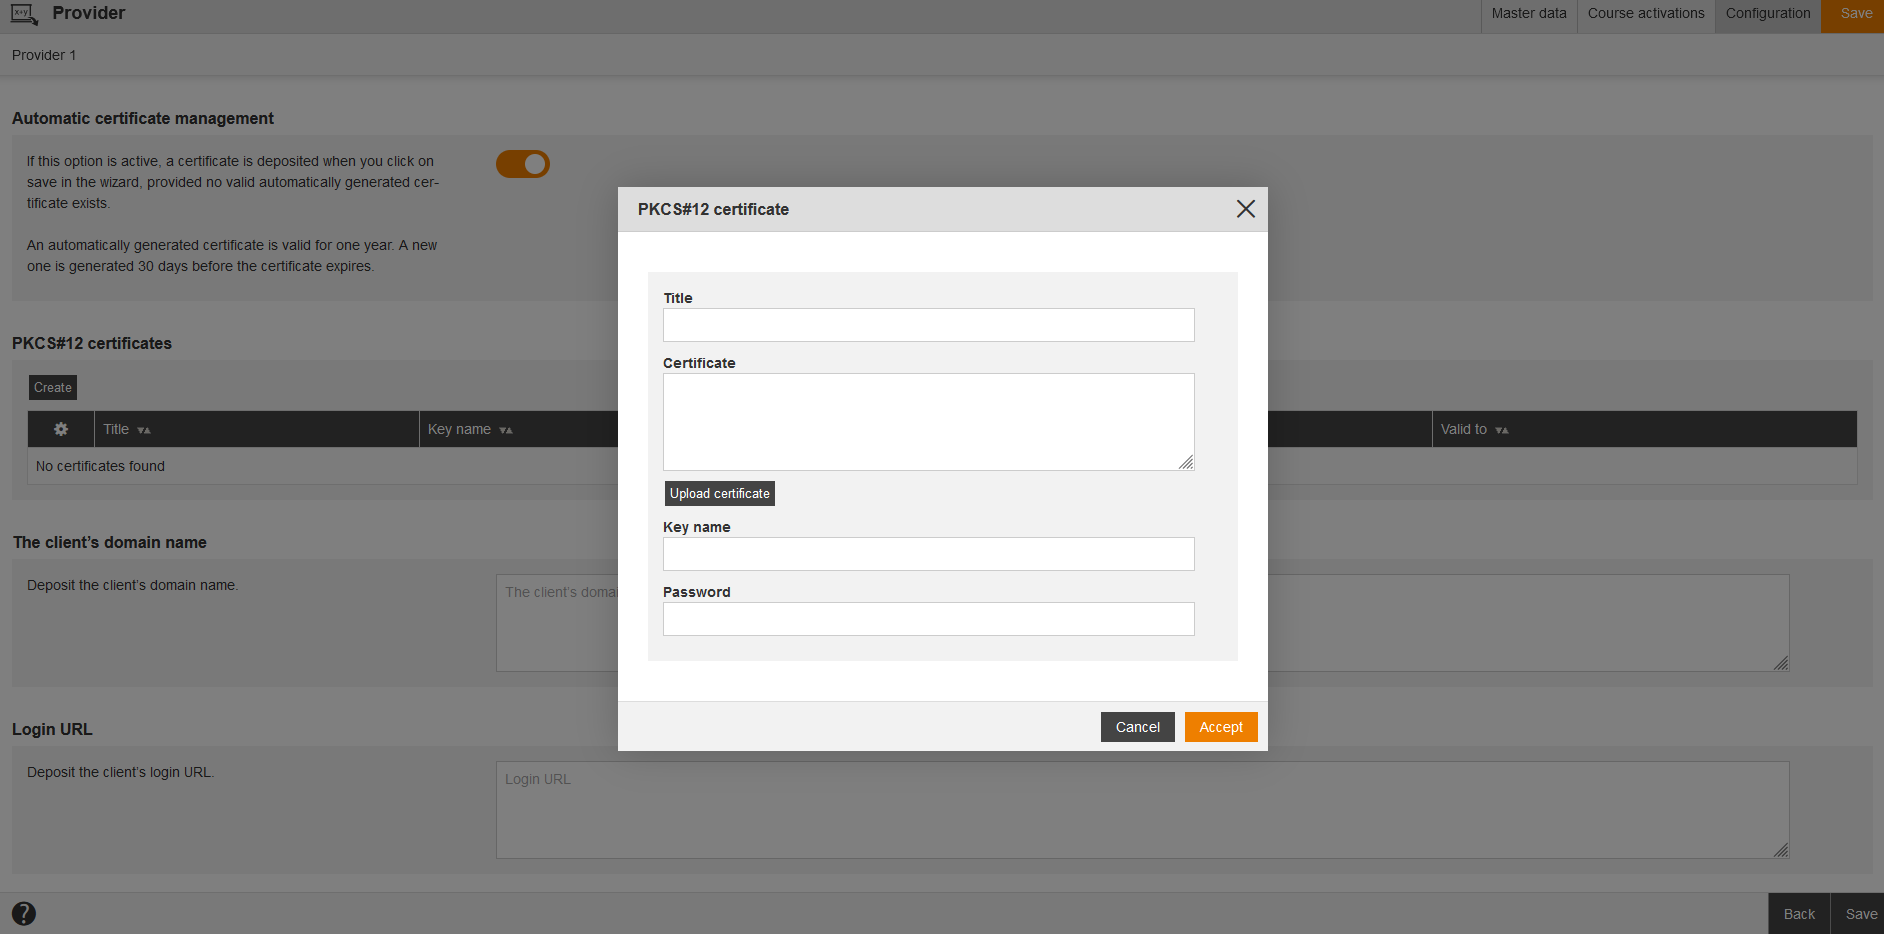
Automatic certificate management
If this option is active, a certificate is deposited when you click on save in the wizard, provided no valid automatically generated certificate exists.
PKCS#12 certificates
To create a p12 certificate file, click the button Create. The dialog window PKCS#12 certificate opens and you can select a p12 certificate file by clicking the button Upload certificate. In the dialog window Import you click the button Search and confirm your selection. Now you see the base64 string of the uploaded p12 certificate file in the entry field of the certificate. This is analog to the system setting “InsuranceDistributionDirective“.
The client’s domain name
Deposit the client’s domain name.
Login URL
Deposit the client’s login URL.
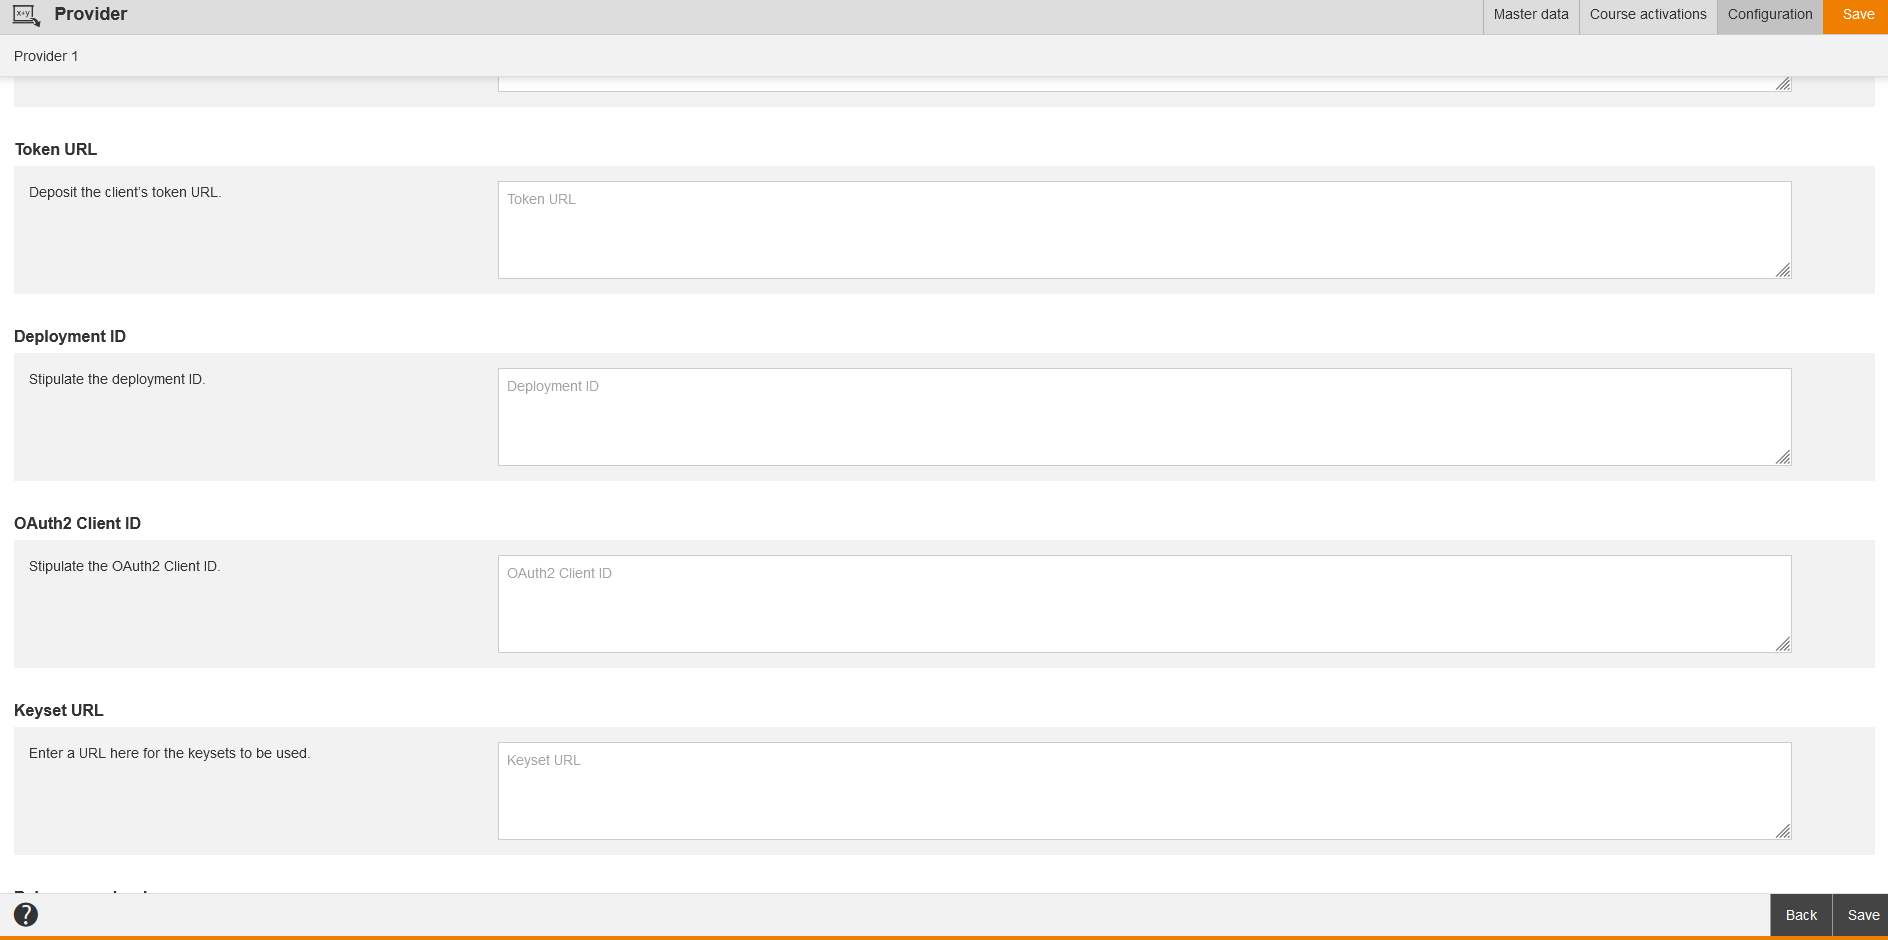
Token URL
Deployment ID
Stipulate the deployment ID.
OAuth2 Client ID
Stipulate the OAuth2 Client ID.
Keyset URL
Enter a URL here for the keysets to be used.
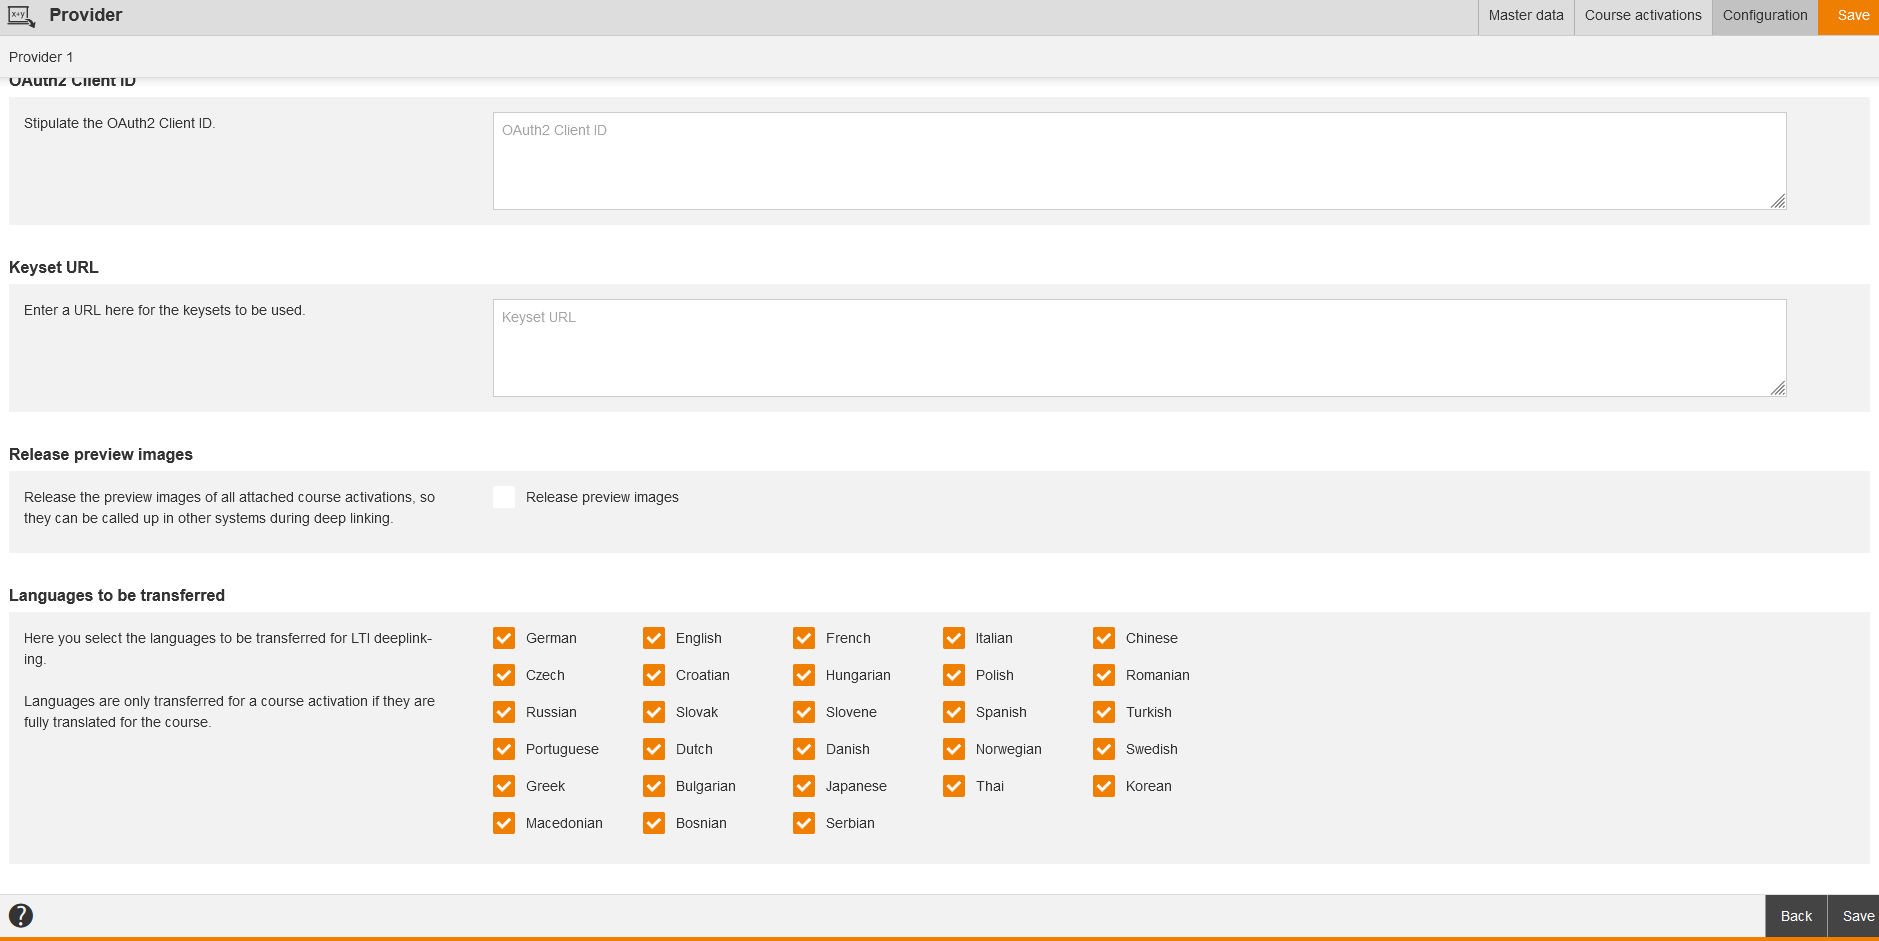
Release preview images
Release the preview images of all attached course activations, so they can be called up in other systems during deep linking. Therefore set the check mark Release preview images.
Languages to be transferred
Here you select the languages to be transferred for LTI deeplinking by setting check marks.
Microsoft Viva Learning
Master data
Title
Enter the title for the provider.
Type
The type of provider is set per default (Microsoft Viva Learning).
Landscape logo for dark mode
Select a landscape image as a logo for dark mode in Microsoft Viva Learning by clicking the button Select, selecting your favored image and confirming your selection. If required you can remove this image via the button Remove.
You have created this image as medium of use everywhere in SVG format. See Administration → Medium of use everywhere.
Landscape image for light mode
Select a landscape image as a logo for light mode in Microsoft Viva Learning by clicking the button Select, selecting your favored image and confirming your selection. If required you can remove this image via the button Remove.
You have created this image as medium of use everywhere in SVG format. See Administration → Medium of use everywhere.
Square logo for dark mode
Select a square image as a logo for dark mode in Microsoft Viva Learning by clicking the button Select, selecting your favored image and confirming your selection. If required you can remove this image via the button Remove.
You have created this image as medium of use everywhere in SVG format. See Administration → Medium of use everywhere.
Square image for light mode
Select a square image as a logo for light mode in Microsoft Viva Learning by clicking the button Select, selecting your favored image and confirming your selection. If required you can remove this image via the button Remove.
You have created this image as medium of use everywhere in SVG format. See Administration → Medium of use everywhere.
Course activations
This tab is identic to tab Course activations of LTI providers.
You find more information about maintaining data under „Course activations“.
Configuration
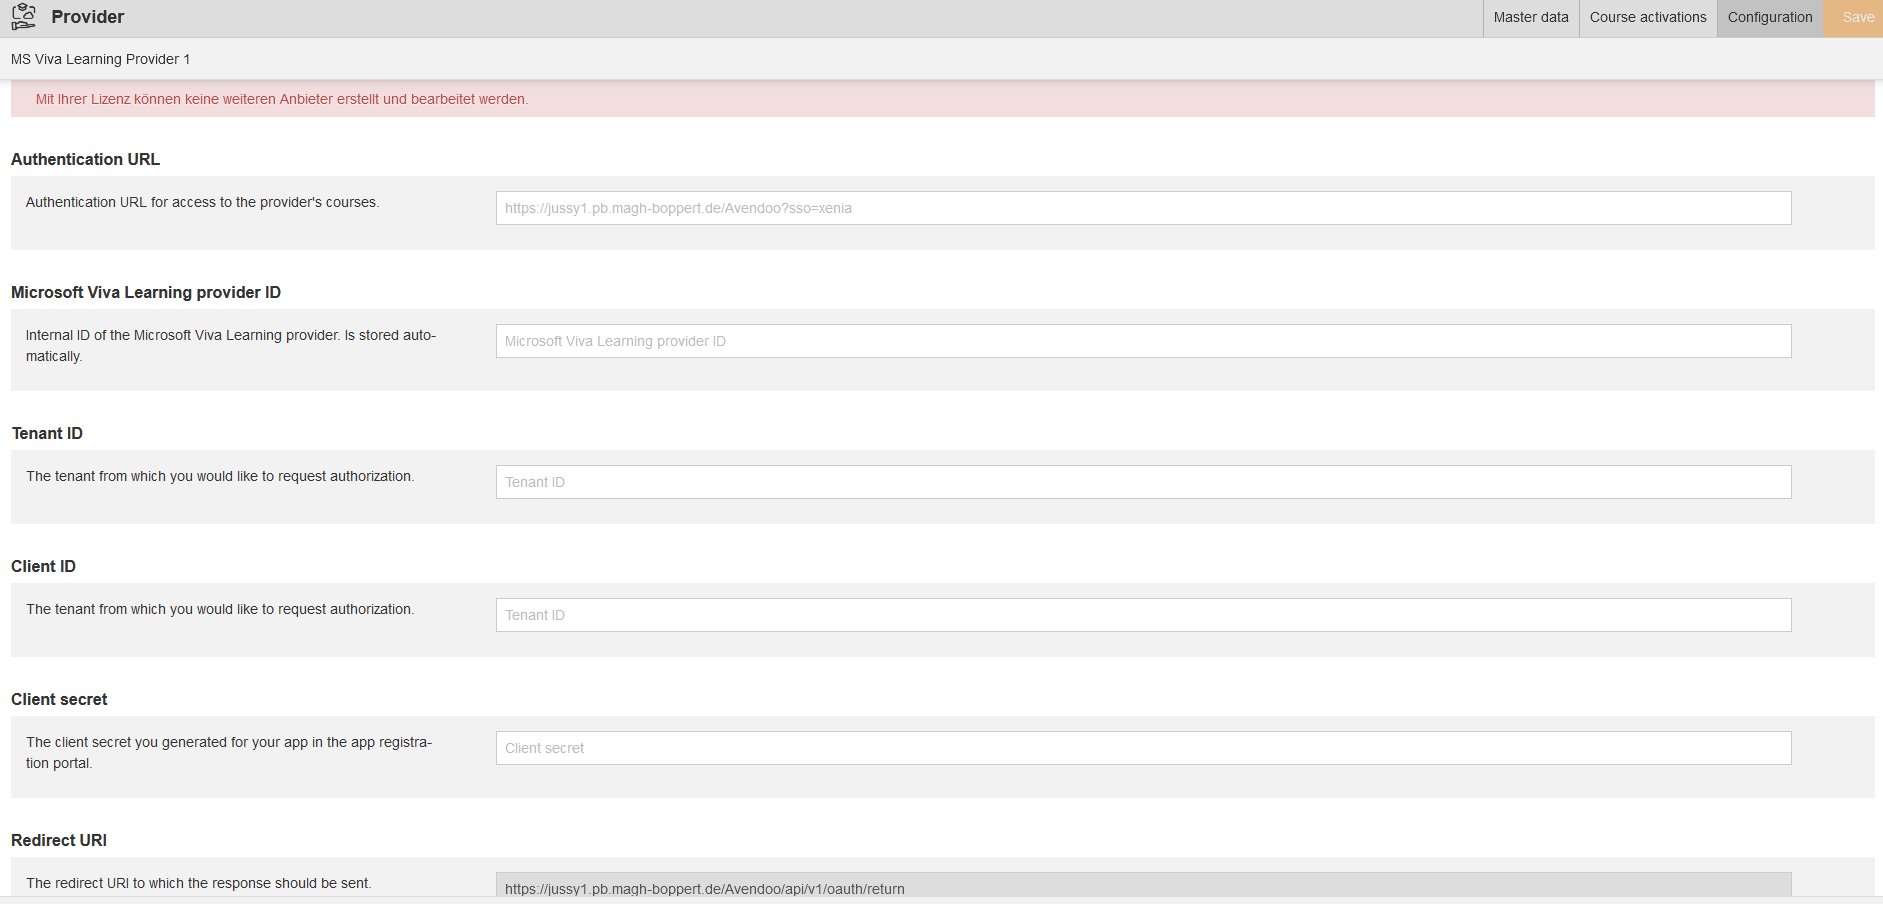
Authentication URL
Enter the authentication URL for access to the provider’s courses.
Microsoft Viva Learning provider ID
Internal ID of the Microsoft Viva Learning provider. Is stored automatically when the connection to Microsoft Viva is done.
Tenant ID
The tenant from which you would like to request authorization.
Client ID
The tenant from which you would like to request authorization.
Client secret
The client secret you generated for your app in the app registration portal.
Redirect URI
The redirect URI to which the response should be send.
Languages to be transferred (mandatory)
Select the languages to be transferred for LTI deeplinking by setting a check mark for the favored languages.
Languages are only transferred for a course activation if they are fully translated for the course.


