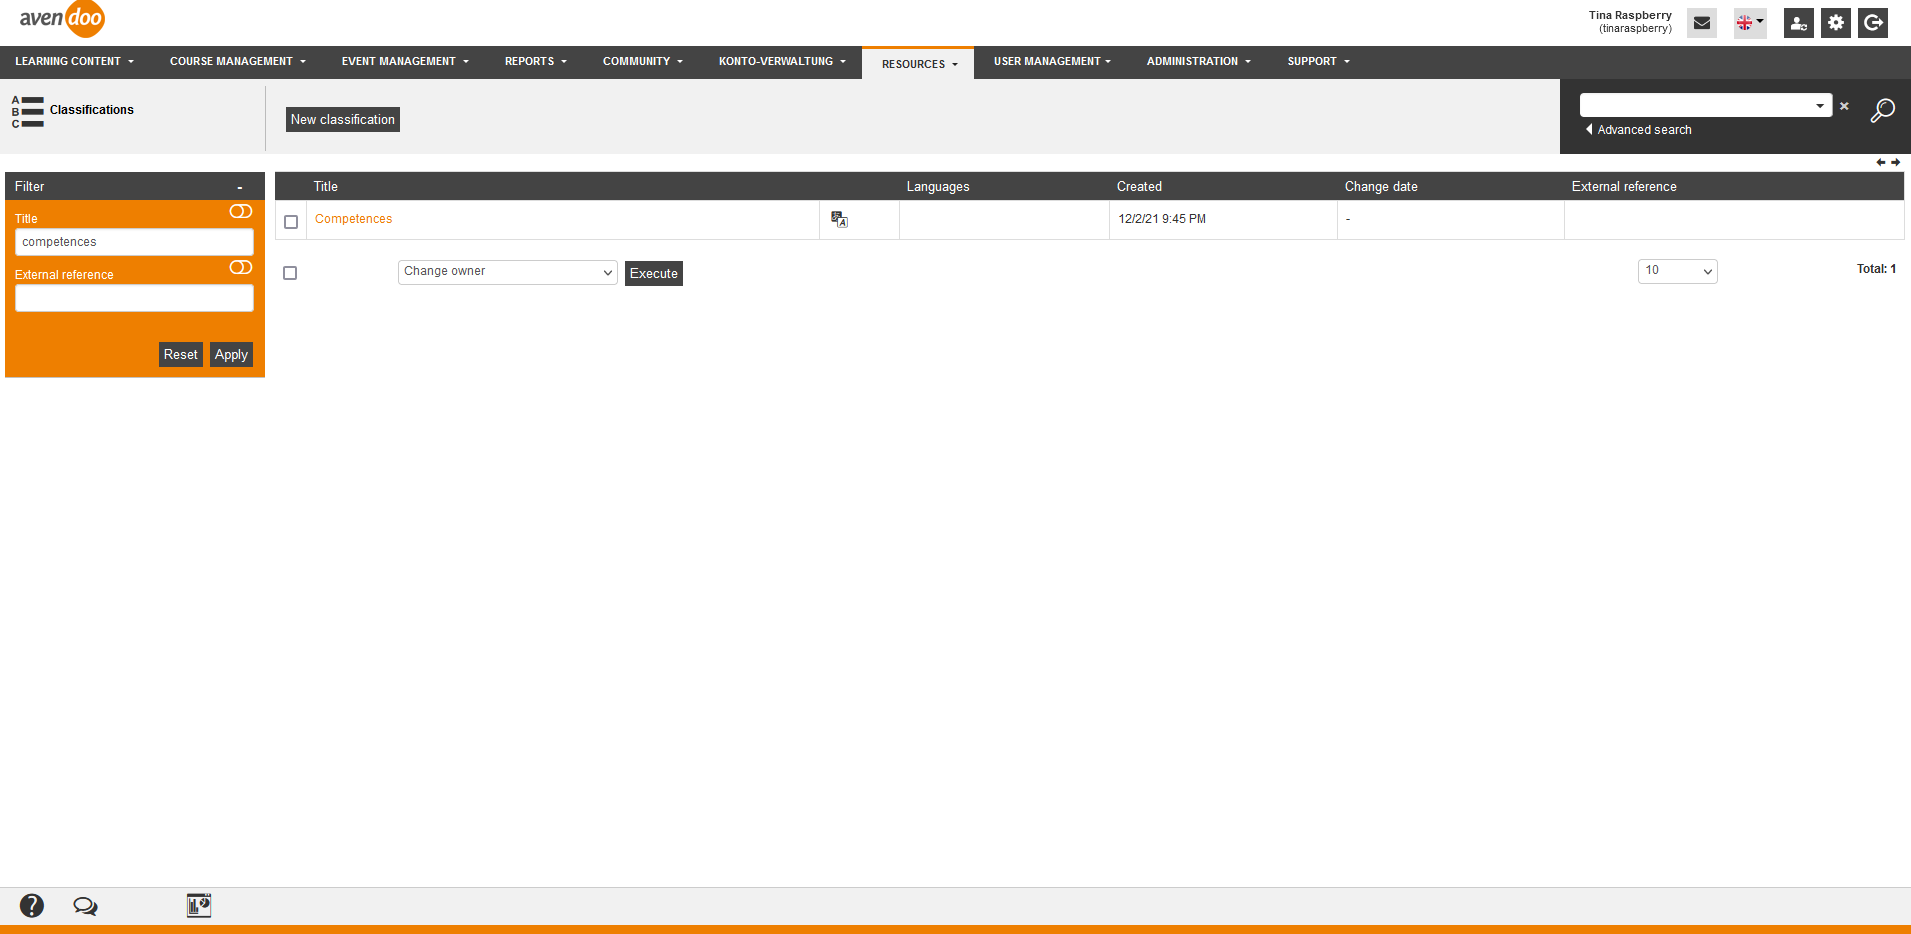
Classifications represent an additional option to insert a filter option in the user’s frontend. You can filter classifications by Title and/or External reference.
Via click on the symbol of the translation area you get into the translation management of the corresponding classification.
There is the mass processing function Delete for classifications. More information about this function you find under Classifications: Mass processing functions.
The following functions are available via the context menu of the corresponding classification title.
Integration of classifications including an example
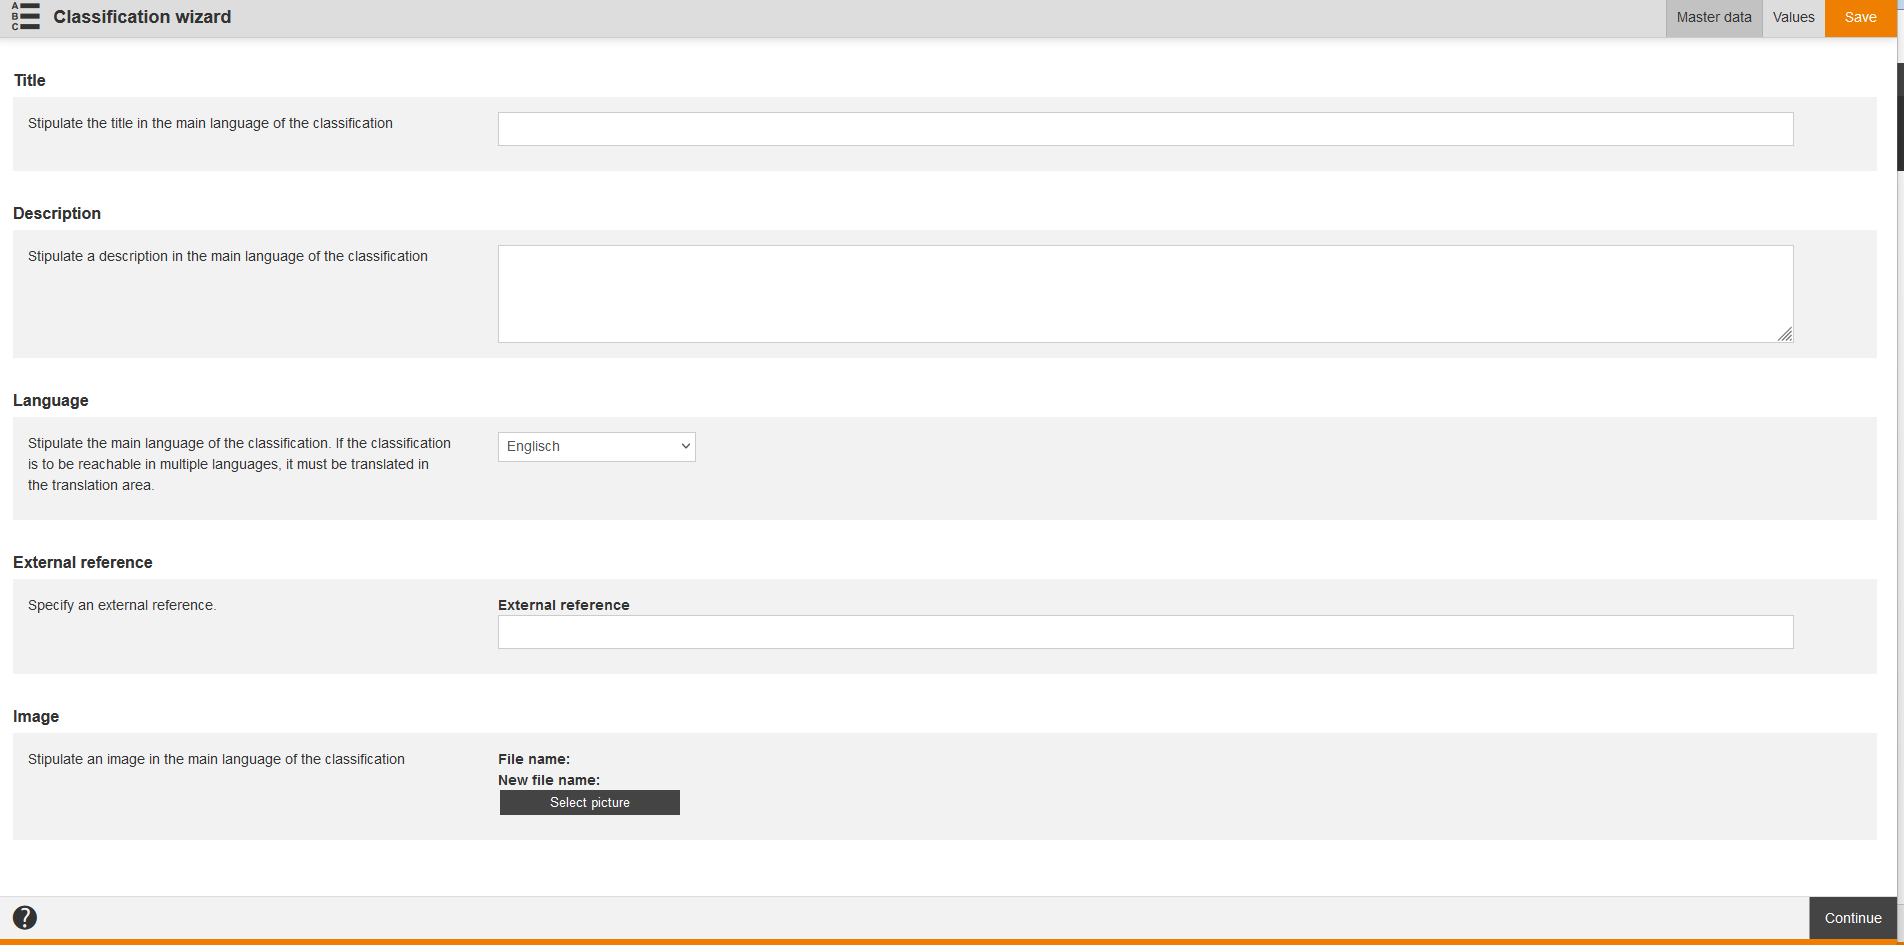
- To create a new classification, choose Resources → Classifications → New classification. The Classification wizard opens.
- Enter “Trainee” for the first classification under the title on the tab Master data. Then select the language English and switch to the tab Values. Click the button Add classification value enter “Year of training 2022” under the title. Enter “Sales training” for the second classification under title on the tab Master data. Then select the language English and switch to the tab Values. Click the button Add classification value for each value. Enter for the first value “Sales training” and for the second value “Communication” under the title (see screenshot number 1). You can also enter a description and select a picture for each classification value. Finally, you click the button Save.
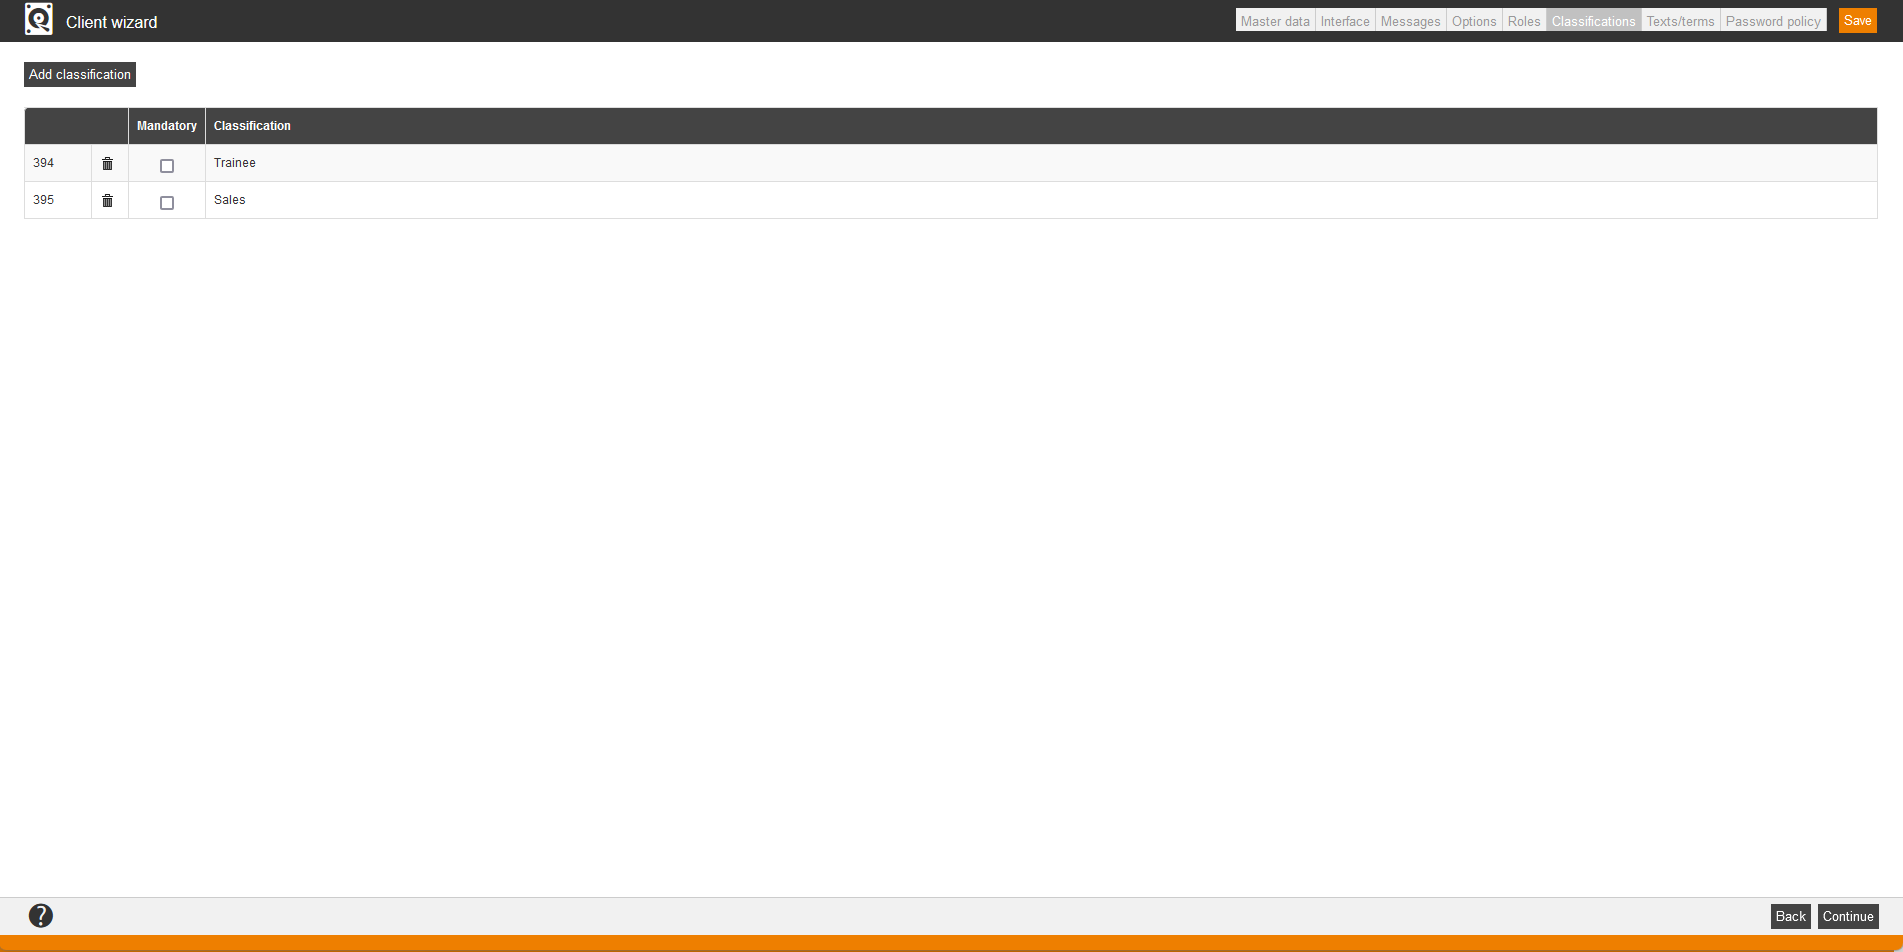
- Click the title of the activation client under User management → Clients. The Client wizard opens.
- Switch to the tab Classifications and click the button Add classification. Set a check mark in front of Trainee and Sales. Confirm your selection. The selection dialog window closes and these two classifications are now available in the activation client. They are shown in the list, consecutively numbered (see screenshot number 2).
- If you want that the classification “Sales” is a mandatory selection in the course activation or training plan wizard for example, set the check mark Mandatory.
- If you delete a classification later on, note that the assignments will be deleted, too. This means the assignments to course activations, training plans and certificates will be deleted.
- Click the button Save in the Client wizard.
- To assign the classification to a course activation, choose Course management → Course activation, click the title of the favored course activation and switch to the tab Classification. On this tab you find the classifications, which are available in the activation client.
- Select in the drop-down menu Trainee the value Year of training 2022 and select under classification Sales the value Communication (see screenshot number 3). Note that you can assign a course activation to one or more classifications.
- Check on the tab Catalog search bar in the User frontend, which filters are shown (see screenshot number 4). The learners sees these classifications as filter, if there is a learning unit, which is assigned to his or her target group. The learner sees then these learning units in his or her catalog or his or her learning place.
Master data
Enter a title and description for the corresponding classification. Further choose a language (main language), external reference and select a picture for the appropriate classification.
Values
To add a new classification value, click on the button Add classification value.
Title
Enter the title of the classification value.
Description
Enter the description of the classification value.
File (=picture)
You can insert a file by clicking the button Select picture. Then you can use this picture via interfaces. If applicable you can remove the picture by clicking the button Remove picture.
Preview
You see the preview image of the picture.


