Via the dialog question you can insert check boxes and entry fields in pictures. So you can simulate operating of entry masks of a software for example.
The dialog question is based on the picture question and contains similar functions like the picture question wizard. In contrary to the picture question you can’t mark incorrect answer areas. Define the ranges by clicking two corners vis-à-vis.
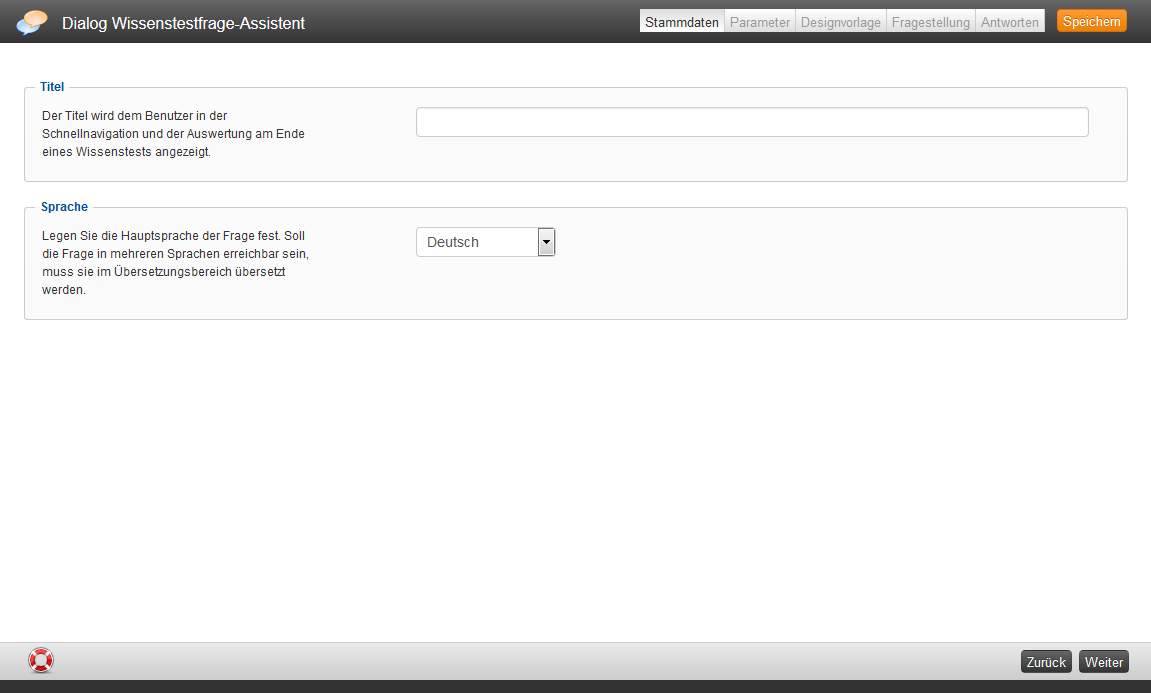
Master data
Title
Enter the title for the question. The user is shown the title in quick navigation mode and the assessment at the end of a knowledge test.
Language
Determine the main language to be used for the question. If the question is to be available in multiple languages, it must be translated in the translation area.
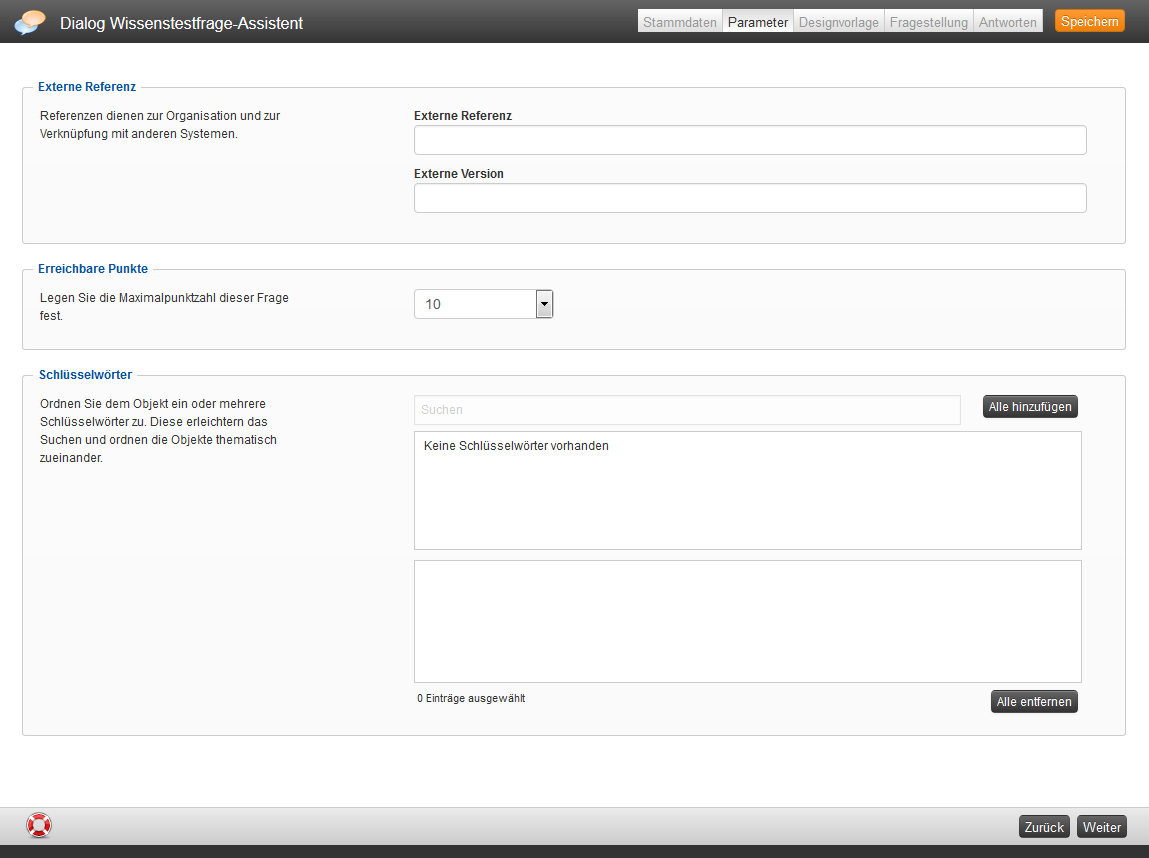
Parameters
External reference
External references are used for organizing and for linking to other systems. This you can use for manual assignments and on using interfaces, for example: REST API. You can search for external reference in the advanced filter function.
The external reference represents a reference value like ID, serial number or name.
Examples:
SAP customer number with the external reference 100234
SAP user ID with the external reference 000004
Achievable points
Define the maximum points for answering the question. You can award points from 1 to 20 points.
Keywords
Assign one or more keyword to the question. These keywords simplify searching for certain learning content. Also they sort objects thematically, so you can choose from a question pool questions with a certain keyword.
You create keywords by a right-click on the client in the category tree and then click on Keywords.
Question
If you want to create a knowledge test question, select an Empty Page or decide for a design template. Now you can arrange freely all areas and you can move it via drag and drop anytime. Also you can adjust the size of the appropriate area individually.
Available variables
![]()
There are different variables available for creating a knowledge test question via the editor. Selected content is automatically inserted via the variables:
- $Author$=name of the author (first name last name)
- $AuthorLastnameFirst$=name of author (last name, first name)
- $ChangeDate$= change date of the learning object
- $CourseTitle$ = title of the course
- $CreationDate$=creation date of the learning object
- $ExternalReference$=external reference of the learning object
- $ExternalVersion$=external version of the learning object
- $ObjectTitle$=title of the learning object
- $ParentObjectTitle$ = title of the superordinate learning object
- $QuestionPoints$=achievable points of the question
- $Serial$=serial number of the learning object
- $UserCountry$ = country of the registered user
- $UserDivision$ = division of the registered user
- $UserFirstname$ = first name of the registered user
- $UserGroup$ = group of the registered user
- $UserLastname$ = last name of the registered user
- $UserOe$ = organizational unit (OU) of the registered user
- $UserRegion$ = region of the registered user
- $UserSex$ = gender of the registered user
Preview mode
To see how the current question is shown on mobile devices, there are five preview modes and the current edit mode available. The pixel width is based on average values. The pixel height is individually well adapted for the dialog window. Choose first a responsive layout and then the preview mode will be shown correctly.
Display on the smartphone (Landscape format, width: 480px)
Display on the tablet (Portrait format, width: 800px)
Display on the tablet (Landscape format, width: 1000px)
Display on the PC monitor (width: 1200px)
Question
You can write a question via the editor and you can insert it at the appropriate position in the marked area.
Answer area
Select the position, at which the answers should be displayed.
Comment on correct or incorrect answer
If you click on this icon, the comment for a correct or an incorrect answer will be displayed at the same position. If the comment for a correct answer should be at another position than the comment for an incorrect answer, insert via click on the appropriate icon each a separate area.
Information text
To display additional information regarding a question, there is the function Information text available.
Select background image
To add a background image to your question, you have first uploaded it in the media center. Depending on the background image you can position the comments for a correct or incorrect answer at different positions.
Responsive Layouts
For optimum display of your questions also on mobile devices, there are different responsive layouts available. To apply it to the edit mode, click on the favored layout. Then the display in the preview mode is adjusted.
Reset page
Via this action all existing content gets lost and you can restart.
Preferences
You can define the width of the window, in which the single question elements are positioned. You can select a fixed width or you can adjust the width dynamically to the window width.
Answers
Define the areas by clicking two corners vis-à-vis.
New image
To select a picture from the media, click on this button.
Text orientation
With this function you can show the question text top or at the side.
Full picture/ cropped picture
Here you change the view of the picture. The picture is either shown in original size or as image section. If the picture is bigger than the dialog window, scroll bars appear. The benefit of the cropped picture option is that the user sees directly the relevant picture area of very big pictures. You don’t have to scroll.
Correct area
Mark the area in the picture, which should be valid as correct answer.
You need the option “Correct area” for finishing to fill-out the dialog question and to send the results.
The area “Save” or “Next” is often shown therefore as “Correct area”.
Example: The dialog question includes the correct filling-out of a form. Thus the “Correct area” represents the created area “Save”, by which the results will be sent automatically.
Check box
First click on this button, then mark the position in the picture, at which the check box should be shown. A dialog window opens. Just enter the correct answer (check box marked/not marked) and the standard value (check box marked/not marked) on opening the question.
Entry field
Via this function you can place entry fields in a picture. So you can simulate operating entry masks of software programs. Therefore click on the button Entry field. Then click at the position in the picture, at which the entry field should be placed. Mark first the upper left and then the lower right corner of the entry field. A dialog window opens, in which you can edit the entry field. Here you define the frame settings for the entry field (operation system, no frame, simple frame). Also you can define the frame color. Enter a hex color code (for example *FFFFFF;) or a HTML standard color (for example: red, white, green, black, blue) in the field frame color. Furthermore you can configure the font and the font size. You can enter a character string in the field standard value, which should be shown as opening the question. You can enter the correct answer in the answer field. You can enter the answer comment on incorrect answer in the field comment.
Mouse information area
Via this function you can lodge information in the marked areas of the picture. The learners see this information, if the mouse pointer is moved over such areas (mouse over).
Remove area
If you want to remove an answer area or a mouse information area, click on Remove area. Then click on the area to be deleted.
Activate this function with the mouse pointer and click then on the mouse information area to be changed or on an answer area for incorrect answers.
Move area
To move an answer area or a mouse information area, click first on the function Move area and then on the area to be moved. The area turns blue. Click now at the position, at which you want to move the area (the mouse pointer marks the upper left corner).
Click on an area in the picture, which you want to move. The selected area turns blue. Mark now the new size of the area (the mouse pointer marks the lower right corner).
Show cropped view
You can choose between two views. First the marked cropped view is shown. Second the whole picture is shown. The non-marked area is grey colored.
Mark cropped view
With this function you mark via a frame an image section. The marking frame is big as the dialog window of the user.


