After you have created a course announcement it is important to define, which user should receive this announcement.
Users
You have different options to add a recipient:
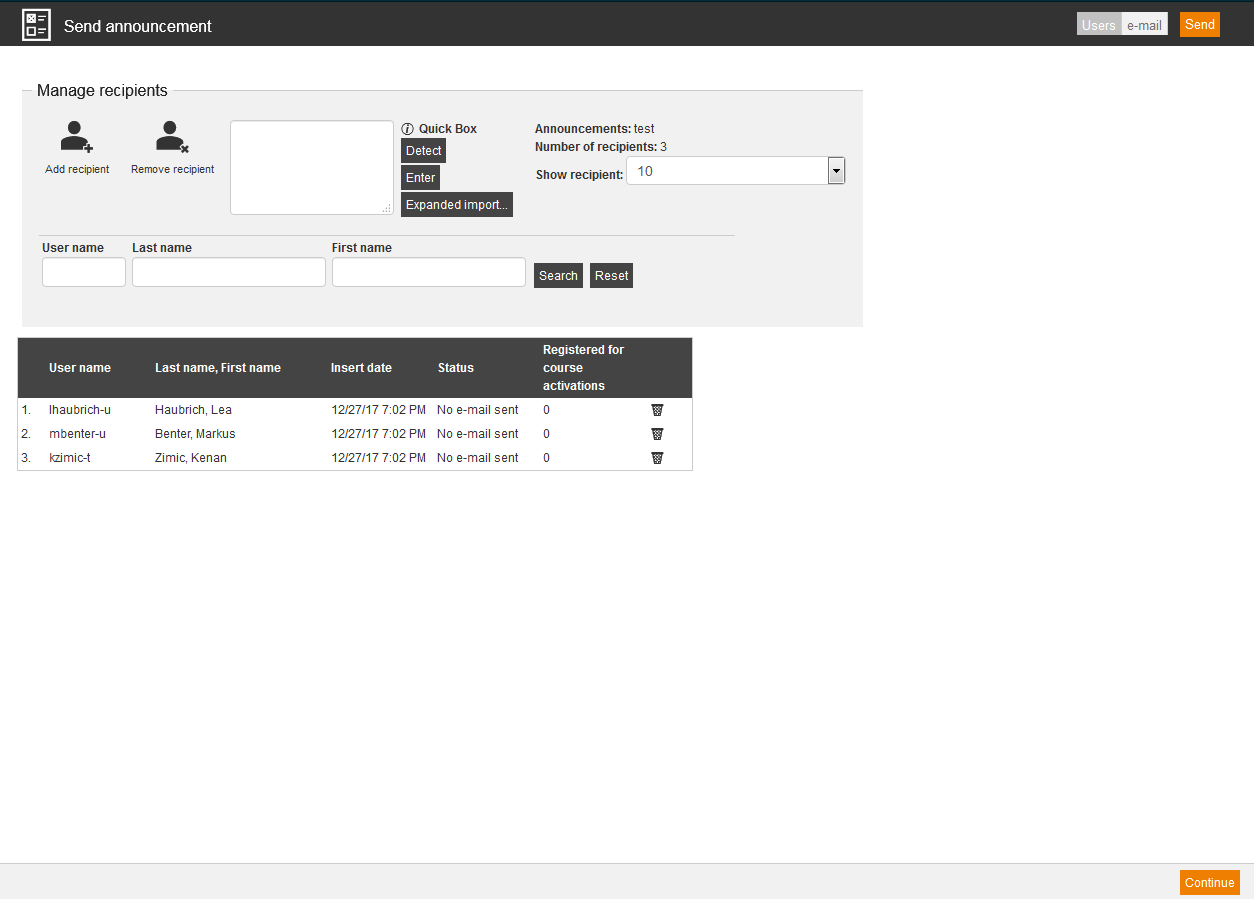
Add recipient
If you have clicked on this button, you get a list of users in the client to select the favored recipient and then to add him/her. During the selection of the recipients you can filter by the following criteria: User name, Last name, First name, OU, Company name, Street and building number, Postal code, Town, Group, Division, Telephone, Mobile number (business), User profile, User status (Show all users, Show only active users or Show only inactive users), Certificate available, Certificate not available, Issuing date for certification (Start date and End date) and End of validity of certification (Start date and End date).
Remove recipient
To remove single recipients, click on the dustbin icon on the right side of the recipient. If you want to remove several recipients you click on this button above.
Quickbox
Enter the recipient of the announcement via the quickbox and the user name. Then click on the button Detect and on the button Enter to add the user as recipient.
Expanded import
The expanded import enables you entering several participants via first and last name or via e-mail address or via login.
In the first field you can enter the e-mail addresses of the users, which must be separated from each other by at least one space.
In the second field you can enter the first and last name of the participants. Note that, the first name must come before the last name and be separated from it by at least one space. Each participant has to be in an own line.
In the third field you can enter the logins of the participants. Note that the logins must be separated from each other by at least one blank space. Alternatively each login can stand by itself in its own line.
Then click on the button Recognize participant data to get a list of the recognized participants. Now you can select via setting a check box the favored users and add them as recipients via the button Add.
You see the added recipients in the listing below. You can restrict this view via search. By clicking the Reset button you remove this filter.
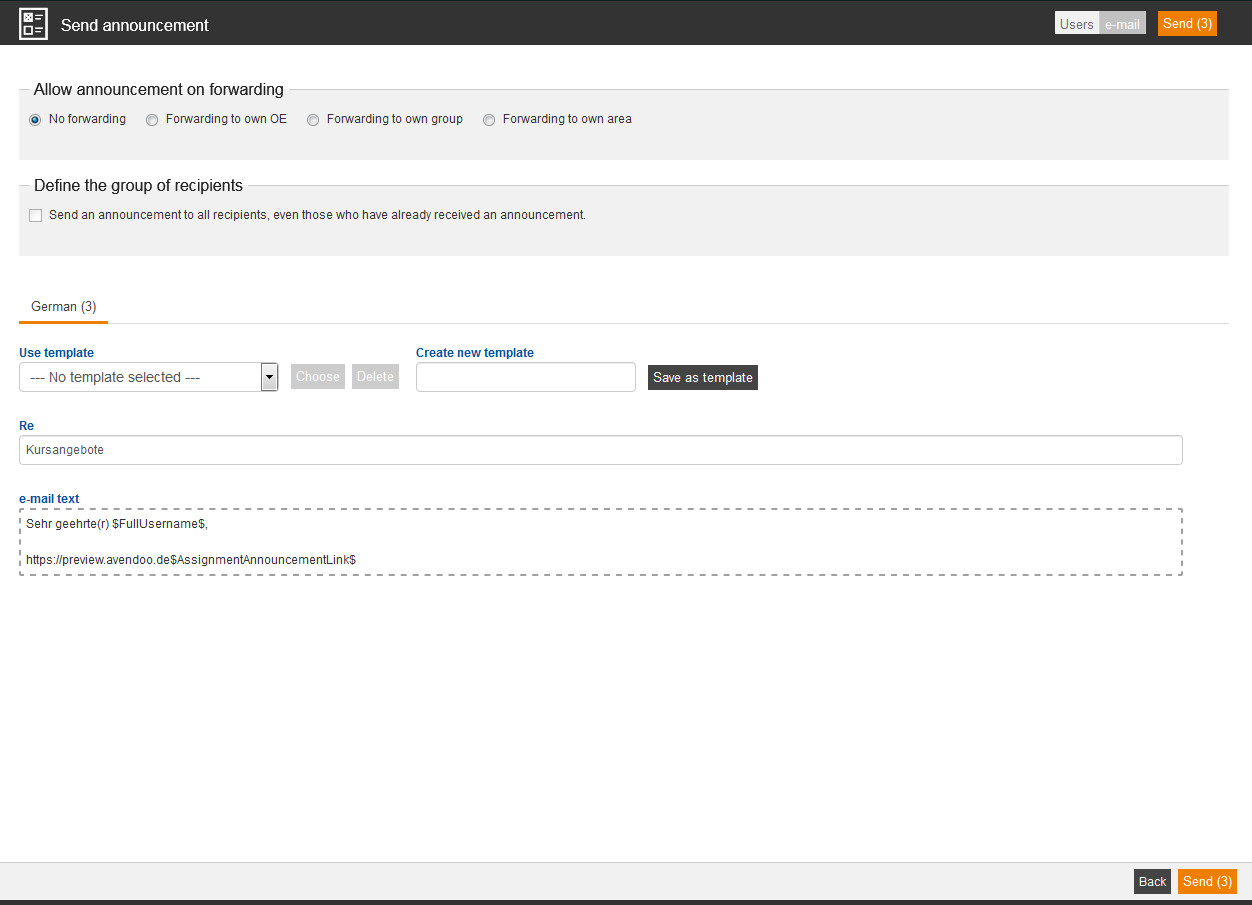
Allow announcement on forwarding
Decide if and to whom a forwarding of the announcement is allowed:
- No forwarding
- Forwarding to own OE
- Forwarding to own group
- Forwarding to own division
Define the group of recipients
If you set this check box, you define that announcements will be sent to all recipients, even they have already received an announcement.
Use template
If you have already a template for the announcement, you can choose one. You create a new template by clicking the button Save as template.
Create new template
To use the template multiple, save your entered text as template.
Re
Enter the subject of the announcement.
E-mail text
Here you can enter the text of the e-mail via the editor.


