Via the menu Support you can carry out tasks of a support author to manage update or display data of the virtual classrooms for example. Therefore the support author has you assigned the right Support as access right in the Author wizard or as author right in the Permission groups wizard.
The following sub menus belong to the menu Support:
- Log files
- All errors
- Grouped errors
- Information
- Virtual classroom Protocol
- VC meeting (NEW)
- VC participants (NEW)
- Cronjobs
- Update history
- Update steps
Therefore you need additionally the right Manage updates. - Automatic update
Therefore you need additionally the right Manage updates. - Execute VC
- Text bundles on/off
- Send mails
- Pick up mails
- Compile reports and create missing report templates
- Reset cache
Inhalte
- 1 Log files
- 2 All errors
- 3 Grouped errors
- 4 Information
- 5 Virtual classroom protocol
- 6 VC meetings
- 7 VC participants
- 8 Cronjobs
- 9 Update history
- 10 Update steps
- 11 Automatic update
- 12 Execute VC
- 13 Text bundles on/off
- 14 Send mails
- 15 Pick up mails
- 16 Compile reports and create missing report templates
- 17 Reset cache
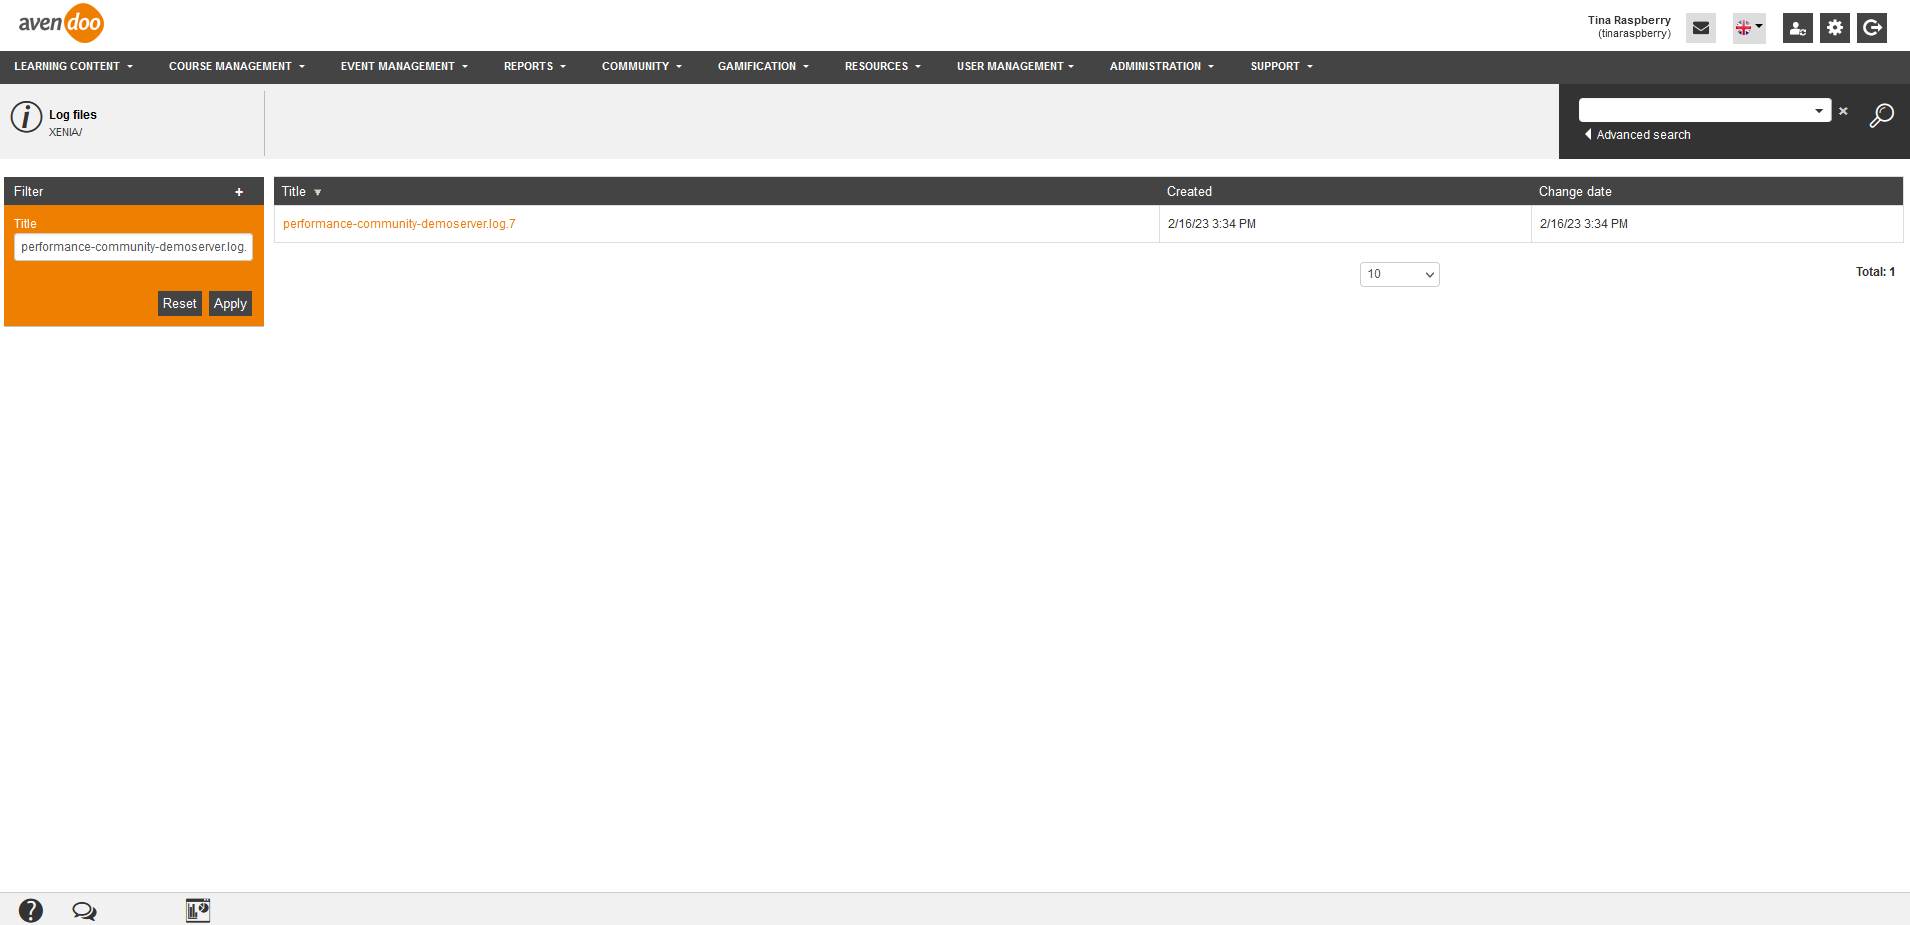
To display lists of log files of your Avendoo® system, choose Support → Log files. The overview table with all log files will be shown.
Log files
Log files
You can show the listing of the ActiveMQ log files with this function, to see the status of threads with date and time for example. Therefore click the title of the log file.
You see in the table of the log files the columns Title, Created and Change date. You can edit the columns and their order by doing a right click on the table header and choose Edit display of columns and order.
Furthermore you can filter the Title.
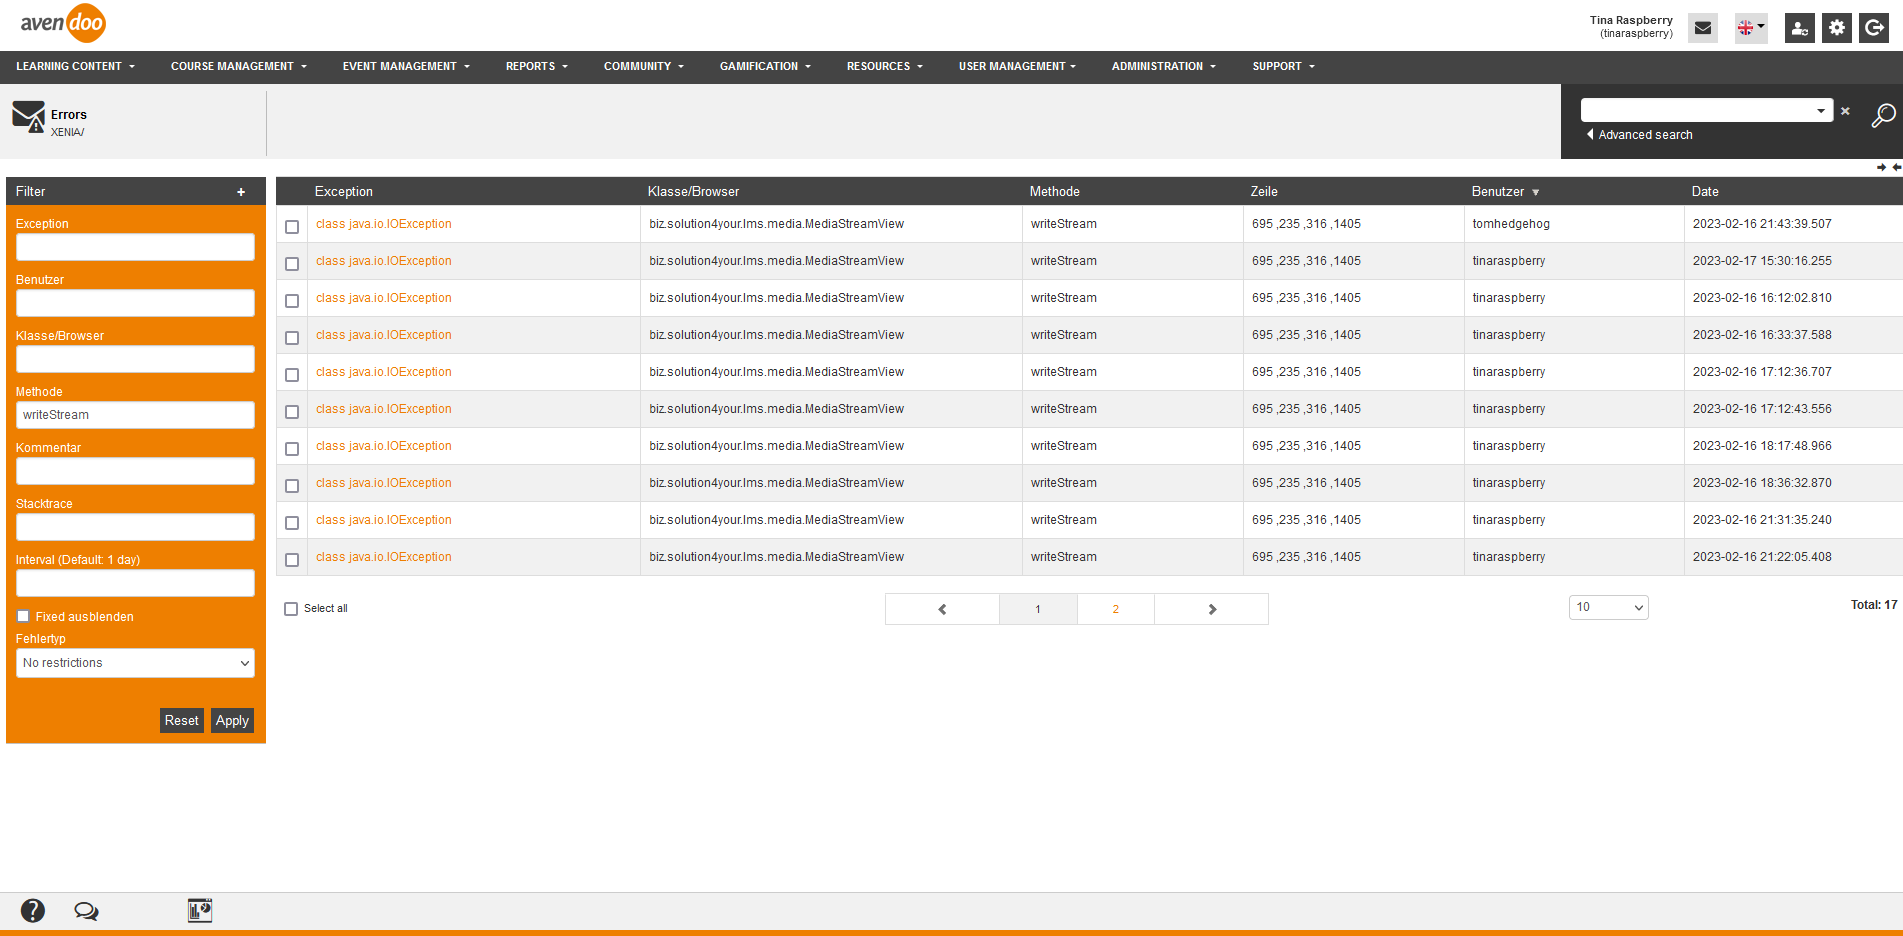
To display lists of all exception errors of your Avendoo® system, choose Support → All errors. The overview table with all exception errors will be shown.
All errors
All errors
Via this function you can display the listings of the exception errors to see the line of the exception error for example. Therefore you click the title of the exception error. You get an overview of the exception, the class, the method, the lines, the comment and the stacktrace.
The overview table got the following columns: Exception, Class/browser, Method, Line, User, Date with time and comment. You can edit the columns and their order by doing a right click on the table header and choose Edit display of columns and order.
Furthermore you can filter by the following criteria: Exception, User, Class/browser, Methode, Comment, Stacktrace, Interval (default: 1 day), Hide fixed and error type (No restriction, system error, JS error or XAPI error).
To display lists of grouped errors of your Avendoo® system, choose Support → Grouped errors. The overview table with all grouped errors and the corresponding number of errors will be shown.
Grouped errors
Grouped errors
Via this function you can display the listing of grouped exception errors for seeing the exception error with the highest number of errors for example. Therefore click the table header of the column Number of errors. The list is sorted by descending order. If click one more, the list is sorted by ascending order.
If click the title of the exception error, you get an overview of the exception, the class, the method, the line, the comment and the stacktrace.
The table got the following columns: Exception, Class/browser, Method, Line, User, Comment, Number of errors, Date and time. You can edit the columns and their order by doing a right click on the table header and choose Edit display of columns and order.
Furthermore you can filter by the following criteria: Exception, User Class/browser, Comment, Stacktrace, Interval (default: 1 day), Hide fixed and Error type (No restriction, system error, JS error or XAPI error).
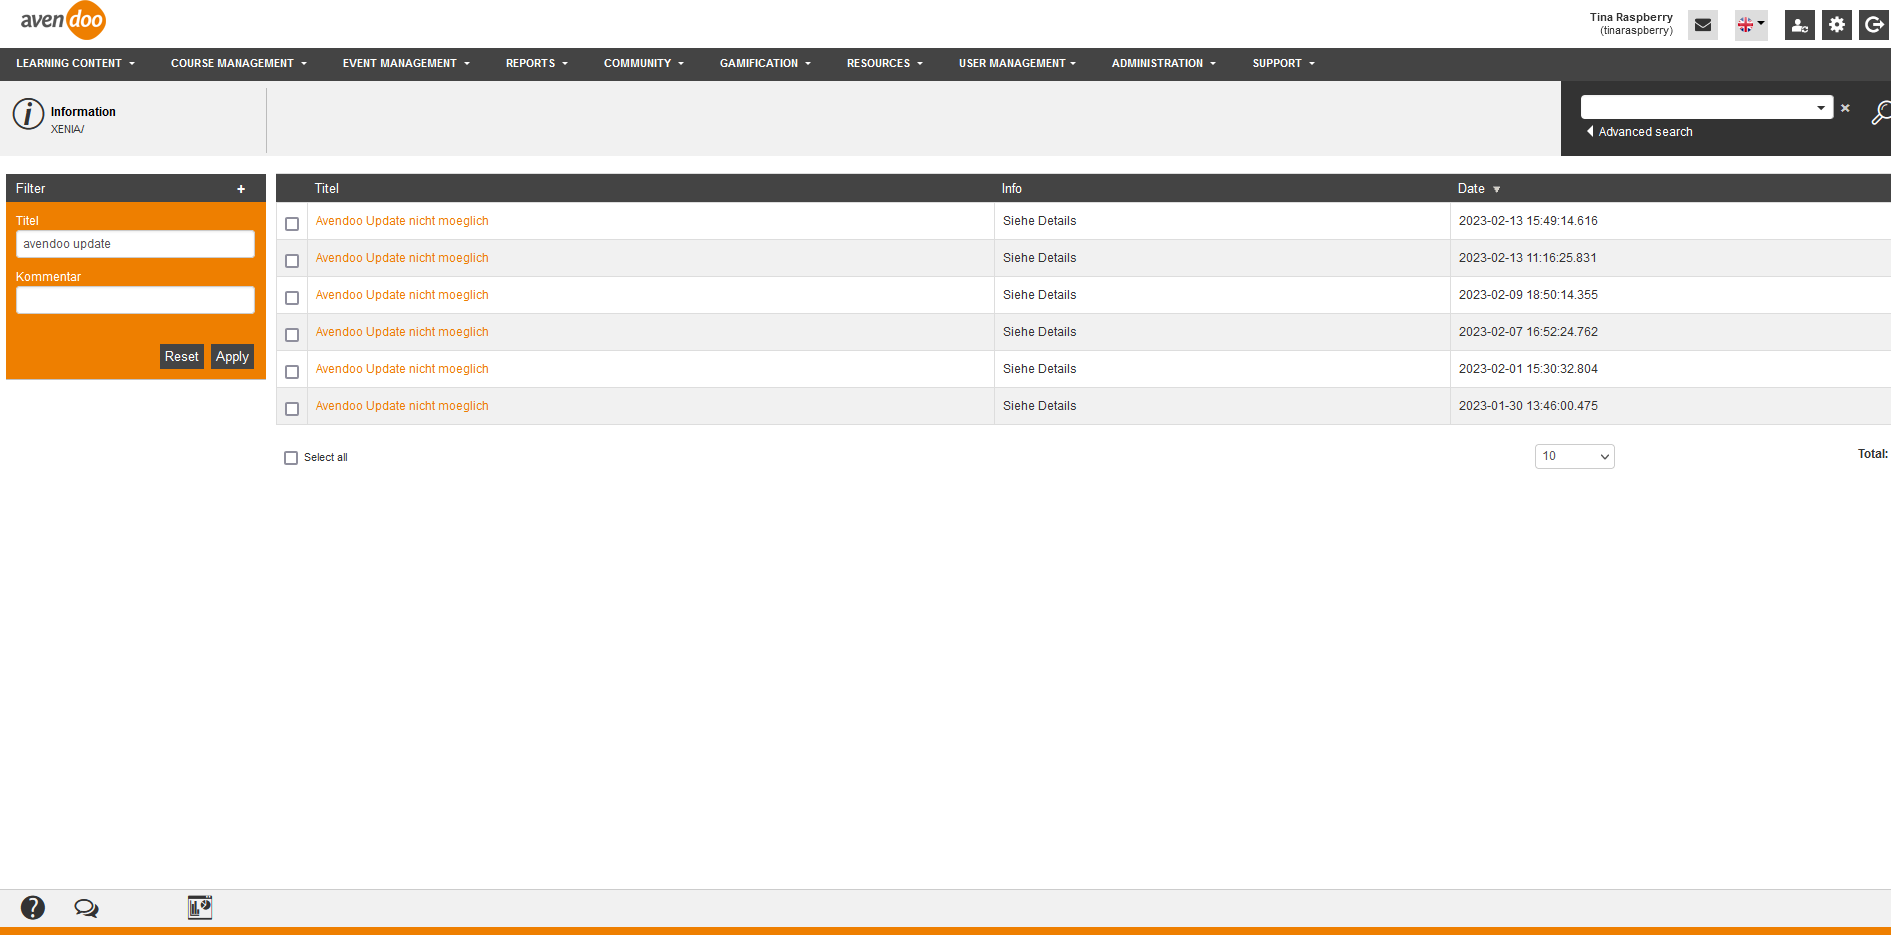
To display information about errors in your Avendoo® system, choose Support → Information. The overview table with all information about errors will be shown, if an update is impossible for example.
Information
Information
Via this function you display information, if an update was impossible for example. To show details, click the title of the information. Then you get an overview with details.
The table got the following columns: Title, Info and Date with time. You can edit the columns and their order by doing a right click on the table header and choose Edit display of columns and order.
Furthermore you can filter by the Title or the Comment.
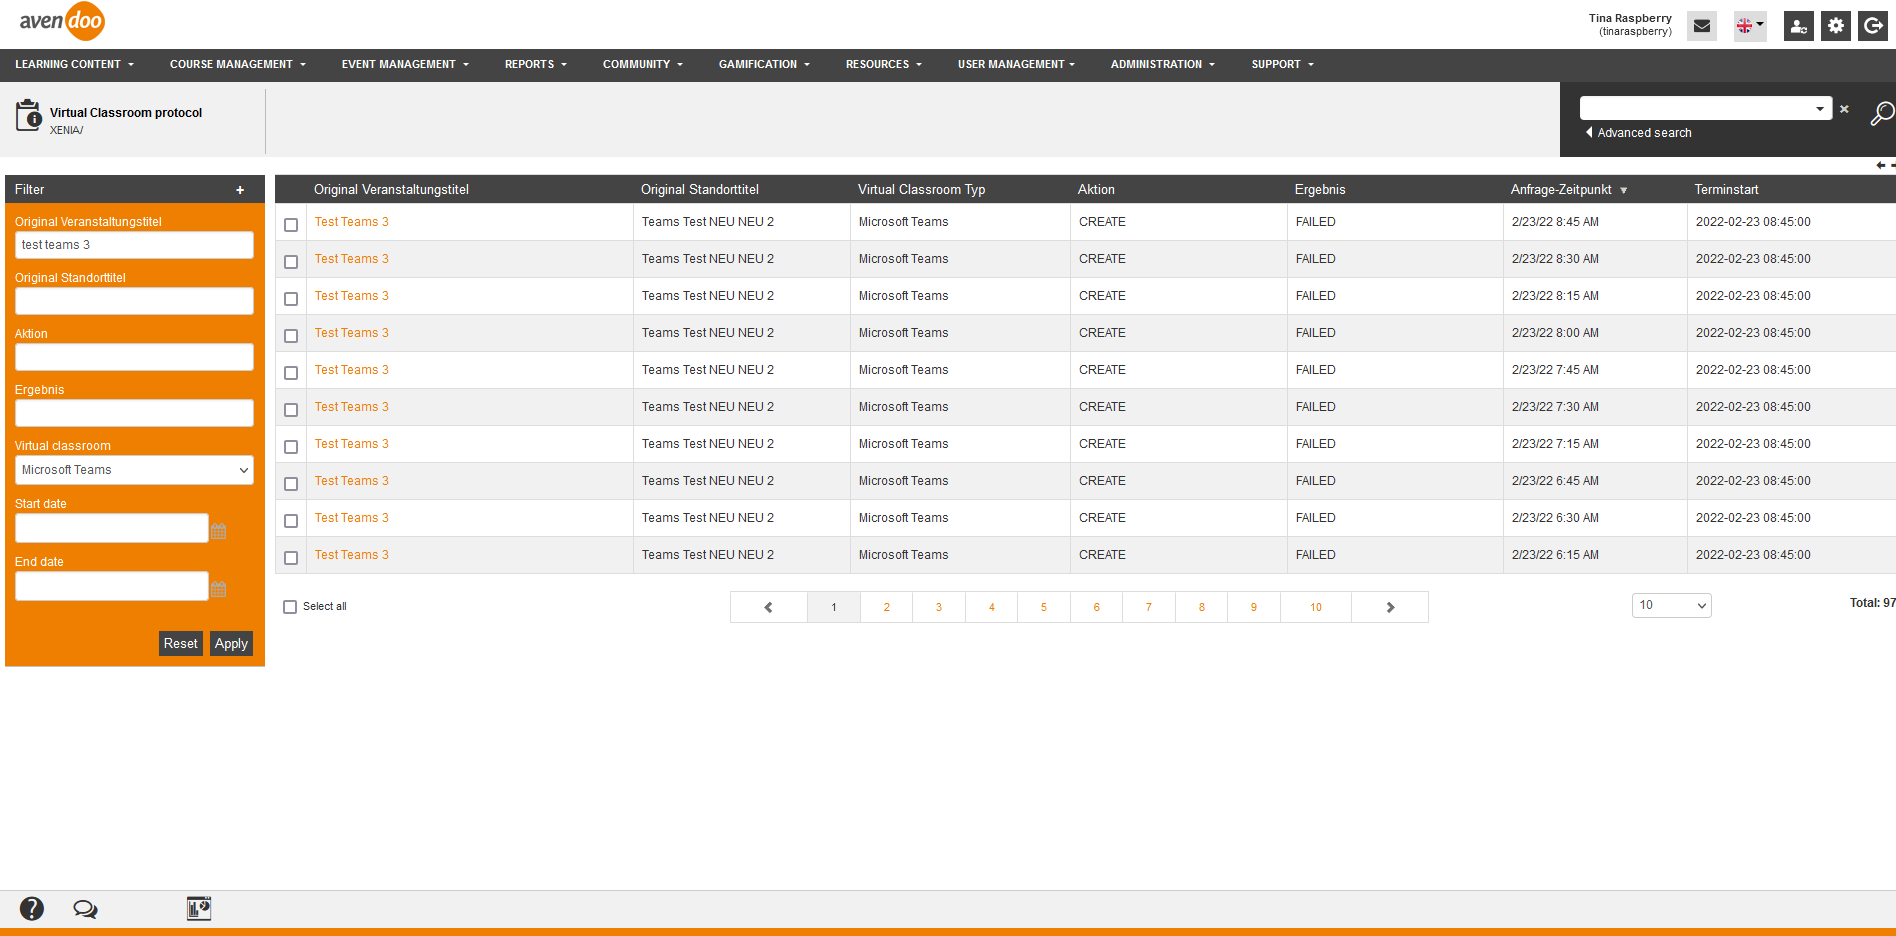
To display virtual classroom protocols of the old virtual classrooms in your Avendoo® system, choose Support → Virtual classroom protocol. The overview table with these virtual classroom protocols will be shown.
Virtual classroom protocol
VC protocols
Via this function you can display the VC protocols of the old virtual classrooms, if you need the information about a seminar ID for example. If you click the title of the VC protocol, you get an overview with the following details: Action, Result, Seminar ID, Event ID and Request.
The table of the VC protocols got the following columns: Event title, Time, VC type, Action, Result, Start of event date and Event date ID. You can edit the columns and their order by doing a right click on the table header and choose Edit display of columns and order.
Furthermore you can filter by the following criteria: Orignal event title, Event title, Action, Result, Virtual classroom (No restriction, iLinc, cisco Webex or Vitero), Start date and End date.
To display virtual classroom (VC) meetings of the new virtual classrooms in your Avendoo® system, choose Support → VC meetings. The overview table with these virtual classroom meetings will be shown.
VC meetings
VC meetings
Via this function you can display VC meetings of the new virtual classrooms (see virtual location), if you need an information for a response for example. If you click the title of the VC meeting, you get an overview with details about Action, Result, Seminar ID, Event ID and Response.
The table of the VC meetings got the following columns: Original event title, Original location title, VC type, Action, Result, Time of request, Start of event date and Event date ID. You can edit the columns and their order by doing a right click on the table header and choose Edit display of columns and order.
Furthermore you can filter by the following criteria: Original event title, Original location titel, Action, Result, Virtual classroom (No restriction, iLinc, Microsoft Teams, GoToWebinar, Link input, YuLinc or GoToWebinar-Admin), Start date and End date.
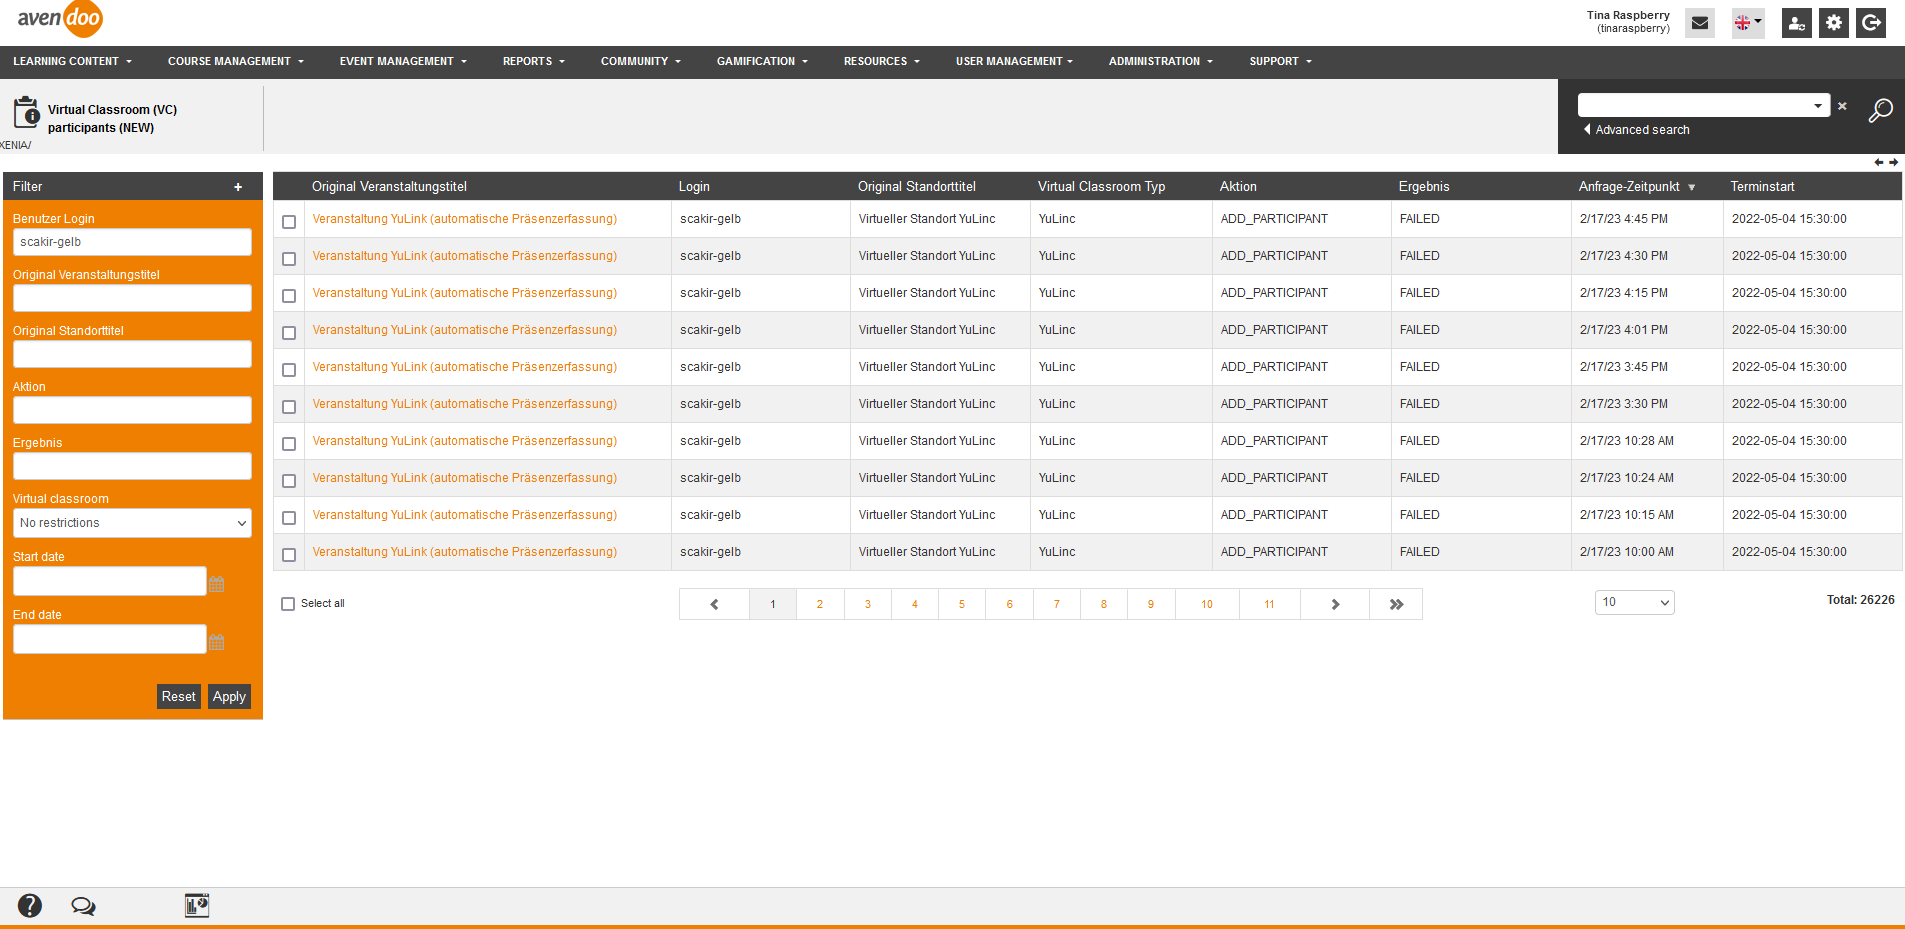
To display virtual classroom (VC) participants of the new virtual classrooms in your Avendoo® system, choose Support → VC participants. The overview table with these virtual classroom participants will be shown.
VC participants
VC participants
Via this function you can display VC participants of the new virtual classrooms (see virtual location), if you need information about the participation for example. If you click the title of the VC participant, you get an overview with details about Action, Result, Seminar ID, Event ID and Response.
The table of the VC participants got the following columns: Original event title, Login, Original location title, VC type, Action, Result, Time of request, Start of event date and Event date ID. You can edit the columns and their order by doing a right click on the table header and choose Edit display of columns and order.
Furthermore you can filter by the following criteria: User login, Original evebt title, Original location title, Action, Result, Virtual classroom (No restriction, iLinc, Microsoft Teams, GoToWebinar, Link input, YuLinc or GoToWebinar-Admin), Start date and End date.
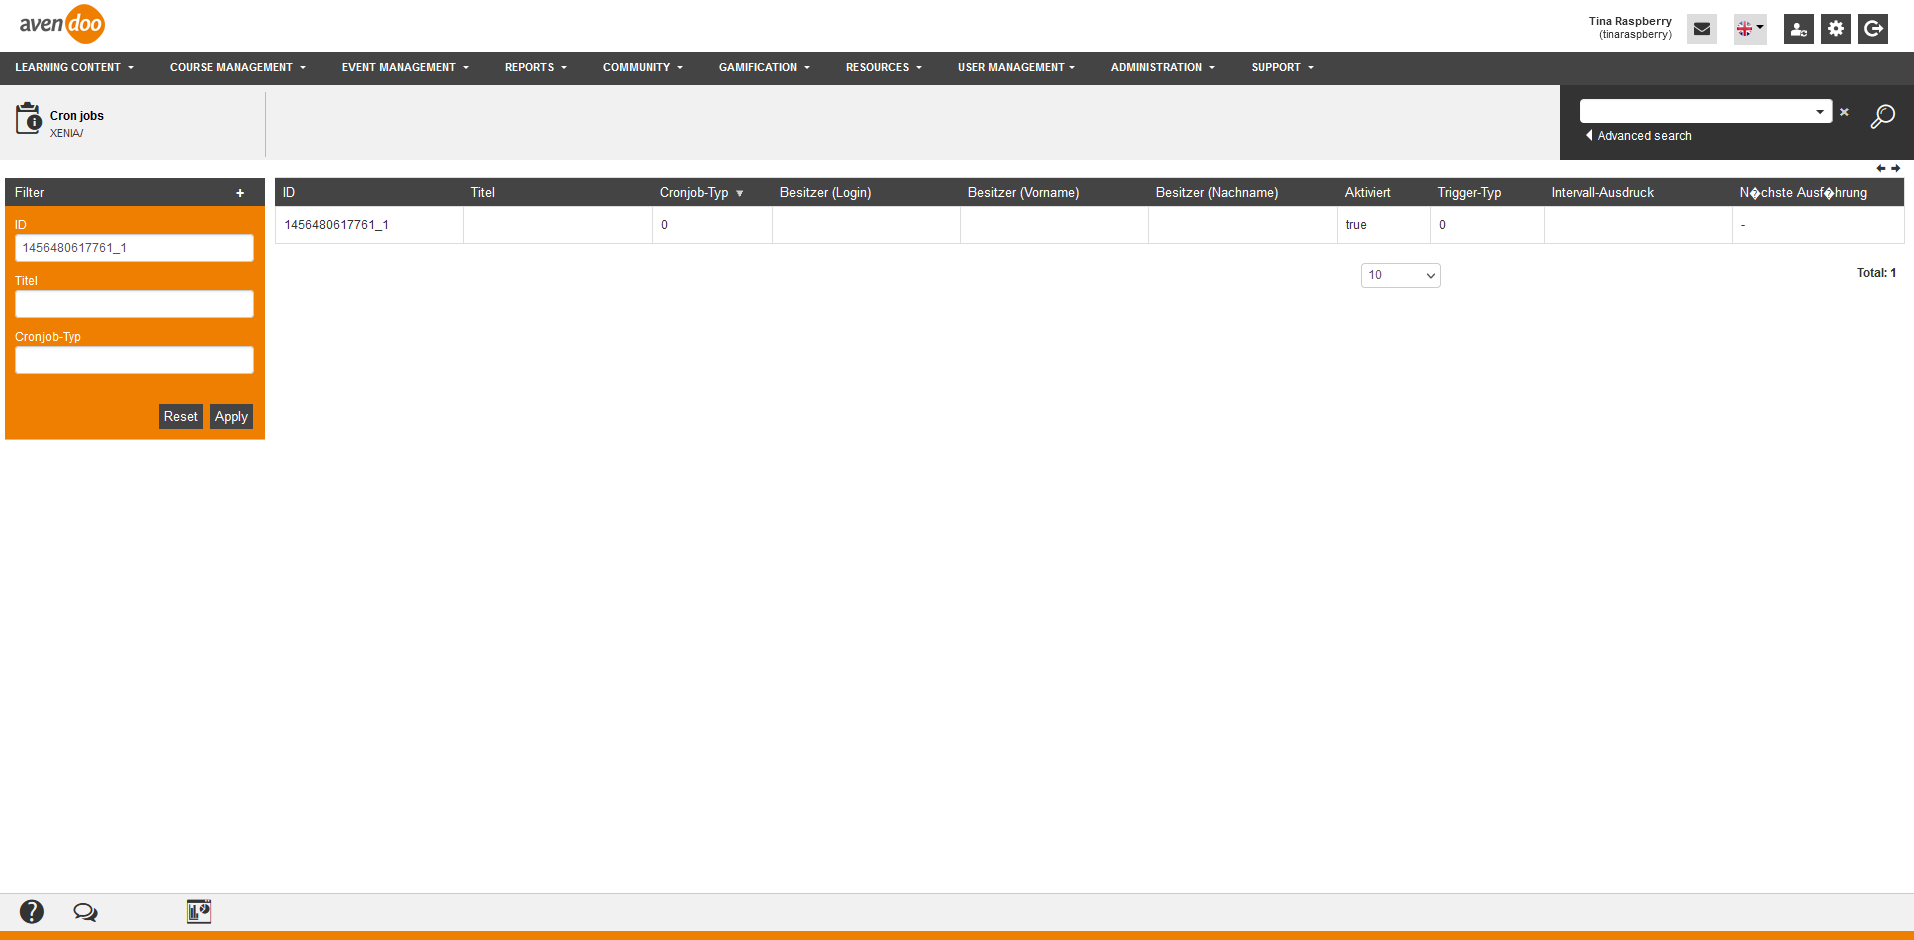
To display the cronjobs in your Avendoo® system, choose Support → Cronjobs. The overview table with all cronjobs will be shown.
Cronjobs
Cronjobs
Via this function you can display all cronjob, if you need information for the next procedure for example.
The table of the cronjobs got the following columns: ID, Title, Cronjob (type), Owner login, Owner (first name), Owner (last name), Activated, Trigger type, Interval term, Next procedure, Start time (Report subscription), End time (Report subscription), Repeat (Report subscription), Interval in days (Report subscription) and Last procedure. You can edit the columns and their order by doing a right click on the table header and choose Edit display of columns and order.
Furthermore you can filter by the following criteria: ID, Title and Cronjob type.
Update history
Update history
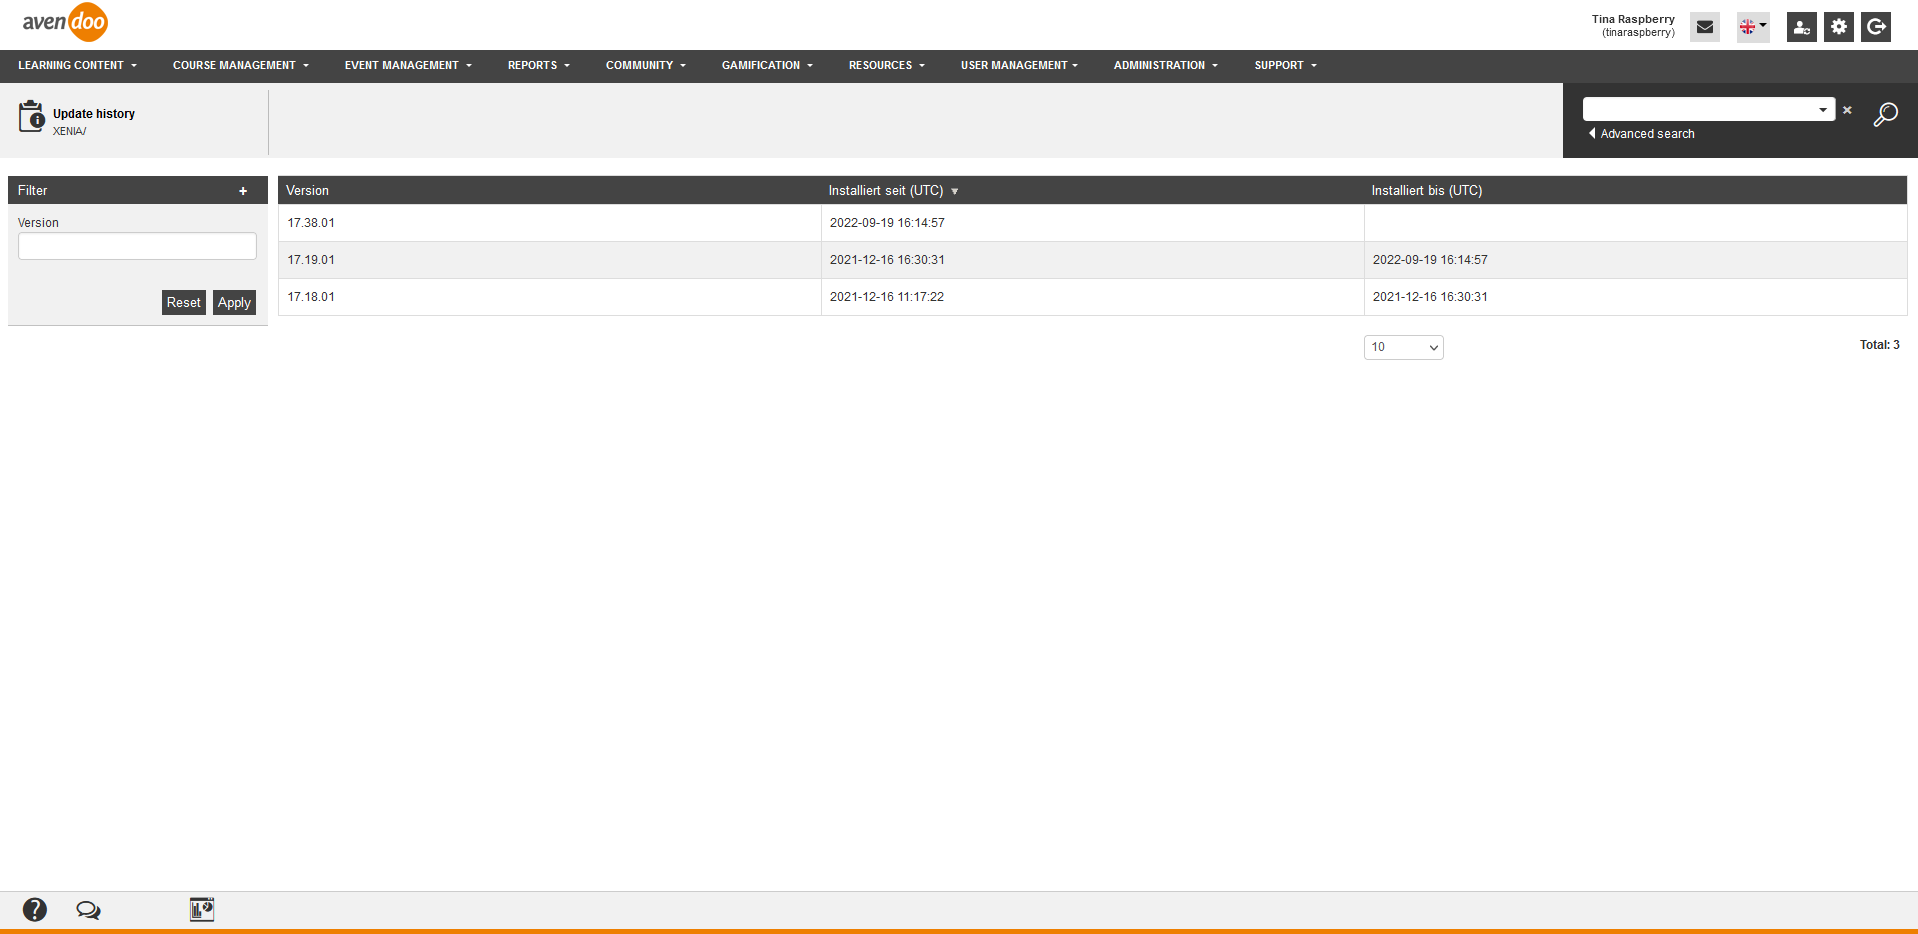
Via this function you can display the update history, if you need information since when a certain update has been installed.
The table of the update history got the following columns: Version, Installed since and Installed until. You can edit the columns and their order by doing a right click on the table header and choose Edit display of columns and order.
Furthermore you can filter the Version.
To display the update steps in your Avendoo® system, choose Support → Update steps. The overview table with all update steps will be shown.
Update steps
Update steps
Prerequisite
The support author has you assigned the right Manage updates in the Author wizard on the tab Access rights or in the Permission groups wizard on the tab Assign author rights.
Via this function you can display the update steps, if you need information about, when (date and time) a certain update step has been processed.
The table of the update steps got the following columns: ID, Date, Duration and Comment. You can edit the columns and their order by doing a right click on the table header and choose Edit display of columns and order.
Furthermore you can filter by ID and Comment.
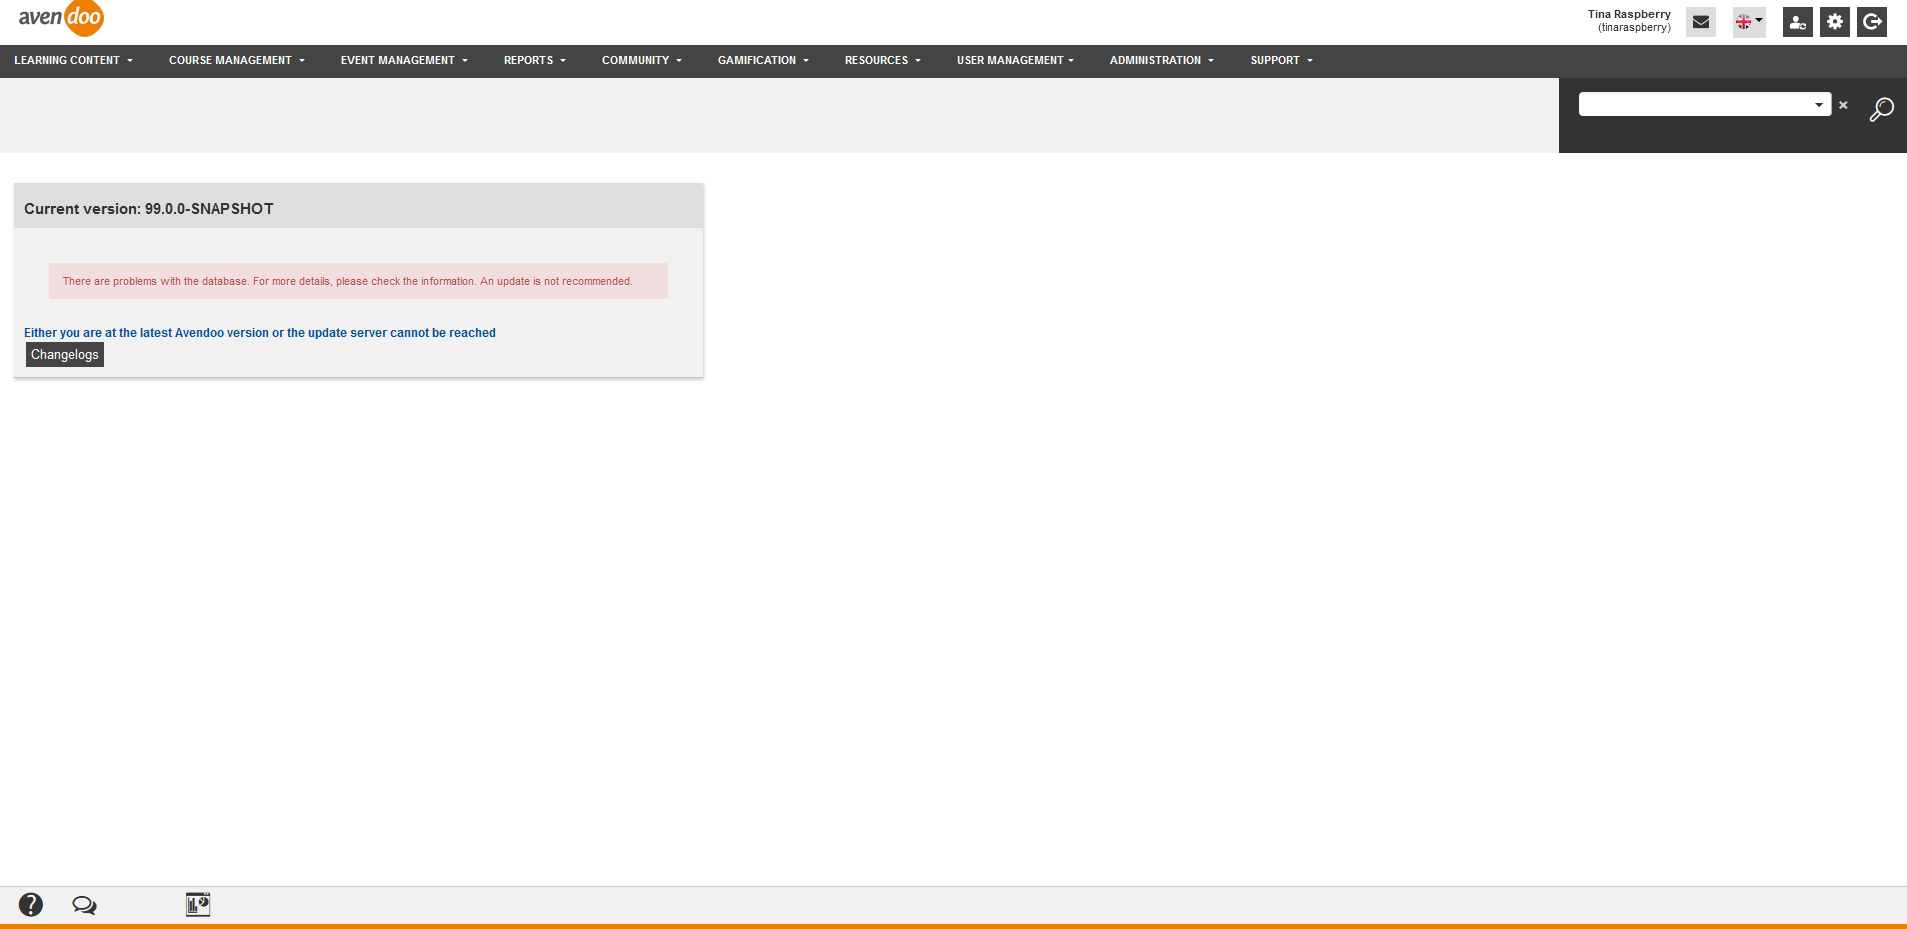
To display the status of the automatic update in your Avendoo® system, choose Support → Automatic update. A status report with button to the Changelogs will be shown.
Automatic update
Automatic Update
Prerequisite
The support author has you assigned the right Manage updates in the Author wizard on the tab Access rights or in the Permission groups wizard on the tab Assign author rights.
Via this function you can start an automatic update to a defined time.
We recommend you in rare cases to schedule 15 to 30 minutes for an update and to consider time for checking. The late afternoon is in most cases the ideal update time.
Avendoo® also checks, if a version can be installed.
Example:
The Avendoo® system has version 17.40.01 and the versions 17.40.02, 17.40.03 and 17.40.04 are available.
Now version 17.40.04 is canceled.
Thus version 17.40.03 is shown as installable and version 17.40.04 as not installable.
Also version 17.40.02 is hidden, because there’s a higher installable version.
You get to the list of the Changelogs via the button Changelogs. You get information about new features and corrections.
Execute VC
If you choose Support → Execute VC, this function will be processed immediately.
Text bundles on/off
If you choose Support → Text bundles on/off, this function will be processed immediately and the text bundles are “off”. Instead of the user inface texts you see instead the bundle keys. If you log out and log in again, the text bundles are “on” again.
Send mails
If you choose Support → Send mails, this function will be processed immediately.
Pick up mails
If you choose Support → Pick up mails, this function will be processed immediately.
Compile reports and create missing report templates
If you choose Support → Compile reports and create missing report templates, this function will be processed immediately.
Reset cache
If you choose Support → Reset cache, this function will be processed immediately.
