Basics
Prerequisites
You got the rights Read, select and Change, create, Delete (object permission) and Change external content under Certificates (Resources (Objects)) via your Author account or your permission group.
Use
Certificates are used as on course level or on learning object level, for example for events or knowledge tests. If a user succesfully completes a course or a learning object with a linked certificate, thus the user gets a certification. If the certification expires, the user gets a reminder as e-mail x months before expiration.
Functions
A certificate confirms participants the successful participation on a training. The certificate is usually at the end of a learning path and is issued by the successfull procedure of a knowledge test. Its validation can be limited. Via a certificate template you can create for each user individually a certificate and you can print it. Furthermore you can give number ranges. Via the report functions you receive information about the acquired certificates. For re-issuing certificates you need the required access right.
You can substitute in future flexible parts of text from the template or you can leave it empty via the PDF form fields. You can place for example an empty PDF form field in your PDF form at a corresponding place for filling this field in the Certificate wizard with a variable or with a freely defined text. Also you can initialize your PDF form fields with an example text. This one you can keep in the Certificate wizard or you can substitute it by an individual text or you can remove it.
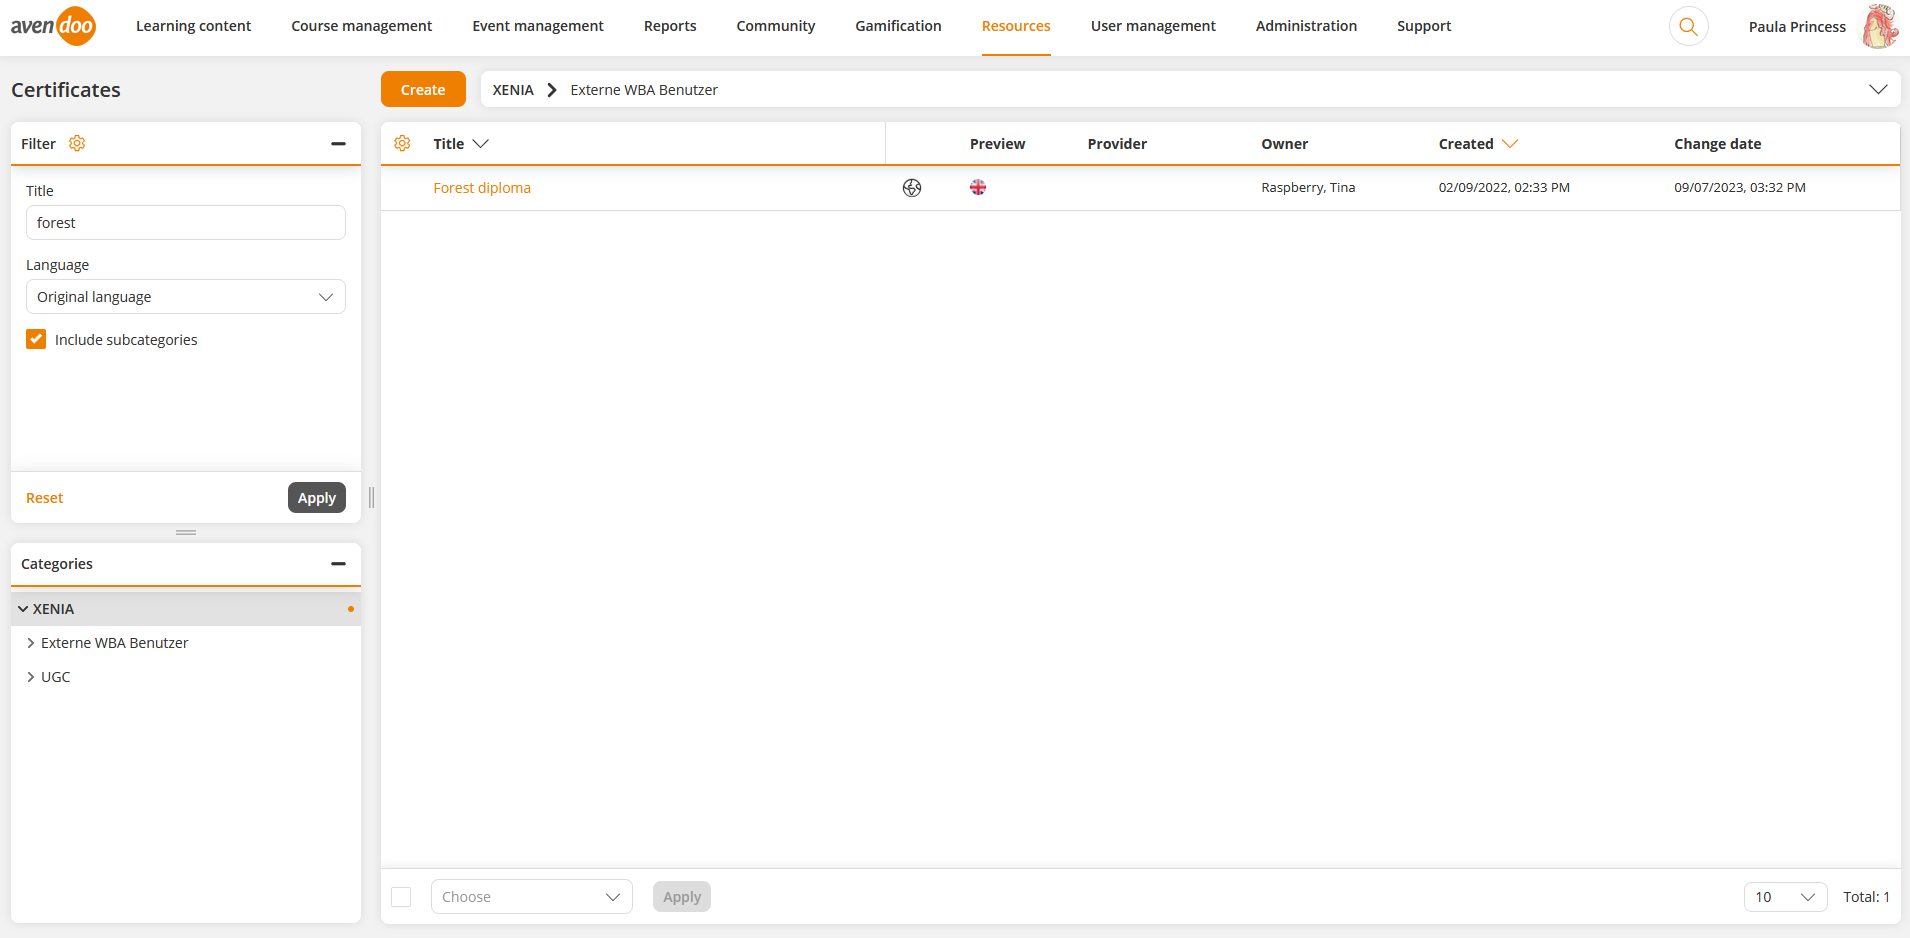
In the overview (Resources → Certificates) you see all already created certificates of the selected client, listed for title, provider, owner, creation date and change date. Via click on the symbol of the translation area you get into the translation management of the appropriate certificate. On the left side you can restrict the overview via filter to title and language.
There are the mass processing functions Copy, Move, Delete, Change owner, Replace and deactivate and Export for certificates. More information about these functions you find under Certificates: Mass processing functions.
The following functions are available via the context menu of the corresponding certificate title.
Create new certificate
Master data
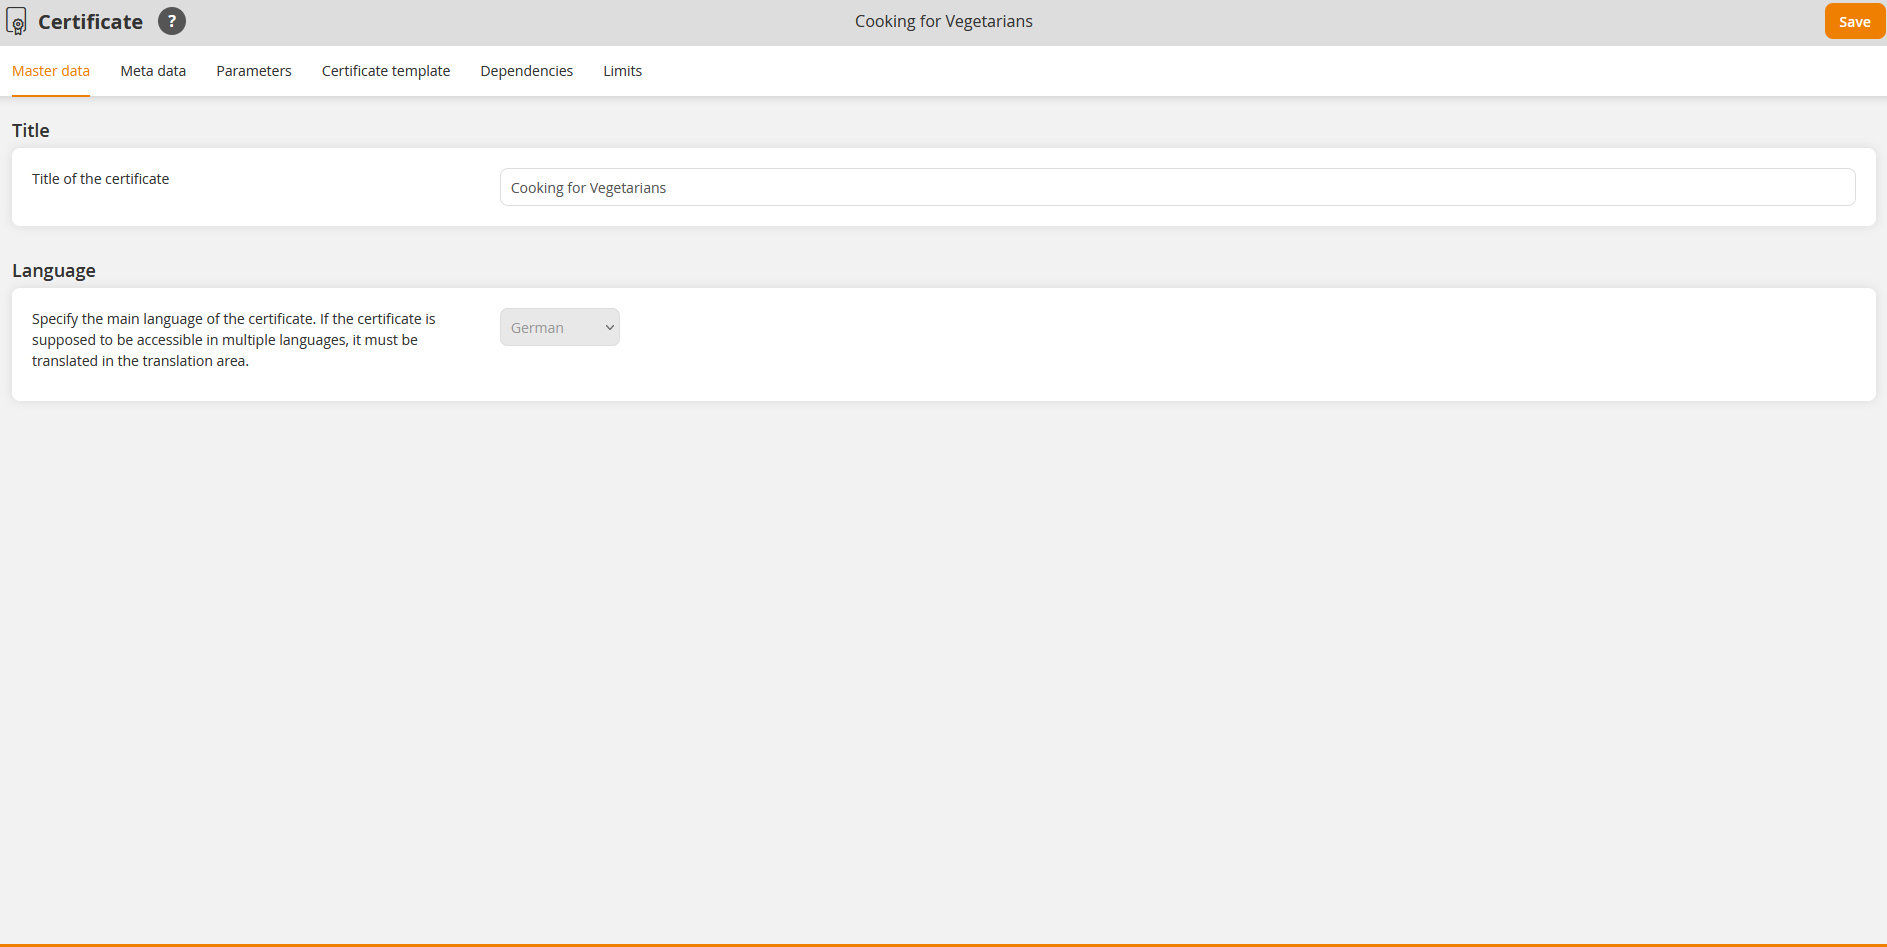
Enter first the title of the certificate.
For the display of a certificate a template in SVG format (Scalable Vector Graphics) or a template in PDF format is needed. You get the SVG file format, if you create a document via OpenOffice Draw. You get the PDF file format via Open Office (see FAQ). To upload a SVG or PDF file, click in the Certificate wizard on the tab Certificate template on the button Select.
Specify the main language of the certificate. If the certificate is supposed to be accessible in multiple languages, it must be translated in the translation area.
Meta data
Valid from
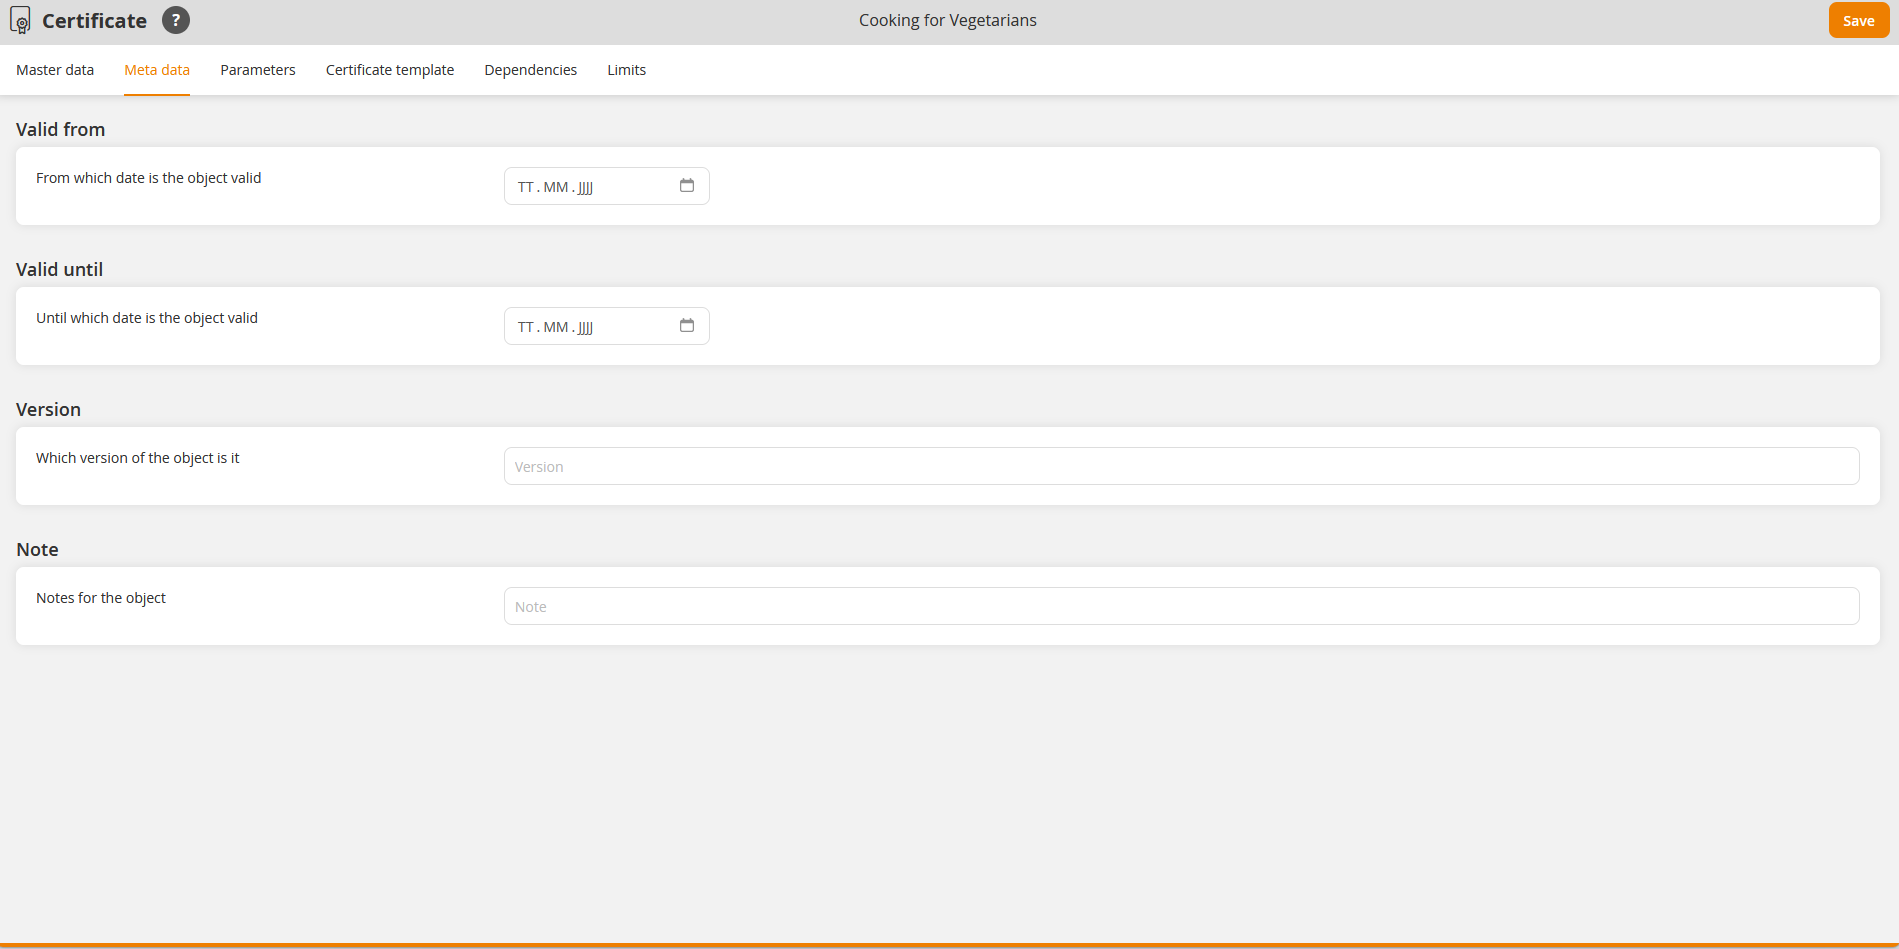
Select a date, if the certificate has an appropriate validity.
Valid until
Select a date, if the certificate has an appropriate validity.
Version
Enter a version description, if the certificate has a version.
Note
Enter if applicable some notes for the certificate.
Parameters
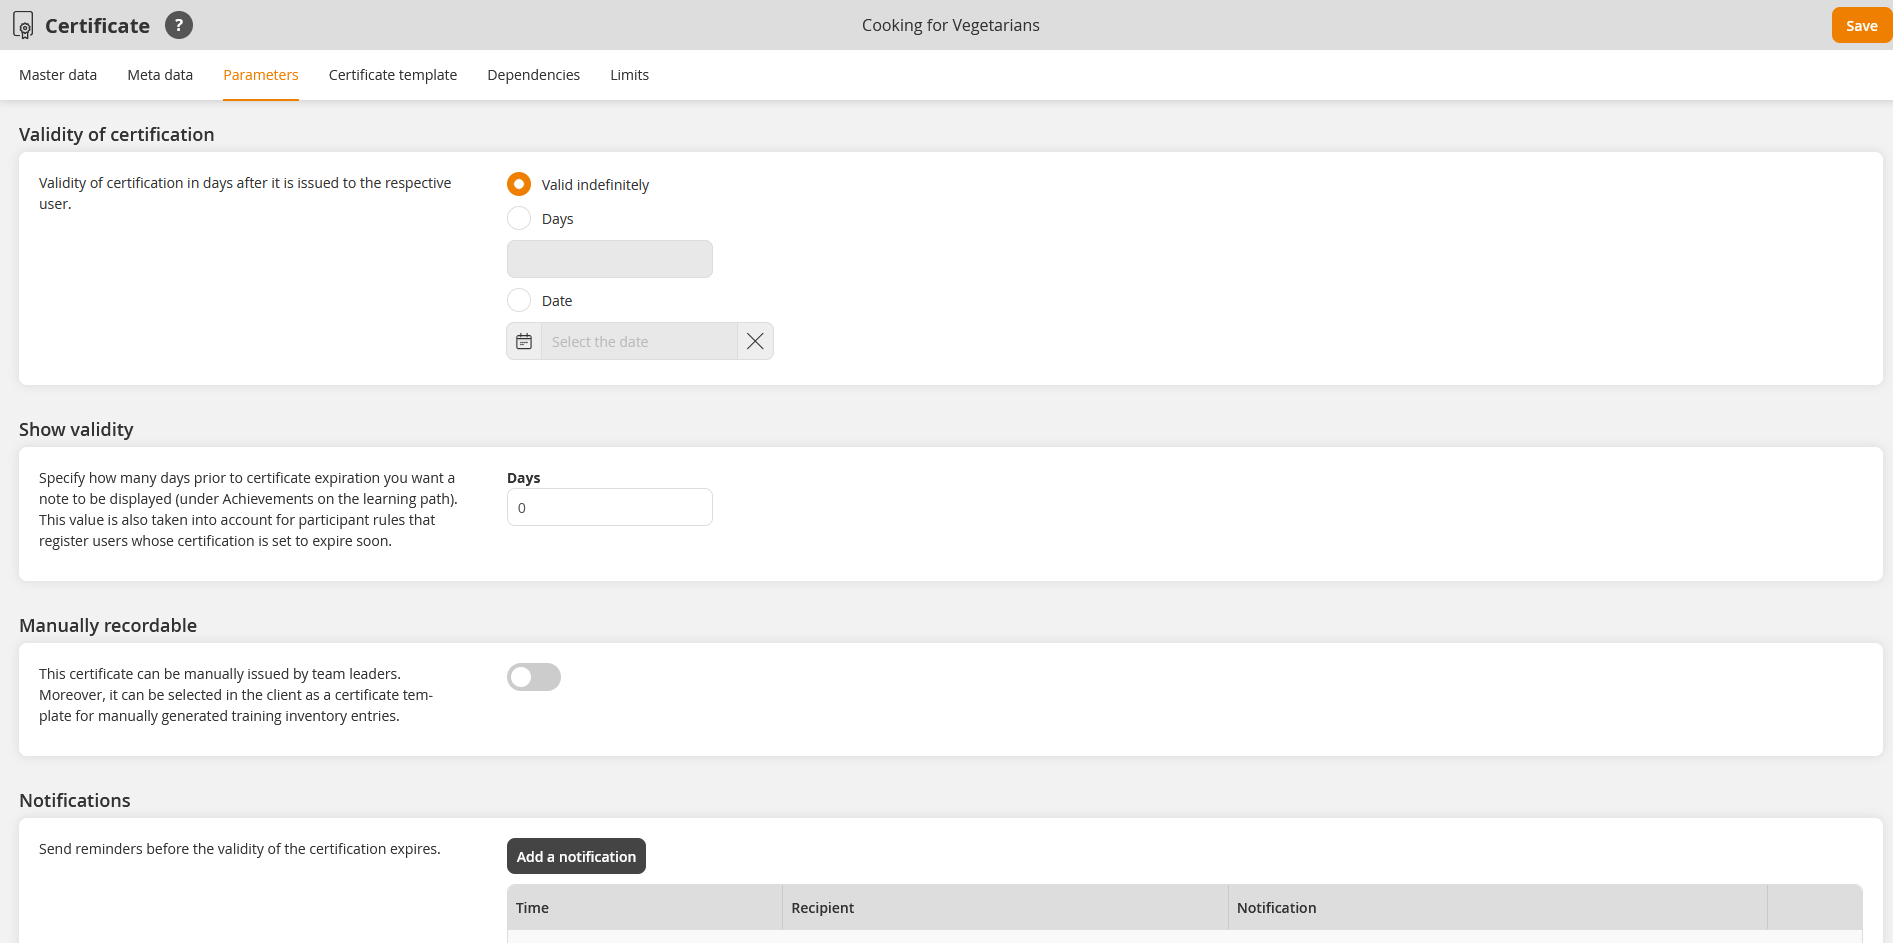
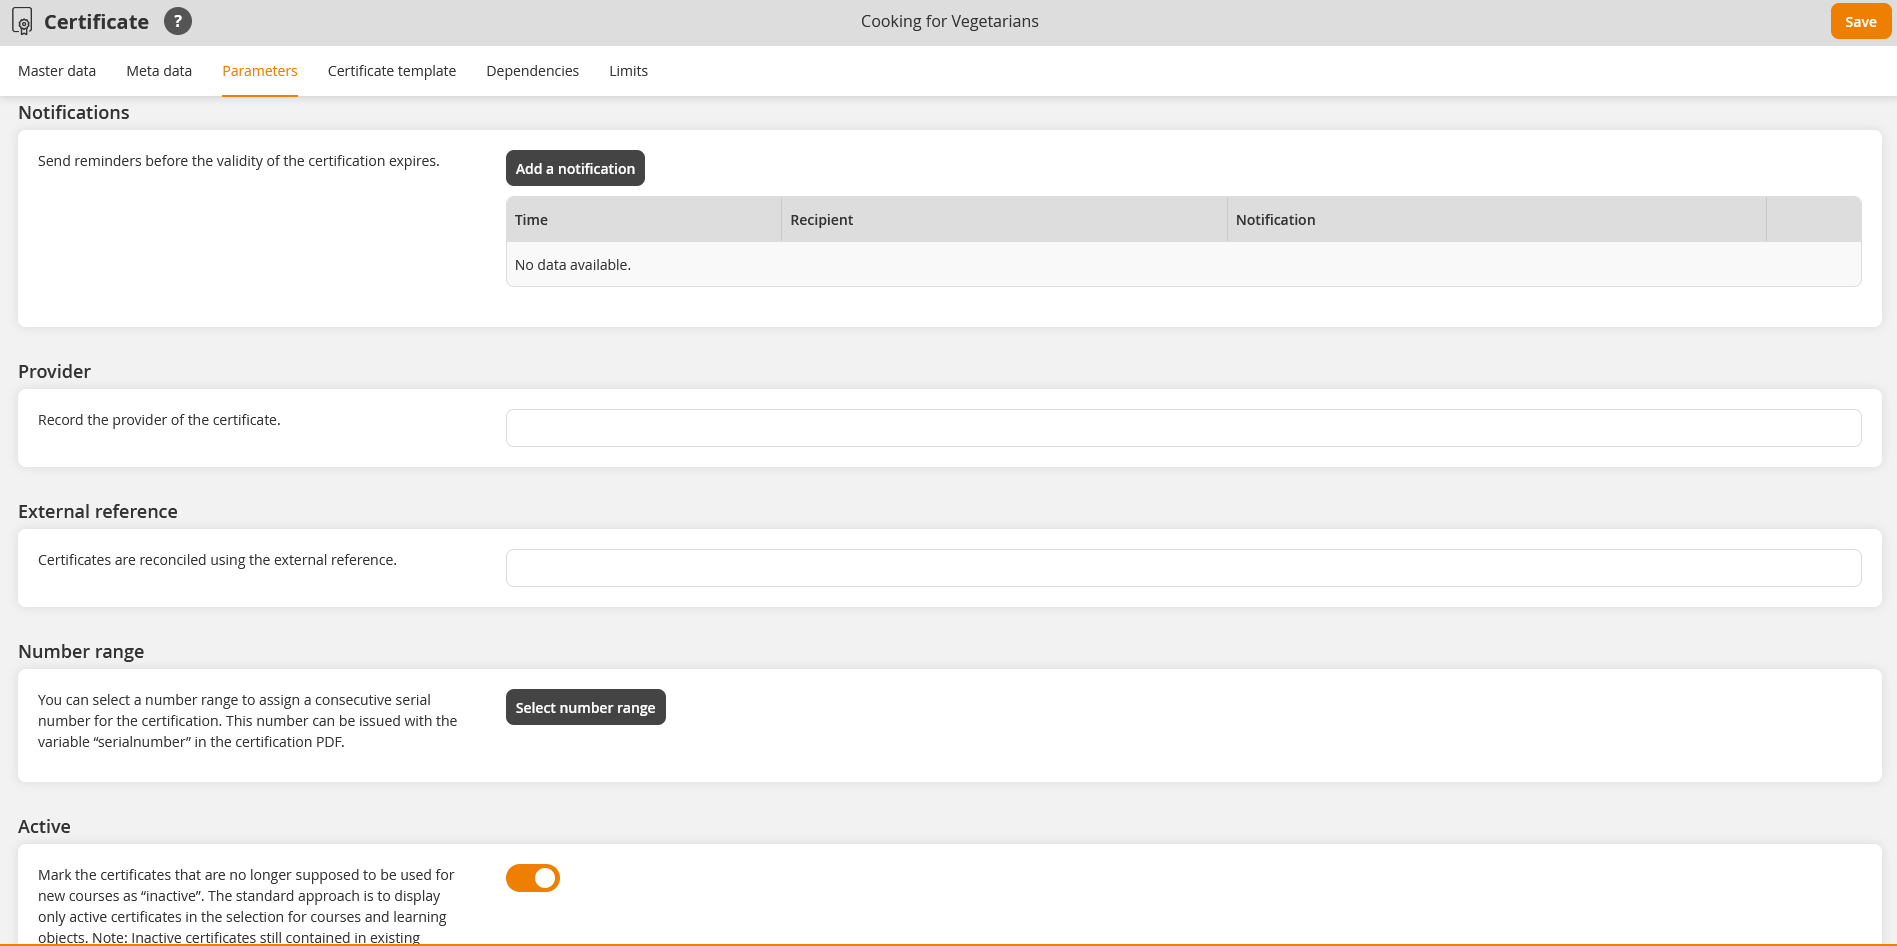
Select in the following options:
- Valid indefinitely,
- Days and
If you have selected Days, enter the number of days after issueing of the certification to the user. - Date
Select a date and also a time zone.
By clicking Days or Years you activate the extension. If the extension is active, the validity date is automatically extended by the indicated number of days or years. Otherwise you select No extension.
If you have selected Days, enter the number of days.
If you have selected Years, enter the number of years.
Finally you can define, how many days in advance you would like the validity date to be updated. The default value is “60”.
Show validity
Specify how many days prior to certificate expiration you want a note to be displayed (under Successes on the learning path). This value is also taken into account for participant rules that register users whose certification is set to expire soon.
Manually recordable
Activate this toggle, if this certificate can be manually issued by team leaders and can be selected in the client as a certificate template for manually generated training inventory entries.
Select the time:
- Expiration or
- Time issued.
The notification will be sent to the selected recipients, when the certificate has been created.
Define, how many days and select, if before or after expiration (of validity of certification) this reminder should be sent. Set a check mark, if the certificate owner (author), the certified user, the superior, the training coach or/and users (select user) or/and external contact (select contact) should receive the reminder.
In the column Notification you select Use client setting or Individual notification. Then the source path of the Individual notification will be shown. Further information about creating an Individual notification you find here.
If necessary you can remove the added notification via the button Remove.
Provider
Record the provider of the certificate.
External reference
Enter an external reference. Note that certificates are reconciled using the external reference.
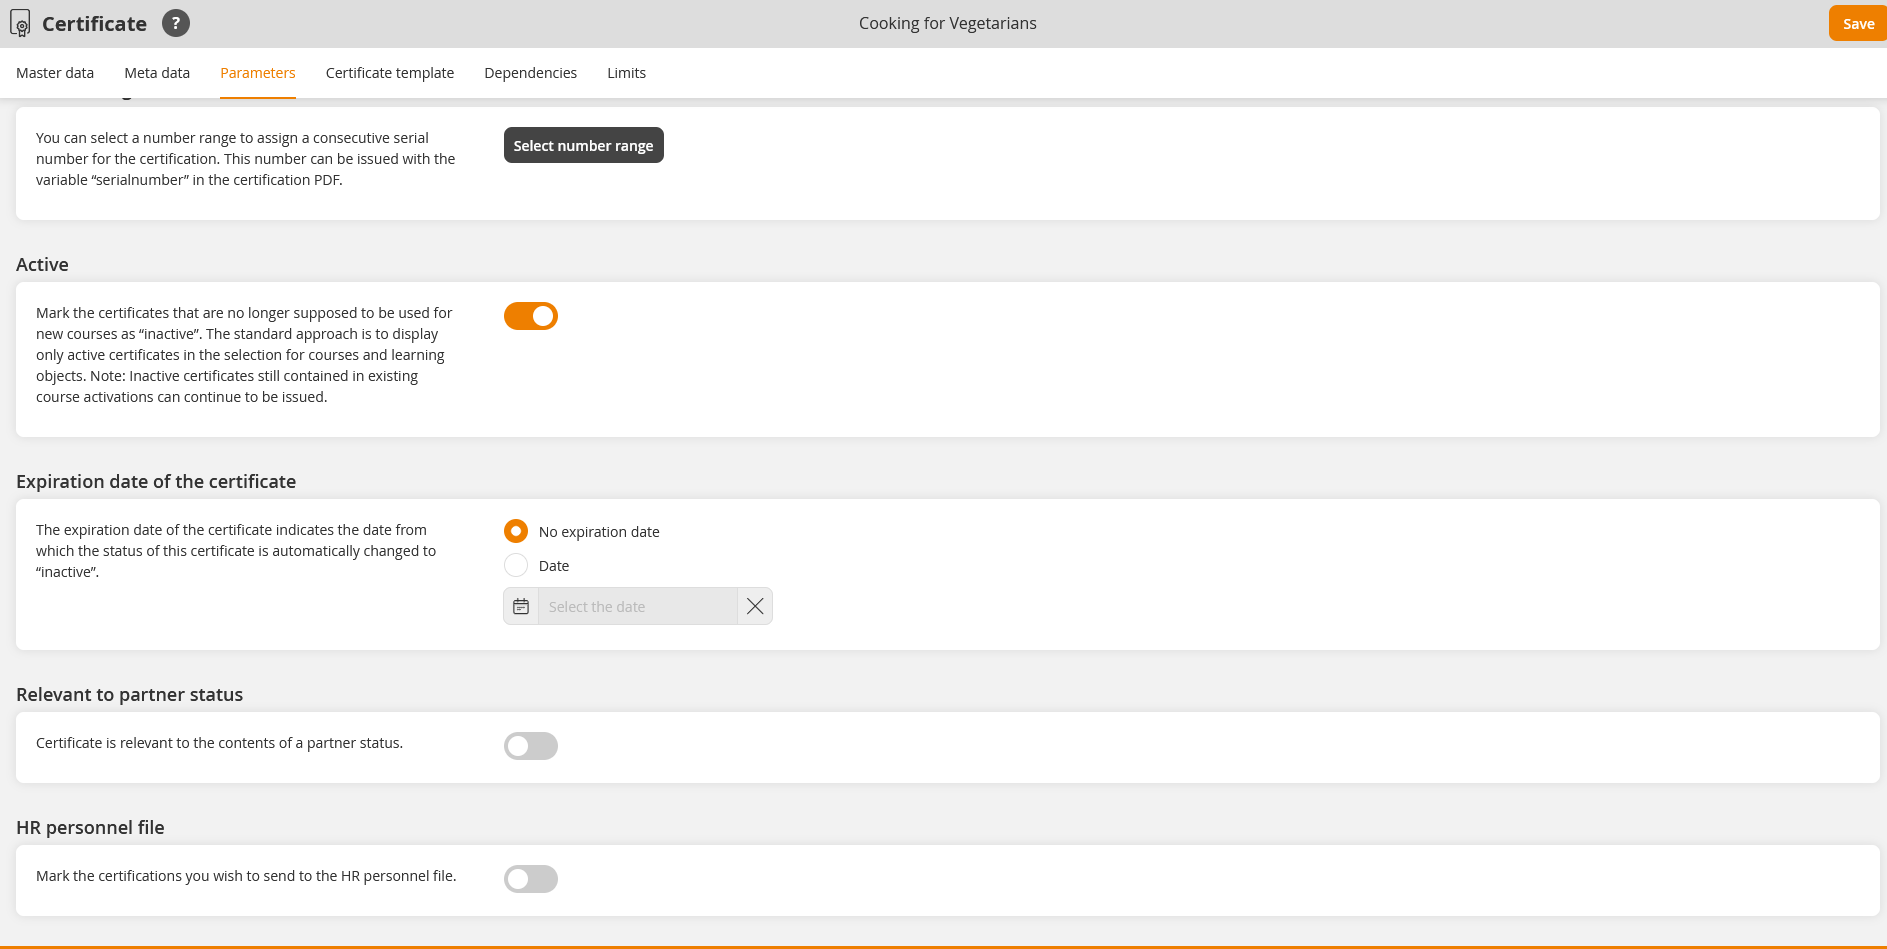
Number range
To assign a consecutive serial number for the certification, click on the button Select number range. This number can be issued with the variable “serialnumber” in the certification PDF.
Active
If the certificate should no longer supposed to be used for new courses, deactivate this toggle.
If the certificate should be shown in the selection for courses and learning objects by standard, activate this toggle.
Expiration date of the certificate
Select either No expiration date or Date and enter a date, from which the status of this certificate is automatically changed to inactive.
Relevant to partner status
If the certificate should be relevant to the contents of a partner status, activate this toggle.
HR personnel file
If you wish to send the certificate to the HR personnel file, activate this toggle.
Certificate template
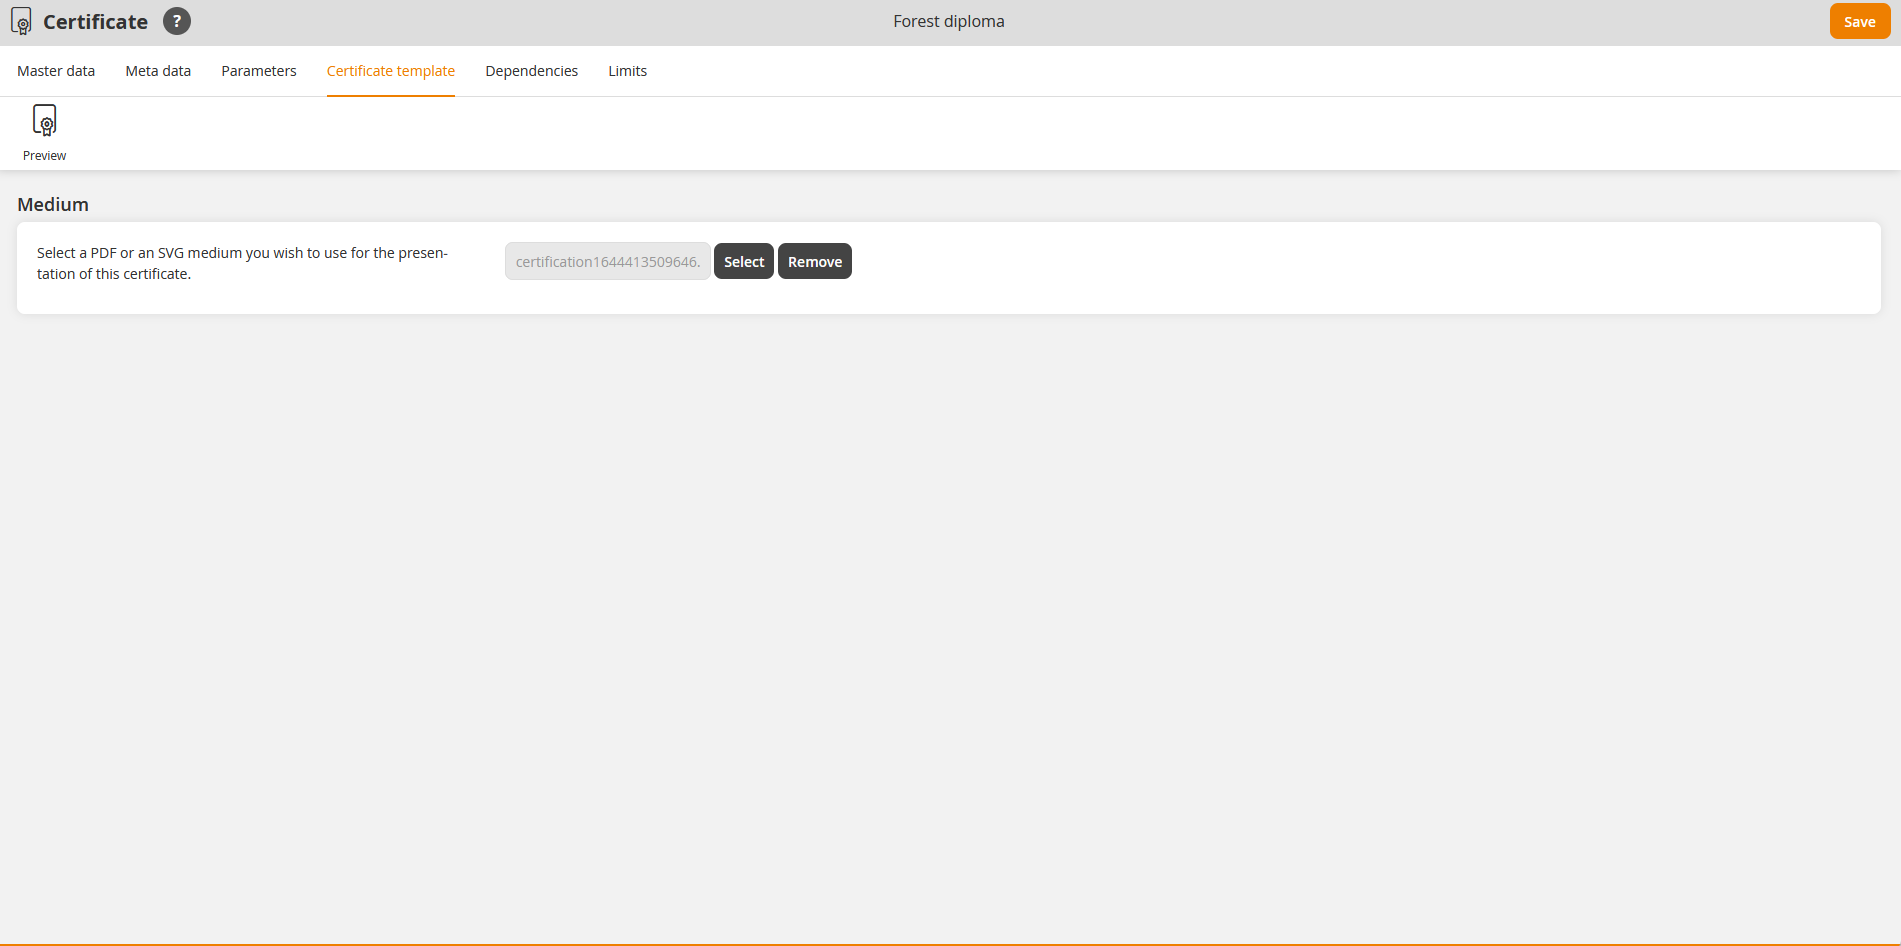
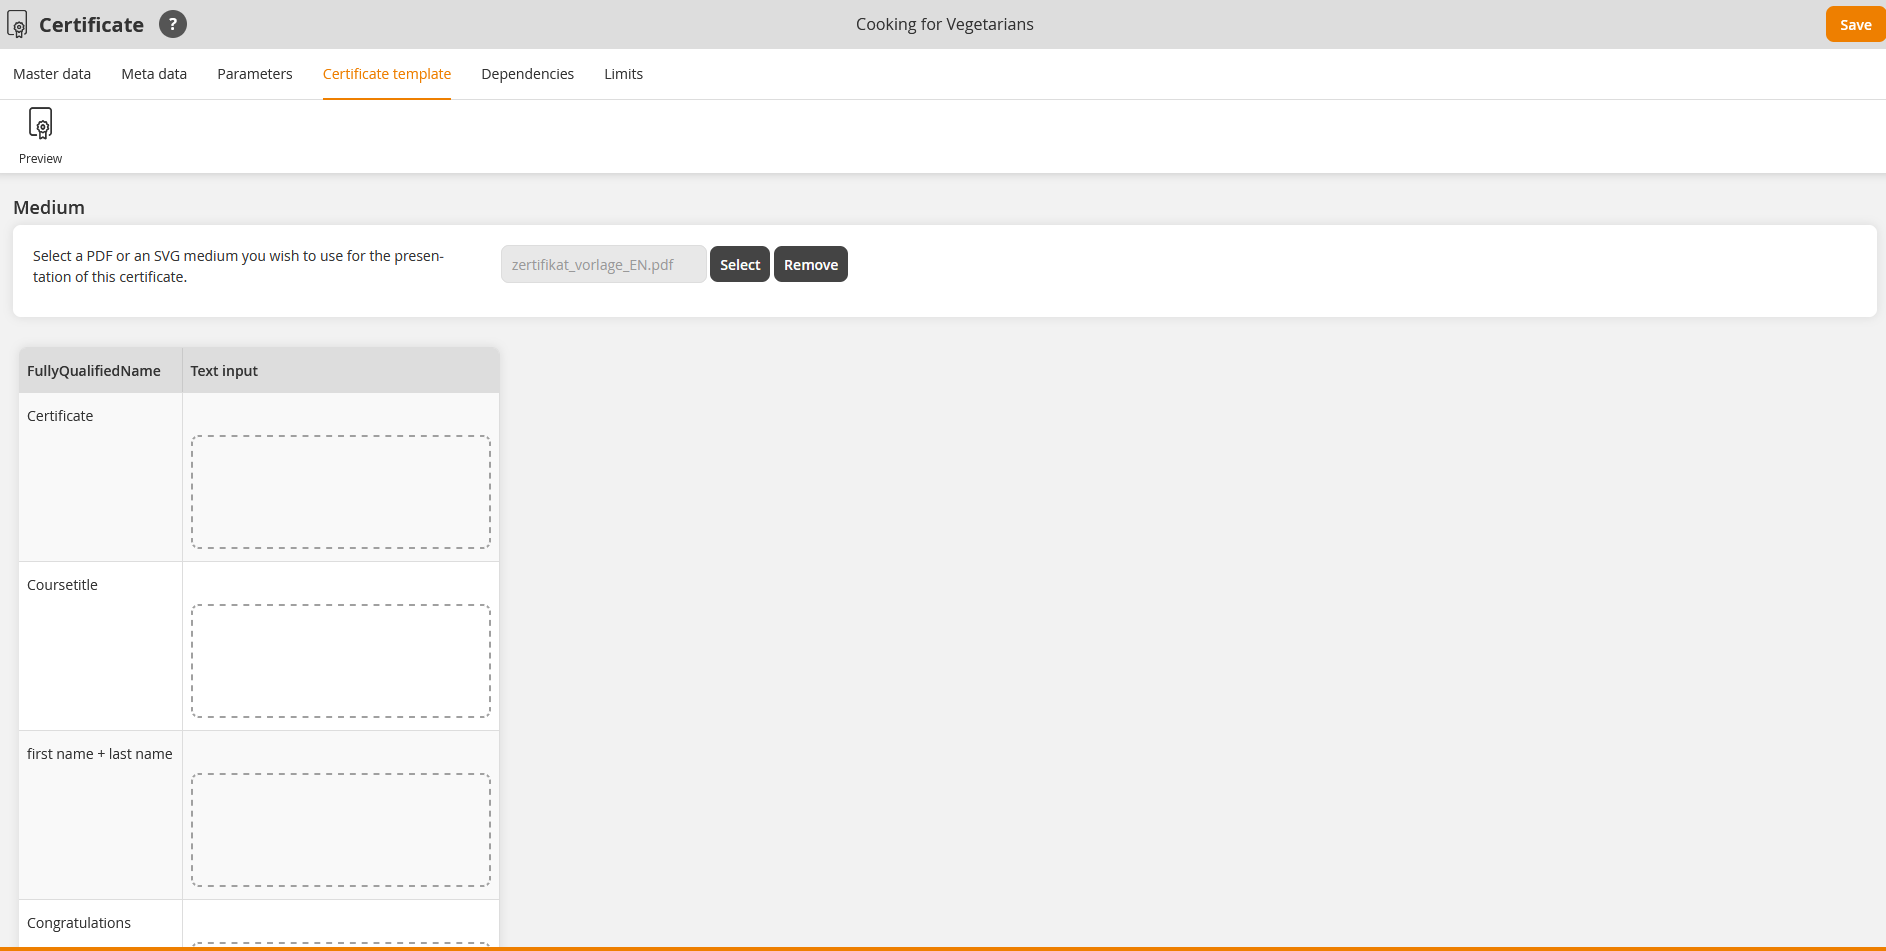
Medium
Select a PDF or an SVG medium you wish to use for the presentation of this certificate.Therefore click on the button Select, select the appropriate medium and confirm your selection. If applicable you can remove the selection via the button Remove.
In the view of the SVG medium you get an overview of all used variables in the selected certificate. To get a preview of the certificate in the corresponding language, click Preview. Unknown Latin special characters (for example) in the text fields of PDF certificates are considered.
![]() Via this button you can use the following Avendoo® variables for the individual design:
Via this button you can use the following Avendoo® variables for the individual design:
| Variable | Bedeutung |
|---|---|
| address | Inserts the address of the certified user. |
| allReferents | Inserts all speakers of an event. |
| BulletPointCourseTarget | Inserts a bullet point list of the text of the course goal (see tab “Parameters” in the Course wizard) on the PDF form. You set off the first course goal with a dash. Note that you set off a blank after the dash. Then you can enter the text, which is shown later with the dashes in the certificate. For a further course goal you set a paragrah and set off a new course goal with another dash. There are bullet points as many you want, but the limitation is given by the height of the form field. |
| certificatetitle | Inserts the title of the certificate. |
| city | Inserts the city of the certified user. |
| company | Inserts the company of the certified user. |
| country | Inserts the country of the certified user. |
| CourseDuration | Inserts the course duration of the certified frontend user. |
| courseobjectduration | Inserts the expected processing time of the learning object (setting on the learning path). |
| courseobjectlist | Inserts the course contents (see paragraph “Certificate content list”). Note that, the check mark for the Certificate content list is set for every learning content in the course. |
| CourseTeaser | Inserts the course teaser of the certified frontend user. |
| coursetitle | Title of the course activation, in which the certification is created. |
| enddate | Date, on which the certification ends. |
| eventlocation* | Inserts the location of the event date. |
| eventprice | Inserts the price of the event date. |
| field10 | Inserts a defined field of the certified user. |
| field11 | Inserts a defined field of the certified user. |
| field12 | Inserts a defined field of the certified user. |
| field13 | Inserts a defined field of the certified user. |
| field14 | Inserts a defined field of the certified user. |
| grade | Inserts the grade of the participant. |
| idddecimaltime | Inserts the IDD learning time as decimal number. |
| IddTime | Inserts the IDD time in hours. |
| iddtimeminutes | Inserts the IDD learning time in minutes. |
| name | First and last name of the certified user |
| oe | Inserts the organizational unit of the certified user. |
| participantlocation | Inserts the location of the certified user. |
| personnelnumber | Inserts the personnel number of the certified user. |
| points | Inserts the achieved points. |
| referentsecondtitle | Inserts the second title of the speaker. |
| referenttitle | Inserts the title of the speaker. |
| secondtitle | Additional title, for example Dr. or Prof. |
| seminarcoach* | Speaker of the event, for which the certificate was given. |
| seminarend* | End date and time of the event, for which the certificate was given. |
| seminarenddate* | End date of the event, for which the certificate was given. |
| seminarstart* | Starting date and time of the event, for which the certificate was given. |
| seminarstartdate* | Starting date of the event, for which the certificate was given. |
| serialnumber | Adds a serial number from the appropriate number range of the resource. |
| startdate | Date, on which the certification is valid. This is when the certification is issued/achieved, but there is one exception: If the certificate is connected with an event on the learning path, then the “startdate” will be used at the end of that event date group, at which the successful participation is confirmed lately. This ensures that not the duration of validity is needlessly extended on a later done recording attendance. Thus the validity starts (=startdate) by the end of the event date (this means event has been attended), independent from the time of recording attendance. |
| title | Title of the certified user |
| UserFirstname | First name of the certified user |
| UserLastname | Last name of the certified user |
| UserUsername | User name of the certified user |
| zipcode | Inserts the zip code of the certified user. |
* = These variables are only available, if the certificate is assigned to an event.
Via this button you can redo your action.
Via this button you can restore your action.
In the view of the PDF medium you get an overview of all used form fields in the selected certificate. To get a preview of the certificate in the appropriate language, click on the button Preview.
In the column Text input you can substitute text of the already existing form fields.
A variable for inserting the date, on which the certification was issued, is:
[avendoo:var name=startdate]
To center the variable content at the certificate, you can add the following behind the name of the variable:
[avendoo:var name=startdate center]
There are the fonts “Arial” and “Arial Black” for the variables available. Instead of “Bold” use the font “Arial Black”.
Dependencies
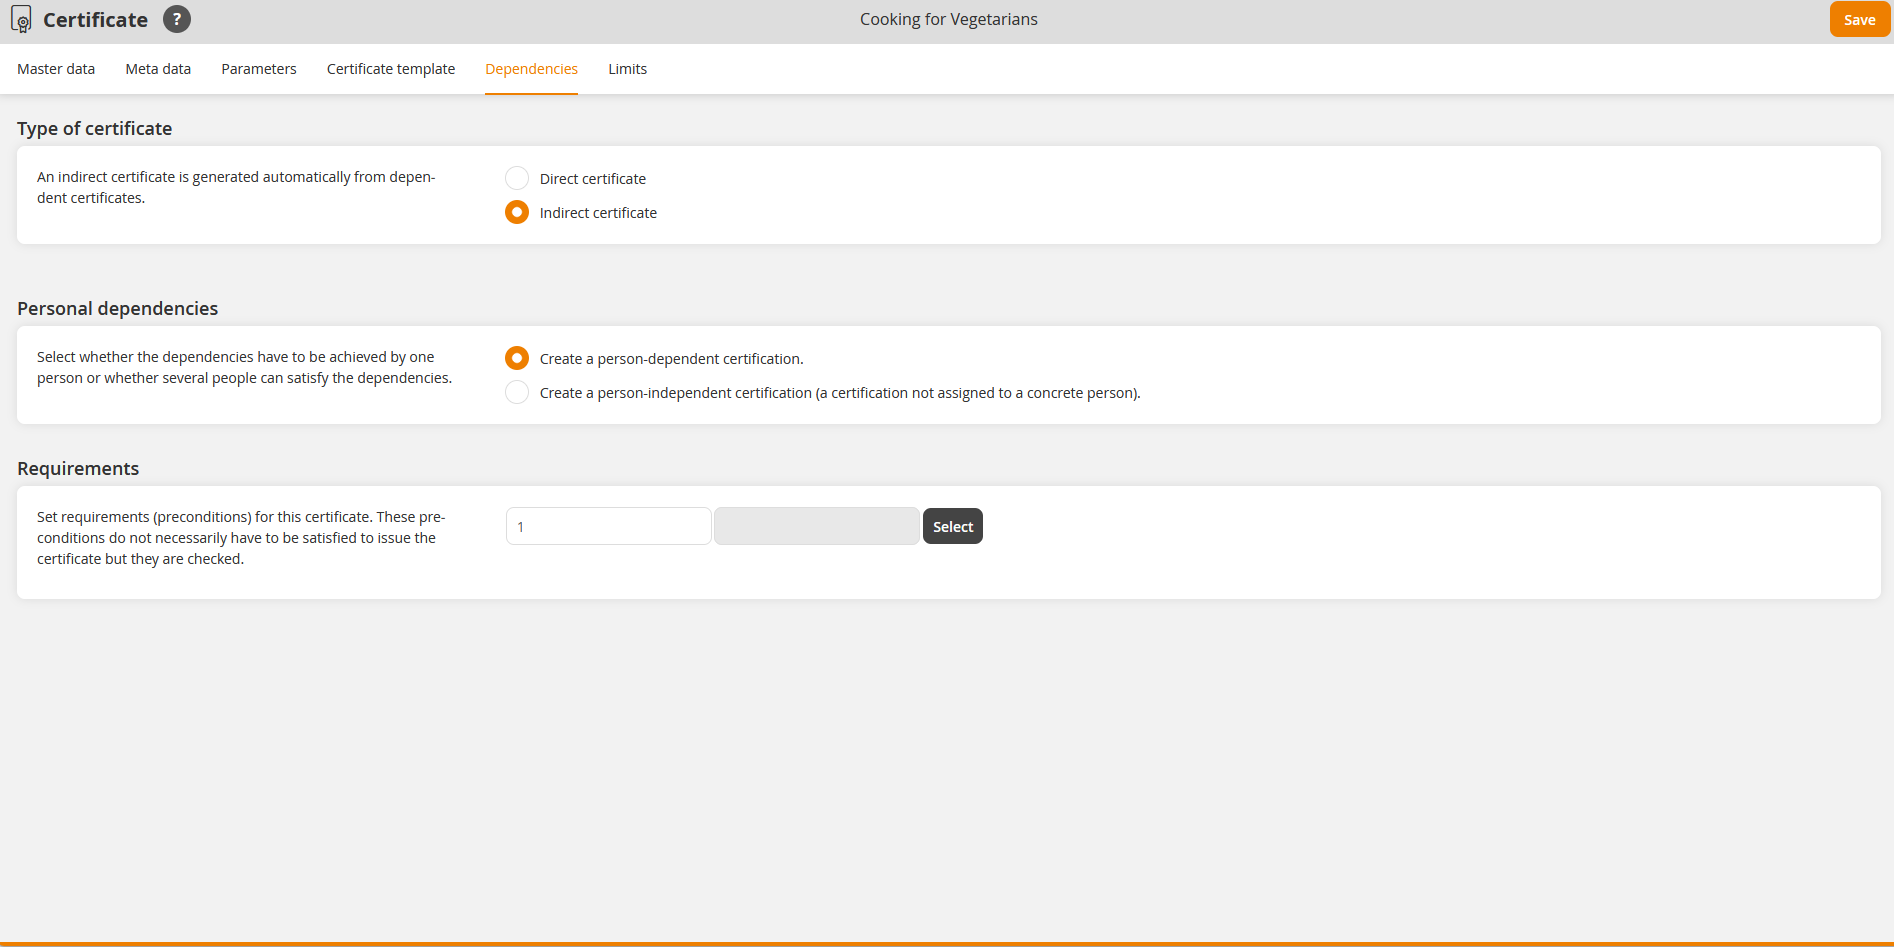
| Direct certificate | Indirect certificate |
|---|---|
| The certificate is directly issued to the user, when a training is successfully completed. | These certificates cannot be achieved directly by the users. They serve for controlling limits in fact or are achieved by combination of multiple direct certifications. |
Type of certificate
Select if it should be a direct or an indirect certificate.
Personal dependencies (only visible on direct certificates)
- Within a line the certificates are linked with “Or” (10 dependencies are possible)
- The certificates are link with “And” across lines (15 dependencies are possible)
If you have certificates which depend on the respective person you can enter at the end of line a number, how many certificates of this line have to be achieved to get a certificate.
- Create certificate that depends on the respective person
If you have certificates which depend on the respective person a person has to fulfill all dependencies to get the certificate.
- Create certificate that does not depend on the respective person (certificate isn’t assigned to a certain person)
If you have certificates which don’t depend on the respective person these certificates are not assigned to a user, but they are created in the system, when the dependencies are fulfilled by single or multiple users.
Example for certification that does not depend on the respective person
To get a special status at a supplier of software, for example Premium Partner, X persons of a company have to do certain trainings. If you use certificates which don’t depend on the respective person you can define that ten employees receive this certification and you as author or team leader get a notification that you whole team has achieved this status.
Dependencies
Enter in the field of the first column per line the number, how much dependencies have to be. To select the dependency, click on the button Select and select the appropriate certificate.
Limits
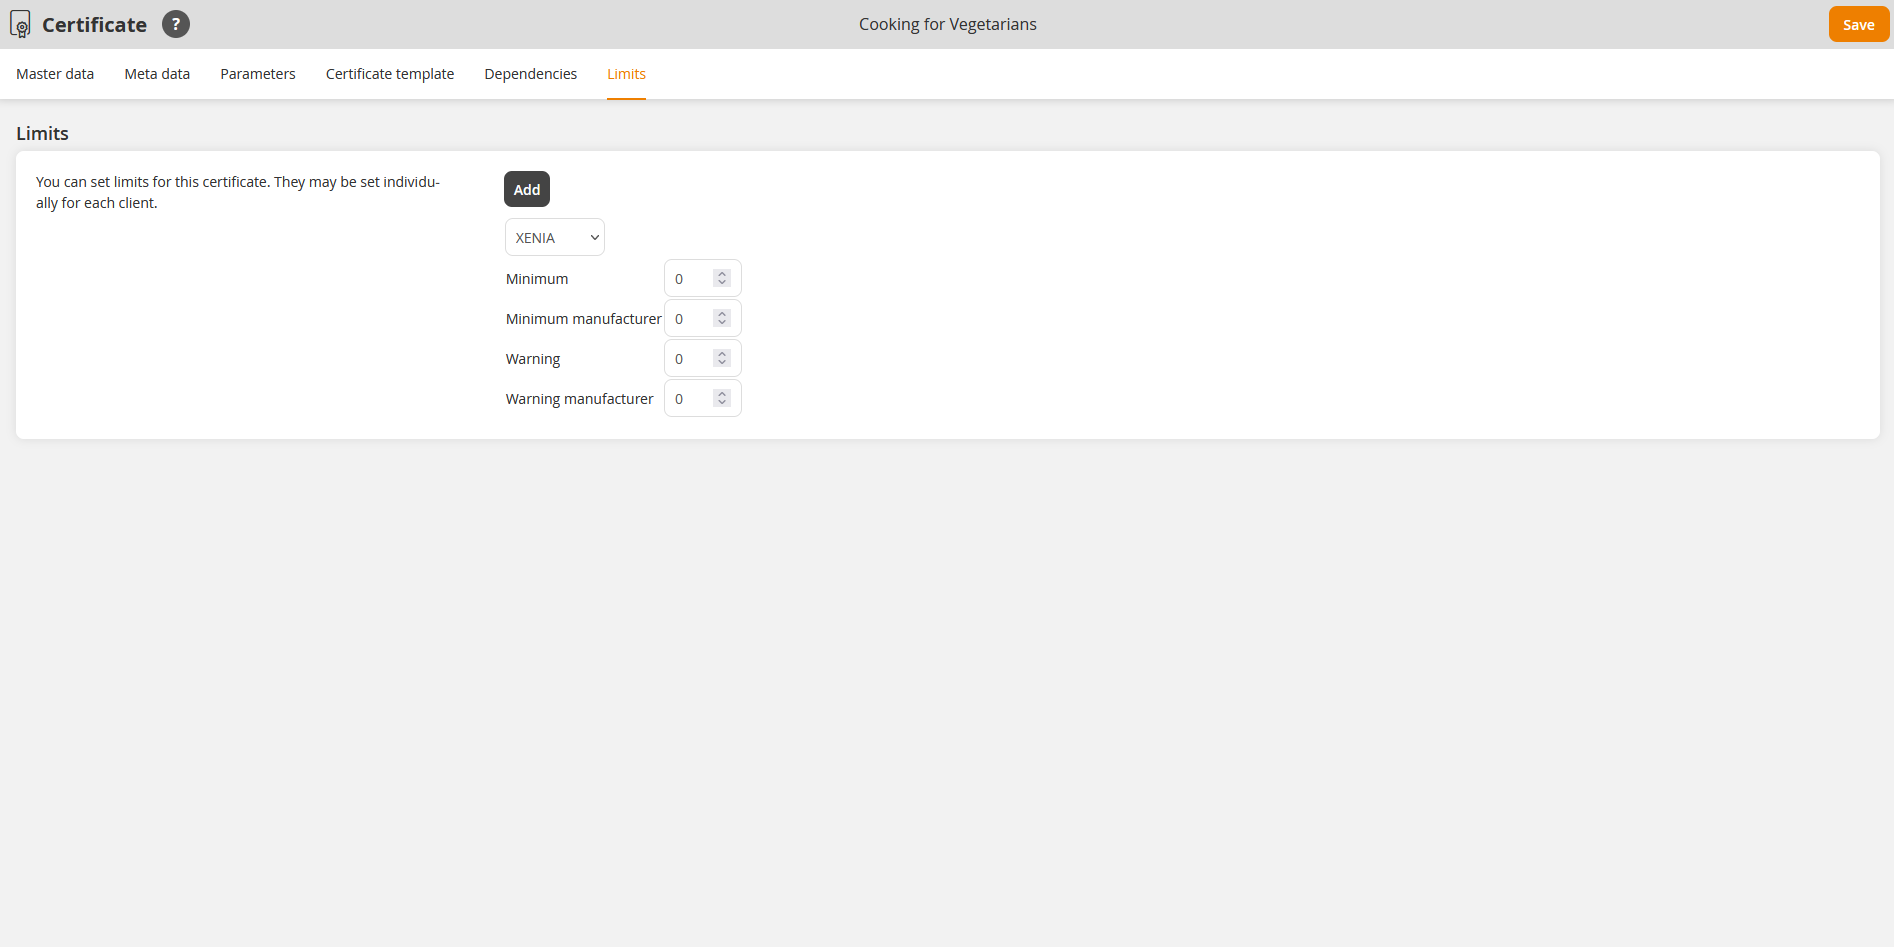
Via limits you can indicate minimum values for the number of certifications for a client.
Example
The partner program of a motor manufacturer requires that reseller have to employ five certified service employees. Via the limits there are notifications sent automatically to defined recipients (see parameters).
- Minimum
Minimum value of certified users of a client, for example 5.
- Minimum manufacturer
Minimum value of certified users of a client
- Warning
Threshold for sending notices, for example 5.
- Warning manufacturer
Threshold for sending notices
If you enter the limits for the appropriate certificate, you can make the minimum values of certified users of a client visible and you can define limits for sending reminders.
If you don’t enter limits for the appropriate certificate, there will be no limits regarding the number of certified users of a client and regarding sending reminders.
At the end of the Certificate wizard the certificate is saved. Now you can use it for the learning path.
Create certificates with OpenOffice Draw
To draw a certificate you use a template in .svg format (scalable vector graphics). You have to create this template with the Office Software OpenOffice 3.0 or 4.0.1 which is freeware. You find further information about Open Office products at http://www.openoffice.org/
Note: Please use for creating Avendoo® certificates only version 3.0, 4.0.1 or higher of OpenOffice.
Export of the SVG file
Export the created template into .svg format. Choose therefore under file the menu Export... Then you select SVG as export format and enter the favored file name to save the template.
Print certificates
You can make certificates available as author for the learners. Further information you find under Learning content → Courses → Parameters → Certifications.
If you want to print certificates as author for your learners, you can open these via PDF link in a report and print them. Further information you find under Reporting → Resources → Certificates.
FAQs
What is the PDF Certificate wizard?
Via version 16.3 the new Certificate wizard is available in the author backend under Resources -> Certificates.
Via this wizard you create certifications, which can be used on course level or for learning objects on the learning path for displaying learners a certification of a successful completed training.
How do you get the new Certificate wizard in your Avendoo® learning world?
Ask your Avendoo® contact person. If you have version 16.3, then the usage of the new Certificate wizard can be activated for free.
You don’t have automatically the new Certificate wizard available with the update to Avendoo® version 16.3 (new customers excluded).
What are the commonalities and the differences of the Certificate wizard?
The basic functions of the Certificate wizard are still the same. The design of the Certificate wizard, the order and the user notes of the functions has changed.
The new Certificate wizard contains as innovation the possibility to use media in the SVG format or in the PDF format.
In the new Certificate wizard you insert your certificate templates as Avendoo® media instead of via the Windows Explorer. First you can upload the medium in the Media center or you can add it via the media selection in the Certificate wizard. This is also valid in future for templates in the SVG format.
You have uploaded your translated SVG certificate templates as long in the old Certificate wizard. From now on you upload your translated certificate templates (SVG and PDF format) in the translation area of the medium in Avendoo® media. Regarding this translations you define the fixed components of the templates, which are not maintained via variables or via manually changes (only possible for PDF), for example image or logo in a foreign language.
Flexible components of the templates are now translated in the newly added translation area of the certificate resource, for example variable learner’s name $name$.
The available languages are now more clearly arranged: The overview of the certifications shows the existing translations (flag symbols) from now on only, if they are created. There are not shown all flags as before, as long as the translations are not created by you.
How do you create a PDF template?
For creating a PDF template you can create it outside your Avendoo® learning world. Examples for programs are OpenOffice or Adobe Acrobat X Pro. Please note, that is not enough to save a word document as PDF file.
Click in Open Office on View -> Tool Bar -> Form control elements and drag the new window to the top of the menu bar. Now you can insert text fields via the ABC button. This Open Office text fields are later on your Avendoo® form fields.
Mark a form field. Via the context menu -> control field you get to the characteristics of the form field. You should give an unique description to each form field, for example the appropriate description of the Avendoo® variable. Furthermore you can define here characteristics like alignment, multiline, font size, frame and font. We recommend to work without a border of the form fields.
Save the file in the .odt format. Then export your PDF formular and upload it as medium in Avendoo®.
You find a standard template as PDF under the next FAQ.
Where do you find a standard template for a PDF template and an ODT template?
You get a PDF template by now in the online documentation:
Please get some further information about the ODT template via the course “Avendoo Zertifikate to go”. This course is part of the e-learning library “Avendoo to go”, which enables as many users as you want to open small learning units about different topic at any time and any place. You can cancel the subscription of “Avendoo to go” each month.
How do you use the PDF form template in Avendoo®?
Enter either a placeholder text, a variable description (for example $name$) or a fixed text (for example a gratulation sentence) into your form field.
Form fields, which contain a variable description, are directly automatically be filled without entering the variable again in Avendoo®.
Placeholder texts and fixed texts can be transferred or you substitute these by individual texts, which you enter in the matching field in Avendoo®.
Also the combination of text and variable within a form field is possible. You mark variables by a $ symbol before and after the variable description.
What happens with your certificates, if you have used the old Certificate wizard so far?
You can use the existing SVG templates in the new Certificate wizard. The done settings still remain (for example validity, dependencies).
Storage location of the file: The SVG templates, which you have saved in the old Certificate wizard so far, are now saved as medium in Avendoo®.
The previous translations of your SVG templates are saved as translations of the medium. Furthermore you find the variable assignment for different languages in the translation area of the certificate. If you haven’t translated a certain language in the SVG format, there is a fall back to the original language in future.
What will change for the learner, if you switch from the old to the new Certificate wizard?
There will be no changes for learner, if you switch from the old to the new Certificate wizard. Existing certifications are still there and you can issue new certifications on basis of the so far SVG template or on basis of a new PDF template.
Can you work parallel with certificates in SVG and PDF?
It is possible to use different certifications in SVG or PDF format. Within the same certificate you cannot combine the formats.
What will happen to your translations, if you switch from the old to the new Certificate wizard?
You can also open as of now your existing certificates with the new Certificate wizard. Your SVG files are preserved in all languages. But these files are no longer saved in the Certificate wizard, but automatically saved as media in Avendoo®. That your translations are still complete, you see via the flag symbols.
If you want to switch from SVG to PDF regarding a specific certificate, you remove the original SVG in the Certificate wizard and insert instead a PDF template. This one you also select from your media area. In the media area you can maintain also the translations for your PDF template.
You maintain the translations of the SVG templates as of now also in the media area.
You additionally define the translations of single PDF fields in the translation area of the certificate resource. Here are, if you switch from SVG to PDF, all original texts for all PDF fields are initialized, which you can overwrite if you want.
How do you create several notices with an exact time for a certificate?
You want to add the following notices:
- The learner should be informed 90 days before expiration of the validity per e-mail.
- The learner and his/her superior should be informed 60 days before expiration of the validity per e-mail.
- The learner and his/her superior should be informed on the day of expiration of the validity per e-mail.
- The learner and his/her superior should be informed 14 days after expiration of the validity per e-mail.
Overall you add four notices via the button Add message:
- In the column Time you enter 90 days and select before expiration. Set a check mark at Certified user. In the column Notice you select Use client setting or you select Individual notification via the button Individual notification.
- In the column Time you enter 60 days and select before expiration. Set a check mark at Certified user and Superior. In the column Notice you select Use client setting or you select Individual notification via the button Individual notification.
- In the column Time you enter 0 days and select before or after expiration. Set a check mark at Certified user and Superior. In the column Notice you select Use client setting or you select Individual notification via the button Individual notification.
- In the column Time you enter 14 days and select after expiration. Set a check mark at Certified user and Superior. In the column Notice you select Use client setting or you select Individual notification via the button Individual notification.
How do you display course content as variable in certificates?
- Create a certificate template and insert the variable.
- Upload the certificate template as medium (PDF) in Avendoo®.
Note:
The listing of learning content is only supported by PDF certificate templates. If you use SVG certificate template the content is inserted indeed, but it cannot be shown technically as list. - Create the certificate via the Certificate wizard in Avendoo®.
- Deposit the certificate as course certificate in the Course wizard on the tab Parameters or link the certificate with a learning object on the learning path in the Course wizard on the tab Course content.
- As the learning content is not visible in the standard, you control as author, which content is shown and is not shown on the certificate. To activate the visibility in the options of the learning objects, configure the options of the learning objects in the Course wizard on the tab Course content. Then the title is shown on the certificate. Also you can change the designation.
