
Completed courses are available for the users via the course activation. There are extensive functions for an individual course activation, tailored to suit the customer’s needs.
Via rules on participants and participant restrictions thus you can publish courses purposefully. To make a bundle of multiple course activations, you find more information under Course management → Training plans.
When the author has entered the processing time for the course activation via the course contents, Avendoo® calculates the planned end date on registering users with entry date in the future or with subsequently defined entry date by adding the processing time to the entry date. Otherwise Avendoo® calculates the planned end date by adding the processing time to the registration date.
In the overview (Course management → Course activation) you see all already created course activations. You can filter by the following criteria: Title, External reference, External reference type, ID, Language, Include subcategories, Status (Initiated, Being Planned, Decision, Rejected Later, Rejected, Approved, Active, Close and/or Archived), Release type, Classification values, Participants (User name, Last name, First name and Participant status) and user-defined fields
The old status filter with Active, Inactive and Archived (see second screenshot) is only available via the OB3 API.
Examples for the old and the new filters
You have filtered in the course activation overview by the criterium Inactive, this means before version 17.45. You have seen all course activations, which got the status Initiated, Being Planned, Decision, Rejected Later, Rejected and Approved. If you use the new filters since version 17.45 you can filter individually by this status. To get the same filter like before version 17.45, select the status Initiated, Being Planned, Decision, Rejected Later, Rejected and Approved.
If you’ve filtered by the status Active before version 17.45, the course activations with the status Active and Closed were shown, this means if the course activations were active by registered participants. Since version 17.45 the course activations you can select the filter status Active and Closed to get the old filter.
The table has the following columns: Title, Preview, Participants, Course, Owner, Created, Change date, Status (Initiated, Being Planned, Decision, Rejected Later, Rejected, Approved, Active, Close and/or Archived), Assessments, Preview image, Date and time at which use data was calculated, Maximum number of participants, Number of occupied participant spots, Currently registered active participants, Current number of active catalog users, Currently registered inactive participants, Current number of inactive catalog users, Number of participants removed from the course activation, Number of users marked as deleted, Currently registered active participants (processing at least begun), Current number of active catalog users (processing at least begun), Currently registered inactive participants (processing at least begun), Current number of inactive catalog users (processing at least begun), Number of participants removed from course activation (processing at least begun) and Number of users marked as deleted (who had already started working through the course), External reference, External reference type, Note, Version, Valid until, Valid from, ID, Teaser, Expected task completion time (format hh:mm; corresponds to the sum of processing time of the mandatory learning objects) and user-defined fields.
Via right click on the table header you can edit display of columns and order. You can add the following columns via the Icon + .
You see the path (location of storage) of the corresponding course in the column Course. In case of the UGC (User Generated Content) courses you see the path of the users or team leaders (corresponding to the category tree). You can switch from the path to the course overview via a left click by choosing Go to path. To open the corresponding Course wizard, you choose Open course.
Further information about the corresponding statistics in the participant management you find here.
If you click the title, you get to the corresponding Course activation wizard.
There are the mass processing functions Move, Delete, Change owner, Change status and Copy for course activations. More information about these functions you find under Course activation: Mass processing functions.
The following functions are available via the context menu of the appropriate course activation title. In the context menu you find also the object permissions, which are used on user content.


You don’t have the permission to edit the selected course activation.
![]()
Via the national flag you open the preview of the user.
If the option Shared files and/or the option Confidentional files is activated on the sub tab Collaboration tools of the tab Options, you can upload files via the tab Files. These files are available for download after the upload via the colored link or the file name (see screenshot).
Opens the participant management of the course activation.
Opens the tab Runs in the participant management of the course activation.
Opens the Course wizard for editing.

Master data
Select the course or the event to be activated.
Status
Stipulate the status of the course activation.
There are the following status of the course activation:
Initiated
The course isn’t visible for the user on the learning place. Neither a self registration nor an external registration by the team leader are possible. Choose this status if the course activation is in creation, but shouldn’t be used.
Being planned
See Initiated: The course isn’t visible for the user on the learning place. Neither a self registration nor an external registration by the team leader are possible. Choose this status if the course activation is in creation, but shouldn’t be used.
Decision → Approved → Rejected later → Rejected
See Initiated: The course isn’t visible for the user on the learning place. Neither a self registration nor an external registration by the team leader are possible. Choose this status if the course activation is in creation, but shouldn’t be used.
Active
The course activation is for users visible and ready for editing.
Closed
All registered users still can complete the course. New users cannot register by themselves anymore.
Archived
The course cannot be edited by users anymore.

Registration management
Controlling the type of registration (event)
If your course contains an event, you can define the registration type.
- Self-registration and external registration
The user can register at the user frontend by him/herself. Also he/she can registered by an assigned team leader. Authors have basically the permission on course and event registration.
- External registration only
Only team leaders and authors can register users to courses and events.
- Only authors are entitled to register
Default setting. Users can only be registerd by authors.
Controlling the type of registration (course activation)
Define the registration type for the course activation. The following settings are also valid for users, which open the course via a training plan, are registered manually or added to the participant list via the extended import.
- Self-registration and external registration
The user can register to the course activation at the user frontend by him/herself. Also he/she can registered to the course activation by an assigned team leader. Authors have basically the permission on registration of the participants to the course activation. - External registration only
Only team leaders and authors can register users to course activations. If you have selected this option and added participants via the browse-catalog, the course activation isn’t visible in the catalog of the participants, because they aren’t allowed to register themselves. The course activation is only visible via the employee view in the team leader cockpit.
- Only authors are entitled to register
Default setting. Users can only be registerd to course activations by authors. If you have selected this option, the team leader can’t see the course in the catalog.


Editing mode
If you add users via the extended import to this course activation, you can define their editing mode for this course activation (Optional or Mandatory).
Registration conducted by team leader
Stipulate whether the new users for the course activation who open the course via a training plan, who are manually registered or who are put on the participant list via the expanded import function should be entitled as team leader to register further participants. Therefore set the check mark Employees unable to see this course activation are allowed to be registered by the team leader.
Insurance Distribution Directive (IDD)
Stipulate whether the IDD is supposed to apply. The option Deactivated is set by standard. Select the option Activated for activating this function and select one of the IDD profiles, which you have defined in the system setting “insuranceDistributionDirective”.
Further information about recording the type of learning for IDD and the learning content for IDD you find under courses and events.
Further information about the recorded time spent on IDD training you find under event dates.
Approval procedure for event participants
If the course activation contains one or more events, you can set a separate approval procedure for the participants in the event at this juncture. If you want this, set the check box.
You can send the approval inquiry to all maintained teamleaders by setting the check mark Send an approval inquiry to all responsible team leaders.
Approval procedure for course activations
Set the check box, if you want to configure the approval procedure for the course activation. Thus users can only edit the content, if they got an appropriate approval.
- Activate escalation / XX days
Activate the escalation, if you want that the responsible person (training coach or owner of the course activation) should be notified, when an approval request isn’t answered in the entered days.
You can send the approval inquiry to all maintained teamleaders by setting the check mark Send an approval inquiry to all responsible team leaders.
Approval procedure for deregistration (event)
To activate the approval procedure for deregistration of events, set the check box “Activate approval procedure”.
If the learners should have the status deregistered, if they deregister by themselves, select the radio button “Approval is deemed “approved””.
If the learners should have the status deregistered, when the deregistration is approved by a team leader or an author, select the radio button “Approval is deemed “declined””.
You can send the approval inquiry to all maintained teamleaders by setting the check mark Send an approval inquiry to all responsible team leaders.
Furthermore you can enter the maximum processing time for the approval in days. Regarding this the standard will be processed.
Days till expiration
You can define how many days the user or learner can access to the course. The user can access to certifications and other important documents of training even after expiration of usage.
Days till expiration are valid since registration to the course activation (Status Catalog is also valid). When the days are expired the user can only see the Expiration page of the course activation.
If you set the days from a set value to 0, this is only valid for new registrations. It isn’t valid backdated for all participants of the course activation.
Further information about the expiration page you find under Course management → Courses → Expiration page.
Maximum number of bookable users
Via default the check mark Unlimited number is set. If applicable you can remove this check mark and enter a number of maximum bookable users.
Automatic course registration
If set the check box “Activate automatic course registration”, users visiting the course information page are automatically registered for the course and transferred onward to the start page.
The selection of the substitute participant for runs
If you set the check box “Enable the selection of a substitute participant for runs”, the author or team leader can select a substitute when deregistering a participant from a run.
Deregistration pursuant to participant rule
If you set the check mark Activate deregistration pursuant to participant rule, users registered on the basis of participant rules are automatically deregistered if the rules no longer apply to them the next time a calculation based on participant rules is carried out.
Further information about the rules on participants you find here.
Runs for a course activation
Stipulate which runs are available for a course activation. If selected runs are used, exclusive runs must also be indicated.
Select between the following options:
-
- No runs,
- Runs selected by author or
- All runs (contains runs exclusively for this course activation).
If you’ve selected this option, only course runs and for the course activation exclusively runs are shown.
To adjust the exclusivity also on a run in the Participant mangement you need the organizational right of an author Create general runs in participant management.
Options
Starting date
Set the starting date for the course activation.
End date
Set the end date for the course activation. Also define the follow-up state of the course activation:


Learning transfer
The training coach is informed about filled out assessments. Select a training coach.

Classification
Classify the course activation for further structuring your training programs. Via your defined classification and its classification value the user can find your course activation quickly and uncomplicatedly in the browse area – via the classification filters.
To activate classifications as additional filter for the user area, there have classifications to be assigned in the client. You can define classifications as mandatory selection in the client for the Course activation and Training plan wizard. Via the Client wizard you add the classifications, you have created in the Classification wizard before.

Remarks
Valid from
Enter a date from which the course activation is valid. You can delete the date if applicable.
Valid until
Enter a date until the course activation is valid. You can delete the date if applicable.
Version
Enter the version of the course activation.
Note
Enter some notes for the course activation.

Communication
On the tab Communication you can define system messages and community messages regarding the course activation.
Notification in the event of a course registration
This notification is only sent to the learner, if the learner (user) has been registered to an active or closed course by a team leader or an author. If the user registers him/herself, there will be sent no notification in the event of a course registration.
You can select Do not send a notification, Use client setting or Individual notification and you click on the button Select and select the appropriate individual notification. Then the source path of the individual notification will be shown. Information about creating an individual notification you find here.
Notification upon a deregistration from a course
This notification is sent if a user is being deregistered from a course activation. You can select Do not send a notification, Use client setting or Individual notification and you click on the button Select and select the appropriate individual notification. Then the source path of the individual notification will be shown. Information about creating an individual notification you find here.
Approval for course activation registration
Stipulate which message is to be sent to the responsible person. Select between:
- Do not send a notification
- Use client setting
- Individual notification ( (therefore select the appropriate individual notification via the button Select)
Then the source path of the individual notification will be shown. Information about creating an individual notification you find here.
New documents in course activation
Specify how participants are to be informed that there are new documents in the course activation. You can select:
- Do not send a notification,
- Use client setting or
- Individual notification and you click on the button Select and select the appropriate individual notification. Then the source path of the individual notification will be shown. Information about creating an individual notification you find here.
If you have set the check mark Also issue notification if “confidential files” are changed, the selected recipients will be notified if there is an upload of confidential files by the author, user or team leader.
Furthermore you can select the recipients by setting a check mark at Notify user and/or Notify training coach.
Notification regarding time obstacle
Stipulate how participants will be informed that the time obstacle in the course activation has been overcome. Select between:
- Do not send a notification
- Use client setting
- Individual notification (therefore select the appropriate individual notification via the button Select)
Then the source path of the individual notification will be shown. Information about creating an individual notification you find here.
Course activation – Denial of an approval request
Stipulate which notification should be sent to the user if his/her request for approval of a course activation is denied. Select between:
- Do not send a notification
- Use client setting
- Individual notification ( (therefore select the appropriate individual notification via the button Select)
Then the source path of the individual notification will be shown. Information about creating an individual notification you find here.
Course activation – Escalation of an approval request
Stipulate which notification should be sent to the person in charge of the course activation if the person in charge of the participants fails to respond to the approval request on time. Select between:
- Do not send a notification
- Use client setting
- Individual notification ( (therefore select the appropriate individual notification via the button Select)
Then the source path of the individual notification will be shown. Information about creating an individual notification you find here.
Course activation – Did not pass knowledge test
Stipulate which notification the team leader should receive if a knowledge test was not passed. Select between:
- Do not send a notification
- Use client setting
- Individual notification ( (therefore select the appropriate individual notification via the button Select)
Then the source path of the individual notification will be shown. Information about creating an individual notification you find here.
Course activation – A new topic was created in the forum
Stipulate which notification the user should receive if a new topic is posted in the forum. Select between:
- Use client setting
- Individual notification ( (therefore select the appropriate individual notification via the button Select)
Then the source path of the individual notification will be shown. Information about creating an individual notification you find here.
Course activation – A new forum article was created
Stipulate which notification the user should receive if a new article was posted in the forum. Select between:
- Use client setting
- Individual notification ( (therefore select the appropriate individual notification via the button Select)
Then the source path of the individual notification will be shown. Information about creating an individual notification you find here.
Course activation – Forum article responded to
Stipulate which notification the user should receive if a response was made to a forum article. Select between:
- Use client setting
- Individual notification ( (therefore select the appropriate individual notification via the button Select)
Then the source path of the individual notification will be shown. Information about creating an individual notification you find here.
Run – approval for run registration
This notification is sent to inform the team leader that there are new approval requests for runs. Select between:
- Do not send a notification
- Use client setting
- Individual notification ( (therefore select the appropriate individual notification via the button Select)
Then the source path of the individual notification will be shown. Information about creating an individual notification you find here.
Assessment – Confirmation
This notification is sent to the configured recipient to notify the recipient that the assessment is completed. Select between:
- Do not send a notification
- Use client setting
- Individual notification ( (therefore select the appropriate individual notification via the button Select)
Then the source path of the individual notification will be shown. Information about creating an individual notification you find here.
Assessment – Fill-out request
This notification is sent to the configured recipient to alert the recipient to the pending assessment. Select between:
- Do not send a notification
- Use client setting
- Individual notification ( (therefore select the appropriate individual notification via the button Select)
Then the source path of the individual notification will be shown. Information about creating an individual notification you find here.
Assessment – Learning transfer
This notification is sent to the configured recipient to make the recipient aware of the learning transfer. Select between:
- Do not send a notification
- Use client setting
- Individual notification ( (therefore select the appropriate individual notification via the button Select)
Then the source path of the individual notification will be shown. Information about creating an individual notification you find here.
Assessment – Plan learning transfer interview
This notification is sent the configured recipient so that the recipient can plan the learning transfer. Select between:
- Do not send a notification
- Use client setting
- Individual notification ( (therefore select the appropriate individual notification via the button Select)
Then the source path of the individual notification will be shown. Information about creating an individual notification you find here.
Notifications
By setting the check box you define, if Avendoo® should send a notification on demand to the training coach (team leader) or to all learners (participants) if there is a new blog entry. Further you can define, if a notification should be sent to the owner of the course activation when an exercise of the participant is done.
Duration
The duration will indicate the number of days after which a participant of the course should have completed the course.
Avendoo® treats the duration as recommendation. Thus the participant can decide if multiple course activations exist, which one he/she processes next.
Note that:
- The duration starts at the moment on which the user gets participant.
- The duration is no time limit and the user can process the course activation after exceeding the duration.
- The duration doesn’t run at course activations with the status Inactive and Archived.
Task reminder (participants)
To define the notifications sent to the participant before the specified task duration comes to an end, click on the button Add notification.
Select between:
- Use client setting or
- Individual notification (click on the button Select and confirm this selection)
In the column Preferences you define:
- Days left till end of task duration
- Interval in days for a repeat (before you set the check mark Activate)
- Additional recipients (email)
Select the Superior, the Training coach, the Course activation owner and/or the Participant`s trainer. - Send to additional recipients: as CC or as copy
If required you can remove the added notification via the button Remove.
Example: The processing duration is 64 days and the task reminder has 14 days and an interval of 2 days. Avendoo® sends the task reminder for editing after 50 days, 14 days before 64 days are over, then again after 52, 54, 56, 58, 60 and 62 days.
Task reminder (summary)
Here you can define notifications sent to the recipients before the specified task duration comes to an end, i.e. it is directed to the participants whose own specified task duration has not yet come to an end.
Therefore click on the button Add notification and select between:
- Use client setting or
- Individual notification (click on the button Select and confirm this selection)
In the column Preferences you define:
- Days left till end of task duration
- Interval in days for a repeat (before you set the check mark Activate)
- Additional recipients (email)
Select the Superior, the Training coach, the Course activation owner and/or the Participant`s trainer. - Send to additional recipients: as CC or as copy
If required you can remove the added notification via the button Remove.
Escalation (participants)
To define the notifications sent to the participant after the specified task duration comes to an end, click on the button Add notification.
Select between:
- Use client setting or
- Individual notification (click on the button Select and confirm this selection)
In the column Preferences you define:
- Days left till end of task duration
- Interval in days for a repeat (before you set the check mark Activate)
- Additional recipients (email)
Select the Superior, the Training coach, the Course activation owner and/or the Participant`s trainer. - Send to additional recipients: as CC or as copy
If required you can remove the added notification via the button Remove.
Escalation (summary)
Here you can define notifications sent to the recipients after the specified task duration has come to an end, i.e. it is directed at the participants whose specified task duration has already come to an end.
Therefore click on the button Add notification and select between:
- Use client setting or
- Individual notification (click on the button Select and confirm this selection)
In the column Preferences you define:
- Days left till end of task duration
- Interval in days for a repeat (before you set the check mark Activate)
- Additional recipients (email)
Select the Superior, the Training coach, the Course activation owner and/or the Participant`s trainer. - Send to additional recipients: as CC or as copy
If required you can remove the added notification via the button Remove.
Response receiver
You define via setting the appropriate check box, to which (training coach and course activation owner) Avendoo® forwards the answer (e-mail) of a participant to an e-mail of the course activation, for example escalation e-mail, for giving this person a chance to react.
Community message
You can define via setting a check box, if Avendoo® should generate community messages for deregistration of the course activation. Further you can define via setting a check box, if Avendoo® should send notifications for adding to the catalog and for removing from the catalog. If the status of the course activations is Inactive or Archived, Avendoo® generates no notifications.
If you want to send a community message for registration of the course activation, use the Individual notifications.
Announcements for runs
Define, under which circumstances participants of runs should receive a message as announcement. Therefore click on the button “Create new announcement”.
If you have selected the Individual notification “Announcement of run”, you can select between the triggers Immediately at registration of run, Start of the run or End of the run. If you have selected Start of the run or End of the run, you can enter, how many days before or after the start or end of the run and the time. Furthermore you can add the report Program of a run and remove it if required. Also you can remove the created or edited announcement.
You can send the report Program of a run as announcement for runs in the PDF format via e-mail to the user, as the user has been registered to a run. The report will be updated if there are changes.
The community message Announcement of a run you create under Individual notifications.
You can see sent notifications of a course activation on the tab Sent notifications in the Participant management of the course activation.


Deeplinks
A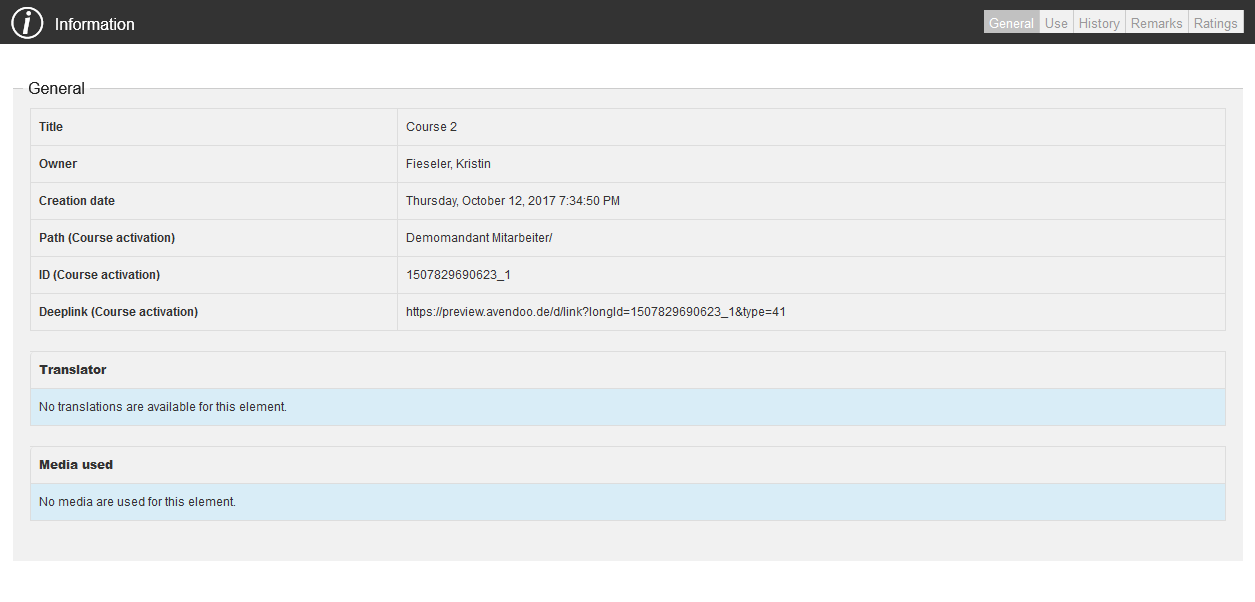
A deeplink can link to a complete course or directly to a learning object, for example to the starting page of a knowledge test. You find the ID of the deeplink in the context menu of the appropriate course activation on the tab General in the menu Information.
In the Administration area you can activate the tab IDs. On the tab systems parameters you have to set the Parameter directLogin.showId on true.
Further information about the different deeplink types you find in the chapter “Deeplinks“.
Note page “No access to course offerings”
You can configure the text of the note page “No access to course offerings”.

How do I edit the created course activation?
To edit a created course activation, right-click on the title of the appropriate course activation or choose the appropriate function in the drop down menu.
Preview
Shows the preview of the selected course.
If you choose this function, you get directly into the course activation wizard and you can create a new course activation.
Edit
You get into the course activation wizard for the selected course and you can do some changes.
Delete
To delete course activations, select the appropriate course activations and choose Delete. Course activations with the status Active or Closed can’t be deleted.
Change status
Via this function you can change the status or you can change multiple course activations.
Show report
You get directly to the reports.
Information