Master data
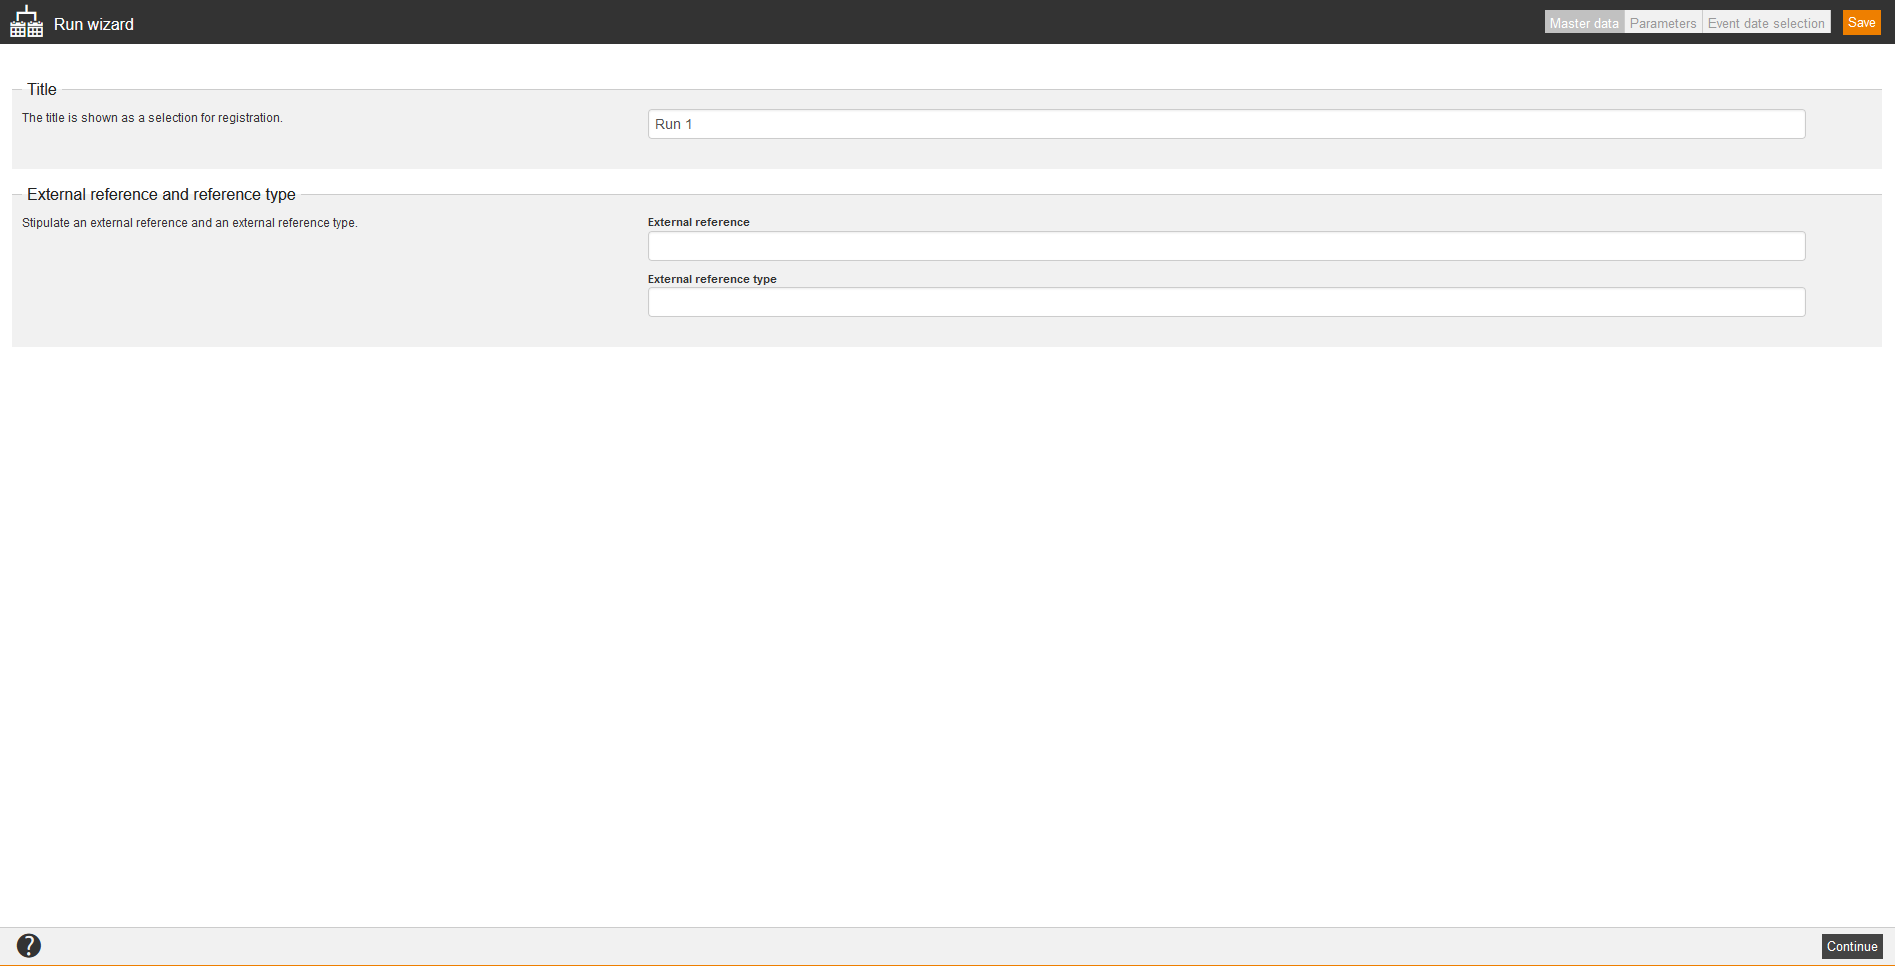
Title
Enter a title for the run, which will be later shown as selection for the registration.
External reference und reference type
External references are used for organizing and for linking to other systems. This you can use for manual assignments and on using interfaces, for example: REST API. You can search for external reference in the advanced filter function.
The external reference represents a reference value like ID, serial number or name. The external reference type describes which reference it is and how to understand the reference value. This is very important, if there are different sources or types of references, which use the same reference values.
Examples:
Reference type SAP customer number with the external reference 100234
Reference type SAP user ID with the external reference 000004
Parameters
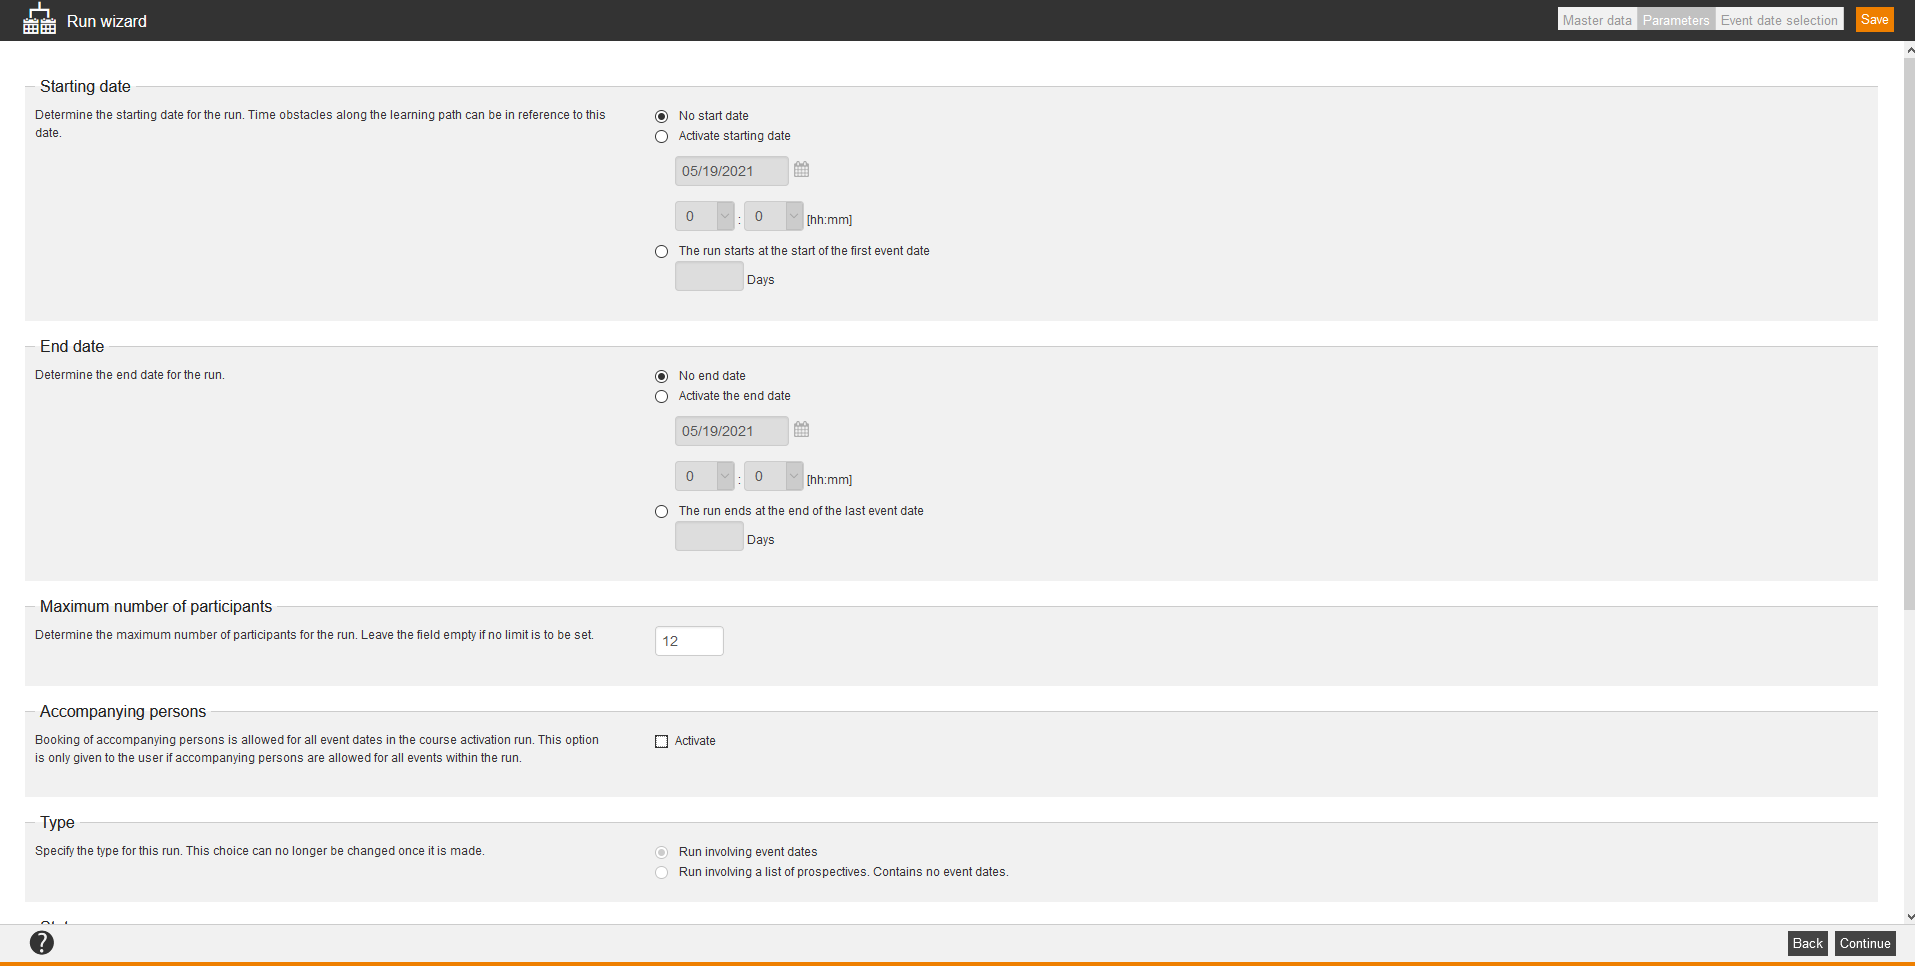
Starting date
To activate the starting date of the run set the check box Activate starting date and define the starting date inclusive time for the run. This starting date you can use for time obstacles on the learning path. Alternative you can enter the starting date in relation to the first event date start (Starting date depending on the first event date start). Therefore you enter a number of days, to which the run should start earlier.
End date
To activate the end date of the run set the check box Activate end date and define an end date inclusive time for the run. Alternative you can enter a relative number of days, to which the run ends after the last event date. If you enter no number, there is no end date for the run.
Maximum number of participants
Determine the maximum number of participants for the run. Leave the field empty if no limit is to be set. An overbooking from author’s view is possible.
Accompanying persons
Set the check mark Activate, if you want to allow a booking for accompanying persons for all event dates of the run. Note that the user can only record accompanying persons, if this is allowed in all events of the run. You configure this on the tab Configuration in the Event wizard.
Type
Specify the type for this run. This choice can no longer be changed once it is made.
Select Run involving event dates, if you want to create a run with event dates (standard case).
Select Run involving a list of prospectives. Contains no event dates., if you want to create a run as list of prospectives.
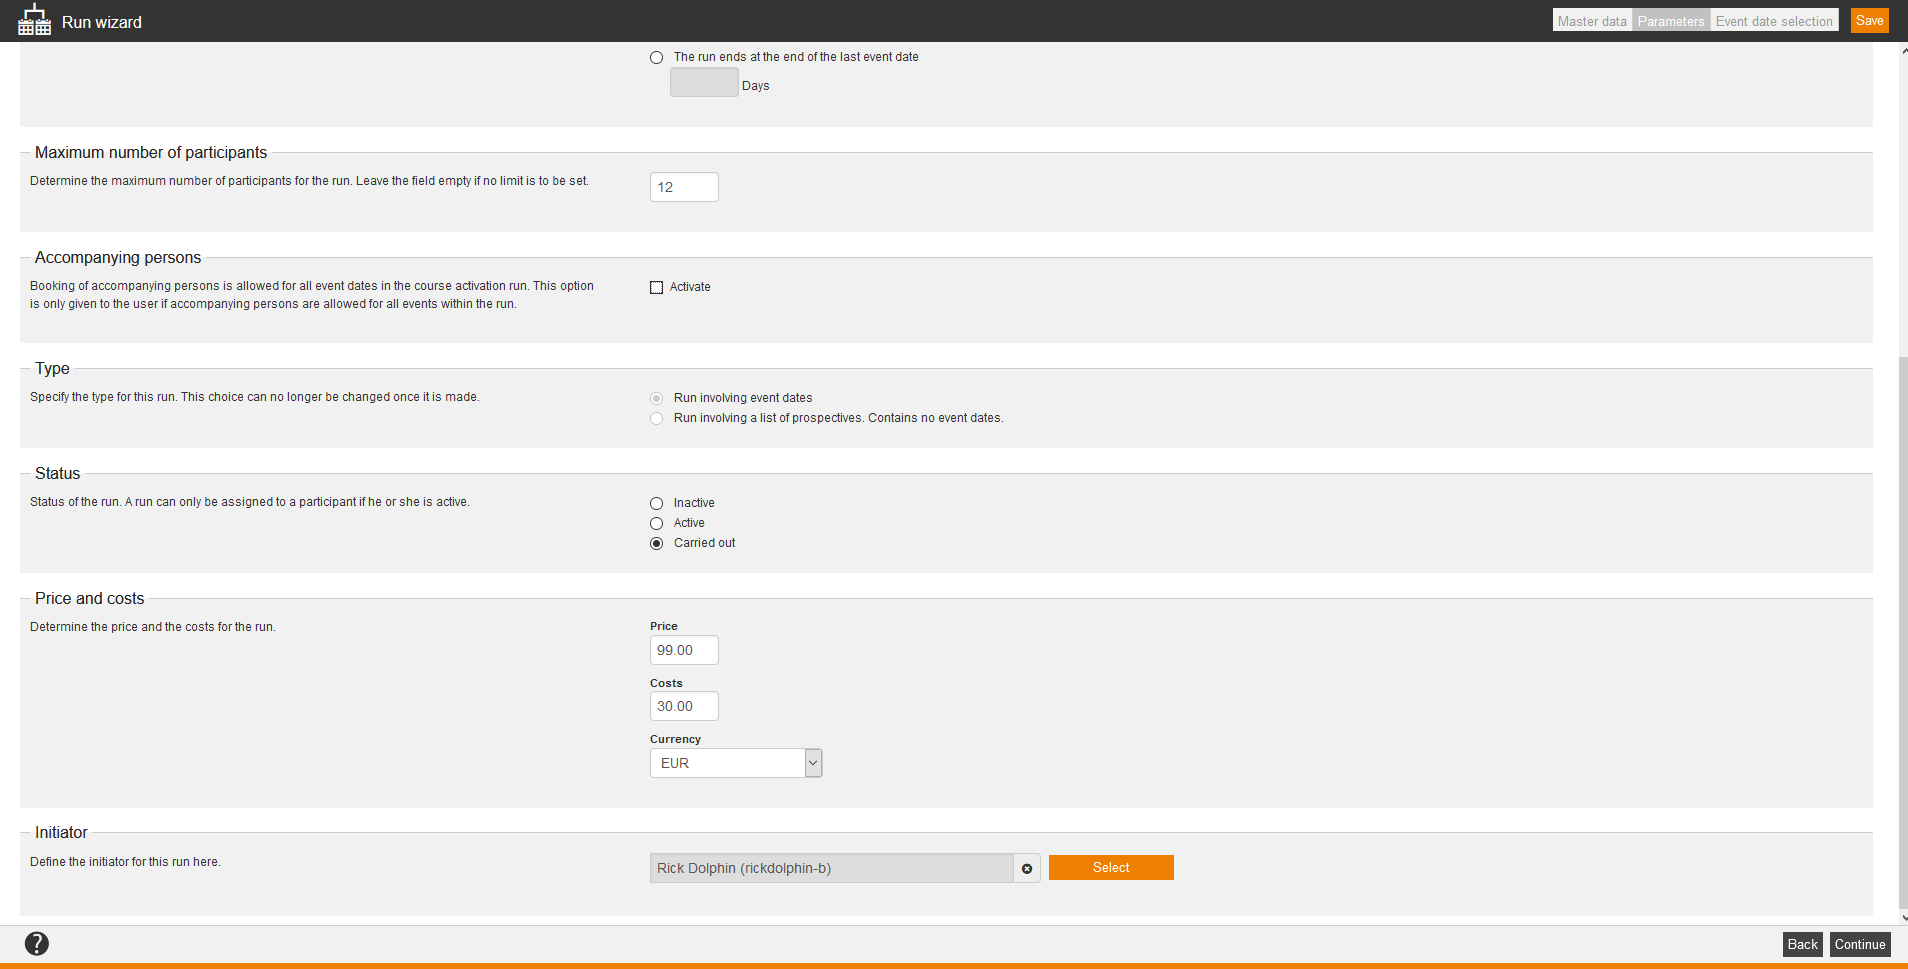
Status
Set the status to Active, if participants should be assigned to the run. Otherwise the run is only created, but it can’t accept participants.
Price and costs
Determine the price and the costs for the run.
Initiator
To define the initiator of the run, click on the button Select and select the appropriate user or author. If you have defined an initiator of the run, you can later understand, for whom the run was created.
Event date selection
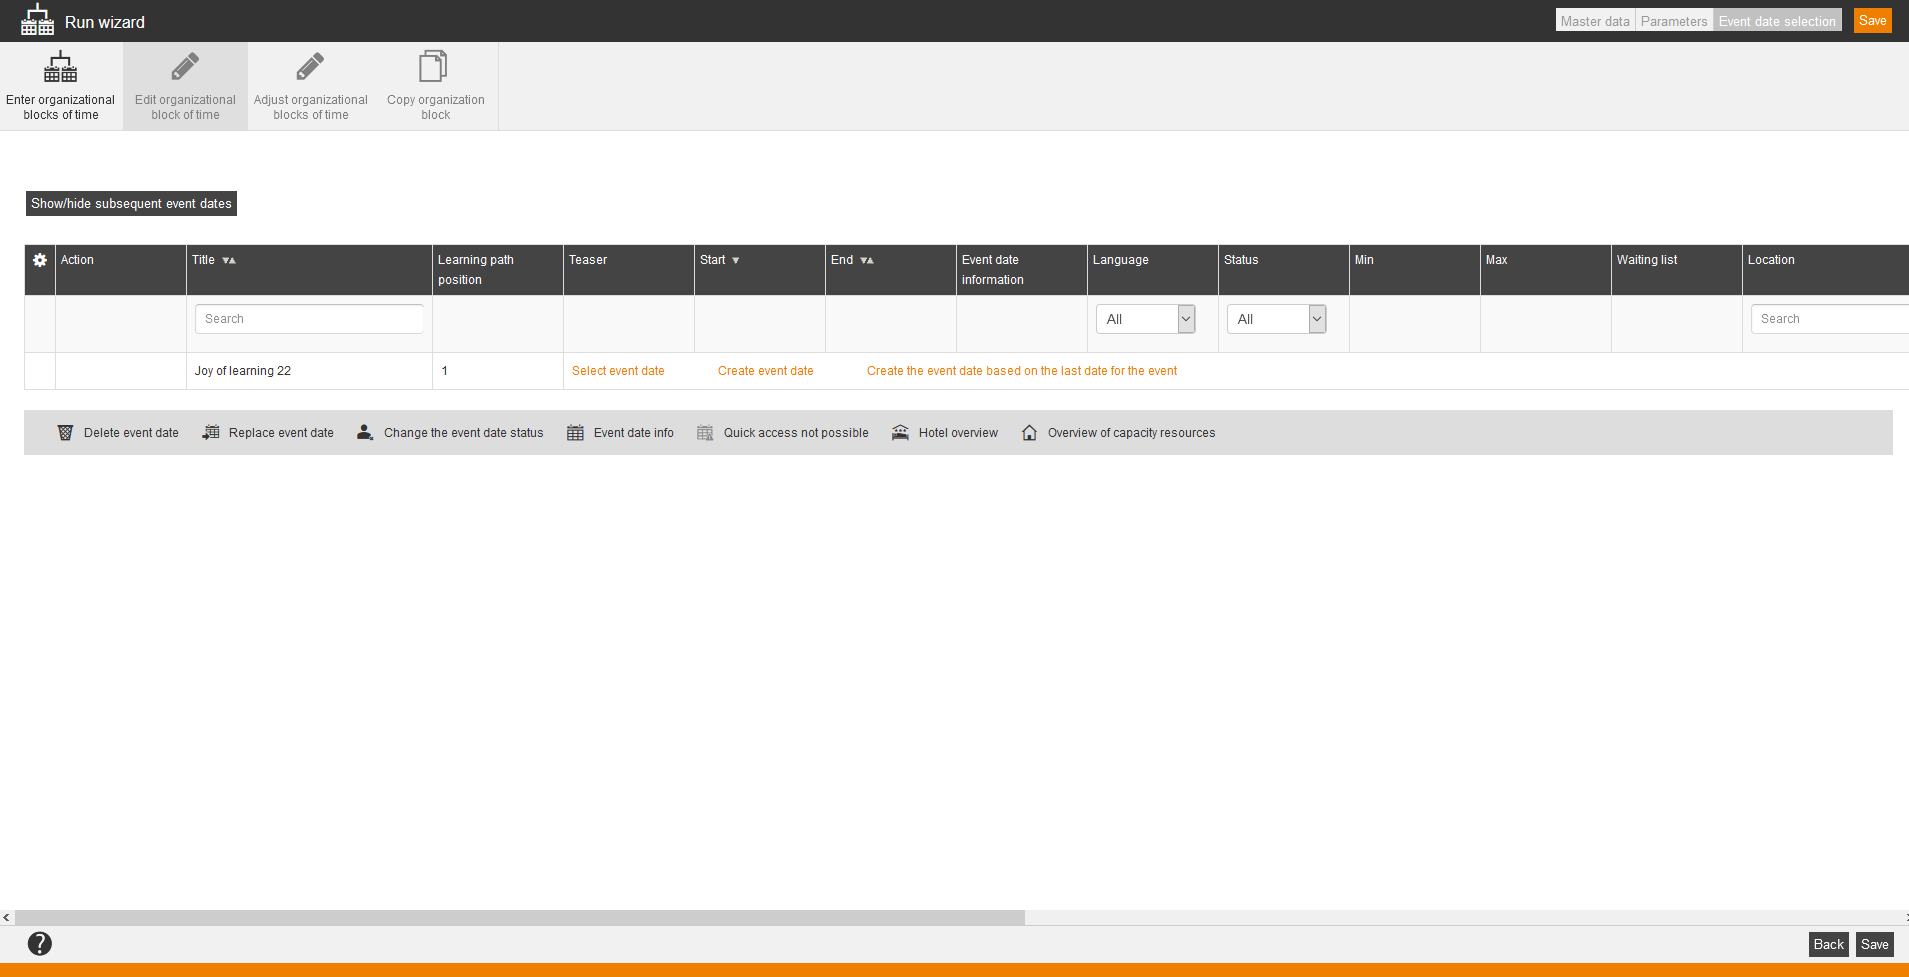
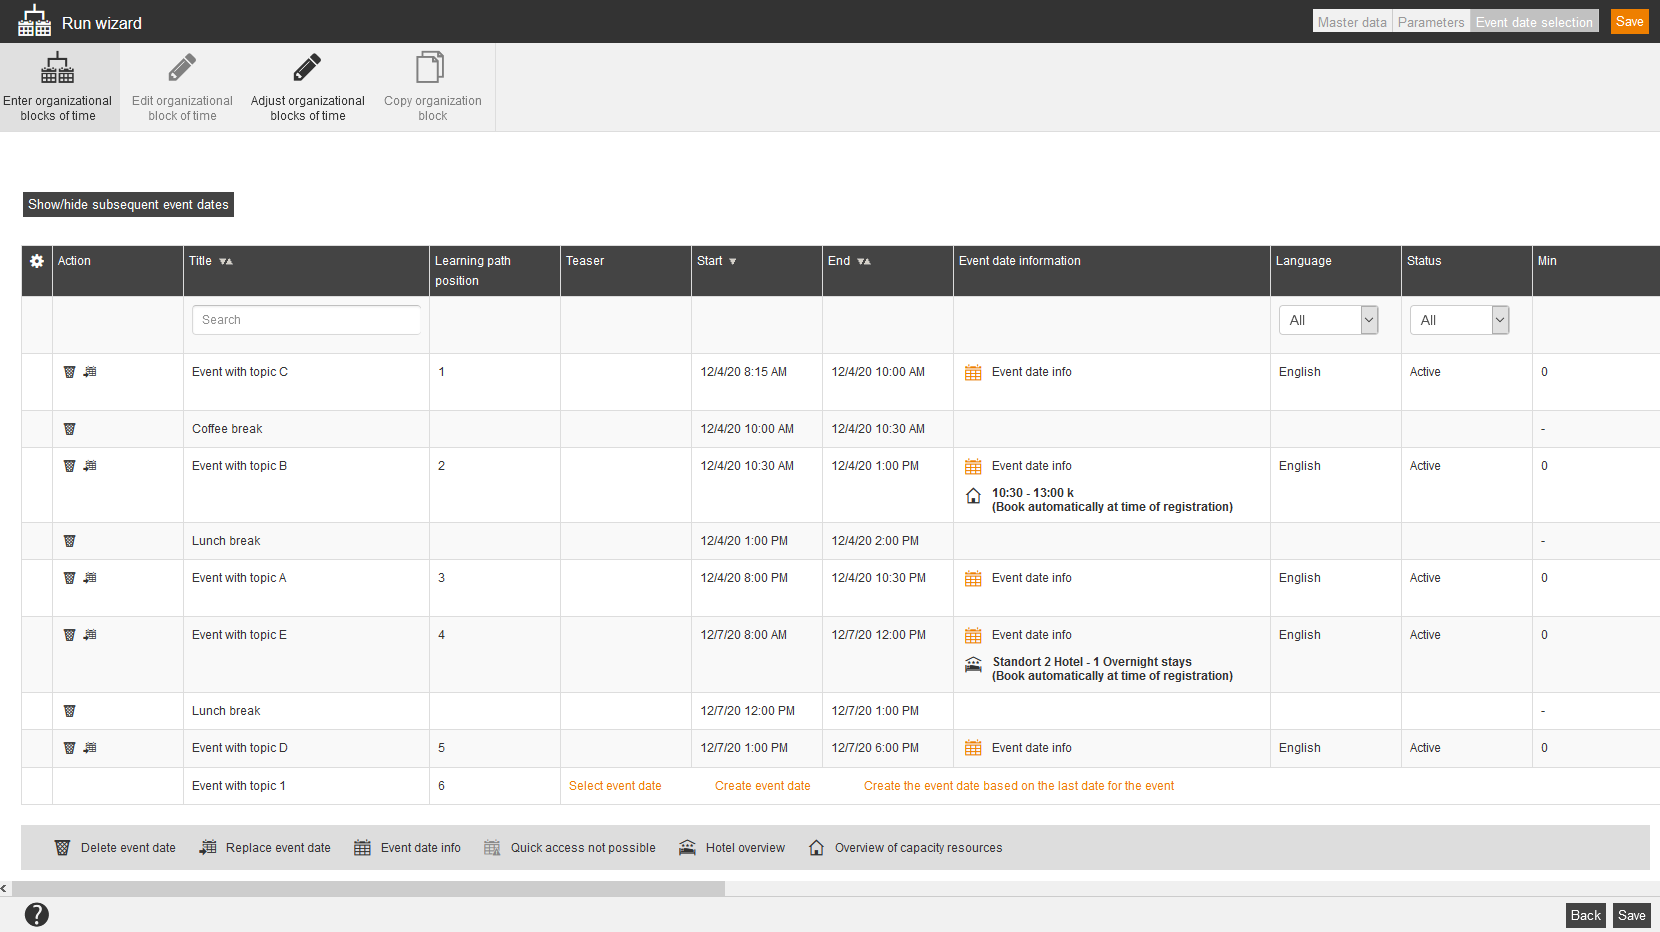
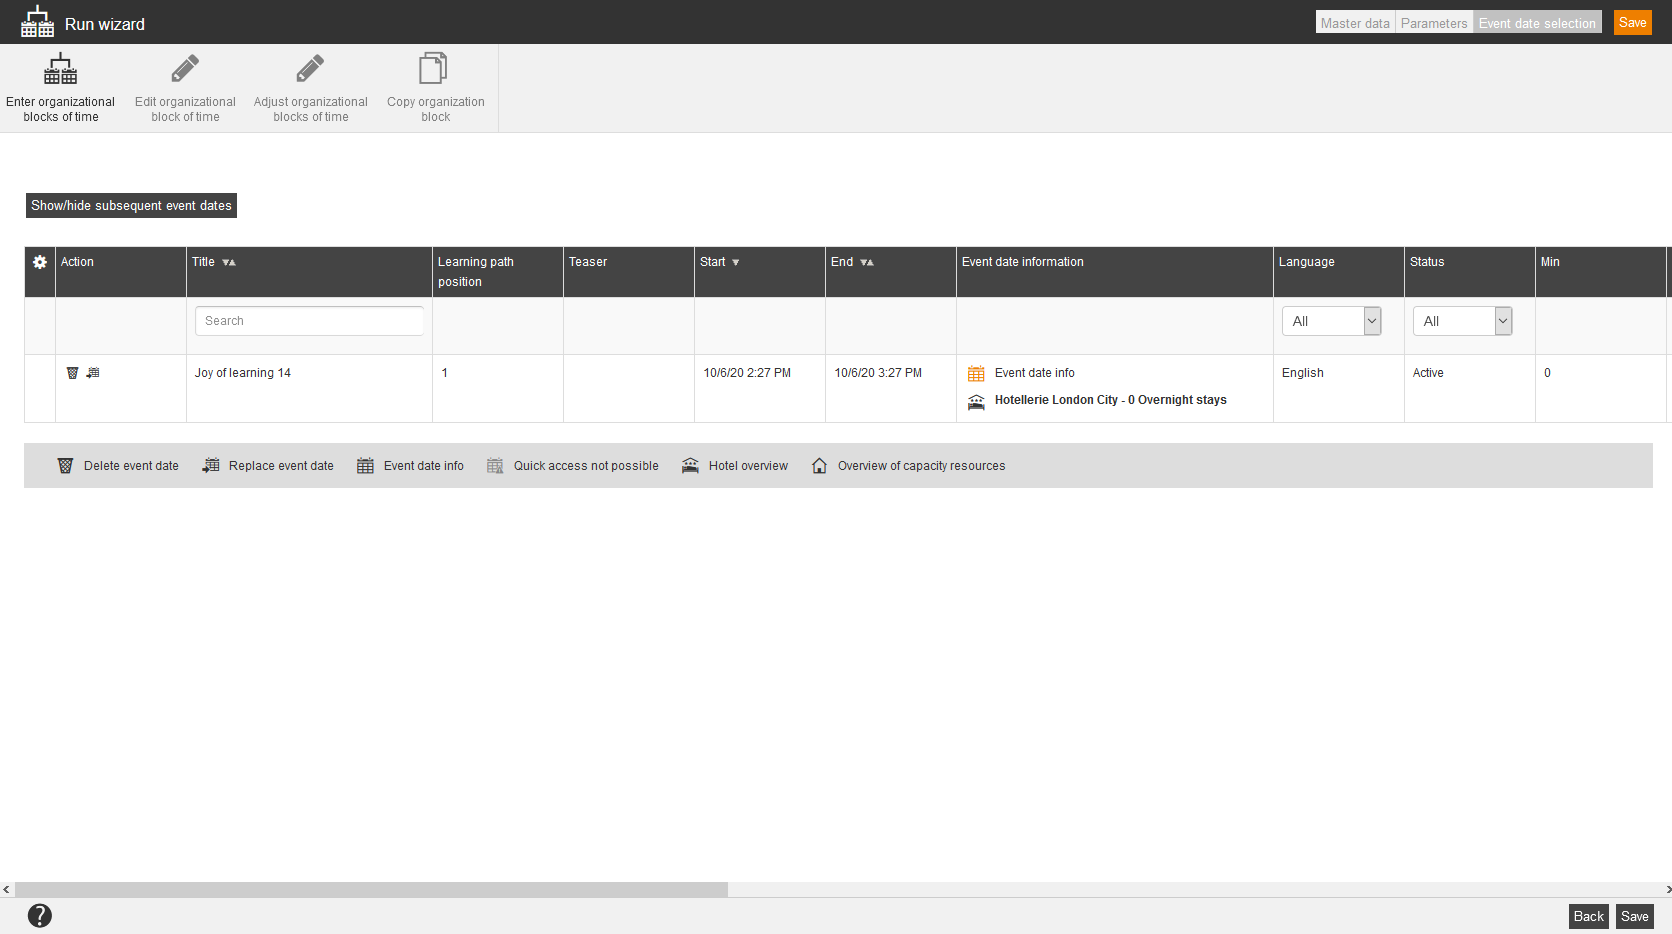
Via Select event date in the Run wizard you can add an existing event date of an event from the list of all event dates of this event in the run. In the table you see the newly added event date.
![]() To delete an event date, click on the recycle bin.
To delete an event date, click on the recycle bin.
![]() To replace an event date, click on this icon. Then the Event date wizard for creating a new event date for the run opens. All data of the replacing event date are transferred except the event date. The event date is automatically taken over to the event date of the next day (the other data remain), if all event dates of the run are in the past. If the run already got event dates, which are in the future, then the date for the current creating event date is set to the maximum date (this means the latest regarding the time) of these event dates.
To replace an event date, click on this icon. Then the Event date wizard for creating a new event date for the run opens. All data of the replacing event date are transferred except the event date. The event date is automatically taken over to the event date of the next day (the other data remain), if all event dates of the run are in the past. If the run already got event dates, which are in the future, then the date for the current creating event date is set to the maximum date (this means the latest regarding the time) of these event dates.
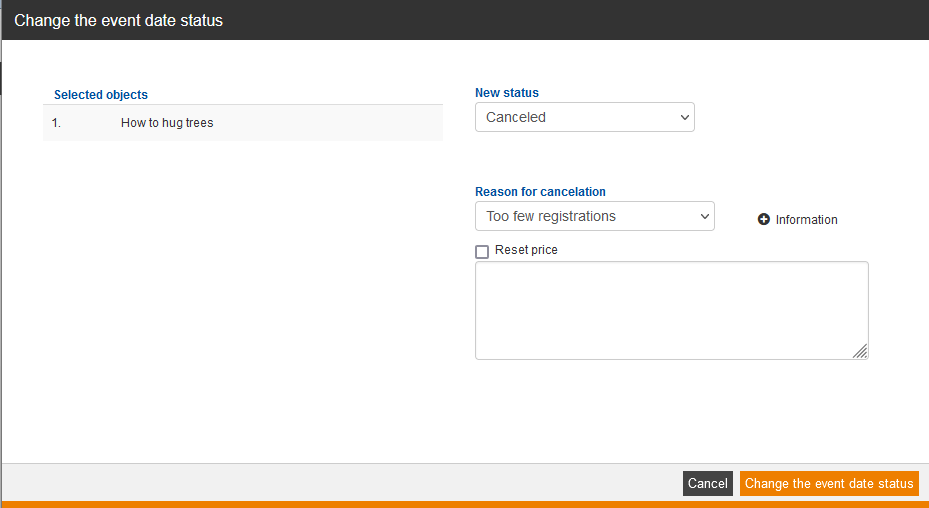
To change the event date status, click on this icon. Then the dialog window Change the event date status opens. You can select under New Status Initiated, Active or Canceled. If you have selected Canceled, you can decide, which Reason for cancelation you select. Therefore you can select the following reasons for cancelation: Too few registrations, Speaker prevented from coming, Speaker feeling ill, Rooms not available, Materials not available, Organizational reasons or Other. If required, you can set the check mark Reset price to reset also regarding the payment. Enter a comment for resetting the price. Via the + besides Information you can insert the user name and/or the date and time of creating the cancelation by clicking on the + and then clicking on the favored line in the drop down menu. Finally you click on the button Change the event date status. If an invitation e-mail was sent before, there will be sent also a cancelation e-mail to the participants.
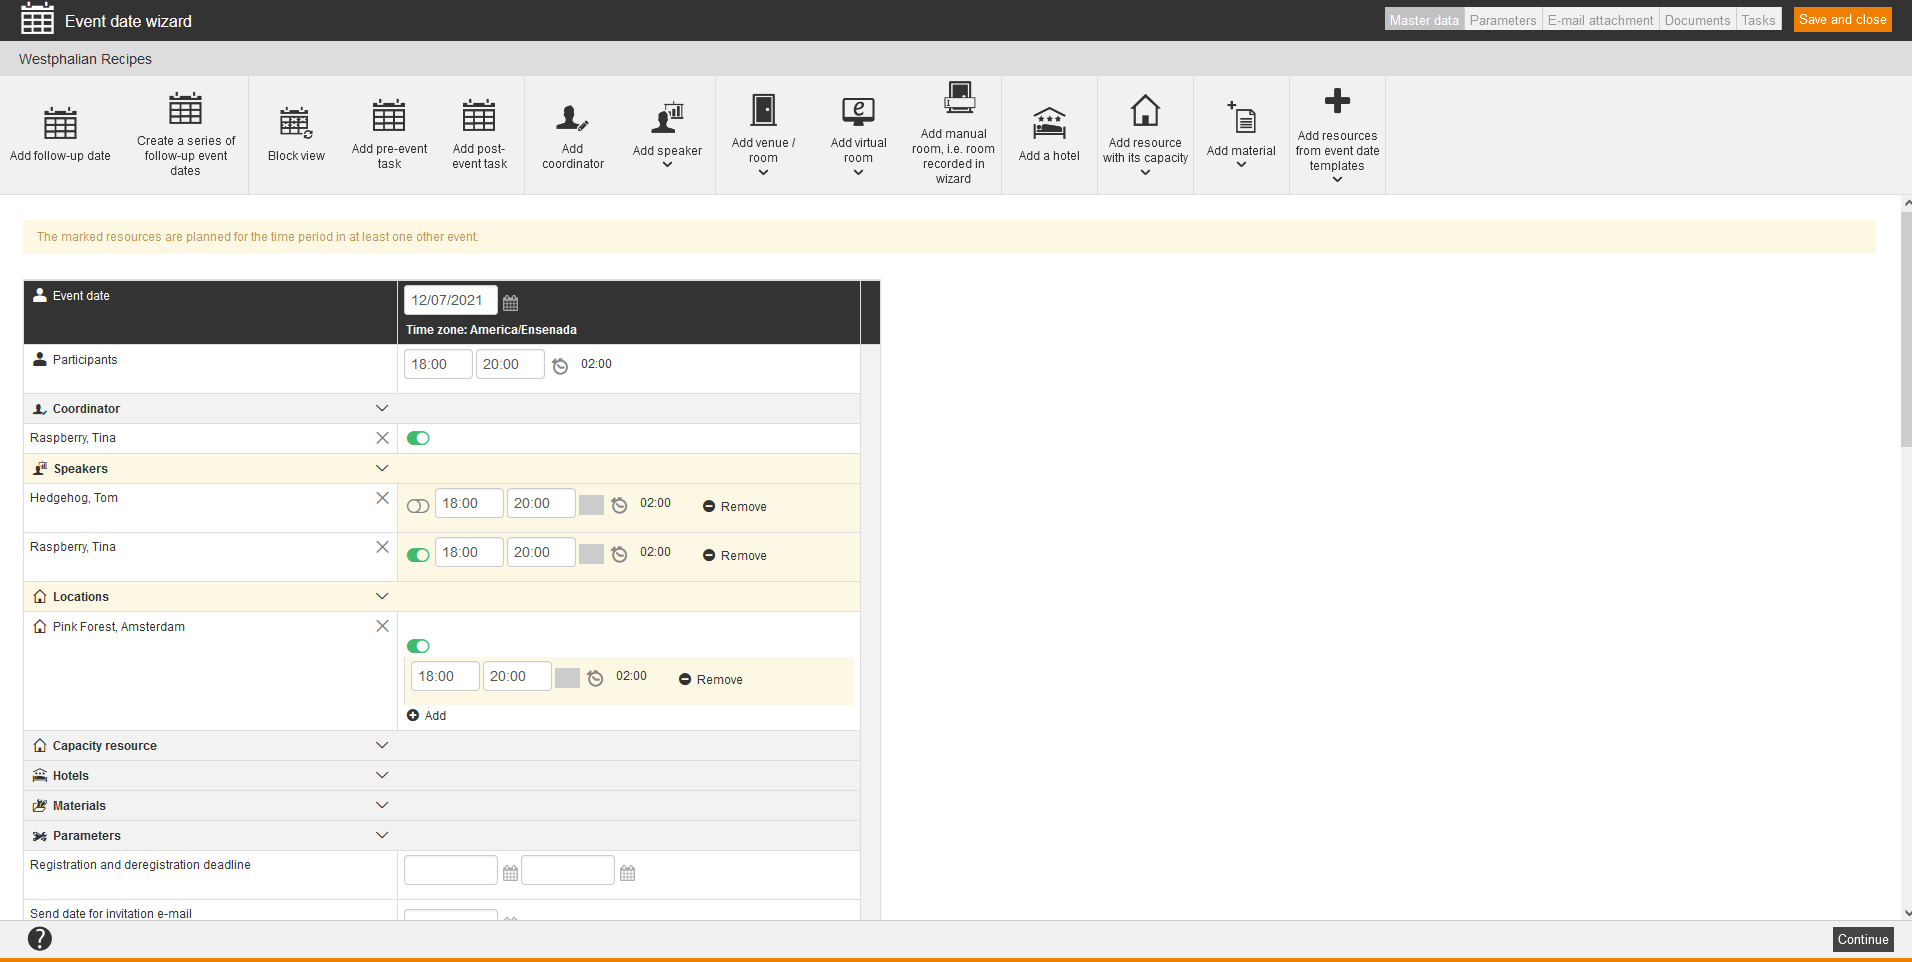
To create an event date without default, click on Create event date. The Event date wizard for creating an event date opens and you have to select the mandatory data at least. When you have created the event date, you can finish creating the event date in the Event date wizard by clicking Save and Close. Though the event is saved without showing the Event wizard and the newly created event date is taken over into the table of the event dates in the Run wizard. Now you see the newly created event date in the table.
When you are finished with the configuration of the event date (for example you have added additional services or a hotel), then click on the button Save and Close. Though the newly created event date is saved in the event and is automatically added to the run. In the table you see now the newly created event date.
To use the last event date of an event as event date template on creating an event date, click on Create the event date based on the last date for the event. The Event date wizard for creating the event date opens, at which the maximum event date (with the maximum of start date and time) of all event dates in the event serves as template. Thus the time is excerpted from this event date and the date corresponds to the start date of the maximum event date in the run. Then you click on the button Save and Close. Now you see the newly created event date in the table.
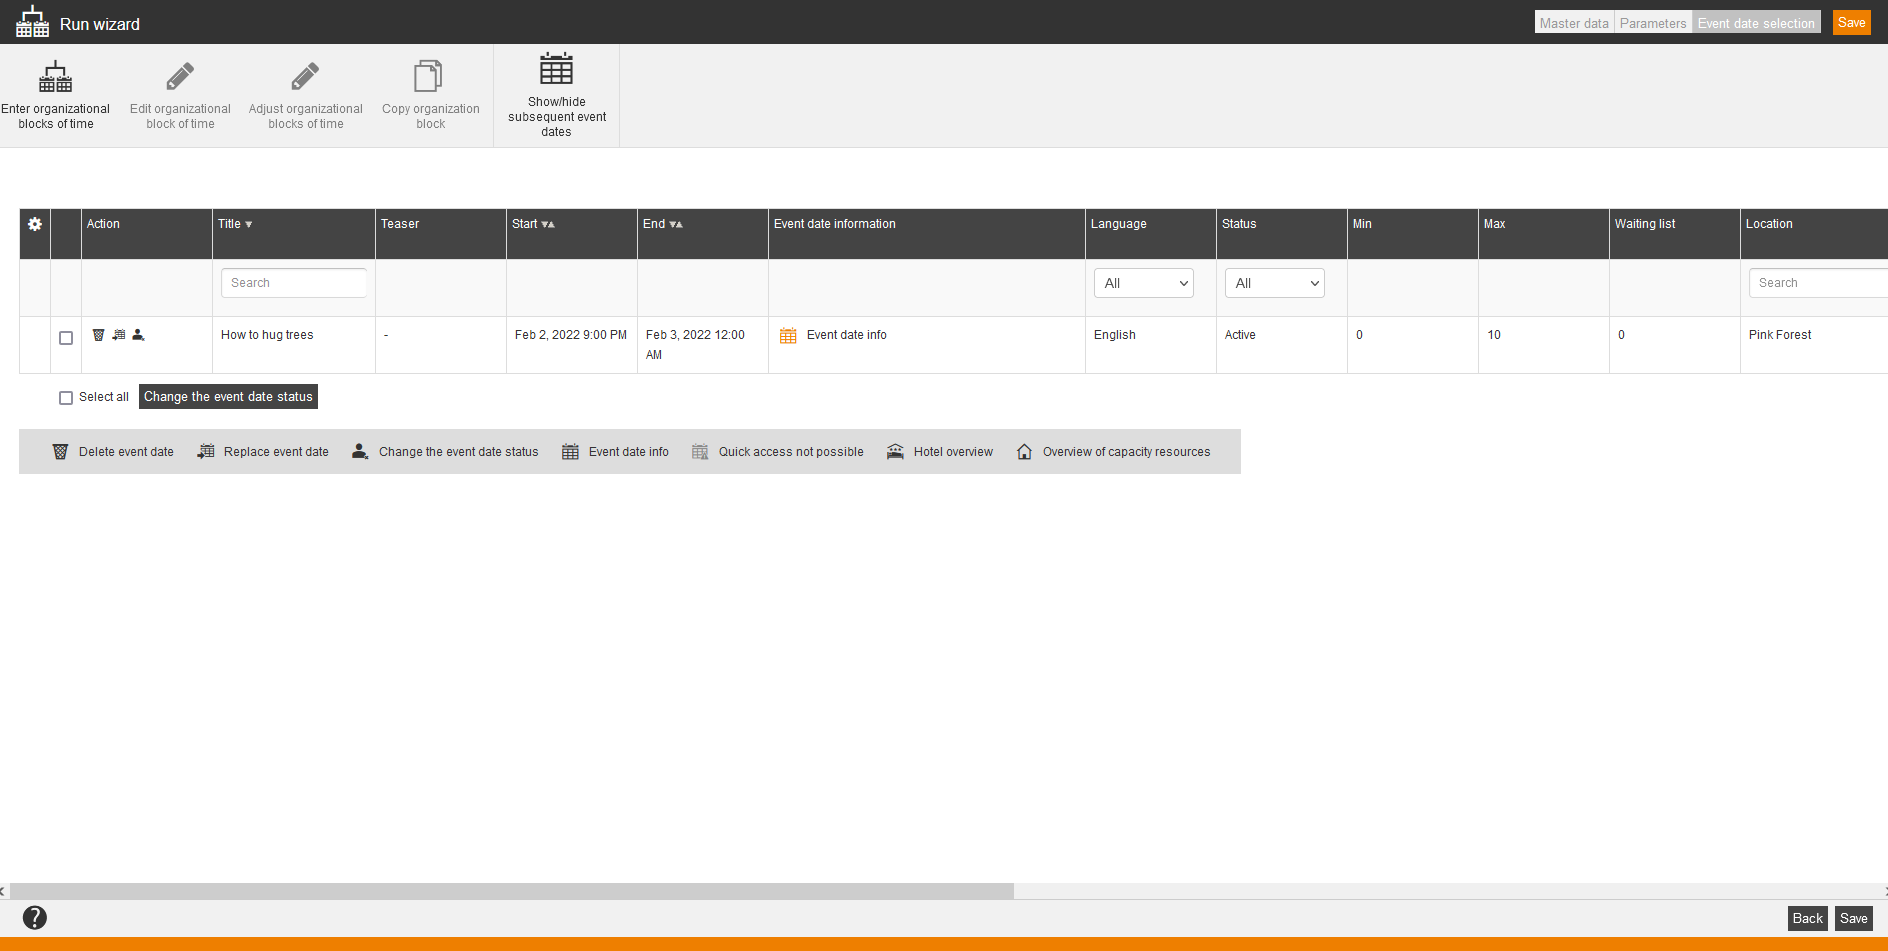
You can change the event date status in each case via the icon or all via the check mark Select all and the button Change the event date status (see screenshot number 3 and 4). In the dialogbox Change the event date status you can change this status to Initiated, Active or Canceled. If you change the event date status to Canceled, you can choose a reason for cancelation, add information (user name, date/time) and a comment. Also you can set the check mark Reset price.
Example for an event date cancelation in the run
The speaker Harry Miller falls ill. Thus the event date on 13th January 2022 has to be canceled. This event date belongs to the run “Cooking for Vegans”. Therefore you go to the Participant management of the corresponding course activation and switch to the tab Runs or you click on the icon Run of the corresponding course activation. All existing runs of this course activation are shown. Set the check mark in front of the run “Cooking for Vegans” and click on the button Edit run. The Run wizard opens. Switch to the tab Event date selection, set a check mark in front of the favored event date and click on the button Change the event date status in front of the event date on 13th January 2022 that should be canceled. The dialog window Change the event date status opens. Select the new status Canceled and the reason for cancelation Speaker feeling ill. Click on information to define the user name who makes the cancelation, date and time of the cancelation. If the price should be reset, set the check Reset price. You can enter the text “Harry Miller falls ill.” in the comment field. Only if an invitation mail was sent before, the cancelation mail is also sent to all participants.
![]() There is no quick access possible, if the event date is in the past and/or is used in another run.
There is no quick access possible, if the event date is in the past and/or is used in another run.
In the synoptical table with the columns Action, Title, Teaser, Start, End, Event date information, Language, Status, Min, Max, Waiting list, Location, City, Room, Coordinator, Time zone for end date, Starting date (location), End date (location), Time zone for starting date, Main speaker and Learning path position you can filter for Title, Language, Status, Location, City, Room, Coordinator and Main speaker. Furthermore you can sort by Title, Start and End. You can move the column Learning path position via click on the gear wheel.
You can filter in the table for title, language, status, location, room and coordinator. Also you can sort by title, start and end. Further you can configure the column view, this means you can add or delete single columns via click on the gear wheel.
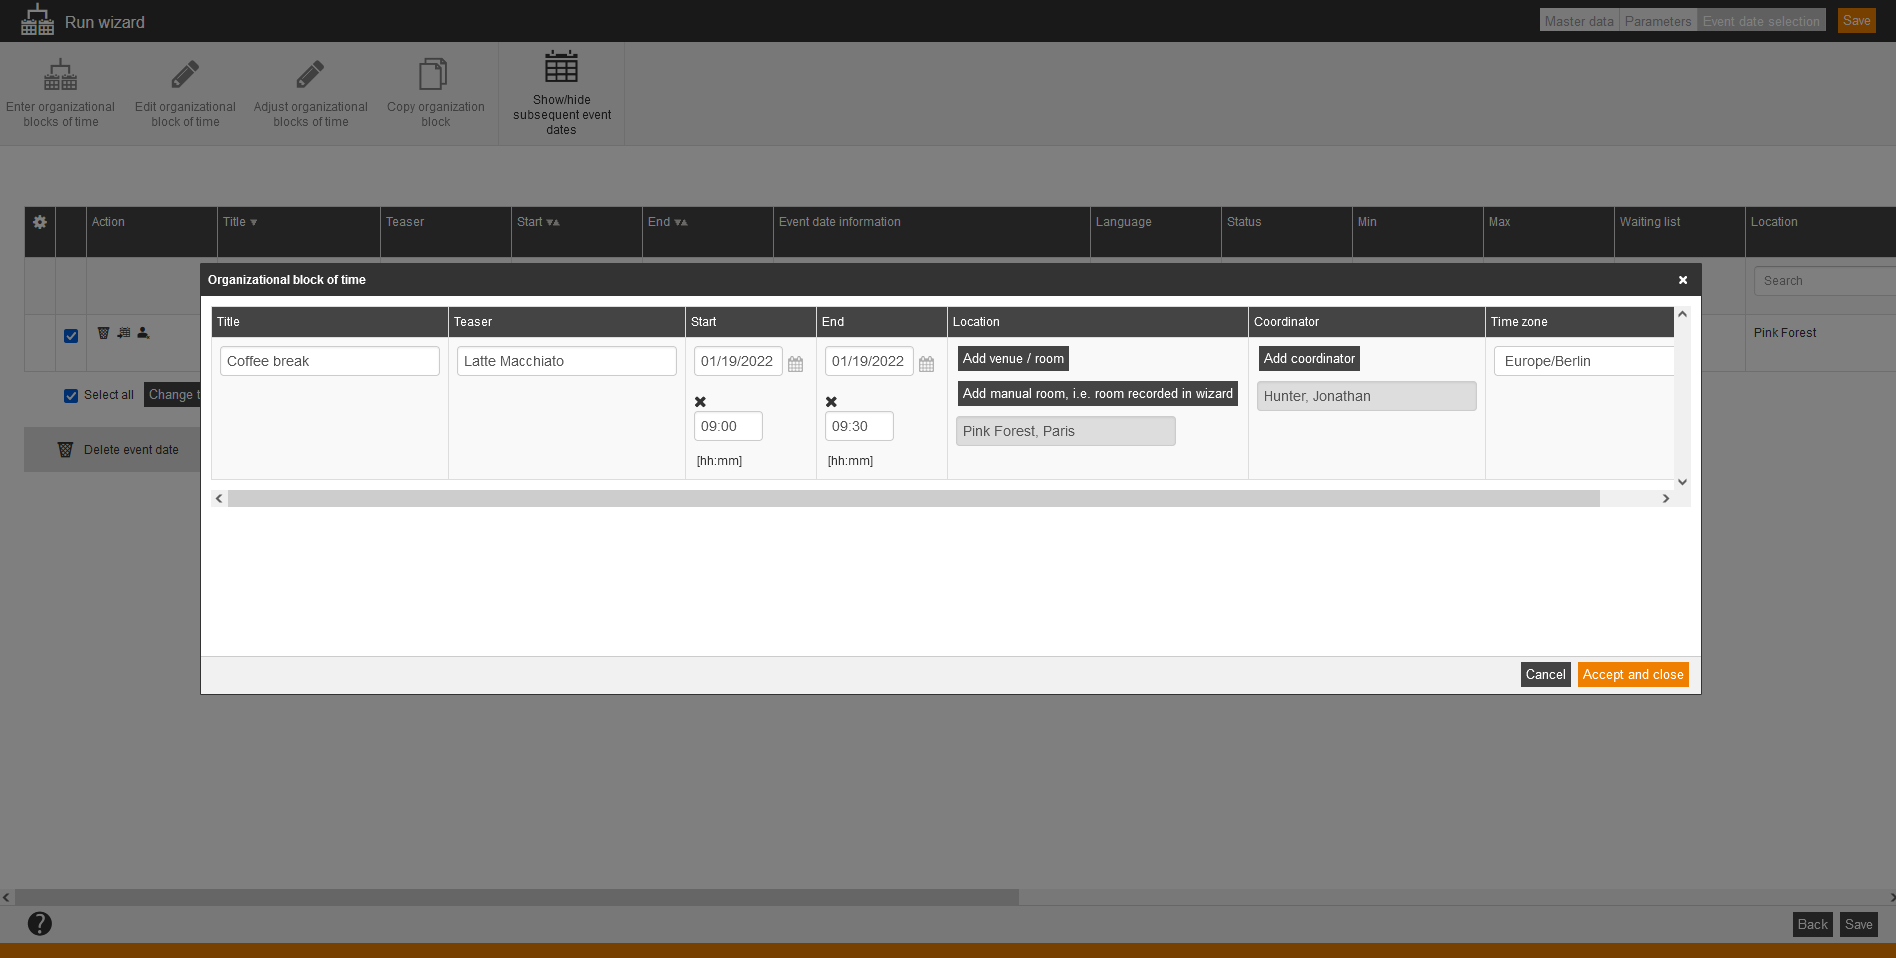
If you have created/replaced or selected an event date, you can create and edit organizational blocks of time via the buttons Enter organizational blocks of time and Edit organizational blocks of time.
To create an organizational block of time, click on the button Enter organizational blocks of time. Mandatory entries are title, start date and time and coordinator (authors, users and team leaders; select the appropriate filter).
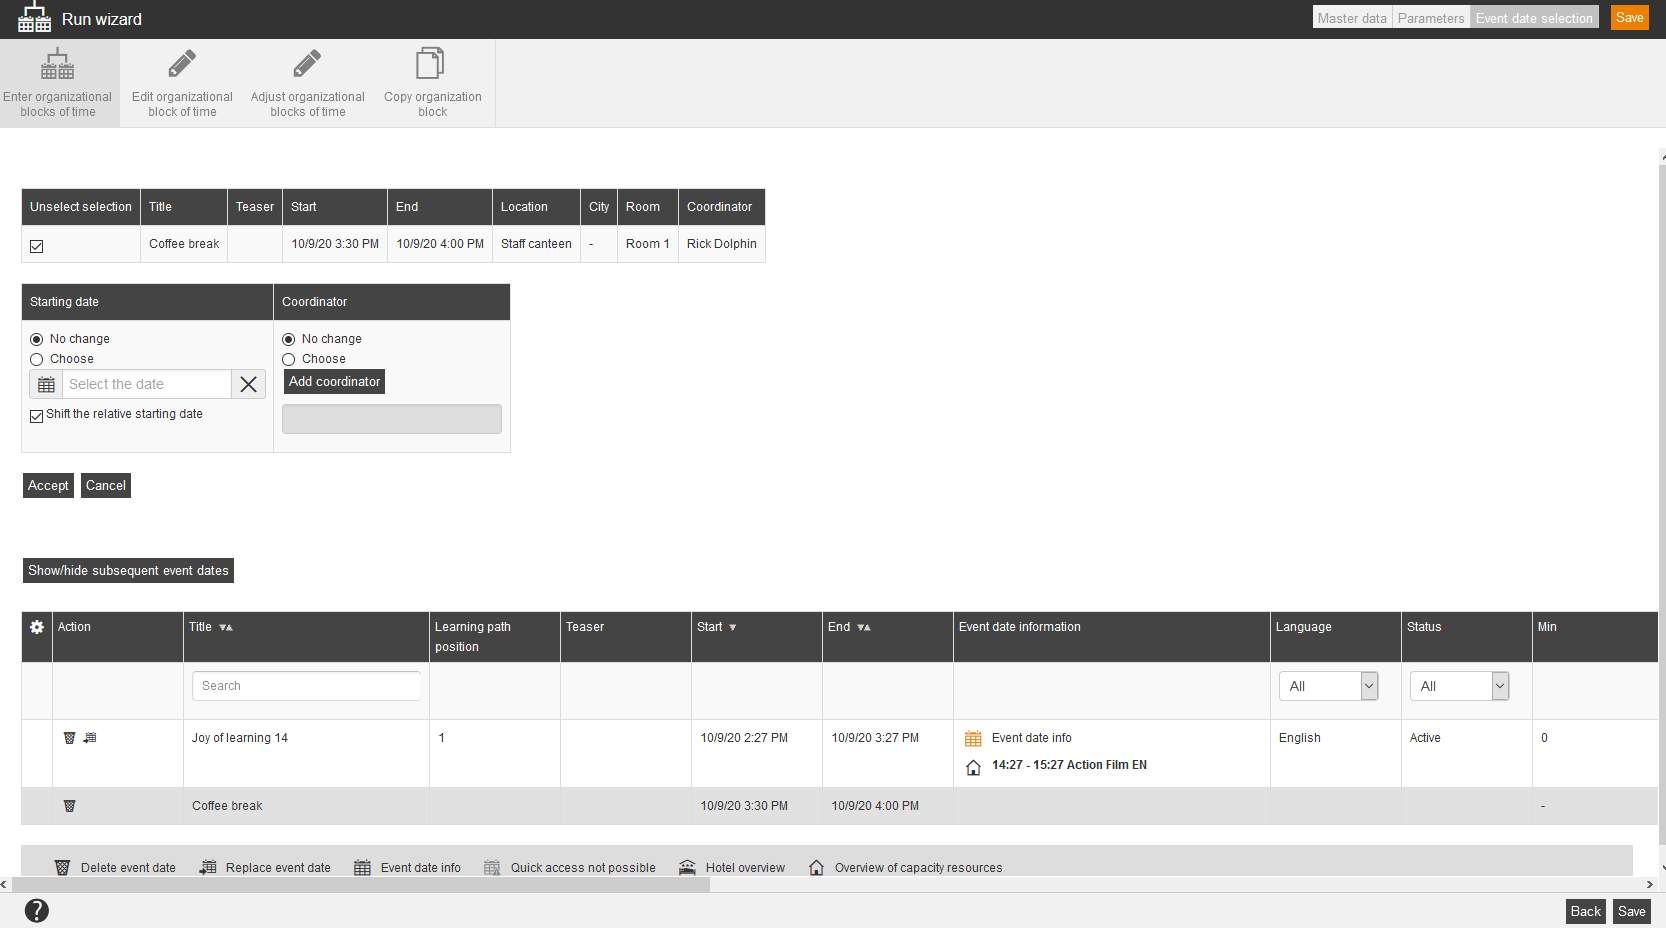
To adjust organizational blocks of time regarding start date and coordinator, click on the button Adjust organizational blocks of time. Then you set the check mark Unselect selection of these organizational blocks of time, which should not be considered by the change. You select if applicable your favored starting date in the column Starting date. Set the check mark Shift the relative starting date, if you have replaced the first event date in the copied run for example (e.g.: December 4th 2020 with January 11th 2021). In this case there is no change in time and the distance between the days is shown in the list of the organizational blocks of time. Then you click if applicable on the button Add coordinator in the column Coordinator and select your favored coordinator. Finally you click on the button Accept.
If you have selected a manual room, then the location is also a mandatory entry. If you have selected location as room, the End date and time are mandatory entries.
To edit an existing organizational block of time, click on the appropriate line and then on the button Edit organizational block of time.
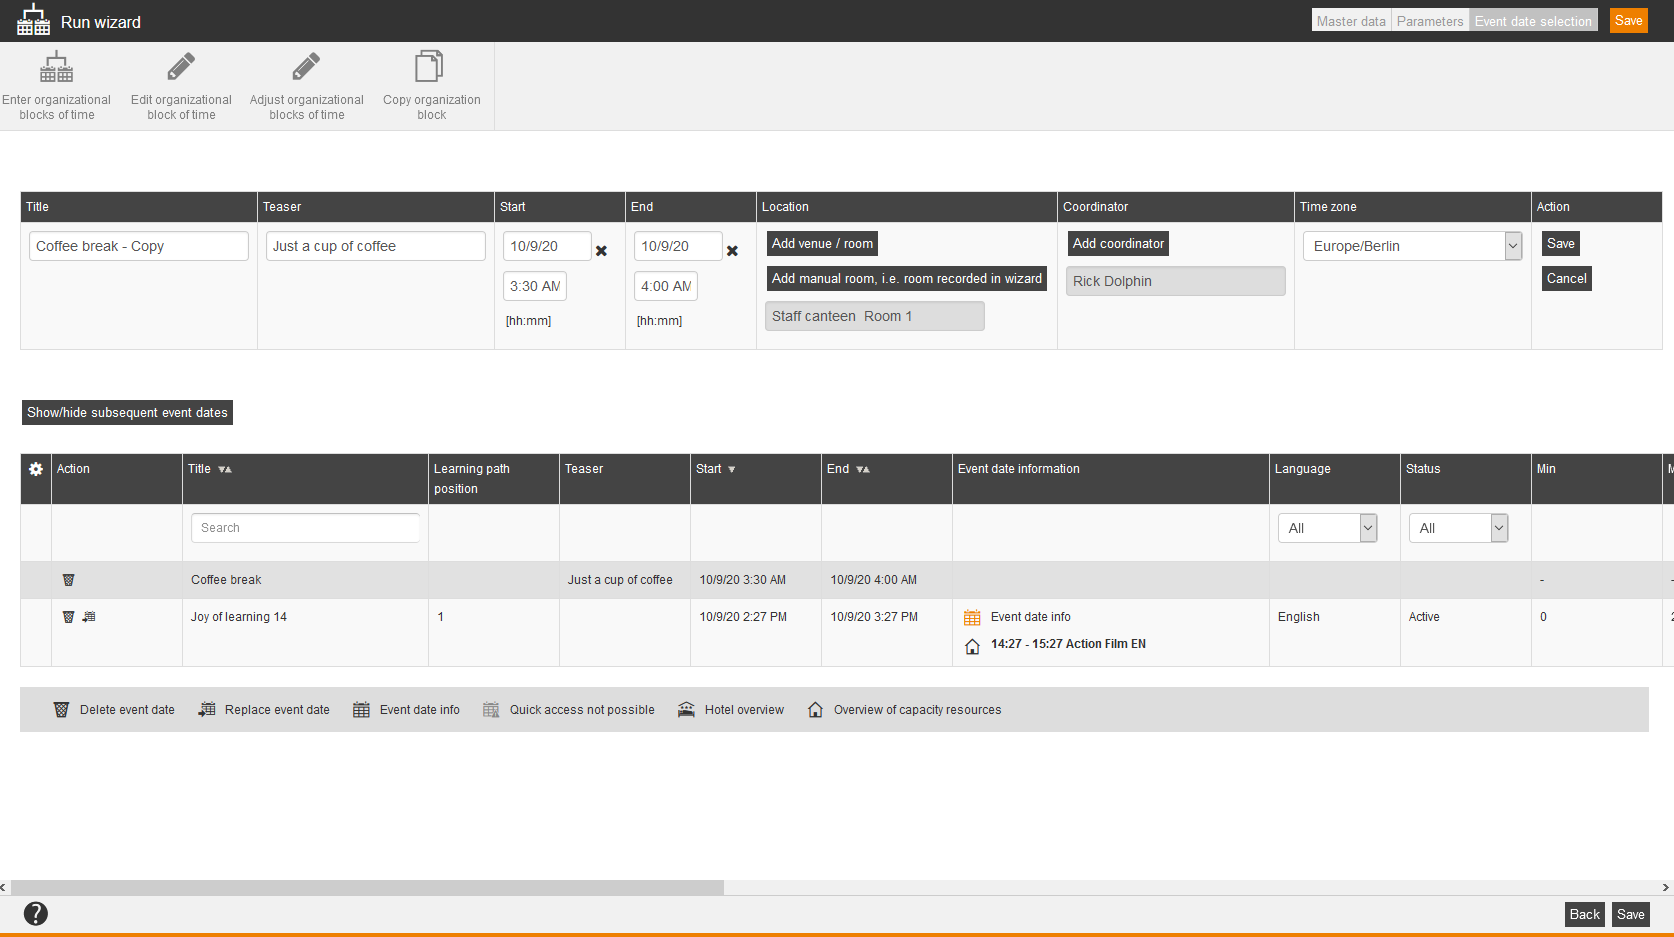
To copy an organizational block of time, click on the appropriate line and then on the button Copy organizational block of time. The data of the columns Title (with supplement copy), Teaser, Start (date and time), End (date and time), Location, Coordinator and Time zone are copied from the original organizational block of time. If applicable you can change the data. Finally you click on the button Save.
Organizational blocks are shown on the course main page in the run view between the event date groups.


